3rdGen2002
New member
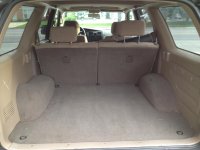
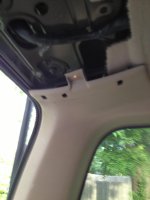
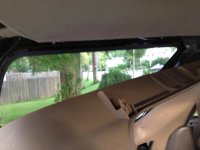
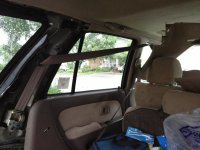
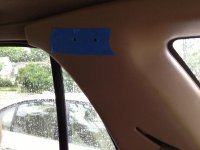
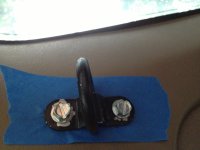
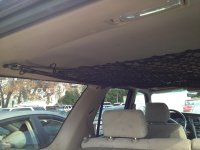
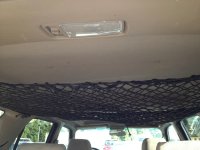
I've wanted to install a gear loft within my 3rd Gen for a while. I find that I often needed a place to extra items I don't want taking up room on the floor of the trunk, or that are of particular value or fragility. I couldn't find much advice on the subject around the forum, so I went ahead and made my own. Description and pictures below.
Equipment:
6 stainless steel D-ring hooks and mounts, 6 caribiners, cargo net of desired dimension, 1 tube black caulk, 1 can rustoleum black paint, cordless drill, tape measure, screwdriver, 12 sheet metal screws (varied length depending on mounting location (see below) - a variety between .5 inch and 2 inches in length may be best. Thread spacing and width of screws should depend on desired loads
Preparation Steps:
1) Purchase equipment
2) Gather tools
3) Paint hooks, carabineerss, sheet metal screws (if desired)
4) Mentally prep yourself for drilling into your 4runner
Install Steps:
1) Remove all gear from your trunk space and fold down seats.
2) Remove interior molding and plastic interior panels from bottom and sides of trunk space (one side at a time). The interior trunk side panels are integral to the seat belts. Rather than touch or modify the seat belts/mounts to fully remove the side panels and get them out of the way, I would recommend simply slacking the belts and placing the panels forward in the driver/passenger compartments.
3) The next step is technically complex. Measure and assess the desired location of D rings relative to the net dimensions. The interior sheet metal box of the truck body will serve of the anchor points of the system. The sheet metal is “double walled” in many places and the interior wall is the purchase surface. You can easily peering into the double wall structure in many places. You must pick locations which offer good purchase within the 1st wall of the boxed sheet metal but that will not permit the sheet metal screws to advance into the outer wall of the body.
4) Once you have identified the position the sheet metal screws, line up the D-ring holes along the frame and mark their position with white out.
5) Drill out each of the white out screw positions with a small diameter bit.
6) The next portion of the install is also complex. Because the D rings will reside on the interior (trunk side) of the panels which have been removed, the screws will need to pass through the plastic panels and into the sheet metal for purchase, necessitating holes through the panels. The reason why this is complex is that the panels must be in there fully seated position to be able to assess the right place to drill the hole. The way I overcame this was as follows:
- Advance the screws about ½ way into the sheet metal
- Place a small amount of some kind of ink or other tracer like white out onto the head of the screws
- Place masking tape on the inside of the panel around where the screw should make contact
- Re-install the panel into the truck and impact the regions of the panel near the screws in order to impart the ink/paint onto the masking tape
- Remove the panel and inspect the ink marks, be sure that you can reliably recognize the center of the mark which should represent the hole you will make in the panel (note that for some of my location choices the screws fell in line with plastic seams on the panel, and so these had to be broken off to allow for drilling
- Once you have your intended hole locations drill them out from the inside (where the marks are) and replace the panels once again, checking that the holes line up correctly
- Place the D-rings onto the panel and line the holes up with the ones you just created in the panels, then place the screws into the holes and tighten.
- The screws need to pass through the D-ring, panel, and then into the sheet metal holes drilled out previously. In some places, there will also be a gap between the panel and the interior sheet metal wall, maybe even up to an inch. For this reason it may be best to keep a few different lengths of screws around to "custom fit" each location. Lining everything up can be tricky
7) Once all the D-rings are in place, attach the carabineers and cargo net configuration of your choice
I posted some pictures of the setup I created. Feel free to comment or post questions.
Equipment:
6 stainless steel D-ring hooks and mounts, 6 caribiners, cargo net of desired dimension, 1 tube black caulk, 1 can rustoleum black paint, cordless drill, tape measure, screwdriver, 12 sheet metal screws (varied length depending on mounting location (see below) - a variety between .5 inch and 2 inches in length may be best. Thread spacing and width of screws should depend on desired loads
Preparation Steps:
1) Purchase equipment
2) Gather tools
3) Paint hooks, carabineerss, sheet metal screws (if desired)
4) Mentally prep yourself for drilling into your 4runner
Install Steps:
1) Remove all gear from your trunk space and fold down seats.
2) Remove interior molding and plastic interior panels from bottom and sides of trunk space (one side at a time). The interior trunk side panels are integral to the seat belts. Rather than touch or modify the seat belts/mounts to fully remove the side panels and get them out of the way, I would recommend simply slacking the belts and placing the panels forward in the driver/passenger compartments.
3) The next step is technically complex. Measure and assess the desired location of D rings relative to the net dimensions. The interior sheet metal box of the truck body will serve of the anchor points of the system. The sheet metal is “double walled” in many places and the interior wall is the purchase surface. You can easily peering into the double wall structure in many places. You must pick locations which offer good purchase within the 1st wall of the boxed sheet metal but that will not permit the sheet metal screws to advance into the outer wall of the body.
4) Once you have identified the position the sheet metal screws, line up the D-ring holes along the frame and mark their position with white out.
5) Drill out each of the white out screw positions with a small diameter bit.
6) The next portion of the install is also complex. Because the D rings will reside on the interior (trunk side) of the panels which have been removed, the screws will need to pass through the plastic panels and into the sheet metal for purchase, necessitating holes through the panels. The reason why this is complex is that the panels must be in there fully seated position to be able to assess the right place to drill the hole. The way I overcame this was as follows:
- Advance the screws about ½ way into the sheet metal
- Place a small amount of some kind of ink or other tracer like white out onto the head of the screws
- Place masking tape on the inside of the panel around where the screw should make contact
- Re-install the panel into the truck and impact the regions of the panel near the screws in order to impart the ink/paint onto the masking tape
- Remove the panel and inspect the ink marks, be sure that you can reliably recognize the center of the mark which should represent the hole you will make in the panel (note that for some of my location choices the screws fell in line with plastic seams on the panel, and so these had to be broken off to allow for drilling
- Once you have your intended hole locations drill them out from the inside (where the marks are) and replace the panels once again, checking that the holes line up correctly
- Place the D-rings onto the panel and line the holes up with the ones you just created in the panels, then place the screws into the holes and tighten.
- The screws need to pass through the D-ring, panel, and then into the sheet metal holes drilled out previously. In some places, there will also be a gap between the panel and the interior sheet metal wall, maybe even up to an inch. For this reason it may be best to keep a few different lengths of screws around to "custom fit" each location. Lining everything up can be tricky
7) Once all the D-rings are in place, attach the carabineers and cargo net configuration of your choice
I posted some pictures of the setup I created. Feel free to comment or post questions.