HELP! Crankshaft Pulley Bolt Removal

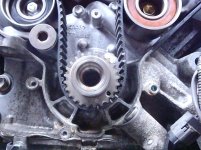
Some more delays and still working on putting some of the engine back together, but at this point the timing belt can be manually cranked with no interference so that's a plus. One of the dealers had the replacement part so that's in there now.

I was planning to reuse the crankshaft bolt with some neverseez on it torqued to the 181ft lb mark. I've heard a lot of people on other forums say to loctite the bolt in place. Is it that much of an issue? Will it ever come out on it's own if it's torqued properly? Should I have not neverseezed the bolt?
 
Some more delays and still working on putting some of the engine back together, but at this point the timing belt can be manually cranked with no interference so that's a plus. One of the dealers had the replacement part so that's in there now.

I was planning to reuse the crankshaft bolt with some neverseez on it torqued to the 181ft lb mark. I've heard a lot of people on other forums say to loctite the bolt in place. Is it that much of an issue? Will it ever come out on it's own if it's torqued properly? Should I have not neverseezed the bolt?

You live in Mass. You get heavy doses of locktite for free every winter.
 
You live in Mass. You get heavy doses of locktite for free every winter.

I think I'm going to just wipe off most of the neverseez and torque it properly. I know that being keyed into place helps it alot, but I'm just paranoid and want to make sure everything is covered so I don't have an "Oh shit" moment 6 months after I finish the job. I'm sorry for the dumb questions, I'm just trying to soak in as much as I possibly can since I'm completely new to all of this.
 
It's all put back together and seems to run fine! (so far) Those were some of the most stressful days I've seen in awhile, but I'm glad I got through it in one piece and I certainly learned A LOT of new things. Thanks again to Blackworksinc for the awesome writeup!!

I took plenty of pics, but here are a couple:

http://www.toyota-4runner.org/attachment.php?attachmentid=91038&stc=1&d=1371091134

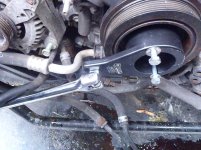
Awesome tool!! Definitely worth it's weight in gold.
http://www.toyota-4runner.org/attachment.php?attachmentid=91039&stc=1&d=1371091155

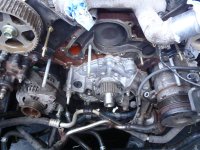
Everything stripped down:
http://www.toyota-4runner.org/attachment.php?attachmentid=91040&stc=1&d=1371091202

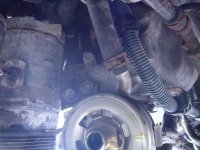
Two bolts hiding behind the oil filter
http://www.toyota-4runner.org/attachment.php?attachmentid=91041&stc=1&d=1371091238
 

Attachments

  • P6111547.jpg
    P6111547.jpg
    138.9 KB · Views: 1,724
  • P6121549.jpg
    P6121549.jpg
    138.3 KB · Views: 2,302
  • P6091537.jpg
    P6091537.jpg
    137 KB · Views: 1,620
  • P6121553.jpg
    P6121553.jpg
    130.6 KB · Views: 1,624
Last edited:
Lessons Learned

Ok, now that this is done it's worth thinking about what we would have done different:

  • Time - The weekend would have been adequate if we didn't run into problems....
  • Organization - We took blackworks advice and used zip lock plastic bags to keep all the bolts organized. Labeled each one with a permanent magic marker and kept it with each part as it came off... Made reassembly very easy....
  • Crank Bolt - Like many before us this was a major PIA... While we were finally able to get it off by taking out the radiator and using an impact driver we still needed a tool to get it torqued back to spec.... IMO this tool Schley (SCH64300) Lexus and Toyota Harmonic Damper Pulley Holding Tool - Amazon.com
  • is well worth the money... If we had this tool from the beginning, I'm convinced we would have been fine....
  • Power Steering Pump - We were unable to get the bolts loose as detailed in Blackworks excellent thread.... Main problem was getting the right access from the wheel well so we could get an impact driver on it.... Ended up taking off the pully which allowed us to get the necessary access.... If/when we do this again will take this approach as it is much easier (at least on our truck) than trying to free the bracket bolts
  • Timing cover bolts - Be careful of these when tightening.... Bolts are fairly soft and we broke one off....
  • Power steering pump - Could not access the bottom bolt with out removing the oil filter.... We had planned on changing the oil anyway but wanted to mention that you want to be sure to leave the filter off until you get that bolt off and later back in place....
  • Pictures - Mark used his digital camera to take pictures everytime we took something off during disassembly.... I thought it was excessive at the time but proved to be a life saver when we were putting everything back to make sure we had all the bolts/studs etc in the right place......
That's about all I can think of... Again kudo's to Blackworks for his awesome write up.... His detail made all the difference in the world for us!:thumb:
 
Last edited:
although i bought a tool for this and is enroute, i don't have time to wait or waste so i am making something or trying something. what about the cam gear sprocket bolts? removal tricks, tips? i have to replace the seals.
 
although i bought a tool for this and is enroute, i don't have time to wait or waste so i am making something or trying something. what about the cam gear sprocket bolts? removal tricks, tips? i have to replace the seals.

Do not use the cam gear sprocket bolts to try and hold the belt in place.... This was what we tried and we actually had the timing belt jump a couple of teeth in the attempt..... Very scary with an interference engine.... If you can't wait you should make your own tool with a 2x4 and two M8-1.25 x 65mm bolts (these are the ones that thread into the crank shaft pully).... There is a thread in the forums on how to make one.... Will post a link if I can find it.....

We ended up pulling the radiator and using a 900fp impact driver to get the nut off but even with this approach you need either the homemade tool or the one we bought to be able to torque it back....
 
Last edited:
i need to know what the torque value is for the cam gear bolts as i am replacing the oil seals as well as the crank seal. i am going to my friend's house and use his compressor with my tools. i am in florida so these bolts come right off.
 
I am using the Haynes Repair Manual which lists the Camshaft sprocket bolt torque as follows:

2003/2004 years = 80 ft lbs
2005 and later = 72 ft lbs
 
The crankshaft bolt on my 2004 V6 4Runner was a pain to get off. I got some angle iron from home depot that had a lot of holes in it. I cut it to length so that one end was on the ground and the other end reached one of the holes in the pulley. I used a hardened bolt and screwed it into the pulley. The angle iron was at a 90 degree angle to the ground (straight up). Didn't use the other pulley hole. This held the pulley and allowed me to put all of my force into the breaker bar. The hardened bolt I used just snapped off. Doesn't look like it harmed the pulley.

So then I bought a Milwaukee high-torque impact wrench. Cost $425 with the 9 amp battery and charger. It's suppose to have 1,000 lbs of torque. It didn't work either.

Next, I searched Youtube and saw a video from this guy who just heats the washer on the bolt, not the head. I used a MAPP torch and heated the large outside washer for about 40 seconds. Put the impact wrench back on and it came right off. In fact, I was shocked at how easy it came off.

My conclusion: whatever method you use, heat the outside washer first. That really did the trick for me.
 
I just did the timing belt on my '03 V8 a month ago. After doing all the research on the subject, I found one guy that recommended using an old serpentine belt to lock the crank pulley while either loosening or tightening the bolt. It works great. Just reverse the belt, so the grooves are facing out and put a crease/fold in one end, and depending on which way you are planning to turn the bolt, wrap the belt around the crank pulley in the opposite direction. You have to wrap the belt, so it overlaps the folded end and then loop the other end around the opposite cam pulley head casting to hold it. Then slowly turn the bolt with a breaker bar, until the serpentine belt locks on the crank pulley. At that point it should hold the crank pulley in place while you loosen or tighten the bolt. It worked like a charm, once I got the hang of were to start the folded end of the serpentine belt when wrapping it around the crank pulley. I did have to use an extension pipe on the breaker bar for extra leverage, but it was a lot easier that I expected. And no worry about things going BANG with the starter bump method.
 
I just did the timing belt on my '03 V8 a month ago. After doing all the research on the subject, I found one guy that recommended using an old serpentine belt to lock the crank pulley while either loosening or tightening the bolt. It works great. Just reverse the belt, so the grooves are facing out and put a crease/fold in one end, and depending on which way you are planning to turn the bolt, wrap the belt around the crank pulley in the opposite direction. You have to wrap the belt, so it overlaps the folded end and then loop the other end around the opposite cam pulley head casting to hold it. Then slowly turn the bolt with a breaker bar, until the serpentine belt locks on the crank pulley. At that point it should hold the crank pulley in place while you loosen or tighten the bolt. It worked like a charm, once I got the hang of were to start the folded end of the serpentine belt when wrapping it around the crank pulley. I did have to use an extension pipe on the breaker bar for extra leverage, but it was a lot easier that I expected. And no worry about things going BANG with the starter bump method.

Just wanted to shout out a big thank you for this tip. Took me a minute to figure out the fold as well, but once I got it I took the breaker bar to it and came off like butter.

Should mention that this was on my new to me 2004 Lexus GX470. :thumb:
 
Hey guys, I know this is a really old thread, but I’m having a very similar problem to the original poster.

I'm in the middle of replacing my timing belt / water pump and just came across a possible issue. Was having trouble getting the nut off of the crankshaft pulley so I lodged the breaker bar up against the frame and bumped the starter to free it.
THEN after I freed the nut I bumped the starter once more to try to spin the pulleys to get the timing mark closer to where I needed it.

Did I screw something up doing this? I only did it because I didn’t want to retighten the bolt a lot by turning a ton. (I’m waiting on a part that will hold the pulley). I went to manually spin the pulleys the rest of the way around and got to a point where I really would have to force it to keep turning.

If it even would keep turning, almost didn't seem like it would. I know there's always compression every so often while spinning but it for sure wasnt just that.

I got the timing marks back to top dead center by spinning back counter clockwise but something is different ..that intermittent pressure you get while turning the pulleys is occurring right at top dead center... and don't think it was before? Could be wrong but don't think so.

I’m assuming it is out of time? Hope I didn't screw something up too bad, if anybody has any suggestions or info l'd really appreciate, don't want to move forwards until I figure this out.
 

Members online

Forum statistics

Threads
278,312
Messages
3,554,089
Members
248,016
Latest member
Advally Service

Trending content

Back
Top