4RunnerRon
New member
HID Install for 2006 4Runner
Install and Review of XenonDepot 4300k HID kit for 2006 4Runner
After much research, I finally decided on an HID system for my new 2006 Sport Edition 4Runner. Based on opinions and reviews from people on this forum and the Lexus GX470 forums, I decided to go with XenonDepot for the kit. There are other companies providing similar HID upgrade kits, but the quality of parts and ease of installation of XenonDepot's kit seemed above par compared with everyone else. Plus, most of the Lexus guys have installed XenonDepot kits and still talk highly of them, even after a couple years of use.
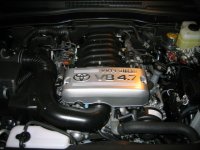
For those interested, the correct kit for the 06 4Runners is XenonDepot's H11 kit. Since our 06s come with projector headlamps from the factory, no retrofit is necessary. This makes the install way easier and very clean. XenonDepot takes Phillips Xenon bulbs and mates them to an H11 base, which is how our stock halogen bulbs mount into the headlight housing.
On the topic of bulbs, there are a couple options within this application, such as 4300k or 6000k. Simply put, these ratings are based on the color and relative light output of the bulbs. Here's what I debated between:
4300k - these bulbs are most common for vehicles with factory-equipped HID systems, for example, a Lexus RX330. The light output is greatest (you will see farther) and the light is a bright white with a slight hint of blue at the cutoff.
6000k - these bulbs provide more blue color in the beam, but have slightly less light output. Although they may have slightly less light output than 4300k, they are still way better than the stock halogens, so the choice will depend on your personal taste. Most of the GX470 guys went with 6000k and were very happy with it.
I picked 4300k because I wanted that factory look and the best possible performance. I'll get on to the post-install review later...
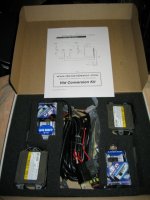
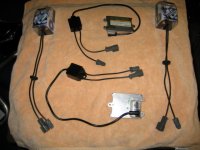
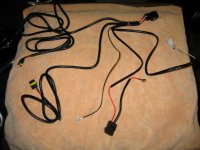
Back to the kit and its contents - in addition to the rebased Phillips xenon bulbs, the kit includes Phillips slim ballasts, ignitors, and a plug-and-play wiring harness with an inline fuse. The wiring harness has connectors that snap firmly into place with both your stock harness and included ballasts. The fuse is designed to protect your factory harness from drawing too much power during startup. Although HID systems draw less power than Halogen during operation (35W vs. 55W), the extra power needed upon startup to ignite the salts in the Xenon bulbs could damage stock wiring if not protected. This kit has you covered with no extra parts needed.
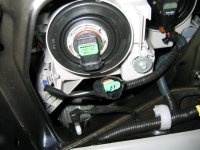
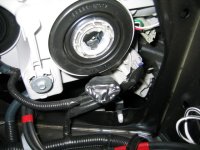
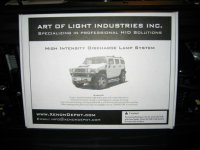
Here's what the kit looks like:
Install and Review of XenonDepot 4300k HID kit for 2006 4Runner
After much research, I finally decided on an HID system for my new 2006 Sport Edition 4Runner. Based on opinions and reviews from people on this forum and the Lexus GX470 forums, I decided to go with XenonDepot for the kit. There are other companies providing similar HID upgrade kits, but the quality of parts and ease of installation of XenonDepot's kit seemed above par compared with everyone else. Plus, most of the Lexus guys have installed XenonDepot kits and still talk highly of them, even after a couple years of use.
For those interested, the correct kit for the 06 4Runners is XenonDepot's H11 kit. Since our 06s come with projector headlamps from the factory, no retrofit is necessary. This makes the install way easier and very clean. XenonDepot takes Phillips Xenon bulbs and mates them to an H11 base, which is how our stock halogen bulbs mount into the headlight housing.
On the topic of bulbs, there are a couple options within this application, such as 4300k or 6000k. Simply put, these ratings are based on the color and relative light output of the bulbs. Here's what I debated between:
4300k - these bulbs are most common for vehicles with factory-equipped HID systems, for example, a Lexus RX330. The light output is greatest (you will see farther) and the light is a bright white with a slight hint of blue at the cutoff.
6000k - these bulbs provide more blue color in the beam, but have slightly less light output. Although they may have slightly less light output than 4300k, they are still way better than the stock halogens, so the choice will depend on your personal taste. Most of the GX470 guys went with 6000k and were very happy with it.
I picked 4300k because I wanted that factory look and the best possible performance. I'll get on to the post-install review later...
Back to the kit and its contents - in addition to the rebased Phillips xenon bulbs, the kit includes Phillips slim ballasts, ignitors, and a plug-and-play wiring harness with an inline fuse. The wiring harness has connectors that snap firmly into place with both your stock harness and included ballasts. The fuse is designed to protect your factory harness from drawing too much power during startup. Although HID systems draw less power than Halogen during operation (35W vs. 55W), the extra power needed upon startup to ignite the salts in the Xenon bulbs could damage stock wiring if not protected. This kit has you covered with no extra parts needed.
Here's what the kit looks like:
Attachments
Last edited: