Home Made Roof Rack on 99 Highlander

genmarks

New member
I have been searching/researching roof racks for the past couple months now, for my 99' 4runner with only the 2 black tracks that run along the top.
I didnt indend on getting anything large, or a basket cause I just want a rack for my surfboards. I wasnt willing to drop $100-$300 for some racks,
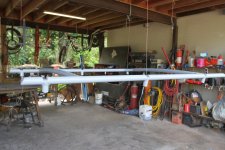
so my dad and i just decided to build some with all materials from home.

I also did not want to drill any holes into the roof so we intended to use the track holes already there.

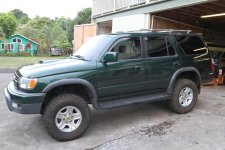
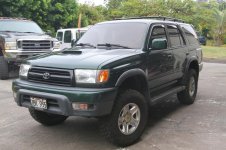
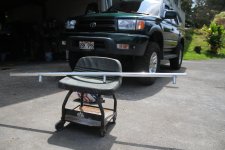
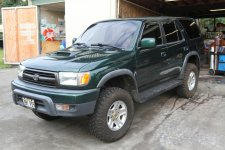
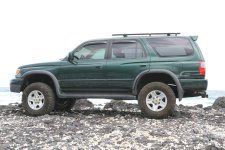
Here was the 4runner before the rack
IMG_5340.jpg

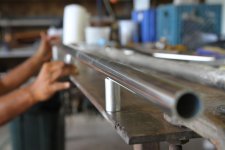
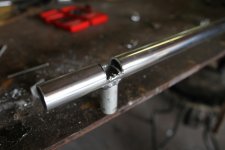
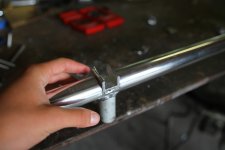
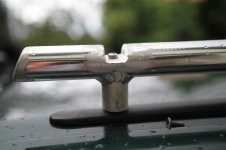
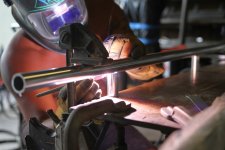
I lost all the pictures of the welding of the two bars we created that go parallel with the black tracks and screw into the track holes. But we rolled two
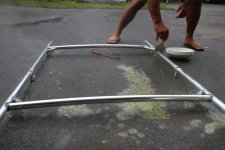
crossbars so they have a similar curve to the roof then tack welded them to the main bars that were over the tracks:
the bars the screw into the black strips are 3/4" aluminum while the crossbars are 1" aluminum, all found, cut, and welded in our garage.
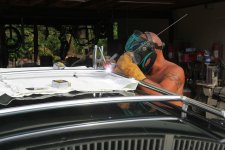
IMG_5327.jpg
IMG_5324.jpg
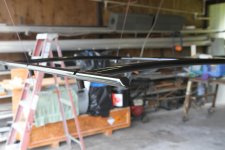
then we completed all the tac welds all the way around
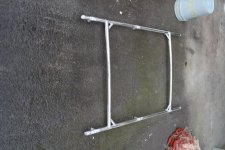
IMG_5341.jpg

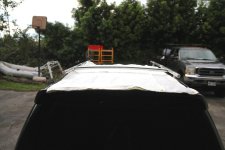
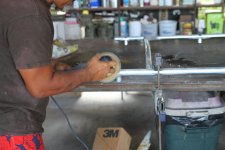
At this point you can see the black track/strip is gonna act as a gasket in between the rack and roof. We took off the track and rack to grind down the
bottom of the rack so it fits flush onto the track.
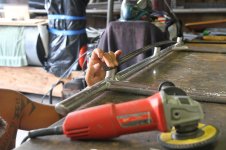
IMG_5345.jpg

Then we fit it back on to see how it looked.
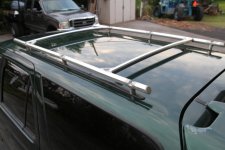
IMG_5347.jpg
IMG_5348.jpg

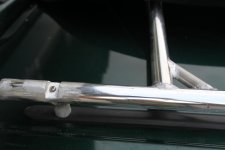
Her is a view of the area to screw in, wherever there is a screw, there is already an existing hole for the track screw. the 3 in screws we used fit perfect
with a length that was long enough to be stable but not long enough to have to go any deeper than was originally intended.
IMG_5352.jpg
 

Attachments

  • IMG_5340.jpg
    IMG_5340.jpg
    136.1 KB · Views: 4,856
  • IMG_5327.jpg
    IMG_5327.jpg
    129.8 KB · Views: 2,820
  • IMG_5324.jpg
    IMG_5324.jpg
    118.6 KB · Views: 1,766
  • IMG_5341.jpg
    IMG_5341.jpg
    138.6 KB · Views: 1,626
  • IMG_5345.jpg
    IMG_5345.jpg
    128.8 KB · Views: 1,722
  • IMG_5347.jpg
    IMG_5347.jpg
    117.7 KB · Views: 3,235
  • IMG_5348.jpg
    IMG_5348.jpg
    134.5 KB · Views: 1,979
  • IMG_5352.jpg
    IMG_5352.jpg
    110.4 KB · Views: 1,598
Last edited:
Register to hide this ad
After the fitting we took it off, gave it an acid wash to even out the lack of shinyness then sanded it with 80grit then 220, then added a couple coats of primer
IMG_5363.jpg
IMG_5365.jpg
IMG_5371.jpg

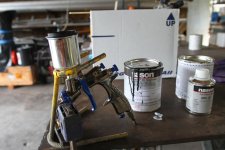
Used Nason black to paint it
IMG_5372.jpg
IMG_5374.jpg

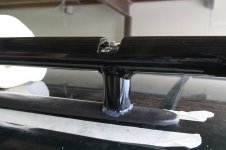
Then before screwing all the way on we put silicon on the tip of the screw and around the gaps to keep it water tight and of course wiped it clean
IMG_5393.jpg

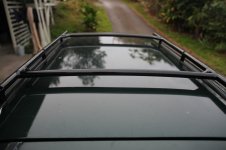
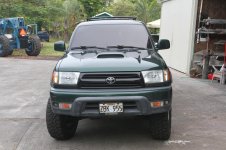
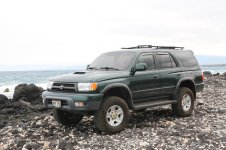
Here is the end product
IMG_5396.jpg
IMG_5402.jpg
 

Attachments

  • IMG_5363.jpg
    IMG_5363.jpg
    133.3 KB · Views: 1,597
  • IMG_5365.jpg
    IMG_5365.jpg
    119.6 KB · Views: 1,566
  • IMG_5371.jpg
    IMG_5371.jpg
    131.2 KB · Views: 1,584
  • IMG_5372.jpg
    IMG_5372.jpg
    124.4 KB · Views: 1,563
  • IMG_5374.jpg
    IMG_5374.jpg
    114.7 KB · Views: 1,551
  • IMG_5393.jpg
    IMG_5393.jpg
    123.2 KB · Views: 1,573
  • IMG_5396.jpg
    IMG_5396.jpg
    139.3 KB · Views: 1,674
  • IMG_5402.jpg
    IMG_5402.jpg
    113.3 KB · Views: 1,661
More Pics

more pics
IMG_5397.jpg

IMG_5435.jpg

IMG_5444.jpg
 

Attachments

  • IMG_5397.jpg
    IMG_5397.jpg
    136.1 KB · Views: 1,702
  • IMG_5435.jpg
    IMG_5435.jpg
    138.9 KB · Views: 1,944
  • IMG_5444.jpg
    IMG_5444.jpg
    138.6 KB · Views: 2,787
Looks super clean and professional! I like it!

Very sharp looking 4Runner! I like the stance, looks solid and planted.
 
Looks super clean and professional! I like it!

Very sharp looking 4Runner! I like the stance, looks solid and planted.

Thanks man! definitely spent a little extra time on it but well worth it, its extremely stable and wont budge at all!
 
Nice work! It looks solid. If you ever wanted to, you could extend the front a bit, add another crossbar, put in some mesh flooring, and you'd suddenly have one of the better looking racks on the market. The way you added radius to the tubing and triangulated the joints makes this thing look pretty solid, and I bet it's fairly light considering that you used aluminum.

Your rig looks all around reasonable and functional, while maintaining what is so great about these trucks from the factory. You have good taste!
 
Very nice [MENTION=120445]genmarks[/MENTION]

Nice thing about TIG is you don't have to deal with the crazy splatter of MIG, so you can weld in your skivies!

Wish I had some 3/4" Aluminum tubing lying around, I'd have to build one for my truck. I built the one on my Land Cruiser, but it weighs about a million pounds. Again, nice work!

I am curious how you guys rolled the tube for the arc of the roof. Throw me a bone please, I could do it in my tubing bender but it would take forever.
 
Thanks guys greatly appreciated!!! [MENTION=98090]hawaiian05[/MENTION] [MENTION=104905]wake_rider[/MENTION] [MENTION=78428]papapoopski[/MENTION] [MENTION=6047]Range[/MENTION]
 
Very nice [MENTION=120445]genmarks[/MENTION]

Nice thing about TIG is you don't have to deal with the crazy splatter of MIG, so you can weld in your skivies!

Wish I had some 3/4" Aluminum tubing lying around, I'd have to build one for my truck. I built the one on my Land Cruiser, but it weighs about a million pounds. Again, nice work!

I am curious how you guys rolled the tube for the arc of the roof. Throw me a bone please, I could do it in my tubing bender but it would take forever.

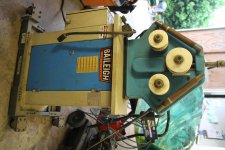
Yeah lucked out, my dad used to own a fabrication shop so he has a load of pipes. Thanks for the compliment! We used a Baileigh electric roller. I thought it would have taken a while
to match the curve of the roof but just did the first crossbar little by little until it matched, then we just made the 2nd bar the same arc.
IMG_5459.jpg
 

Attachments

  • IMG_5459.jpg
    IMG_5459.jpg
    136.1 KB · Views: 1,525
Pics of first half of the build

Here are pics of creating the bars that run along the black tracks,
just found the pics.
IMG_5291.jpg

IMG_5294.jpg

IMG_5309.jpg

IMG_5310.jpg

IMG_5311.jpg

IMG_5317.jpg
 

Attachments

  • IMG_5291.jpg
    IMG_5291.jpg
    110.2 KB · Views: 1,760
  • IMG_5294.jpg
    IMG_5294.jpg
    118.7 KB · Views: 1,412
  • IMG_5309.jpg
    IMG_5309.jpg
    134.9 KB · Views: 1,419
  • IMG_5310.jpg
    IMG_5310.jpg
    107.4 KB · Views: 1,375
  • IMG_5311.jpg
    IMG_5311.jpg
    103.5 KB · Views: 1,390
  • IMG_5317.jpg
    IMG_5317.jpg
    112.9 KB · Views: 1,360
I've seen your runner around in kona side, looking good bro, that Jaos spoiler is what caught my eye, nice build on the rack aswell, been wanting to get a basket for my runner but you already know shipping here is a load of BS, tryna get me the rola vortex, haven't seen anyone here with it yet
 
Yeah lucked out, my dad used to own a fabrication shop so he has a load of pipes. Thanks for the compliment! We used a Baileigh electric roller. I thought it would have taken a while
to match the curve of the roof but just did the first crossbar little by little until it matched, then we just made the 2nd bar the same arc.
You're Hawaiian. Can't you just bend those bars by hand?
 
I've seen your runner around in kona side, looking good bro, that Jaos spoiler is what caught my eye, nice build on the rack aswell, been wanting to get a basket for my runner but you already know shipping here is a load of BS, tryna get me the rola vortex, haven't seen anyone here with it yet
Thanks Man! Yeah ive been looking at racks and baskets for a while just not willing to pull the trigger especially with the shipping!
 

Members online

Forum statistics

Threads
278,316
Messages
3,554,121
Members
248,016
Latest member
Advally Service

Trending content

Back
Top