How to: Install Rock Sliders with KDSS

fernie

New member
Thought I'd give back what I can, and document my experience installing rock sliders on a 4Runner equipped with KDSS.

My wrenching experience is limited to oil changes. So the thought of destroying KDSS lines crossed my mind several times. However, if you take your time you can get through this as I did. After driving around with only the passenger slider slider on the truck for a few weeks, I decided I needed to figure this out!

Only documenting the drivers side, as the KDSS lines run down this side of the frame.

Tip for the passenger side - bolt the slider to just one of the holes on the top right corner first when attaching the slider. Next, bolt or thread just one of the holes on the top left corner. Doing this will allow the slider to pivot up more easily so you can align all of the holes on the slider to the frame.

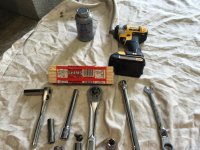
Tools Needed:
  • jack (multiple are helpful)
  • jack stands or blocks or whatever
  • impact wrench (optional but helpful for removing bolts)
  • 12mm socket (1/2 and 3/8 inch came in handy)
  • 13mm socket (1/2 and 3/8 inch came in handy)
  • socket extensions
  • 13mm wrench with swivel or flex ratcheting
  • torque wrench
  • anti-seize
  • wood shims
  • hack saw

Parts Needed:
  • a 4Runner
  • rock sliders (C4 are used in this example)

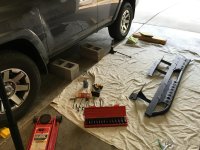
1. Let's get started -
1_IMG_0760.jpg

2. Closeup of items needed -
2_IMG_0761.jpg

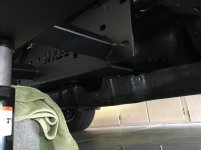
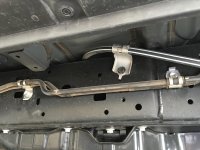
3. Using a 12mm socket, remove the drivers side parking brake fastener - (push the brake line up and out of the way)

Also, remove the bolts for each of the two KDSS brackets.
3_IMG_0762.jpg

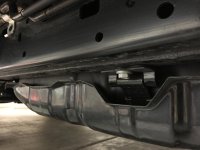
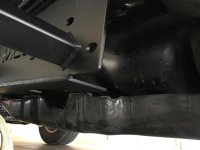
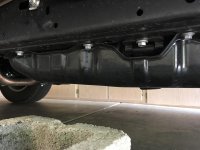
4. Remove the three 12mm bolts holding the gas tank skid only in this picture. Do not remove the 3rd bolt in from the left. This is for the fuel tank strap. Leave it alone.
We don't need to remove the gas tank skid completely. It just has to drop down far enough so that we can get the slider in between the frame and the gas tank skid.

Not pictured, but you will also need to remove two more 12mm gas tank skid bolts towards the rear of the 4Runner. After removing these the gas tank skid will hang down low enough to get the slider in. I used the socket extensions to remove these two additional bolts.
4_IMG_0763.jpg

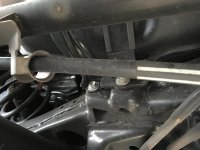
5. Another picture of the fuel tank strap bolt. Leave this one alone.
5_IMG_0764.jpg

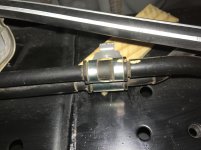
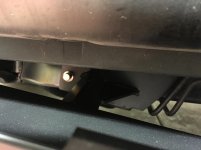
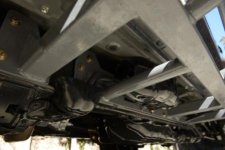
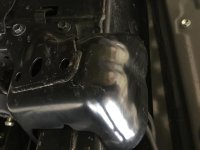
6. Remove the two 12mm bolts holding the small KDSS skid plate.
6_IMG_0765.jpg

7. Another angle of the small KDSS skid plate.
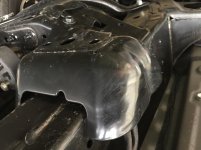
7_IMG_0766.jpg

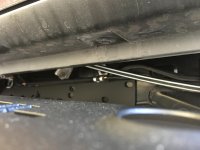
8. KDSS lines now exposed with the skid removed.
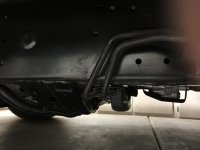
8_IMG_0767.jpg
 

Attachments

  • 2_IMG_0761.jpg
    2_IMG_0761.jpg
    137.1 KB · Views: 8,684
  • 3_IMG_0762.jpg
    3_IMG_0762.jpg
    128 KB · Views: 9,864
  • 4_IMG_0763.jpg
    4_IMG_0763.jpg
    124.2 KB · Views: 10,056
  • 5_IMG_0764.jpg
    5_IMG_0764.jpg
    118.5 KB · Views: 9,080
  • 6_IMG_0765.jpg
    6_IMG_0765.jpg
    115.4 KB · Views: 8,745
  • 7_IMG_0766.jpg
    7_IMG_0766.jpg
    122.1 KB · Views: 8,766
  • 8_IMG_0767.jpg
    8_IMG_0767.jpg
    120.2 KB · Views: 8,926
  • 1_IMG_0760.jpg
    1_IMG_0760.jpg
    134.3 KB · Views: 9,819
Last edited:
Register to hide this ad
9. Ensure the gas tank skid is hanging down far enough to move the slider in between for later.
9_IMG_0768.jpg

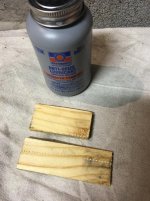
10. Prepare a couple of wood shims about 4 inches long or so. Will be easier to work with if not too long since there isn't much room. (ignore the lube for now)
10_IMG_0769.jpg

11. Insert a wood shim in between one of the brackets. Just enough that it pushes the KDSS bracket away from the frame.
As the slider is pushed up into place, these would shims will be close to falling out on their own.
11_IMG_0770.jpg

12. Insert a second wood shim on the other remaining KDSS bracket.
12_IMG_0771.jpg

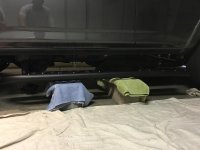
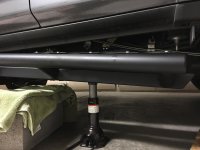
13. We are now ready to mount the slider to the frame. This was my second go-around at installing these things. Jack stands proved to be very difficult in balancing a 60 pound or so piece of metal. I found cinder blocks with towels placed under to work very well. Height wise, the cinder blocks were perfect.
13_IMG_0772.jpg

14. I found it easier to work on installing the left side of the slider first (closest to front of 4Runner).
Begin to jack up the slider and carefully get it in between the KDSS lines.
14_IMG_0773.jpg

15. Attach a 13mm bolt to the bottom left hand corner of the slider. Apply some anti-seize to the bolt if desired. Do not tighten completely.
I only inserted this bolt for now on the left side of the slider. This will allow the slider to pivot when we lift up the right side of the slider. Also it will keep the slider from falling and hitting the lines when working on the right side.
Keep one jack under the slider on the left side to support the weight of it as it pivots.
15_IMG_0774.jpg
 

Attachments

  • 9_IMG_0768.jpg
    9_IMG_0768.jpg
    129.3 KB · Views: 9,053
  • 10_IMG_0769.jpg
    10_IMG_0769.jpg
    137.8 KB · Views: 8,441
  • 11_IMG_0770.jpg
    11_IMG_0770.jpg
    123.8 KB · Views: 8,788
  • 12_IMG_0771.jpg
    12_IMG_0771.jpg
    133.2 KB · Views: 8,647
  • 13_IMG_0772.jpg
    13_IMG_0772.jpg
    126.1 KB · Views: 9,073
  • 14_IMG_0773.jpg
    14_IMG_0773.jpg
    114.2 KB · Views: 8,573
  • 15_IMG_0774.jpg
    15_IMG_0774.jpg
    138.4 KB · Views: 8,619
Last edited:
16. Using a second jack, slowly start to jack up the right of the slider. Be mindful of whole slider the entire time as it is moving.
16_IMG_0775.jpg

17. Make sure the slider is pushed back against the frame when jacking it up. This will help ensure it makes it behind the KDSS lines.
17_IMG_0776.jpg

18. Once the slider is up between the KDSS lines, remove the wood shims if they haven't already fallen out.
18_IMG_0777.jpg

19. Don't forget about the gas tank skid. Make sure the bottom part of the slider is between the frame and the gas tank skid plate.
19_IMG_0778.jpg

20. Slider is in.
20_IMG_0779.jpg

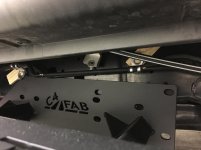
21. Begin to attach all of the supplied 13mm bolts to the remaining holes.
21_IMG_0782.jpg
 

Attachments

  • 16_IMG_0775.jpg
    16_IMG_0775.jpg
    138 KB · Views: 8,718
  • 17_IMG_0776.jpg
    17_IMG_0776.jpg
    124.3 KB · Views: 8,406
  • 18_IMG_0777.jpg
    18_IMG_0777.jpg
    129.6 KB · Views: 8,617
  • 19_IMG_0778.jpg
    19_IMG_0778.jpg
    117.6 KB · Views: 8,510
  • 20_IMG_0779.jpg
    20_IMG_0779.jpg
    116.9 KB · Views: 8,598
  • 21_IMG_0782.jpg
    21_IMG_0782.jpg
    114.7 KB · Views: 8,577
Last edited:
22. Bolt up the fuel tank skid plate. (not pictured)

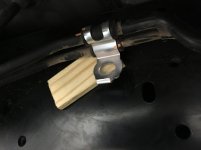
23. This part I was not happy about. Perhaps others found a better way. However, the small KDSS skid plate could not be re-attached without some modification. Hence, the hacksaw.

Between the two bolts, the see the metal tab. After installing the slider, this metal tab cannot be inserted as the hole is blocked by the slider. Only way I found to install this KDSS line protector / slider was to cut off the tab. (picture is with the tab showing what to cut)

6_IMG_0765.jpg

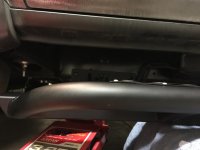
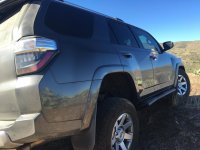
All done! Now grab a beer to ease your back pain.

IMG_0754.jpg
 

Attachments

  • 6_IMG_0765.jpg
    6_IMG_0765.jpg
    115.4 KB · Views: 8,671
  • IMG_0754.jpg
    IMG_0754.jpg
    129.1 KB · Views: 9,246
Last edited:
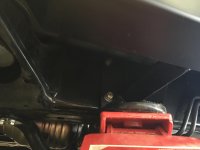
Nice write up! Couple of things I had to do when putting on my C4 sliders.

1). I had to entirely unbolt the tank skid. Without doing that it was just too difficult to get the skid to stay in a pulled back position. This may vary between installs but I because so frustrated with it that I just removed it entirely and put it back once the skid was in place.

2). The KDSS line guard near the front would not go back into place once the skid was mounted without me cutting off the tab that went into the frame. Once this tab was removed I was able to place the guard back in place but it did require me to use a few extra washers on the bolt nearest to the front in order to level the guard.

3). There's nothing that you really need to brace once the KDSS lines and the box have the bolts removed. Those lines are so stiff that they barely move even once everything is unbolted.
 
Nice write up! Couple of things I had to do when putting on my C4 sliders.


2). The KDSS line guard near the front would not go back into place once the skid was mounted without me cutting off the tab that went into the frame. Once this tab was removed I was able to place the guard back in place but it did require me to use a few extra washers on the bolt nearest to the front in order to level the guard.

Thanks!

Great. Good to know I'm not the only one who had to hack off the tab.
 
Nice write up and photos. [MENTION=139465]Ohio Hawk[/MENTION] did his on his own, and then helped with mine, so I took advantage of his experience.

One thing that I think helped move the sliders into place and keep them level was the use of a Craftsman motorcycle lift that I have. You can easily lift it into place and roll it wherever it needs to be without multiple jacks or jack stands. If you have a motorcycle riding body, see if he has something similar.

00950191000
 
Thanks for posting up the detailed rite up on the install! Lots of great close up photos and good tips.
The reason we do not have a hole in the forward lower plate where the small KDSS skid plate goes, is because we have actually not even had a KDSS equipped 4runner available to bring in our shop and do an install. We used the same lower mounting plates as we do on the non-KDSS sliders. So we do not have a measurement to work from as to where we could put a hole for the tab.

The easiest way to address this is to just lay the KDSS skidplate on a table or cinder block in your case would work well, and flatten the tab with a hammer. That way the tab doesn't need to go back into a hole, and you don't have to bust out the hack saw or grinder to remove the tab.

Do you mind if we post a link to this thread in our vendor sub forum for others to see?
 
Thanks for posting up the detailed rite up on the install! Lots of great close up photos and good tips.
The reason we do not have a hole in the forward lower plate where the small KDSS skid plate goes, is because we have actually not even had a KDSS equipped 4runner available to bring in our shop and do an install. We used the same lower mounting plates as we do on the non-KDSS sliders. So we do not have a measurement to work from as to where we could put a hole for the tab.

The easiest way to address this is to just lay the KDSS skidplate on a table or cinder block in your case would work well, and flatten the tab with a hammer. That way the tab doesn't need to go back into a hole, and you don't have to bust out the hack saw or grinder to remove the tab.

Do you mind if we post a link to this thread in our vendor sub forum for others to see?

Yes, perhaps hammering the tab flat would have been an alternative solution. If I could have slept on it overnight that would make sense, but at the moment the hacksaw was the first option that came to mind after endless hours :)

No not at all, yes please share from my experience or me learning the hard way!
 
Last edited:
Yes, perhaps hammering the tab flat would have been an alternative solution. If I could have slept on it overnight that would make sense, but at the moment the hacksaw was the first option that came to mind after endless hours :)

No not at all, yes please share from my experience or me leaning the hard way!

Thank you, we attached a link to our install instructions page. We really appreciate it!
 
22. Bolt up the fuel tank skid plate. (not pictured)

23. This part I was not happy about. Perhaps others found a better way. However, the small KDSS skid plate could not be re-attached without some modification. Hence, the hacksaw.

Between the two bolts, the see the metal tab. After installing the slider, this metal tab cannot be inserted as the hole is blocked by the slider. Only way I found to install this KDSS line protector / slider was to cut off the tab. (picture is with the tab showing what to cut)

View attachment 227395

All done! Now grab a beer to ease your back pain.

View attachment 227397

I can't even put that skid plate back on. Its insane
 
Installing Domello rock sliders

I had similar experiences installing the Domello rock sliders. I just used a bunch of wood blocks of various thicknesses to prop up the sliders until it was in place. I lifted one end at a time and slid in another block until it was high enough. Once I got a bolt in at each end the rest of them were easy.

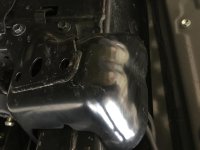
With the Domello I did not have to remove the gas tank skid plate and as many other parts. I unbolted the KDSS lines and removed the KDSS line skid plate where the lines wrap under the frame and the skid under the control unit, shown in the photo below.

The hardest part with the Domello sliders was I had to remove the nut holding the KDSS control unit, a machined aluminum block, to the frame and shift the unit out 1/4". The one bolt holding it to the frame is semi-hidden, up on top of the unit. I couldn't get a socket wrench in there and the space above the unit only allowed about a 10 degree turn with each pull of the open end hand wrench. I could have used the ratchet closed end wrenches I have now. It took a long time to remove that nut and slide it back. Later the nut passes through a hole in the Domello sliders made for the KDSS unit.

As you may have noticed, the KDSS skid plate is bolted to the bottom of the KDSS unit so if you really smash the skid plate hard you could shear off that bolt. Makes me want to fabricate a skid plate that only bolts to the frame.
 

Attachments

  • Sized6915.JPG
    Sized6915.JPG
    65.3 KB · Views: 7,505
22. Bolt up the fuel tank skid plate. (not pictured)

23. This part I was not happy about. Perhaps others found a better way. However, the small KDSS skid plate could not be re-attached without some modification. Hence, the hacksaw.

Between the two bolts, the see the metal tab. After installing the slider, this metal tab cannot be inserted as the hole is blocked by the slider. Only way I found to install this KDSS line protector / slider was to cut off the tab. (picture is with the tab showing what to cut)

View attachment 227395

All done! Now grab a beer to ease your back pain.

View attachment 227397

Thanks for the detailed instructions. I was able to install the sliders successfully. however I still haven't installed the kdss skid. Can you please share a picture of how the skid looks after you cut the tab off?
 
Thanks for the detailed instructions. I was able to install the sliders successfully. however I still haven't installed the kdss skid. Can you please share a picture of how the skid looks after you cut the tab off?

I'm too lazy since it's a thousand degrees outside in Phoenix right now. However, as others suggested don't cut the tab. Try hammering it flat (bending it up) and see if the KDSS skid will fit.

See the photo under the step "Remove the two 12mm bolts holding the small KDSS skid plate". That tab between the two bolts at the top of the photo is the tab in question. I had just cut it level with the body of the KDSS skid removing it completely.
 
Great information. Really nice sliders; this post will probably be the motivation I needed to finally bust out my credit card. And the under carriage of your truck is insanely clean.
 

Members online

Forum statistics

Threads
278,312
Messages
3,554,089
Members
248,016
Latest member
Advally Service

Trending content

Back
Top