Inheritance Build

For those that are on the fence about dropping too much coin for some decent LED driving or spot lights, Cali Raised LED's are a really reliable & well built light. I decided to replace my Amazon specials ditch lights w/ these
IMG_20171209_114242_zpsbvtfibjp.jpg


I've gotta set on my 06' 4Runner & they've been used quite a bit. They're not quite as expensive as some of the other high end LED lights, but the quality is certainly there. These are side specific, which is cool. I'll be ordering more from Cali Raised once my winch bumper is here.
 
... That's the Dave Ramsey in me...

I had to laugh when I read this. My mods are also dictated by how much is in the "4runner mods" envelope. Gotta stick to the budget! This is a cool build, but what really makes it special is the story behind it.
 
So I guess I haven't updated in a minute...
Got my Cali LED's mounted to my ditch brackets & relocated my Amazon specials to the lower valance/frame rail.
IMG_20171223_135231_zpsutt2rixp.jpg


I'm pleased w/ the brightness until I get my winch bumper & add a couple more lights.
IMG_20171222_224845_zpstsmpdxd8.jpg


That's pretty much the last upgrade update I've done since Christmas. Around Feb, we had some consecutive days of cool a.m. temps & warm afternoon temps. So of course running the heater in the mornings, A/C in the afternoon... I started to smell a mildew-ish smell. After a few days of driving, I checked my coolant level... sure enough, radiators low on antifreeze & my floor vent smelled of antifreeze. Looks like it's time for a new heater core. I've replaced a few on various models, including my 85' 4Runner. They're never fun, but how bad can it really suck??? Well I'll tell you, the 3rd gen 4Runner's heater cores are an absolute nightmare to get to compared to several other models that I've done.
Researching YouTube & Google, lots of people claimed that you had to have your A/C discharged & your EVAP & lines removed so you can remove your heater core box. Absolute BS. You do however have to basically remove EVERYTHING else. I'll try & not bore you w/ the details, but provide a decent description.
 
So the dash remove process is pretty straight forward once you get your radio bezel & trans shifter trim off. Remove your driver & pass side door seal plates, then your kick panels. Once that's off, you've got to remove the black trim around the gauges, then basically all bolts/screws should be exposed.
You should end up w/ this cluster f...
IMG_20180322_222031_zpsomufwwsq.jpg


You see that metal tube that stretches from driver to pass side? Yeah, disconnect all cables & wires from that, b/c it's coming out & you're gonna have to drop the steering wheel.:madgrin::madgrin::madgrin:
There you have it:
IMG_20180324_145426_zps5pn9ines.jpg


There's the culprit, tucked waaaay under there.
IMG_20180322_224006_zpsb5fxavce.jpg


Before I get too far, I wanted to mention that there are 4 (maybe 5 too lazy to go look) clips that hold the dash into these tabs...
IMG_20180323_092951_zpsfdbei1mh.jpg


These are the clips... in the broken form :redbrick::redbrick::redbrick:
IMG_20180323_093018_zpswr1q3whd.jpg

If you break yours, part # is 90467-15020. You're welcome! I took me about an hr & multiple dealership parts sites to find that God-forsaken part #. Now if USPS will just hurry up & deliver them.

This makes me sad...
IMG_20180323_092934_zpsyccmgfwz.jpg

And sometimes my woodworking makes messes that are unintended:ohwell:
IMG_20180408_112815_zpsqqw3fkdc.jpg


Alright, ALL DUCT WORK on the driver side can come on out, the radio frame will have been removed prior to removing the cross bar. KEEP UP W/ the routing of your HVAC cables. This will matter. You're gonna have to remove your HVAC controls, cables easily disconnect from the duct work. In order to get the duct work & heater core out, you're going to have to also remove the airbag control module that has hella tight torx head bolts. 2 outta 3 of mine came out w/ my impact, the 3rd was stripped. Out comes the grinder w/ a cutting wheel. :censored::censored:
IMG_20180323_155524_zpsuwbbfqxd.jpg

IMG_20180323_155833_zpsyxxiffjs.jpg


There's a few bolts up top, & a few on the bottom. A lot of cussing, oh yeah, disconnect the soft lines going to the heater core at the fire wall. And boom. She's out. It's not a smooth slide out, you've gotta hold your mouth just right.
IMG_20180323_160335_zpswekaeosk.jpg


Awfully empty & lonely feeling once it's all out:
IMG_20180323_160430_zpsayg7y9cm.jpg
 
Unless you're willing to pay $400+ for a TOYOTA replacement part, just go ahead & get your generic $70+/- heater core from your parts store. 4 screws & 3 clamps & you can swap the old out w/ the new.
IMG_20180325_153137_zpsqyywmcjc.jpg


You're essentially going to do the reverse to put it back in. I didn't take any pics, b/c I was pissed & tired. 1st you're gonna need to pull the floor vent off the box to get it to slide back in w/o issues. Once you've got it back in, 1 screw holds it in place. Just go in at an angle to get the lines through firewall, & shimmy the box back in place. The front most screw mounting spot, you're gonna need a flat head to kinda pry on the flange to get it to mount up properly. But don't just CRANK on it & break the mounting tab.


This is what I'm riding around w/ currently. Lookin like a straight up trash can.
IMG_20180408_124259_zpshv4pznlc.jpg


During the burping process, I noticed my radiator cap was starting to come apart, so I ordered a new 1 from Toyota. Just some slight differences, but it all fits the same.
IMG_20180404_173356_zps0sfby0wi.jpg

IMG_20180404_173426_zps1ja32chz.jpg


After a few trips around town, & looking at 2018 4Runners at the Toyota dealership, I decided to pop the hood to ck & see if there are any leaks at the firewall. I'll be damned if the heater control valve didn't start leaking AFTER the burping process:gun4::redbrick::redbrick:
Screenshot_20180410-105328_zpsdfyvgjsi.jpg


These things happen, but man they can be frustrating. ESPECIALLY when something like burping your coolant system is involved. But once she's back on the road, & sporting a new winch bumper in about a month, it'll all be ok.

I'm still struggling w/ which bumper to go w/, between an ARB, Addicted OR Tube, or Addicted OR plate. I'm leaning most heavily towards the AOR tube bumper, mainly b/c of PRICE. But that plate bumper sure does look great. The ARB would be a project that I'd have modified to emulate a couple ARB's I've seen on here. But then again, this needs to stay in a budget. So the AOR tube is the most likely choice.

Stay tuned, hombre's...
 
Finally got the heater control valve replaced. As you can see, this 1 clearly had a leak:
IMG_20180415_153217_zpsriyxb98m.jpg


The new 1 basically requires you to disconnect that cable coming through fire wall (tension secured clip fixes the cable body to the mounting bracket), disconnect the 2 hoses, & 1 10mm bolt that holds it to the firewall. You'll re-use your mounting bracket, there's 2 Phillips head screws that fix the valve to the bracket. Pay special attention to the orientation of the arrow on the body of the valve, it's important. And she's all back together:
IMG_20180415_153156_zps2etddw3a.jpg


1 more burp session for good measure & she should be ready to be a semi-daily driver again. After re-assembling the dash, I noticed some of the bulbs were burnt out, so I'll be ordering some new LED's soon. Not sure what colors to go w/ yet though. Stay tuned...
 
The trigger has been pulled on my 1st piece of armor:
Screenshot_20180422-145929_01_zpsrloz2uq1.jpg


Much to my chagrin, it may not be here for 2+ months. I'll probably have my winch by then, w/ no way to mount it

Hit 225K the other day...
IMG_20180415_190108_zpsrfg3kzif.jpg


And I finally got a new dash piece in to button up my dash.
IMG_20180426_212415_zpsitofyune.jpg

Seems petty, but this clip was broken on my old dash & it caused it to sag & was SUPER annoying.
IMG_20180426_212427_zpsoqsjycjc.jpg

All snug & buttoned up
IMG_20180427_123926_zpsif0zdfrm.jpg
 
Last edited:
Finally replaced my Amazon specials w/ some better amber LED fogs. Cali Raised pretty much has all of my auxiliary LED light business.
IMG_20180511_055312_zpstxh2d4jc.jpg


How bout this sweet wire routing :thumb3::thumb3::thumb3:
IMG_20180519_182728_zpsdhaydy4p.jpg

This will get cleaned up in the near future whenever I get my new fuse box mounted. All of my wiring will be well organized.

Their temporary home until my AOR bumper arrives:
IMG_20180519_182749_zpsrahalsrq.jpg


These are ORANGE... I was hoping for a little more yellowish orange, but these are straight up ORANGE:
IMG_20180519_182810_zpsz0t0mmpl.jpg


I'll give y'all a guess at which 1 of these antenna gives me better reception...
IMG_20180609_135054_zpsgfj50pp6.jpg

This shorty antenna was absolute garbage & I lived w/ it for 2 years. I got this black antenna off eBay from The Antenna Sources store & it was a MASSIVE instant improvement. I highly recommend them.

If I'm doing this, I've got a bumper on the way...
IMG_20180621_215731_zpsp8weffwj.jpg
 
Ay Wes been a while, you have the runner lookin good.

Much to my chagrin, it may not be here for 2+ months. Yep

AOR had March sale on their products, Plate Bumper I ordered 3-12 got it 6-11.
Was well worth the wait though, so hang in there.
 
Welp, she came in...
IMG_20180622_120806_zpszk3p4rx5.jpg


I went w/ flat black rattle can:
IMG_20180622_170556_zpslzl1nez5.jpg

IMG_20180622_170608_zps3kjgt1b8.jpg


So this truck has been wrecked before... The front passenger frame horn took the brunt of the damage, but things aren't like new. The bumper bracket that AOR includes, slipped on over the frame rails w/ no issues, but the hole that needed drilling on the driver side frame horn ate a drill bit. Since it wasn't flat, I had to drill at an angle & once I punched through it snapped my bit. No biggie, it was a cheap Ryobi bit.
IMG_20180623_131338_zpsf9grvvbm.jpg


For now, the bumper is bolted on to the frame. However, in the next couple of weeks, I'll be getting the bracket welded to the frame. But here she is mounted up:
IMG_20180623_161907_zpszslirmoi.jpg

IMG_20180623_161914_zpscehh0xuj.jpg

IMG_20180623_161922_zps0uevyqvu.jpg


I'm extremely happy w/ the purchase. I did initially want a plate bumper, but I love the look of this bumper too. Hopefully I'll have a winch for her in the next couple of months, probably going w/ a Smittybilt XRC 9.5 synthetic. And I think it's safe to say that radiator hanging out will cause me to get a stout skid plate in the near future as well.
 
Just a couple small updates... Got my tube brackets for my fog lights & relocated my fogs where I wanted them.
IMG_20180629_150045_zpsjd4o6shf.jpg

IMG_20180629_151114_zpsnuapm3hm.jpg


Got my clear parking lenses installed & relocated my blinkers into my parking lights. I know many have used multiple different bulb sockets, I decided to use the stock sockets w/ 7440 bulbs to avoid any wiring changes. I just need to acquire some amber bulbs or do an LED upgrade.
IMG_20180629_150051_zpsyjz1xwin.jpg

IMG_20180629_151100_zpsyujrvpqs.jpg

IMG_20180629_151109_zpsqkttbqja.jpg

At some point I'm going to put the headlight fill plates back in place once I get the driver side fender replaced. Currently the driver side fender has a crease in it just below the headlight from a small impact w/ a tree via my sister.

IMG_20180629_151126_zpsgaogcqnh.jpg

IMG_20180629_151143_zps0jnuxnlq.jpg


Next up... sliders.
 
It's been a while since I've updated. Outside of sliders, a winch, & a new sound system, this truck is basically done any way. But, I will be keeping this thread updated w/ maintenance type stuff too.
So I'm sure everyone with a sunroof has been dreading something similar to this:
IMG_20190419_115258_zps2xyb0dj8.jpg


I'd been smelling a mildew-esque scent, but never could locate any sort of dampness or centralized location of the smell. Leak confirmed, now it's time to rip everything out.
IMG_20190419_121349_zpskaugjev4.jpg


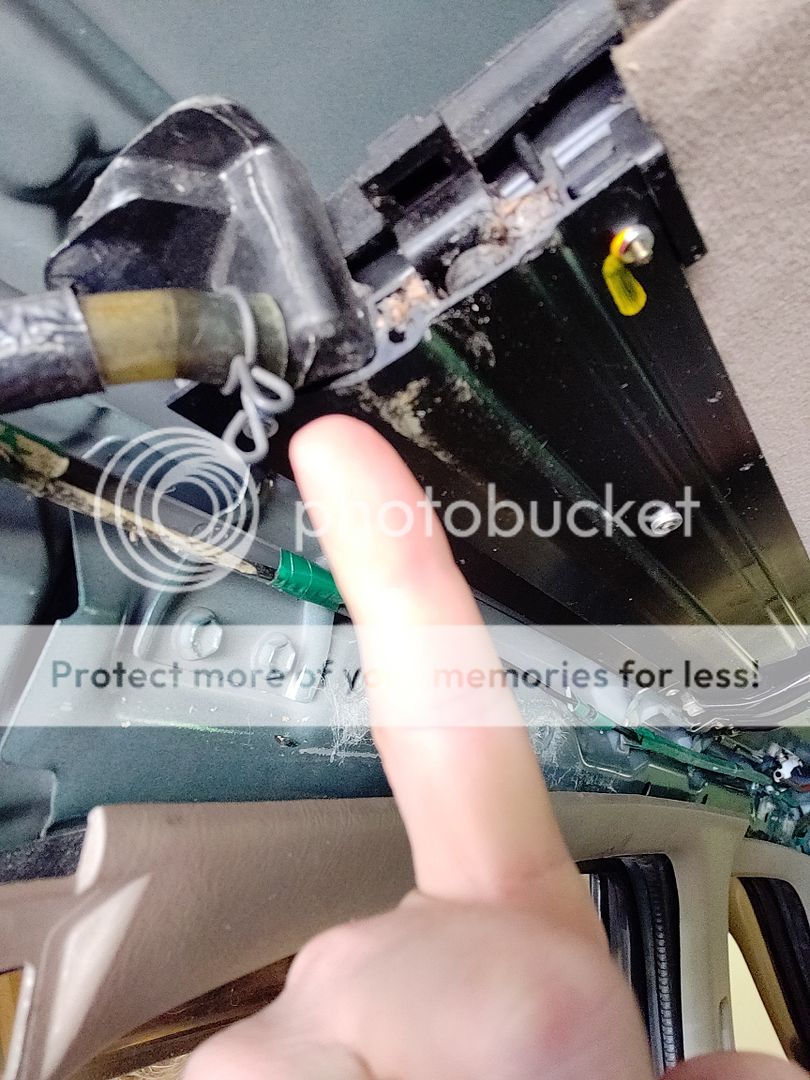
We were getting a good bit of rain the week that I discovered that I had a leak, so I basically had to play the waiting game for a good storm to come along & see where it was actively leaking. The rear passenger side drain tube was the culprit, which seems to be extremely common.
IMG_20190425_112347_zpsscw3oodo.jpg

IMG_20190425_112351_zpspuhrmidt.jpg


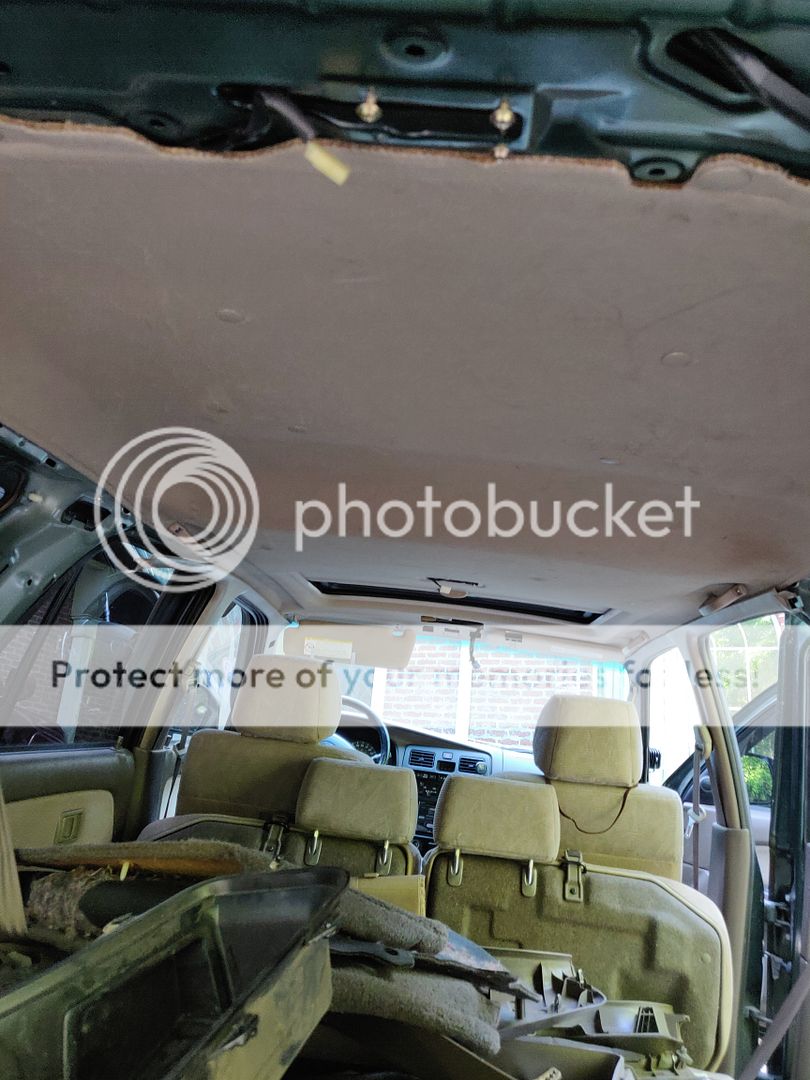
For those of you that haven't had to tackle this, there's a LOT to remove. Everything behind the back seat was SOAK'd, so I had to pull basically everything out beyond the back seat.
IMG_20190426_183857_zpsnmpdgq3j.jpg


For good measure, I went ahead & disconnected the driver side tube & made sure it wasn't going to become a problem in the future. It was discolored, but it was totally non-occluded.
IMG_20190427_140219_zpsh23j9iwz.jpg


The clips (6) that you WILL break when you pull the headliner. Trust me, YOU will break them. For you gray interior folks, I don't know the part #.
IMG_20190505_164028_zpslwadegql.jpg


Basically my leak was cured by removing the headliner. B/c once I had headliner out, NOTHING was leaking anymore. I'm guessing that the drain tube just gets clogged or unseated & the removal of the headliner massaged it in place. Who knows... Either way, I let it sit out in heavy rain for 3 days to make sure it wasn't leaking for any of the 4 drain tubes. No leaks anywhere!

You'll really need a 2nd set of hands to help place headliner back in place.
IMG_20190505_164357_zpsa58dk0br.jpg

IMG_20190505_164408_zpsooh0rg2e.jpg


And keep your eyes peeled for a build on this:
IMG_20190204_172936_zpsxju4ue3k.jpg

IMG_20190204_173043_zpsgcnb95ru.jpg


The turbo motor is rebuildable, but not a cost effective option. So this will be getting dropped in instead:

IMG_20190524_142927_zpsxz2byzgl.jpg
 

Members online

No members online now.

Forum statistics

Threads
278,309
Messages
3,554,068
Members
248,016
Latest member
Advally Service

Trending content

Back
Top