DeepSea
New member
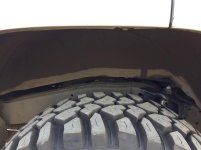
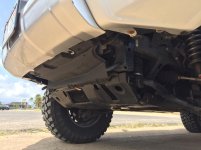
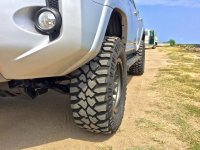
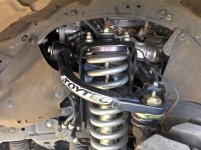
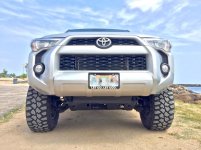
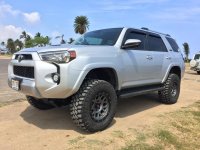
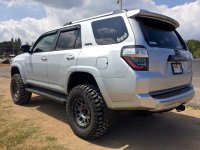
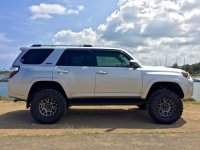
Wanted a bit more lift without sacrificing ride quality and my CVs as well as additional clearance for my new 305/65R17 MT Deegan 38 tires. Installed Fat Pats 1" body lift Fat Pats Body Lifts - Home which took about 4-5 hours to do. Stoked on how it turned out!
Here are my install notes:
1. The bolts were slightly larger in diameter (3/4" head) than the OEM (18mm head) so we had to drill out all the body holes and washers to make them work. Wasn't a problem at the shop I did this at because they had 18" drill bits but you definitely need to get exact bolts for other 5th gen guys wanting this kit. The length wasn't a problem just the diameter.
2. No need to move nor trim radiator shroud. Didn't affect the fan movement at all.
3. Windshield water reservoir bottle just needs the three bolts taken out and hung/slid out of the way to access the mount. No need to disconnect all the hoses & wiring. I zip-tied it to my UCA.
4. Aluminum front bumper can be moved up exactly one inch via its 8-bolt mounting holes and you have to in order to seam the plastic bumper cover back up tight. If not , you'll have a slight 1/8" gap between bumper and fender. By moving it up you can only use 4 of the 8 original mounting holes. Still plenty strong enough mount though. Weld it if you think differently.
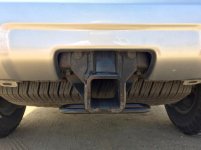
5. No problem with rear bumper (and/or bumper cover) but you'll obviously have a space now between the cover and the frame support so I'll be buying a sheet of 1" foam from a craft store and glue to pre-existing bumper styrofoam support. In order to do this though, the bumper will have to be removed to access.
6. You'll definitely need a magnetic retrieval tool that has a strong pull in order to lift the OEM body mount bolts out, particularly for the front and rear set.
7. All the interior door panels are just snapped in/out but the rear is a bit trickier because you don't want to have to remove the entire panel. We just popped about a 3rd of it back enough for a hand and tool to get in there
8. Be prepared to have plenty patience, especially with carefully removing the OEM inner fender fasteners
Here are my install notes:
1. The bolts were slightly larger in diameter (3/4" head) than the OEM (18mm head) so we had to drill out all the body holes and washers to make them work. Wasn't a problem at the shop I did this at because they had 18" drill bits but you definitely need to get exact bolts for other 5th gen guys wanting this kit. The length wasn't a problem just the diameter.
2. No need to move nor trim radiator shroud. Didn't affect the fan movement at all.
3. Windshield water reservoir bottle just needs the three bolts taken out and hung/slid out of the way to access the mount. No need to disconnect all the hoses & wiring. I zip-tied it to my UCA.
4. Aluminum front bumper can be moved up exactly one inch via its 8-bolt mounting holes and you have to in order to seam the plastic bumper cover back up tight. If not , you'll have a slight 1/8" gap between bumper and fender. By moving it up you can only use 4 of the 8 original mounting holes. Still plenty strong enough mount though. Weld it if you think differently.
5. No problem with rear bumper (and/or bumper cover) but you'll obviously have a space now between the cover and the frame support so I'll be buying a sheet of 1" foam from a craft store and glue to pre-existing bumper styrofoam support. In order to do this though, the bumper will have to be removed to access.
6. You'll definitely need a magnetic retrieval tool that has a strong pull in order to lift the OEM body mount bolts out, particularly for the front and rear set.
7. All the interior door panels are just snapped in/out but the rear is a bit trickier because you don't want to have to remove the entire panel. We just popped about a 3rd of it back enough for a hand and tool to get in there
8. Be prepared to have plenty patience, especially with carefully removing the OEM inner fender fasteners
Attachments
Last edited: