Installing 6x9 speakers in front door

tony_4r

New member
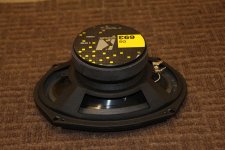
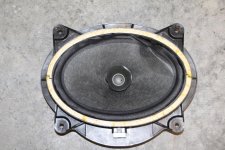
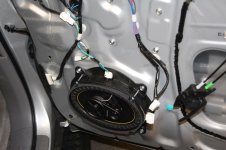
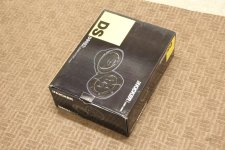
I finally got these new DS693 Kickers 6x9 on the front doors. I first intended to install Kicker’s 6.5" DS65 speakers. However, in that process my impact driver fell on one of the cones and cracked it. I still installed one of the DS65 speakers using the Scosche SAT69 adapter, but was not happy with the bass. Basically, the bass was completely gone. The main reason was probably not because the speaker but rather that the Scosche adapter is flushed on the door frame compared to the factory adapter that adds about two more inches of depth. Since I have one broken speaker, I needed to buy a new pair. So I decided to go with the much bigger Kicker DS693 6x9. I knew it was going to require some cutting and adapting, but the preliminary measurements showed that it could be done. Some readers may prefer to add subwoofers for bass and use 6.5” at the door. This is certainly an option that will give you much better bass, but I did not want to add a subwoofer.

I assume that installation of other 6x9 speakers will work in a similar fashion. As a reference, the depth of the DS693 is 3 1/4". I think you still have a little bit more room before the window hits it. I saw about 1/2” to 3/4” gap between the back of the magnet and the window, but make sure to measure beforehand. Where you don’t have much more room is on the front of the speaker. I had about 0.2” to spare.

The install shown here took me about 3 hours. It is very quick once you know what to do. The first door took about 8 hours over a few days.
 

Attachments

  • IMG_4119.jpg
    IMG_4119.jpg
    140.9 KB · Views: 7,700
  • IMG_4122.jpg
    IMG_4122.jpg
    134.3 KB · Views: 7,893
Register to hide this ad
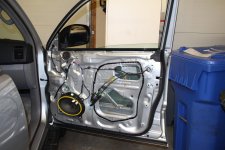
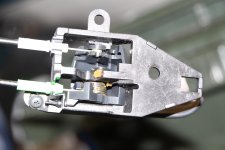
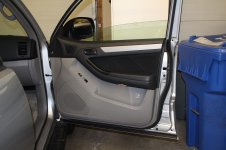
The first thing to do is to disassemble the door cover. I won’t go into details because this is explained in many other posts. It is a quick and easy step. Actually, during my build I disassembled the driver’s door about 10 times, so it was taking about one minute to do it after that. This post is based on the passenger door, which is 98% identical to the driver’s door. Two tips here: be careful with the plastic fasteners at the bottom of the door hitting the new speakers when disassembling or assembling – you could break the cone; some forums say that it is hard to disconnect the cables to the door handle, but you don’t need to do that, you just take out the screw located on the back of the handle assembly (behind the panel) and disconnect the whole handle from the door cover. Takes 10 seconds and now you have the door panel completely out of the way.
Here is a good link that explains how to take out the door panel: http://www.toyota-4runner.org/engin...-idiots-guide-door-panel-removal-4th-gen.html
 

Attachments

  • IMG_4123.jpg
    IMG_4123.jpg
    129.3 KB · Views: 12,480
  • IMG_4128.jpg
    IMG_4128.jpg
    131.5 KB · Views: 7,705
Last edited:
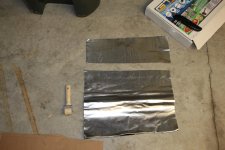
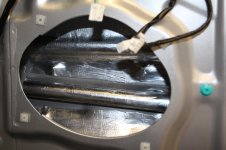
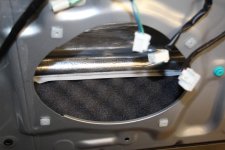
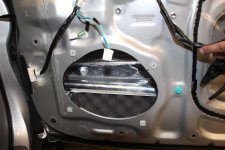
First I wanted to add a little of sound dampening to the door. During this step you can add as much as you want, and spend as much time/money as you desire. I just added a little bit. I used the GT mat, which has a good price in Amazon. I concentrated on installing a layer behind the speaker and around the structural tube behind the speaker. I also wedged a piece of egg carton foam below the structural tube of the door (also bought in Amazon). I read in a forum that this is a good idea. To be honest, I don’t know if it makes a difference, but the cost was minimal. The recommendation is to place the foam on the door panel behind the speaker. I did not have spray glue so I only covered half of the area behind the speaker. This could be an easy step for later, but I wanted to finish that night.
 

Attachments

  • IMG_4136.jpg
    IMG_4136.jpg
    131 KB · Views: 7,581
  • IMG_4143.jpg
    IMG_4143.jpg
    126.5 KB · Views: 7,667
  • IMG_4144.jpg
    IMG_4144.jpg
    130.8 KB · Views: 8,391
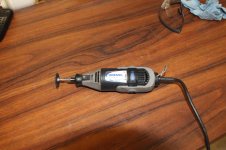
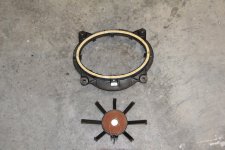
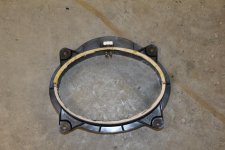
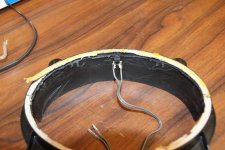
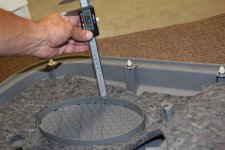
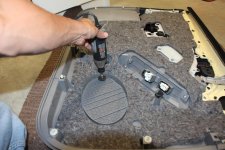
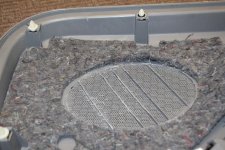
Next is to disassemble the factory speaker adapter. The adapter has the speaker molded in it. I used the factory speaker adapter for my new 6x9 speakers. The speakers need an opening slightly bigger than the factory adapter. First, cut out the factory speaker cone. Then cut out the 8 ribs that hold the speaker to the adapter. I used a Dremel with a cutting wheel. Then you have to remove the inside flange along the circumference of the adapter’s speaker opening. The amount to cut here depends on the opening required by your speaker. I don’t think you need to be to exact since the speaker flange will sit on the adapter’s opening and create a good seal. The finish here does not look the best, but it works. You could also reuse the foam of the factory adapter to create a better seal. In my case, I think that the seal was good enough.
 

Attachments

  • IMG_4146.jpg
    IMG_4146.jpg
    138.6 KB · Views: 7,548
  • IMG_4148.jpg
    IMG_4148.jpg
    135.5 KB · Views: 7,487
  • IMG_4150.jpg
    IMG_4150.jpg
    133.6 KB · Views: 7,492
  • IMG_4154.jpg
    IMG_4154.jpg
    133.6 KB · Views: 7,617
  • IMG_4153.jpg
    IMG_4153.jpg
    132 KB · Views: 7,425
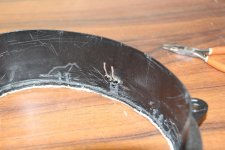
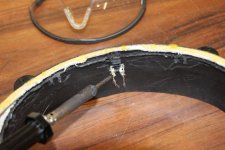
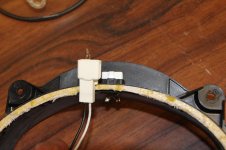
You can use the same wire connectors of the factory adapter. With a welder I heated them to take the original wires out, and then welded the speaker wires to the factory connector. I used the wire harness I bought for the 6.5” speakers to figure out the location of the negative or black wire (see picture, the negative is the left wire). The nice thing here is that you can use the factory speaker connector and do not need any harness.
 

Attachments

  • IMG_4160.jpg
    IMG_4160.jpg
    131.2 KB · Views: 7,481
  • IMG_4161.jpg
    IMG_4161.jpg
    126.4 KB · Views: 7,480
  • IMG_4162.jpg
    IMG_4162.jpg
    136.3 KB · Views: 7,397
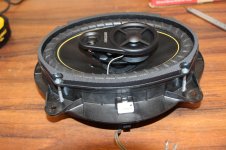
The next step is to attach the new 6x9 speaker to the factory adapter. I used 2” wood screws threaded into the plastic flange – you can also use sheet metal screws. I mounted the speaker with the screws to make the screw holes on the adapter’s flange and then I unscrewed them. I then placed the adapter on the door to mark the screw holes on the sheet metal of the door. Then I made small holes on the sheet metal for the speaker screws to thread in. In this manner you are not only screwing into the plastic, but also into the sheet metal of the door panel to make a more robust installation. Make sure you angle the screws away from the speaker so the holes are actually in the sheet metal and not on the speaker opening. As you can see in the picture, there are only three holes in the sheet metal because one of the screws was not angled enough.
 

Attachments

  • IMG_4174.jpg
    IMG_4174.jpg
    136.8 KB · Views: 7,580
  • IMG_4176.jpg
    IMG_4176.jpg
    132.1 KB · Views: 7,735
  • IMG_4181.jpg
    IMG_4181.jpg
    125.6 KB · Views: 9,152
The last step requires grinding some plastic from the door cover. The amount will depend on the speaker. My speakers have a thick flange that interferes with the oval flange from the panel. I measured that I needed to cut about 0.6” from the flange on the panel. I marked around the flange and cut with the Dremel cutting wheel. It is hard to do this step in a way that looks nice and flat. I just made sure that I was cutting at least 0.6”. The final look is not professional, but at the end of the day it is on the inner side of the door panel that no one will see. The last thing I did was to grind a portion of the ribbing on the speaker grill of the door panel. I had to grind the ribbing to allow space for the tweeter that protrudes out from the speaker. This last step will highly depend on the speaker design and may take some trial and error.
 

Attachments

  • IMG_4159.jpg
    IMG_4159.jpg
    131.6 KB · Views: 7,335
  • IMG_4165.jpg
    IMG_4165.jpg
    138.1 KB · Views: 7,412
  • IMG_4170.jpg
    IMG_4170.jpg
    138.2 KB · Views: 7,287
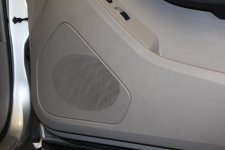
The final assembly looks factory with no indication of a large speaker behind the door grill. The sound is a noticeable improvement. The speakers handle a lot more volume and the bass is much more “solid”. My next project would be to cover the big hole on the door panel to better seal the sound from the back of the speakers. I have read this makes a huge improvement. I will post once I perform this step. I am by no means an audiophile, so I may not be able to appreciate subtle improvements. I just want a deeper and solid bass. BTW, I don’t have the factory radio. I had already replaced it with a USB/ipod compatible from Sony that has a little more power than the factory.
 

Attachments

  • IMG_4182.jpg
    IMG_4182.jpg
    122.9 KB · Views: 7,783
  • IMG_4183.jpg
    IMG_4183.jpg
    131.6 KB · Views: 7,973
I don't have a polarity issue, so I think. The bass sounds great now with the 6x9 and the factory adapter/spacer. The bass was poor with the 6.5" and no spacer. I followed the polarity of the wiring harness I purchased from Metra, which I assume is correct.
 
Great post.

Are you getting any high & mid out of the new 6x9's? If you use the factory wiring, I thought that the only signals going to the bottom speaker were low's. That's why the separate tweeter is there.

I'm about to do a new stereo install later this week and decided to go with 6.5" separates. I'm planning on using the crossovers that came with the new speakers and running new speaker wire for everything. I'm hoping that I don't regret not going with 6x9's.
 
good write up..plan to do something similar soon........gota seqarch for the door panel removal video..tried removing my door panel..and didnt see any screw holding the inner door opener..thus i cudnt totally remove the panel
 
In my 4runner the door speakers wires carry all the spectrum, there is a bypass filter up by the tweeter that only afects the tweeter. Thus, I have mids and highs at the bottom speakers. My 4Runner is a non-JBL. I believe though, that the JBL 4Runner system has its own crossover somewhere in the dash so the frequencies may be divided before the doors.
Based on 97BlackAckCL's post the crossover in JBL 4Runner is at the door.
 
Last edited:
Singleshot, also, I think you should get good bass out of your 6.5. Just make sure you use a spacer such as the factory adapter. If you have a 6.5 to 6x9 adapter somehow attach it to the factory adapter/spacer so you can gain the extra depth the spacer gives you, which will give you much better bass. You could first try installing it without cannibalizing the factory spacer and see how much bass you get. Then decide if you want to take the extra effort of reusing the factory adapter. I tell you the difference is huge.....
 
Earthrealm, look at my 4th picture. The screw I am talking about is the one on the lower-left corner of the door opener latch in that picture. This screw is on the inner side of the panel, so you have to first pull out the panel a little. I assume you can already remove the panel and move it at least couple inches away from the door.
 
U dont need to take the door latch off, just carefully move the cables off the latch. Pry out and take it off the hole.
 
There are two ways, at least in my door design. Unscrewing the latch assembly screw on the inner side of the panel is easier based on my experience.
 
In my 4runner the door speakers wires carry all the spectrum, there is a bypass filter up by the tweeter that only afects the tweeter. Thus, I have mids and highs at the bottom speakers. My 4Runner is a non-JBL. I believe though, that the JBL 4Runner system has its own crossover somewhere in the dash so the frequencies may be divided before the doors.

Nice writeup, just to clarify, the JBL crossovers are in the door, not the dash
 
Dude awesome thread! I registered just for this!

I just did the same thing with the Focal ISS 690 components. They fit great and I didn't have to trim the plastic on the door at all.

I used the 50mil sound proofing you recommended, but I'm going to have to add a lot more. Even after doing nearly the entire inside of the door (the metal behind the speaker) it still vibrates and rattles like crazy. Those speakers really put out a lot of bass.
 
I've just installed and replaced all 4 speakers with Polk Audio DB series and mounting them similar to the method here. Everything playing well and I retained the factory plug. The important question is does polarity matter? If polarity is reversed , would the speakers still play? How do you test for the polarity?
 

Members online

Forum statistics

Threads
278,312
Messages
3,554,087
Members
248,016
Latest member
Advally Service

Trending content

Back
Top