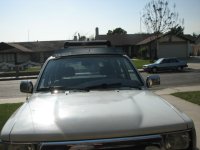
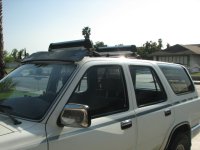
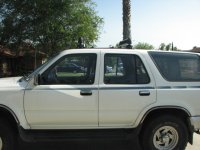
Well, finally got the rack installed this past weekend. Unfortunately I was racing a rainstorm to get it installed so I wasn't able to take any pictures. I will however post up some instructions....
I started with a stock rack from a 1991 Runner ($50 on Craigslist). It has seen it's share of use and abuse and was looking a bit weathered, so my first task was giving it a good clean up. I scrubbed it down with some soap and water, removed the plastic end caps, and all of the sliders from the rails. I then used a scotchbright bad to scuff the finish and clean up irregularities from chipping etc. I threw on two new coats of black paint, let cure, scuffed the flat surfaces and added three or four coats of clear.
Total cost at this point, about $65.
Next step: Drilling.....
After reassembling the rack, I positioned it using "JV's" pictures above. Nothing magical here. Just a lot of measuring and comparing to the images. Once I had the rack more or less centered I secured it to the roof with masking tape and center punched the drill holes. !!POINT OF NO RETURN!! I then drilled 8 pilot holes in the punched locations, ran a strip of two inch masking tape down the center of the racks future location and masked the roof off with newpaper to protect the finish from the metal shavings. I then poked holes in the tape where the pilot holes were located. Depending on the Rivnuts you use, I chose some 1/4-20 stainless, with 1/4-20 rivnuts, your final bore with either be 3/8 or 25/64, use a proper gauge and triple check! Once you're satisfied that you've got it right, drill away!
** I used a long piece of tape to create a stop about half and inch up the drill bit so I didn't accidentally drill through the headliner.
Next step: Rivnuts (nutserts)
After removing the newspaper and masking tape from the roof, ensure that you've got nice clean drill holes. I took some time to touch up the finish around the drill holes with some touch up paint before continuing. Silicon is your friend! I applied a healthy dollop of silicon around the drill holes, and on the rivnut itself, then install using whichever method you choose (Hand tool or pneumatic). The silicon gets the tool a little messy, but I'd rather have to take a bit of extra time to clean up the tools, than have a leaky roof.
*I had access to a pneumatic rivnut gun, so I was able to use stainless rivnuts, if you're using a hand tool they can be pretty difficult to install, especially with the short handle on the Rivnut hand tools. If you're using a hand tools, you might want to pick up some of the softer aluminum rivnuts.
*If you're using a hand tool, make sure that you thread the rivnut completely onto the tools threads, if you strip out the threads trying to install it, you're going to have to drill it out and then drop the headliner to retrieve the lower part of the rivnut. They're also super hard to drill because if it's not properly installed it will rotate in it's drill hole. PITA!!
Total cost at this point, $75
Next step: Installation!
I went to the local hardware store and picked up some Phillips head stainless steel bolts. (4) 1.5" 1/4-20 for the four ends (needed a little longer bolts for the ends as they bolt through the plastic endcaps) and (4) 1" 1/4-20 for the intermediate bolts in the rail channels. I put some loctite on the threads of the Rivnuts to keep them secured, and a bead of silicon around the bottom of the head of the bolts for a little bit of added water protection.
*I wasn't too concerned about being able to slide the three intermediate crossbars around, so I used button cap bolts.
Total cost of install $90 including rack, tool rental and hardware. Quote from stealership: $200+ for installation alone.
Next step: Enjoy!
Sorry about not taking any pictures, but hopefully this will help someone who is in the same boat I was in. There doesn't seem to be much information out there regarding installing stock roof racks. It's a pretty unnerving experience drilling holes in a perfectly good roof so make sure you quadruple check your measurements!!!!