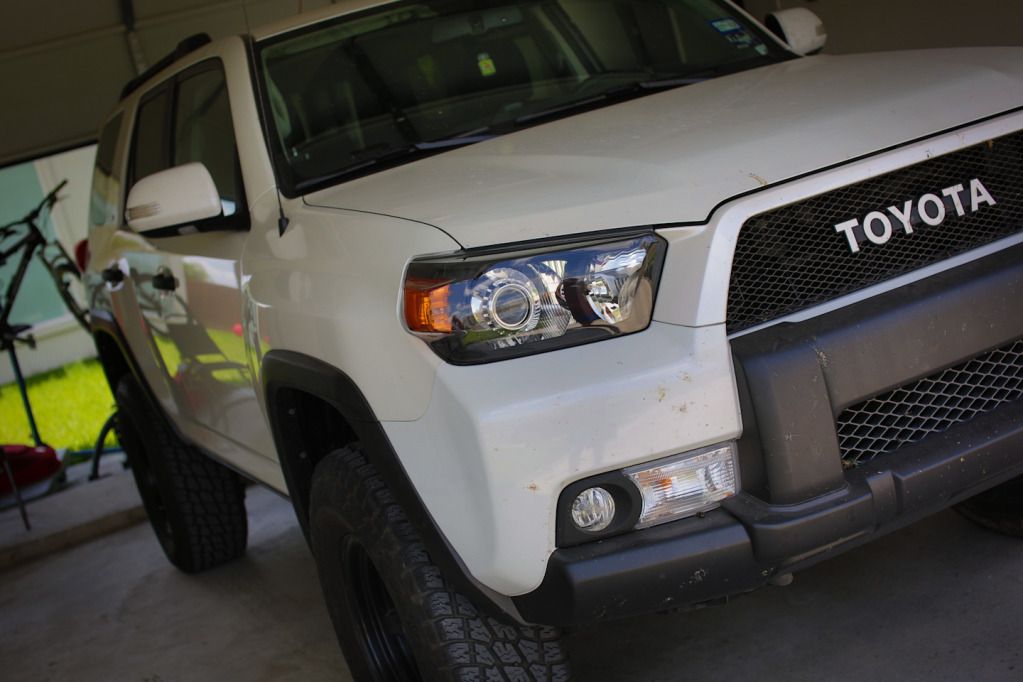
Jangoforhire's Build and Pictures

jangoforhire

New member
Alright everyone, here is my (real) build thread. I won’t be posting a lot of write-ups, but I will be documenting my mods with a lot of (probably bad) pictures and quick tips. But I will always be around to answer any questions anyone might have, so please ask!

First of all thanks to everyone here for the ideas and inspiration! Hope I can help do the same for other people eventually!

I will be updating this as I go so check back often! I have lots of plans…

Table of Contents:

  1. Miscellaneous</br>
  2. Interior (In Progress)</br>
  3. iPhone/Key Case</br>
  4. Headlight Retrofit</br>
  5. LED DRL’s </br>
  6. Lights</br>
  7. Sliders</br>
  8. Skids (In Progress)
    • Delivered - not yet installed
    </br>
  9. Storage</br>
  10. Switches</br>
  11. Photo Shoots</br>
  12. Gobi Rack</br>
  13. Winch</br>
  14. TE Conversion</br>
  15. Suspension</br>
  16. On Board Air</br>
  17. Wheeling


==========================================================================================
==========================================================================================


Lets start from the beginning. My only previous car was my Dad’s old 1995 Toyota T100 SR5 pickup truck (the little known pre-cursor to the Tundra, which he then upgraded to). He gave me this truck completely stock when I got my drivers license and boy did I have fun with that thing.
This truck was a great first car because it was so easy to work with. It had all the space in the engine compartment you could ever want, and after I had owned it for a few years I could literally take the entire interior apart in roughly 10 minutes.
This truck was what I like to call my car-audio phase. The T100 was made for such a short amount of time that no great aftermarket parts were ever manufactured. (and what few were made were all out of production by the time I had the truck). Outside of custom, I couldn’t do much with the suspension, bumpers, etc. So, I went crazy on the interior.

Here is a picture of the 2nd sound system (first one was very basic) I put in a custom box I made:
T100.2.JPG


Third custom box under construction (this box actually had two configurations, the right and left subs were high quality and in sealed enclosures, while the center sub was more for loudness and was in a ported enclosure. I had a custom switch panel made that allowed me to switch between high quality, loudness, or both):
T100.JPG


And in the car:
T100.1.JPG


Having a little fun in the fields of my farm after a storm (pictured with MT sidebiter wheels, BFG AT’s, and gaul wing toolbox)
T100.4.JPG


I could go on for pages about the mods on that truck, but that isn’t why we are here is it. It was a great first car but I had always told my friends that when it came time to get a new car, I would definitely switch to a 4Runner. Unfortunately that time came in January of 2012. A bad oil leak, cold weather, and 200,000 miles on the engine caused the engine to basically self-destruct from the inside. Faced with the choice of re-building the engine, buying a new one, or looking for a new car, I set out to find the 4Runner I wanted!

I had always been huge fan of the 5th gens since they were released. But I never dreamed I would get one. I test drove a couple of 4th gens, some Xterras, a Tacoma, and some fun small cars looking looking the right fit. I was set on a 09 Tacoma until the salesperson put me in the 2010 Blizzard Pearl Limited with tan interior and nav. I loved the interior and overall look of it. First test drive was fantastic and I knew this was what I wanted. It was a lot more money that I wanted to spend, but after some deals with parents, grandparents, friends that owed me money, the change in the living room couch, and an extra 20$ bill that I found in my wallet (kidding) I was lucky enough to take this great truck home:

4Runner1.JPG


I had promised certain people that I wouldn’t tear this one apart like my last truck…


…And then I found this forum.

Let the mods begin!
 
Last edited:
Register to hide this ad
The first thing I did was order an LED conversion kit from the forum. In my opinion that is a must buy for any BP owner. The white light looks awesome against the paint job. Following the instructions on the forum, I had them all installed in just an hour or two.

Next was the Z4 Antenna. I never use the radio (constant iPod and Bluetooth streaming) so I didn’t care about the reception issues. I just think it looks cool!
Because I am still in college, I can’t really do much during the semester. So what I did do was constantly search forums, eBay, and craigslist looking for parts for the 4runner. By the time summer rolled around, I had quite the collection:

Fuse box’s, ARB air locker, some ICON suspension parts, 7 Rigid LED’s , and a custom Gobi rack is on order.

All of that is going on soon, but let’s get to the stuff that I am putting on now!
 
Inspired by Ducmonsta, I swapped out my rear badge for a Hilux Surf logo. I am not completely happy with how it looks and think I will swap the colors at some point (garnish black, logo chrome). It is tricky to nail down a solid color scheme for the BP trucks in my opinion.
Here is the logo getting painted (got this on ebay for ~50)
rear1.jpg


Gotta love that duck tape right?

4Runner letters off, I just used fishing line to cut through the adhesive and then pulled them off!
rear2.jpg


Here it is completely de-badged. It is mentioned in another thread, but there are 3 or 4 small dimples in the chrome garnish that are used to align the 4Runner letters. With everything off, these are clearly visible.
rear5.jpg


Also, the Hilux Surf logo is much smaller than the 4Runner logo, I thought it would still cover the dimples, but it is actually impossible. I checked Ducmonsta’s thread, and a careful eye can catch one left exposed to the far right. Unfortunately there is no getting around this. You can’t really see it unless you are looking for it though.


Finally here it is with the logo on:
rear4.jpg
 
Last edited:
Next thing I changed was the grill. I have always loved the FJ40’s so I went with that badge as opposed to the larger one. The inside of these logos when you get them is like a yellow color so I got some model paint and painted it white to match the truck, it isn’t perfect, but gets the job done. As far as the grill goes, I just ordered a grill craft upper grill as opposed to making my own.

I used the instructions found at grillcraft online website combined with the how-to thread here found in the write up sticky. Using the two this took me about two hours.

Here is before:
grill1.jpg


Grill taken off:
grill2.jpg


And finished!
grill5.jpg


Closer:
grill6.jpg


The logo I had came with threaded posts on the back so instead of using 3M tape I bolted it on through the grill. Here is a shot of the back with the bolt:
grill4.jpg


Because I didn’t use 3M, you can see here that the badge sticks off the grill a bit. I actually like this look, it gives it more dimension from the front and sides.
grill3.jpg


Here is me removing and trimming the stock grill in just 3 minutes! You will see me going back to the table on the right a lot, that is because I am checking the how-to thread and instruction on my iPad as I go. You can see the longest part is actually getting the clips to release to take the front grill off. (Also great tip for doing dirty car work: wear a t-shirt an x-girlfriend gave you, It feels great to wipe grease and dirt all over them!)

<iframe width="853" height="480" src="http://www.youtube.com/embed/SxYs5KG5AyE?rel=0" frameborder="0" allowfullscreen></iframe>


I love how this turned out, much more aggressive look!
 
Next major project was the dual battery setup.

I got in on the GB for the trays from IBS (thanks Phillyd2!) and am glad I did. These trays are awesome!

First I replaced the starter battery with a red top, I had to bend the battery connections a bit, but nothing major:
battery13.jpg


Next I modified the tray a bit to make a larger battery fit. This involved

1. Drilling the tray
2. Cutting the battery height adapter
3. Trimming the battery clamp

Here are the pictures of drilling new holes into the tray:
battery2.jpg


Here I trimmed the height adapter with a dremel (doesn’t need to be pretty).
battery3.jpg


And here you can see I trimmed the top clamp just a tad to fit snuggly on the battery:
battery1.jpg


Next I plastidipped the tray:
battery9.jpg


And mounted it in the truck!
battery10.jpg

battery11.jpg

battery12.jpg


All finished!
battery4.jpg
 
Last edited:
Obviously following the battery tray is the install of the IBS dual battery controller. I got mine from Sierra expeditions and was very happy with their service.

I was a little confused about how this battery controller works and it is actually very simple.

When in automatic mode (which you will use 99% of the time) The batteries are disconnected when the car is off (so a drain on one battery will not effect both), and connected when the car is on (so the alternator can charge both batteries).

You do have the option to manually link for doing some “heavy lifting” such as powering a winch or something like that, or to jump start your self.

I was glad to see that the controller unit was actually smaller than I thought. This made it easier for me to hide. I didn’t want this unit to be displayed 24/7 because I knew it would look kind of out of place attached to the dash somewhere. So I decided to hide it in the center console lid.

The console lid is actually super easy to take apart. I was pleasantly surprised. Just pry off the rear trim of the center console, remove the 6 screws holding the hinge bracket on, and bam, its off.

Next you can separate the top (leather covered portion) from the inner lining (with the tissue holder and all that). Just remove the 4 screws at the bottom, and then get a small trim removal tool that can fit in the gap, and start prying.

Here are the two sections removed and the tool that I used.
DBS1.jpg


Next I removed the mounting plate from the rear of the IBS controller so I could get a flush mount in the console lid, this is held in with just two small screws on the back of the controller. NOTE: (I don’t think I would recommend this, I think the controller needs the height to allow the speakers to broadcast the warning (low voltage) beeps properly. With the whole unit flat against the plastic, everything sounds muffled. I do like the look better though.)

Here is a picture of the mounting plate removed:
DBS2.jpg


Next I measured, and drilled a whole in the lid for the wires to pass through:
DBS3.jpg


I cut the plug off the back of the controller to extend the wiring and allow the wire to fit through the whole:
DBS5.jpg


Next I drilled another hole at the bottom of the lid for the wires to exit:
DBS7.jpg


Here are the wires all connected and extended with heat shrink entering and exiting through the holes I drilled:
DBS8.jpg


Next I drilled a hole in the console box itself where the wired will pass from the lid to the box (this is before I knew I would need more than just a hole):
DBS9.jpg


Here is the lid re-attached, and the hole from the previous post has been extended to a long channel for the wire to fold into. This was the hardest part of this install. It is trick to get wires to pass from the console box to the lid without having any interference or catching. This is the best way to do it in my opinion. It took a little time to get it right, and a lot of trimming the hole with an exacto knife, but if fits perfectly now!
DBS10.jpg


Here are the wires exiting the back:
DBS11.jpg


And tucked away:
DBS14.jpg


I then fished the wires through to the center console (by the shifter) and re-attached the quick connect plug.
DBS12.jpg


And all finished! I love the way this turned out and am very happy with it. Everything else for this install is just boring under the hood wire connections, nothing to ground breaking.

DBS15.jpg


DBS13.jpg
 
Looks great and love the video. You work like I do.....including to the look of satisfaction when something comes apart as it should....quickly followed by pure panic wondering if you will ever get it back together again. :tongue:
 
Looks great and love the video. You work like I do.....including to the look of satisfaction when something comes apart as it should....quickly followed by pure panic wondering if you will ever get it back together again. :tongue:

Pretty much nailed it! Haha
 
Who's ready for some bad pics!

I had to replace the yellow top today, it had a bad core (old battery). Good news is that Pep Boys gave me like 75% off the new one. No complaints there.

While I was out I decided to grab a small project box from radio shack to clean up my instal of the IBS system. I grabbed this box, re-routed some of the engine compartment wiring, and got everything all crammed in. The box hides perfectly between the starter battery and engine compartment wall. All of these pics are with the starter battery removed.

Here is a god-awful pic of the two relays in the box with the wiring coming in:
DBS16.jpg


Box all closed up (slight bulge is visible, not because the relays are to big, but because that 4 ga. wire doesn't like to bend):
DBS17.jpg


Box secured to the engine compartment wall with industrial velcro.
DBS18.jpg

This thing isn't going anywhere and really cleans up the look! You can't even tell it's aftermarket.
The red and black wires coming out the top are the power and ground for the relay system. These are all connected and hidden now.
 
Last edited:
Very nice. I like the space behind the Toyota logo, makes it look as though it is floating.

Dual battery setup, definitely on my list of to do's!
 
Gobi stealth packed full of Rigids should hopefully go on in the next week or two...also I just sealed the deal on getting my lights retrofitted! Very excited about that. Should have them in about 2 weeks! Will update here with install/pictures when everything comes!
 
Gobi stealth packed full of Rigids should hopefully go on in the next week or two...also I just sealed the deal on getting my lights retrofitted! Very excited about that. Should have them in about 2 weeks! Will update here with install/pictures when everything comes!


Who is doing your lights? I really want to do that too, but I don't know who to use.

Thanks
 
Who is doing your lights? I really want to do that too, but I don't know who to use.

Thanks


I asked around ALOT. I talked to a lot of people who have done retrofits and also to people who have sent them away. In the end, I am getting them done by Black Flame Customs in NY. They were recommended by TRS and have beat everyone else's prices (Lightwerkz, AAC, Oracle, TRS) that I have looked at. They have had FANTASTIC customer service (I exchanged over 25 emails with the techs there yesterday banging out details and prices, you can't get that kind of responsiveness anywhere else) and seem really excited to take a crack at these lights. I told them to get creative and see what they can come up with for me. OEM lights are getting to them next week and I should have some progress/concept pictures here soon.


Just keep in mind that it is expensive. I got 2 or 3 quotes earlier in the year and every time I saw the final number I bailed. You can get a good deal, but a good quality retrofit will cost you. You have to know how much you are willing to spend going in.

As far as Black Flame Customs goes, I have yet to see their work in person, but if their work is anywhere close to how fantastic their customer service is, I would highly recommend them.
 
I asked around ALOT. I talked to a lot of people who have done retrofits and also to people who have sent them away. In the end, I am getting them done by Black Flame Customs in NY. They were recommended by TRS and have beat everyone else's prices (Lightwerkz, AAC, Oracle, TRS) that I have looked at. They have had FANTASTIC customer service (I exchanged over 25 emails with the techs there yesterday banging out details and prices, you can't get that kind of responsiveness anywhere else) and seem really excited to take a crack at these lights. I told them to get creative and see what they can come up with for me. OEM lights are getting to them next week and I should have some progress/concept pictures here soon.


Just keep in mind that it is expensive. I got 2 or 3 quotes earlier in the year and every time I saw the final number I bailed. You can get a good deal, but a good quality retrofit will cost you. You have to know how much you are willing to spend going in.

As far as Black Flame Customs goes, I have yet to see their work in person, but if their work is anywhere close to how fantastic their customer service is, I would highly recommend them.

Thanks Man. I just sent them an email to get the ball rolling. Do you mind if I ask about your set up? What color, projectors, did you do any thing with LED at the bottom of the headlight....ect?
 
Thanks Man. I just sent them an email to get the ball rolling. Do you mind if I ask about your set up? What color, projectors, did you do any thing with LED at the bottom of the headlight....ect?

They close at six but you will probably here from them first thing in the morning. I am still deciding exactly what I want. They are going to wait to get the lights in-house before we iron out all the details. I think I am going to do kind of a mashup of Ducmonsta's, Jesse1983's, and Hbryanlopez's. They are my three favorite retrofits.

Images stolen from all their builds:

Ducmonsta: (<a href="http://www.toyota-4runner.org/5th-gen-t4rs/100058-ducmonstas-build-thread-very-pic-heavy.html
">Build</a>)
- Complete custom setup by Oracle.

52030d1319078109-ducmonstas-build-thread-very-pic-heavy-dsc_0175.jpg~original


Jesse1983: (<a href="http://www.toyota-4runner.org/5th-gen-t4rs/60125-jesse1983-10.html
">Build</a>)
- FXR-Stage 3 with (painted) orbit shrouds.

9359ba8f.jpg~original


Hbryanlopez: (<a href="http://www.toyota-4runner.org/5th-gen-t4rs/116681-fx-r-projector-retrofit-diy.html
">Retrofit Thread</a>)
- FXR-Stage 3 with E46 extended shrouds

4runner-2037.jpg~original


Who knows what I am going to end up with though...

In answer to the LED question, I like what Ducmonsta did on the side of his lights. But what I have been hearing is that the LED's are not very reliable and they have been having issues with them. I think Duc even had to send his back because one went out. I am not ruling them out, but they would have to look awesome for me to include them. I don't want to be one of the cheap Audi imitators running around in their ricers with led strips that you can barely see.
 
Last edited:
Just a few updates with what I have going on right now:

Headlights:
BFC has the lights in house and is starting work, hoping to have them finished in a few weeks. I told them to get creative if they had any cool ideas. I will post any status pics that they send me.


Rack:
My Gobi Stealth SHOULD ship this week. I will hopefully get it installed this weekend, but I am not sure if I will have time. Most likely next weekend will work. I am getting two Rotopax for the rack (gas/water - just like Okki)


Rigids:
The last set of Rigid's came in last week!

Pictured are:
- 6" SR Hybrid (2 for the rear of the rack)
- 6" SR Flood (1 per side of the rack (2 total))
- 10" SR Hybrid (2 for the front of the rack)
- 20" SR Hybrid (1 for the front of the rack)

LED's Anyone?
rigid1.jpg


Switches:
Also here are all my switches from OTRATTW. The left and right roof lights are custom switches (only text change, the normal light says left/right alley light) I have two sets because I am building a rear control panel as well as a front control panel (This will allow you to control the lights, and compressor from the rear hatch). The Rigids, air compressor, and rear locker are all going to be on a protective switch that I am getting custom made from OTRATTW, that should be here soon.

switch1.jpg


Air Compressor:
The air compressor is here! I was going to make a mount myself, but this thing is way to heavy and any bracket I fab up will not be strong enough. So I am taking it to a fab shop this week to get it mounted in the engine compartment. Ill try to get some pictures of the bracket they make for everyone. I am taking reference pictures from Phillyd2's build to give the fab guys an idea of how I want it mounted.

comp1.jpg


comp2.jpg


Suspension:
I picked up some ICON UCA's today off a guy who had them on his FJ.

SO, I now have everything for the ICON stage 6 suspension except the front extended travel CO's. I will be on the lookout for them now. Every part I have got for this suspension has either been from Icon scratch&dent, used from forum members, or during sales. I am going to add up my cost and compare it to the MSRP on Icon's site for the complete kit. It should be substantially lower, I have been finding some awesome deals. Patience can save you money!


That's it for now. I can't wait to get all this on my truck!
 
Last edited:
Switches:
Also here are all my switches from OTRATTW. The left and right roof lights are custom switches (only text change, the normal light says left/right alley light) I have two sets because I am building a rear control panel as well as a front control panel (This will allow you to control the lights, and compressor from the rear hatch). The Rigids, air compressor, and rear locker are all going to be on a protective switch that I am getting custom made from OTRATTW, that should be here soon.

switch1.jpg

I am absolutely loving the switches! Can't wait to see them all in, and def an awesome idea for the rear mounted switches as well!! Good luck with all the repetitive wiring, it should be pretty straight forward, but def time consuming to keep it clean. I patiently await the finished pictures... :snacker:
 
Waiting to see how and more importantly where the hell are you going to install all those switches.

Ha Phillyd2, you and me both. The rear switches will be easy, the front ones are the hard part. I have the 6 switch holder going in soon (it requires making a new bracket for the knee airbag), it's the 3 switch holder that is the wildcard...Ill get creative with something I'm sure.


I am absolutely loving the switches! Can't wait to see them all in, and def an awesome idea for the rear mounted switches as well!! Good luck with all the repetitive wiring, it should be pretty straight forward, but def time consuming to keep it clean. I patiently await the finished pictures...

Yea I have been messing with a lot of wiring diagrams lately. I think I have got it nailed down though. What makes it all more complicated is that I am using a "kill" or "safety" switch in both the front and rear for the rigids and locker, that makes the wiring even MORE fun.
 

Members online

Forum statistics

Threads
278,316
Messages
3,554,109
Members
248,016
Latest member
Advally Service

Trending content

Back
Top