
You are using an out of date browser. It may not display this or other websites correctly.
You should upgrade or use an alternative browser.
You should upgrade or use an alternative browser.
Jicko Build Thread ...
- Thread starter jicko
- Start date

JohnTheLuck
Member
Oh also, behind the RTT, I have space for SIX 5gal Scepter Jerry Cans..... so I can have a combination of gas and water up there.... 20gal of gas plus 10gal of water, or 25gal of gas plus 5gal of water.... etc....
Did you ever run with all these full? How the 4R handling was affected by the added weight such high above ground:
Fuel: 2 X 20L * 0.775 Kg/L = 30 Kg
Water: 3 X 20L * 1.0 Kg/L = 60 Kg
Total of 90 Kg or about 200 lbs.
Added with the RTT and rack, this is probably close to 500 pounds high above the ground !!! Just thinking...
Did you ever run with all these full? How the 4R handling was affected by the added weight such high above ground:
Fuel: 2 X 20L * 0.775 Kg/L = 30 Kg
Water: 3 X 20L * 1.0 Kg/L = 60 Kg
Total of 90 Kg or about 200 lbs.
Added with the RTT and rack, this is probably close to 500 pounds high above the ground !!! Just thinking...
5 cans gas (32lb each) and 1 can of water (40lb) = 200lb.
25gal total, extending the range of the vehicle by 300+ miles.
RTT is only 130lb.
So, just +350lb (with Hi-lift jack up there too).
It is ok. Don't really feel much difference on freeway etc..., slight off-road seems fine too. I haven't had all those one seriously crawling.

familymopar
New member
I had looked into various battery strategies (single, dual), and considering my use case, I have decided to start with a single large capacity, deep cycle battery. As it is much simpler, easier, and lower cost to implement than a full-on dual batteries with isolator setup is.
My use case:
- weekend and short(few days) offroading trips
- driving around during the days, and camping during the nights
- maximum "offline" (car's engine not ON) time will be no longer than 36hours
- powering (offline) ARB 50QT fridge
- powering (offline) HAM mobile radio
- powering (offline) some low power LED light strips
Like many others on this forum, I have decided to use a 31M-PC2150 marine grade, deep cycle battery, from Odyssey (some claimed that Sear's Diehard Platinum 31M is the same thing).
Amazon.com: Odyssey 31M-PC2150ST-M TROLLING Thunder Marine Dual Purpose Battery: Automotive
SPECIFICATIONS
Pulse (5-second) Hot Cranking Amps (PHCA): 2150
Cold Cranking Amps (CCA): 1150
20Hr Nominal Capacity (Ah): 100
Reserve Capacity Minutes: 205
Dimensions L x W x H (in): 13.00 X 6.80 X 9.41
Weight (lbs): 77.8
Some useful info about this particular battery (voltage vs % of charge):

This battery comes with brass SAE posts, 3/8 inch positive and 5/16 inch negative thread SS stud terminals. And in order to it to hook up to the "factory" clamps without ANY modifications, ordering some Remy Battery "Stud to Post" converter is THE WAY TO GO! (Be sure to order 1 of each size) Stud to Post Conversion Adapters - Remy Battery
Also, while you are ordering from Remy, I found that their group 31 battery to be the lowest cost solution ($8.44!!!) to house the battery (a $100 battery cage is NOT needed!!): Steel Battery Tray (13") - Remy Battery
Post converters screwed in (and extra converters) and the battery tray:

Size comparison between the Odyssey 31M vs the stock Panasonic:

Once you removed the factory battery and the whimpy plastic tray, the new steel tray fits right in, and you can get a "M6 bolt/screw" (maybe 15mm long) and a washer to screw into a threaded hole as you can see in the picture below. Together with an aligned "hook", this tray is not going anywhere!

Unfortunately, with the added battery try, the factory "J-hooks" are not long enough to hold-down the battery, you would need some 10in hooks. You can get them from Amazon cheaply (with prime too): Amazon.com: Road Power 966-10 General Motors J Hook Battery Hold down bolts, 2-Pack, Chrome, 10-Inch: Automotive
I am not a big fan of the "wing nut", hence, I dropped into home depot and picked up some 1/4" (IIRC) nut/washer/lock-washer for the "J-hooks". And 1 last final touch (not really necessary), is to use a bolt-cutter and trim off the extra length of the J-hook that is closer to the fuse box).
Here it is, all mounted!

SOLID and economical!!
Jicko - great build thread! I have a few questions if you wouldn't mind. I am thinking about doing the group 31 swap (great write up!) and was wondering now that you've run it for a while if you were still satisfied with it? Any problems? I also see that you run an ARB 50. How often do you run it? Is it wired direct to the battery? Any problems with the single battery and fridge set up? Thanks in advance!
Edit: Have you upgraded your alternator? Are you on stock suspension? Do you feel the 75# battery up there?
Last edited:
encitrdpro
New member
Oh also, behind the RTT, I have space for SIX 5gal Scepter Jerry Cans..... so I can have a combination of gas and water up there.... 20gal of gas plus 10gal of water, or 25gal of gas plus 5gal of water.... etc....


Do you secure the jerry cans with anything other than the tie-down going over the top in the picture?
I was lagging on write-ups for quite a few installs. But here are some pictures from this past weekend.
Highlights:
- Tepui tent deployed and in action
- Newly installed, Wi-fi controlled, music sync'ing, blinking/color-changing RGWB LED strips (inside the tent, under the tent, and under the awning); it's a partayyyyyy!
- ARB fridge in action
- Cargo slider in action


Awesome build, Jicko. The rig looks sweet! I am staying with the stock suspension for now and I am on the fence on 265 or 275 on my TRD wheels. How are the 265s off road? I think the 275s may look a little better but they look pretty stuffed and I would worry about them rubbing off road.

blkhwk
Member
In order to try out the Roof Top Tent, an offroad camping trip is warranted!
Any issues like bowing or cracking when you had the rtt on the stock rails?

toytruck
New member
Jicko - great build thread! I have a few questions if you wouldn't mind. I am thinking about doing the group 31 swap (great write up!) and was wondering now that you've run it for a while if you were still satisfied with it? Any problems? I also see that you run an ARB 50. How often do you run it? Is it wired direct to the battery? Any problems with the single battery and fridge set up? Thanks in advance!
Edit: Have you upgraded your alternator? Are you on stock suspension? Do you feel the 75# battery up there?
what he said regarding battery update.
Let me respond to a bunch of questions all at once....
The rack acts as a basket. with just the tie down, those cans are not going anywhere.
Nope, no issues at all (while it is much nicer to have it mounted on a Gobi).
RTT can totally go onto STOCK vertical rails (the 2 that come attached to the roof, run vertically along the side of the vehicle; NOT the additional crossbars, which only have 150lb limit).
Stock suspension, 265 BFG KO2, TRD wheels..... awesome! I have been running these for 18mos now, 33k miles..... I have no issue with this combo..... I may up a new suspension when the stock is worn a bit more....
Do you secure the jerry cans with anything other than the tie-down going over the top in the picture?
The rack acts as a basket. with just the tie down, those cans are not going anywhere.
Any issues like bowing or cracking when you had the rtt on the stock rails?
Nope, no issues at all (while it is much nicer to have it mounted on a Gobi).
RTT can totally go onto STOCK vertical rails (the 2 that come attached to the roof, run vertically along the side of the vehicle; NOT the additional crossbars, which only have 150lb limit).
Awesome build, Jicko. The rig looks sweet! I am staying with the stock suspension for now and I am on the fence on 265 or 275 on my TRD wheels. How are the 265s off road? I think the 275s may look a little better but they look pretty stuffed and I would worry about them rubbing off road.
Stock suspension, 265 BFG KO2, TRD wheels..... awesome! I have been running these for 18mos now, 33k miles..... I have no issue with this combo..... I may up a new suspension when the stock is worn a bit more....
Last edited:

T4RZAN
New member
Simple, reversible, quick, & cheap - ALWAYS ON 12V Outlet Mod
The diagrams and explanation is here:
http://www.toyota-4runner.org/5th-gen-t4rs/187467-jicko-build-thread-2.html#post1950091
This execution skips the "switch" part.
"Add-a-ciruit" available @ your local auto stores - Kragen/O'reily, AutoZone, Pep-boys for $6.
*Credits to a few other guys in this forum who had done it before*
This will NOT run your fridge tho.
The factory wire gauge of wires off the 2 rear seats 12V outlet as well as the cargo 12V outlet from the battery are probably not sufficient enough to handle the instantaneous current draw of the starting of the compressor, hence, at the 12V outlet, the voltage dips lower than the "battery monitoring" voltage. The ARB fridge will NOT run.
For the ARB Fridge, you need to run your own wiring. (This seems to be the conclusion I am getting at).
Still plenty of reason to do this.
So I can't tell if I am missing something or not but when I do this my T4R thinks it's in ACC mode. So a lot more stuff turns on and I can't lock or unlock the truck. Am I missing something? TIA
I'm looking at possibly getting these. How are they working out for you? How do they compare to OEM fogs?
I haven't found any night pictures of these yet showing low beams only and low beams with fogs. Do you happen to have any you could share, from the drivers seat perspective?
X2 please
unspoken44
New member
Nice build!!! What storage box is that in the back? it looks like it fits very nicely. Ive been looing for something like that.
Some recent pics.... (still haven't write up some of the new installs tho... coming soon....)

Rancho Penasquitos?

transplant
Member
i attempted to install the 12v jumper from the 4th dash fuse to the P/Outlet fues using the two add a circuit pieces spliced together.
instead of the 12v being always on, my radio comes on and the 12v doesnt work.
i must be doing something very wrong. can anyone think of any reason this wouldnt work as advertised?
instead of the 12v being always on, my radio comes on and the 12v doesnt work.
i must be doing something very wrong. can anyone think of any reason this wouldnt work as advertised?
TOUGHasNAILS
New member
I had looked into various battery strategies (single, dual), and considering my use case, I have decided to start with a single large capacity, deep cycle battery. As it is much simpler, easier, and lower cost to implement than a full-on dual batteries with isolator setup is.
My use case:
- weekend and short(few days) offroading trips
- driving around during the days, and camping during the nights
- maximum "offline" (car's engine not ON) time will be no longer than 36hours
- powering (offline) ARB 50QT fridge
- powering (offline) HAM mobile radio
- powering (offline) some low power LED light strips
Like many others on this forum, I have decided to use a 31M-PC2150 marine grade, deep cycle battery, from Odyssey (some claimed that Sear's Diehard Platinum 31M is the same thing).
Amazon.com: Odyssey 31M-PC2150ST-M TROLLING Thunder Marine Dual Purpose Battery: Automotive
SPECIFICATIONS
Pulse (5-second) Hot Cranking Amps (PHCA): 2150
Cold Cranking Amps (CCA): 1150
20Hr Nominal Capacity (Ah): 100
Reserve Capacity Minutes: 205
Dimensions L x W x H (in): 13.00 X 6.80 X 9.41
Weight (lbs): 77.8
Some useful info about this particular battery (voltage vs % of charge):
This battery comes with brass SAE posts, 3/8 inch positive and 5/16 inch negative thread SS stud terminals. And in order to it to hook up to the "factory" clamps without ANY modifications, ordering some Remy Battery "Stud to Post" converter is THE WAY TO GO! (Be sure to order 1 of each size) Stud to Post Conversion Adapters - Remy Battery
Also, while you are ordering from Remy, I found that their group 31 battery to be the lowest cost solution ($8.44!!!) to house the battery (a $100 battery cage is NOT needed!!): Steel Battery Tray (13") - Remy Battery
Post converters screwed in (and extra converters) and the battery tray:
Size comparison between the Odyssey 31M vs the stock Panasonic:
Once you removed the factory battery and the whimpy plastic tray, the new steel tray fits right in, and you can get a "M6 bolt/screw" (maybe 15mm long) and a washer to screw into a threaded hole as you can see in the picture below. Together with an aligned "hook", this tray is not going anywhere!
Unfortunately, with the added battery try, the factory "J-hooks" are not long enough to hold-down the battery, you would need some 10in hooks. You can get them from Amazon cheaply (with prime too): http://amzn.to/1PHfrFm
I am not a big fan of the "wing nut", hence, I dropped into home depot and picked up some 1/4" (IIRC) nut/washer/lock-washer for the "J-hooks". And 1 last final touch (not really necessary), is to use a bolt-cutter and trim off the extra length of the J-hook that is closer to the fuse box).
Here it is, all mounted!
SOLID and economical!!
Such a good write up. Thanks!
Question, any noticeable dip in ride height from the Group 31?

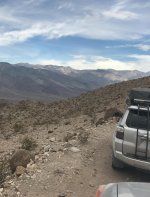
4runner window tint
Just Got My 4Runner tinted with 5% All Around! At Window Tinting San Diego!
So Excited!
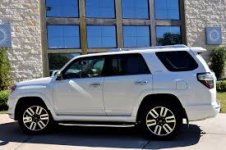
Just Got My 4Runner tinted with 5% All Around! At Window Tinting San Diego!
So Excited!
Attachments

Similar threads

- Replies
- 0
- Views
- 2K

- Replies
- 2
- Views
- 2K

- Replies
- 19
- Views
- 2K

- Replies
- 0
- Views
- 8K


