JLRSR5 Build

JLRSR5

New member
Well finally started to mod my current 07' 4runner. I never really got to do much to my 99' before I sold it, unfortunately :(. So I'm determined to not let that happen to my 07'. So here goes.....bye bye all future money. :D

I've been busy the past few weeks doing a few things here and there from a small lift for now and to plasti-dipping a few things and window tints. More will come later as time and more importantly money allows. :thumb:

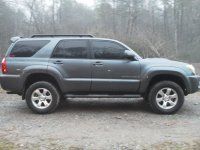
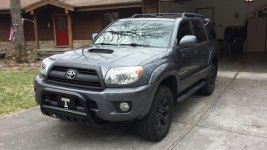
First pic is 4runner stock no lift. Just had the window tints done. 20% on the front two with 20% front strip and 35% over the factory stained rear glass. It turned out great, couldn't be happier with the tints.

Bottom picture is updated (2-18-18).
 

Attachments
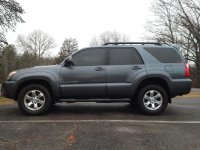
  • Before Lift.jpg
    Before Lift.jpg
    136.9 KB · Views: 765
  • Update.jpg
    Update.jpg
    133.6 KB · Views: 767
Last edited:
Register to hide this ad
Next came my Daystar lift. I got the 1'' Budget Boost part #(KT09117BK) in the front and the 1.5'' rear spacer part #(KT09127BK) The rear is for the FJ but works fine with the 4th gens. The reason I opted for this one was because I wanted to keep a little bit of the raked look still. And wanted to keep XREAS until in starts to leak and craps out on me. The front was the easy install kit that comes with the stud extenders which makes it a breeze.

I was going to get a shop to install everything, but after calling and hearing some outrageous prices and being worried about a shop messing up the XREAS system I decided to give a good friend a call who has a ton of tools and knows quite a bit about lifts to help me, as I have no experience, just a little bit of information I know from being a member here and reading install threads.

So long story short install went flawless, had no issues took me, my buddy and my brother roughly 2.5-3 hours to do my lift and 2 to do my brothers. My brother bought the same lift but for his 3rd gen. His was so much easier!! XREAS is annoying to work around. But, I am very pleased with the amount of lift I got and big thanks to the many threads on here that show step by step how to install. All the threads that I used are listed below. A lot of great and helpful information in these threads, def. was worth reading and enhanced my knowledge.

http://www.toyota-4runner.org/4th-gen-t4rs/101483-what-about-daystar-1-front-1-5-rear.html
http://www.toyota-4runner.org/4th-gen-t4rs/77183-leveled-her-weekend.html
Daystar (Spacer) installation on 4Runner with XREAS - Toyota 120 Platforms Forum
2007 Toyota 4Runner Sport Edition Lift

To anyone who is nervous about installing these lifts. Don't be, if you have the tools or friends who do and are willing to help, it's very doable. And do it yourself, you learn a lot about your vehicle which is never a bad thing. And best of all you save some CASH!
 

Attachments

  • After Lift.jpg
    After Lift.jpg
    132.7 KB · Views: 1,859
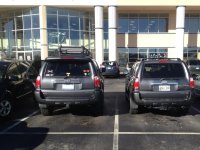
Me beside a stock 4runner a few days after the daystar 1/1.5 lift.
 

Attachments

  • Lift, Beside Stock 1.jpg
    Lift, Beside Stock 1.jpg
    132.8 KB · Views: 1,574
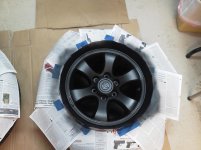
Now time for some plasti-dip! Never really used this stuff before, but just youtubed some vids and saw some peoples experiences on here and gave it a shot. Turned out pretty good I did my wheels and my grill. About 4-5 coats on the wheels and 6-8 on the grill.

Thought about adding some clear coat but after reading some people reporting having trouble peeling off the plasti-dip later on decided to not go that route, but may later on, we will see how this holds up.
 

Attachments

  • Plasti Dip Wheels.jpg
    Plasti Dip Wheels.jpg
    130.5 KB · Views: 1,559
  • Plasti Dip Wheels 2.jpg
    Plasti Dip Wheels 2.jpg
    88.7 KB · Views: 1,670
  • Plasti Dip Grill.jpg
    Plasti Dip Grill.jpg
    136.3 KB · Views: 1,551
  • Plasti Dip Grill 2.jpg
    Plasti Dip Grill 2.jpg
    133.3 KB · Views: 2,257
That's pretty much it for now as far as everything I've done recently. But more will come hopefully soon!
 
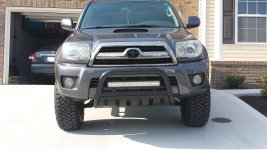
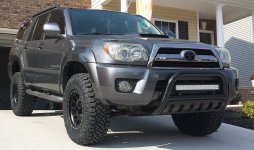
Steelcraft bull bar installed

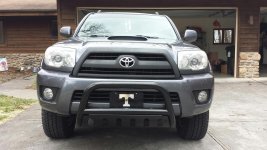
Got a steelcraft bull bar from my g/f for vday, may be the best gift I've gotten! :biggrin2: Finally got around to putting it on today.

The bumper bolts/nuts were a pain to loosen, finally resorted to heating them up a little bit and that's what it needed w/ some muscle they finally broke loose, then install was a breeze from there.
 

Attachments

  • Steelcraft bull bar.jpg
    Steelcraft bull bar.jpg
    138.8 KB · Views: 1,759
  • Steelcraft bull bar 2.jpg
    Steelcraft bull bar 2.jpg
    139.8 KB · Views: 1,603
Very good looking Galactic Grey! We've got pretty similar trucks.

Those tires from my pic were a 265/70/17 BF Goodrich All-Terrain.
 
Very good looking Galactic Grey! We've got pretty similar trucks.

Those tires from my pic were a 265/70/17 BF Goodrich All-Terrain.

Thanks man I appreciate it and the info on the tires! Yeah I noticed ours were pretty similar. You managed to snag a V8, I originally wanted one but found a V6 that I just couldn't pass up. Your truck is looking good, I like the updates with the black wheels and bigger tires. :bigok:
 
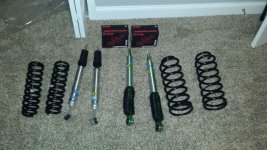
After many years of wanting/debating a lift, finally pulled the trigger. New KYB top mounts plus OME 884's, Toytec Superflex's, and Bilstein 5100's all the way around, with the front set at "0" , and no top plate spacer.

Me and my brother put it on ourselves this past weekend using the no spring compressor method. I first had planned on getting my front struts put together at a local shop, but everywhere wanted around $100 to just assemble them. So I said forget it and just did the no spring compressor method. Worked great, but glad it's all over. Also pulled all the XREAS lines out, talk about a mess.

Overall very pleased with the outcome and the new suspension feel and look. :)
 

Attachments

  • 20160614_205757.jpg
    20160614_205757.jpg
    143.9 KB · Views: 1,385
  • 20160829_202224.jpg
    20160829_202224.jpg
    134.7 KB · Views: 1,377
After many years of wanting/debating a lift, finally pulled the trigger. New KYB top mounts plus OME 884's, Toytec Superflex's, and Bilstein 5100's all the way around, with the front set at "0" , and no top plate spacer.

Me and my brother put it on ourselves this past weekend using the no spring compressor method. I first had planned on getting my front struts put together at a local shop, but everywhere wanted around $100 to just assemble them. So I said forget it and just did the no spring compressor method. Worked great, but glad it's all over. Also pulled all the XREAS lines out, talk about a mess.

Overall very pleased with the outcome and the new suspension feel and look. :)

Looks great man.....I went the same route you did.....and now Im about to get coilovers......lol........
 
Nice clean build so far!

Tires next?

That's the plan to get tires soon. Just debating now if I want to go 285 or 275. I like the 275 KO2's, but just hate the fact they only come in E. If I go 285 i'll either get Nitto Terra Grappler G2's or Nitto Ridge Grapplers.
 
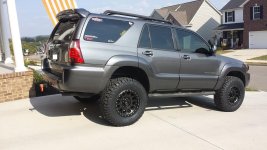
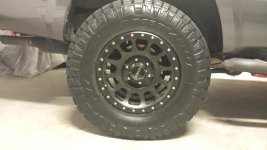
New tires on!

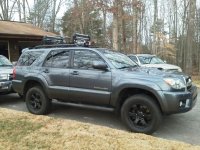
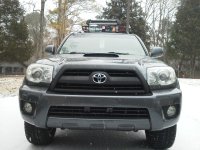
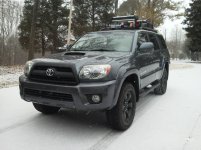
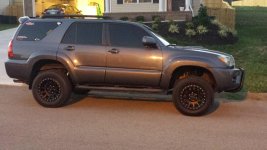
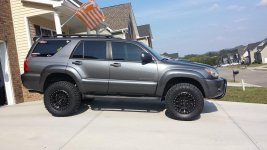
New tires on yesterday and I am more than pleased. Nitto Ridge Grappler 285/70r17 C load.
 

Attachments

  • LandW1.1.jpg
    LandW1.1.jpg
    88.2 KB · Views: 1,346
  • LandW 2.1.jpg
    LandW 2.1.jpg
    93.7 KB · Views: 1,312
  • LandW 3.1.jpg
    LandW 3.1.jpg
    112.9 KB · Views: 2,752
  • LandW 4.1.jpg
    LandW 4.1.jpg
    91.8 KB · Views: 1,620
  • LandW 5.1.jpg
    LandW 5.1.jpg
    136 KB · Views: 1,306
Nitto Ridge Grappler C load 285/70r17 first impressions.

Overall impressions of the Nitto Ridge Grapplers C load, absolutely love them. Very little road noise which is surprising considering how aggressive the tires look. I had 265 Michelin LTX at/2 tires before and they are maybe 5-10% louder. We will see if the low road noise is maintained as the tires wear some.

The tires fit great, I had already pushed forward my fender liners as far as I could in preparation for the 285's, no rubbing on those. I also removed my front mud flaps and trimmed the rear mud flaps, so no rubbing there either. The only place the tires rubbed were the bottom of the front bumper when making sharp turns. I took care of this today with some trimming. No rubbing at all with full lock on level ground, and no rubbing on the body mount. :hail: I'm sure once I get it off road some there will be new rubbing points with potential BM rubbing, so we will see. Regardless I am very pleased with solving all the rubbing issues.

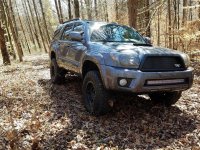
After 8+ years of wanting a 4runner lifted on 33's, finally was able to afford to do it and am more than happy with the outcome.
 
Looks great! What was the condition of the stock top mounts?

They seemed to be in decent shape when I removed them prior to my lift install. I bought new ones because I was under the impression that the xreas top mounts would not work with aftermarket coils, but I never really checked once I took them off.
 
They seemed to be in decent shape when I removed them prior to my lift install. I bought new ones because I was under the impression that the xreas top mounts would not work with aftermarket coils, but I never really checked once I took them off.

Thanks. The reason I asked is because I'm planning on doing a similar lift using the no spring compressor method install and contemplating whether or not I should replace the top mounts. I live in the south so I have zero rust or corrosion and don't want to replace them if they are still in reasonably good condition.
 
Thanks. The reason I asked is because I'm planning on doing a similar lift using the no spring compressor method install and contemplating whether or not I should replace the top mounts. I live in the south so I have zero rust or corrosion and don't want to replace them if they are still in reasonably good condition.

Yeah, if I could have reused mine I would have, if that was an option. I bought kyb top mounts off of amazon, they weren't too expensive. KYB SM5640 is the part number if you need them.
 

Members online

Forum statistics

Threads
278,309
Messages
3,554,067
Members
248,016
Latest member
Advally Service

Trending content

Back
Top