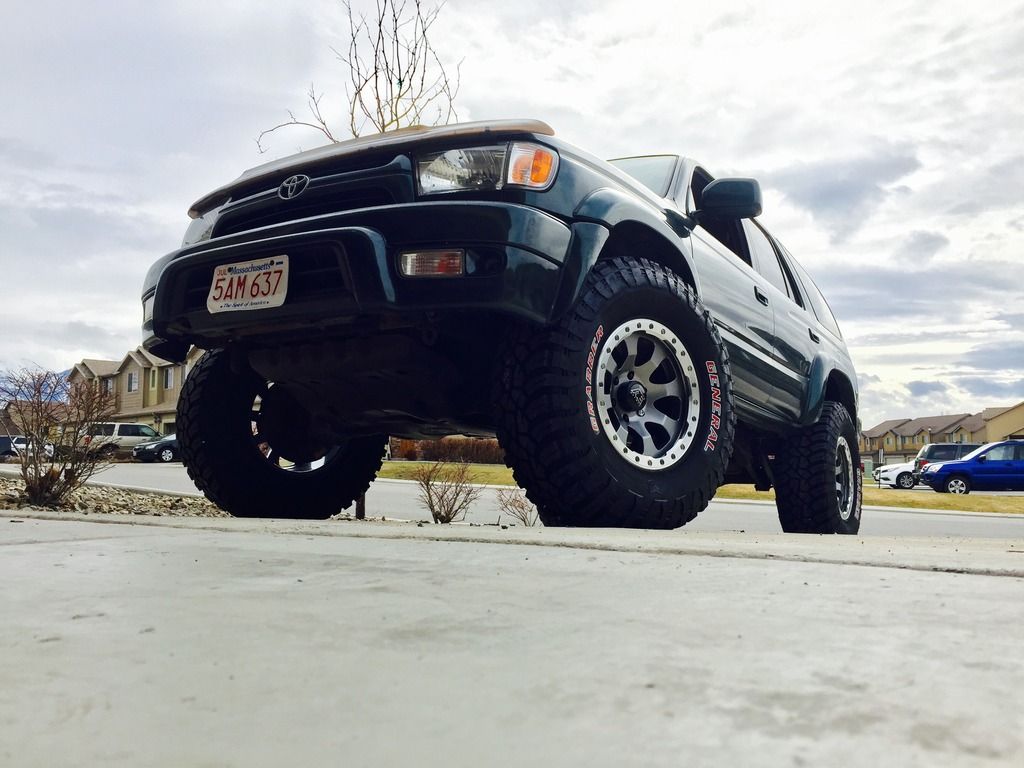
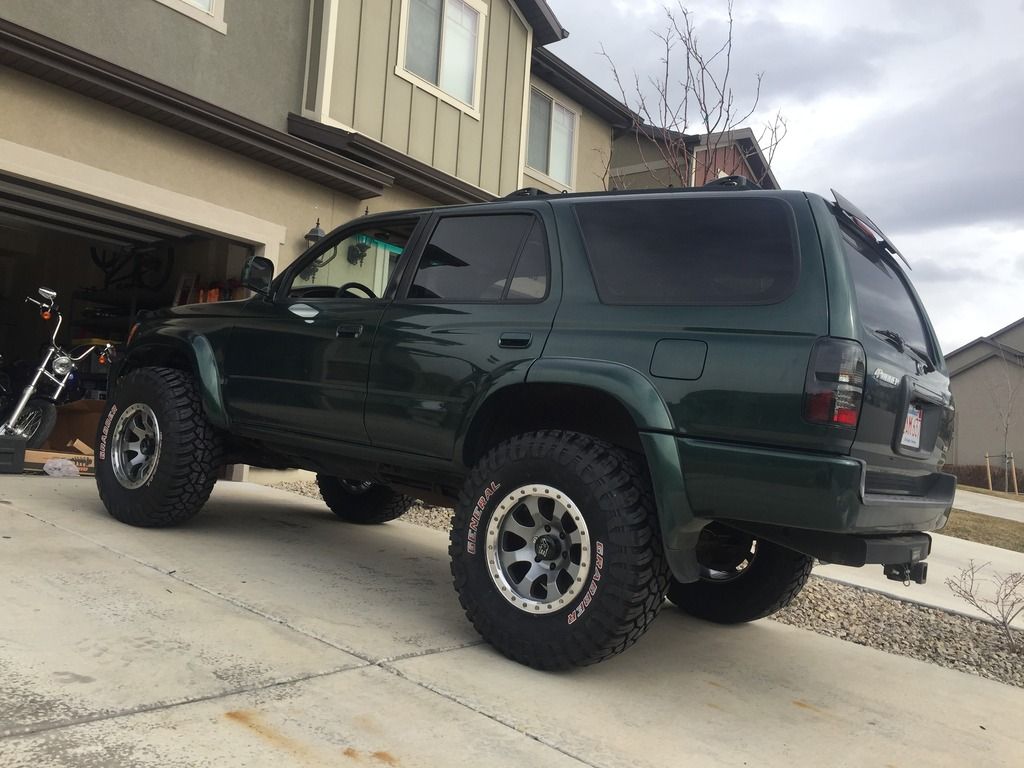
***Most Recent Pic 3/26/17***

So here's the goal... build a vehicle to go anywhere, handle any type of terrain, under any conditions. I recently moved to Utah from the east coast and am blown away by the different terrain this state has to offer. You have snowy thick forests in the Northern Wasatch Mountains, red slickrock in Moab, huge sand dunes in Little Sahara, and endless salt flats out towards Bonneville... not to mention it goes from 110+ under the hot sun in the summer to single digits with snow and ice in the winter. I need a vehicle that can handle all these conditions and still be capable of driving the 100's of miles in-between. So I chose this as my platform for the build:
2001 Toyota 4Runner SR5
"Fins n' Things" Trail Moab, UT

American Fork Canyon, UT

Honestly I'm really impressed with just the stock performance both on and off road. Once I got some seat time in a 4Runner it was an easy decision to use one for my build.
The Plan/Progress: (blue="completed", red="in progress", black="planned")
Suspension/Wheels/Tires
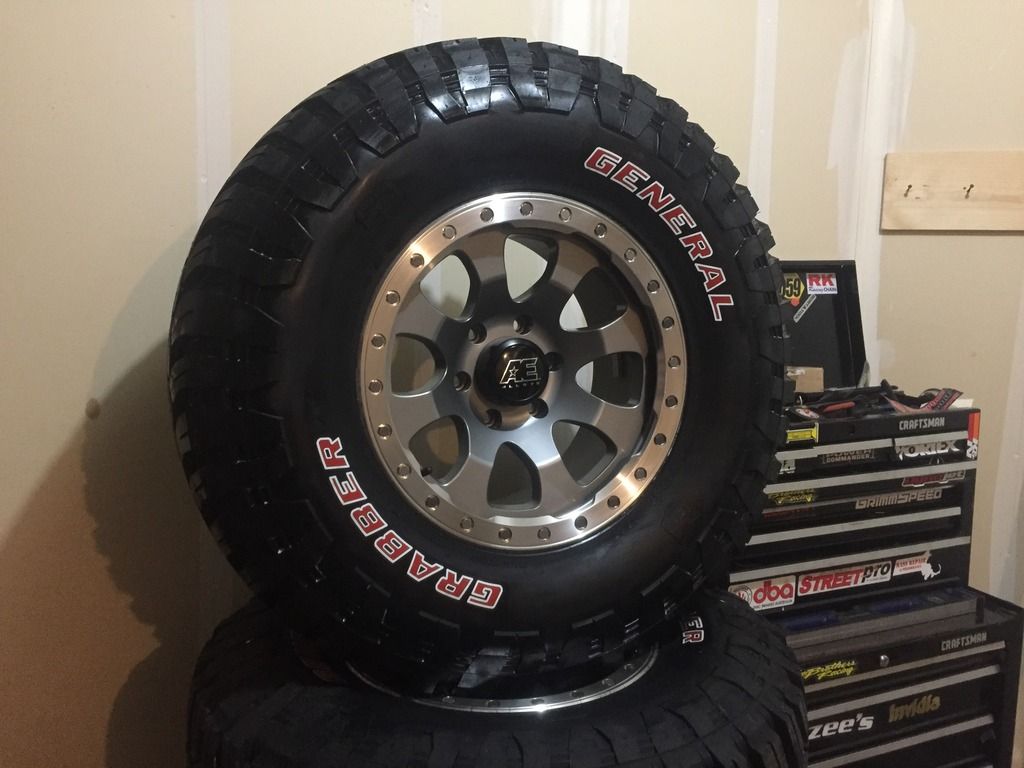
17x9 American Eagle Series 023
35x12.50R17 General Grabber X3's
Solo Motorsports 14" Long Travel
Bilstein 7100 2" Coilover Shocks
King 600# Springs
3" Rear Lift Springs
Low Range Offroad Front Diff Drop Kit
Energy Suspension Steering Bushings
Solo Motorsports Double Shear UCA Mount Kit
Heim Steering Conversion
Modified Front Diff Rearward Mount
Custom Panhard Mount
Solo Motorsports Fully Fabricated Spindles
Solo Uniball Lower Ball Joint Conversion
King Remote Reservoir C/O
Custom Long Travel Rear (working on designing a 3-link w/ track bar with cantilever rear c/o's)
Secondary Air Ride System
Detachable Sway Bars
Engine/Drivetrain/Brakes:
K&N Panel Filter
13WL Tundra Calipers & Rotors
Modified Tundra Front CV Axles
Relocated Aftermarket Radiator
Electric Fans
Trans Cooler w/ Fan
Rear Limited Slip Differential
Front E-Locker (or ARB air. Still debating)
Front Range Full Floater Conversion w/ discs
Hydraulic Handbrake
Motor Swap (the last thing I'm going to do. I haven't made up my mind entirely but I want something powerful, reliable, that can also be tuned for decent gas mileage)
Body/Armor/Lighting:
Depo Smoked LED Tails
Low Range Offroad Front Bumper
Trail Gear Rock Sliders
Fiberglass Front Fenders
Custom Front Bumper/Skid Plate
Full Skids
Rock Sliders
Modified Tacoma Fiberglass Bedsides
Custom Rear Plate Bumper w/ Spare Carrier
Custom Roof Cargo Rack
Retrofit LED Projectors
50" LED Light Bar
Rock Lights
Rear LED Spot Lights
Mirror-Mounted LED Trail Lights
Integrated LED Grill Lights
Interior/Electronics:
Pioneer AVIC-5200NEX GPS
ABS/VSC/TCS Switch
On-board Air
Seats
Custom Switch Panel
Communications System
Back-up Batteries
Solar
Comforts/Recovery:
Roof-top Tent
Fold-able Stove Unit
Integrated Refriderator/cooler
All Necessary Survival Gear
Trail Jack
Recovery Boards
2 Spare Gas Cans
12000lb Winch
---------------------------------------------------------------------------------------------------------------------
Alright, lets get started. The most important aspect of this build is the suspension so thats what I'm starting with. I have already purchased a long travel setup from Solo Motorsports:
Solo Motorsports 14" Long Travel

2/10: Picked up my wheels and tires today. Still a lot of work to do before they will fit...
35x12.50 General Grabber X3's on 17x9 American Eagle 023's
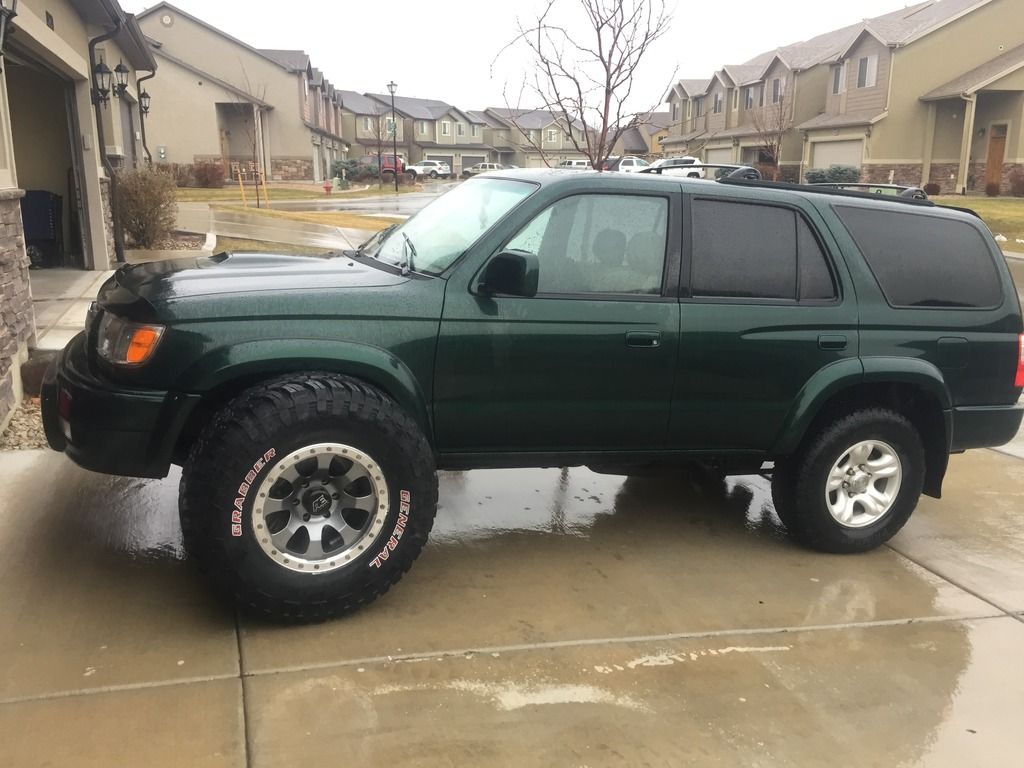
2/18: Installed a Rough Country 3" lift and front spacers to test ride height/wheel fitment. After getting everything on, I think I'm going to move the mounts for lower control arms, front did, and steering 1.5-2" forward and down before installing the L/T kit. Most people run 33's on tacomas/4Runners with similar 14" kits but with the 35's I want to allow enough room for proper up travel. That and with 10" C/O's instead of 8's and a little custom mount work, I may be able to achaive closer to 16" front travel with this kit. So compared to the pics below, the truck will be 2" higher, 2" longer wheel base, about 2-2.5" wider per side in the front and 2-3" wider in the rear. Also installed my Depo LED tails. Already starting to look good!
Budget 3" lift, 2" front spacers, wheels, and new tail lights installed
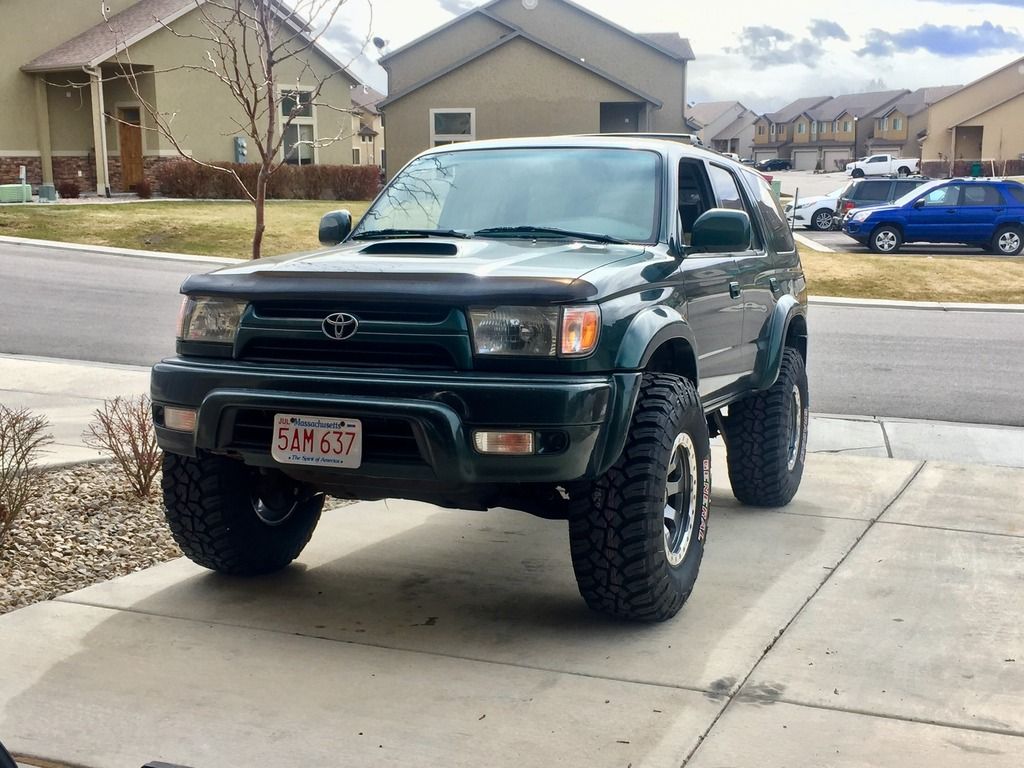
3/6: So I've been busy this week... The girlfriend and I drove the Runner (she had named it "Rusty Ralph") roughly 2k mi to Mexico and back for a wedding. It was a fun trip, Ralph made it without issue other than wandering due to a piss poor alignment job by Big O Tires. After seeing all those amazing desert roads driving through Arizona (this was my first time EVER seeing a desert being from New England) I decided it was time to install the long travel.
Couple pics from the Mexico trip


Taken 24hrs apart! Left: Puerto Penasco, Mexico Right: Park City, UT

The day after we got back, it went under the knife. I started with disassembling the driver's side which was surprisingly easy. Nothing was stuck, even the lower control arm bolts came out with ease.
Driver's side with all the suspension removed

Since the driver's side was such a piece of cake I assumed the passenger would be the same. Man was I wrong... Every other nut and bolt either broke or had to be cut off/drilled out. It was a nightmare. Even my tie rods were completely fused together. Rusty Ralph was living up to his name.
Aftermath of the passenger LCA removal

The L/T kit uses upper uniballs so the oem ball joints have to be pressed out. Only issue is I left my press in Boston. So after a quick trip to Harbor Freight, I was back in busines. Oh and for the record, if your pressing out ball joints in the future, Dana 44 axle nut sockets are the perfect size for the receiving end.
$109 Harbor Freight 12-ton press


Finally every stock part was officially removed and I could get the new parts mounted up. I had to twist and shorten my limit straps until I modify my new axles to achieve the full amount of travel. (No those are not the permananent shock or strap mounts, just mock-up) Since I went with a longer shock to achieve more lift, I'll have to temporarily mount it to the top of the strut towers instead of the bottom. Once I lower the steering components and front diff, I will be able to mount them normally. For now, I'm going to double up on the existing bolts and use 6 grade-8 3/8 bolts with lock nuts. Before everyone tells me this is a bad idea, think about the fact that there are only 4 bolts of this size that hold the lower ball joint to the knuckle torqued only to 37ft-lbs. So in theory, mounting the shock this way should be fine to support the weight of the truck at least temporarily.
Solo Motorsports kit mounted

3/12: Front suspension is on but I'm having issues with camber. Even with my lower bolts adjusted to the max, I still have positive camber on both front wheels. Finally I ended up calling Solo-Motorsports and they are going to send me their updated adjustable heimed upper control arms free of charge! These guys really stand by their stuff! Since that's getting squared away, I'm now working on a heimed steering setup. To get the height so I want out of the front end, I need to drop the front diff. A diff drop kit with an extra spacer and a quick modification to the rear mount should do the trick. Dropping the steering rack is much more difficult. So by switching over to heims instead, I should get enough angle out of the tie rods to accommodate for the extra ride height. Tomorrow my Tundra 13WL caliper and rotors should come in so I'll have that to do this week as well. Going to be a long week!
Suspension freshly installed, you can see the + camber

Sitting in the parking lot at work

First off-road test went amazing today!

So here's the goal... build a vehicle to go anywhere, handle any type of terrain, under any conditions. I recently moved to Utah from the east coast and am blown away by the different terrain this state has to offer. You have snowy thick forests in the Northern Wasatch Mountains, red slickrock in Moab, huge sand dunes in Little Sahara, and endless salt flats out towards Bonneville... not to mention it goes from 110+ under the hot sun in the summer to single digits with snow and ice in the winter. I need a vehicle that can handle all these conditions and still be capable of driving the 100's of miles in-between. So I chose this as my platform for the build:
2001 Toyota 4Runner SR5
"Fins n' Things" Trail Moab, UT
American Fork Canyon, UT
Honestly I'm really impressed with just the stock performance both on and off road. Once I got some seat time in a 4Runner it was an easy decision to use one for my build.
The Plan/Progress: (blue="completed", red="in progress", black="planned")
Suspension/Wheels/Tires
17x9 American Eagle Series 023
35x12.50R17 General Grabber X3's
Solo Motorsports 14" Long Travel
Bilstein 7100 2" Coilover Shocks
King 600# Springs
3" Rear Lift Springs
Low Range Offroad Front Diff Drop Kit
Energy Suspension Steering Bushings
Solo Motorsports Double Shear UCA Mount Kit
Heim Steering Conversion
Modified Front Diff Rearward Mount
Custom Panhard Mount
Solo Motorsports Fully Fabricated Spindles
Solo Uniball Lower Ball Joint Conversion
King Remote Reservoir C/O
Custom Long Travel Rear (working on designing a 3-link w/ track bar with cantilever rear c/o's)
Secondary Air Ride System
Detachable Sway Bars
Engine/Drivetrain/Brakes:
K&N Panel Filter
13WL Tundra Calipers & Rotors
Modified Tundra Front CV Axles
Relocated Aftermarket Radiator
Electric Fans
Trans Cooler w/ Fan
Rear Limited Slip Differential
Front E-Locker (or ARB air. Still debating)
Front Range Full Floater Conversion w/ discs
Hydraulic Handbrake
Motor Swap (the last thing I'm going to do. I haven't made up my mind entirely but I want something powerful, reliable, that can also be tuned for decent gas mileage)
Body/Armor/Lighting:
Depo Smoked LED Tails
Low Range Offroad Front Bumper
Trail Gear Rock Sliders
Fiberglass Front Fenders
Custom Front Bumper/Skid Plate
Full Skids
Rock Sliders
Modified Tacoma Fiberglass Bedsides
Custom Rear Plate Bumper w/ Spare Carrier
Custom Roof Cargo Rack
Retrofit LED Projectors
50" LED Light Bar
Rock Lights
Rear LED Spot Lights
Mirror-Mounted LED Trail Lights
Integrated LED Grill Lights
Interior/Electronics:
Pioneer AVIC-5200NEX GPS
ABS/VSC/TCS Switch
On-board Air
Seats
Custom Switch Panel
Communications System
Back-up Batteries
Solar
Comforts/Recovery:
Roof-top Tent
Fold-able Stove Unit
Integrated Refriderator/cooler
All Necessary Survival Gear
Trail Jack
Recovery Boards
2 Spare Gas Cans
12000lb Winch
---------------------------------------------------------------------------------------------------------------------
Alright, lets get started. The most important aspect of this build is the suspension so thats what I'm starting with. I have already purchased a long travel setup from Solo Motorsports:
Solo Motorsports 14" Long Travel
2/10: Picked up my wheels and tires today. Still a lot of work to do before they will fit...
35x12.50 General Grabber X3's on 17x9 American Eagle 023's
2/18: Installed a Rough Country 3" lift and front spacers to test ride height/wheel fitment. After getting everything on, I think I'm going to move the mounts for lower control arms, front did, and steering 1.5-2" forward and down before installing the L/T kit. Most people run 33's on tacomas/4Runners with similar 14" kits but with the 35's I want to allow enough room for proper up travel. That and with 10" C/O's instead of 8's and a little custom mount work, I may be able to achaive closer to 16" front travel with this kit. So compared to the pics below, the truck will be 2" higher, 2" longer wheel base, about 2-2.5" wider per side in the front and 2-3" wider in the rear. Also installed my Depo LED tails. Already starting to look good!
Budget 3" lift, 2" front spacers, wheels, and new tail lights installed
3/6: So I've been busy this week... The girlfriend and I drove the Runner (she had named it "Rusty Ralph") roughly 2k mi to Mexico and back for a wedding. It was a fun trip, Ralph made it without issue other than wandering due to a piss poor alignment job by Big O Tires. After seeing all those amazing desert roads driving through Arizona (this was my first time EVER seeing a desert being from New England) I decided it was time to install the long travel.
Couple pics from the Mexico trip
Taken 24hrs apart! Left: Puerto Penasco, Mexico Right: Park City, UT
The day after we got back, it went under the knife. I started with disassembling the driver's side which was surprisingly easy. Nothing was stuck, even the lower control arm bolts came out with ease.
Driver's side with all the suspension removed
Since the driver's side was such a piece of cake I assumed the passenger would be the same. Man was I wrong... Every other nut and bolt either broke or had to be cut off/drilled out. It was a nightmare. Even my tie rods were completely fused together. Rusty Ralph was living up to his name.
Aftermath of the passenger LCA removal
The L/T kit uses upper uniballs so the oem ball joints have to be pressed out. Only issue is I left my press in Boston. So after a quick trip to Harbor Freight, I was back in busines. Oh and for the record, if your pressing out ball joints in the future, Dana 44 axle nut sockets are the perfect size for the receiving end.
$109 Harbor Freight 12-ton press
Finally every stock part was officially removed and I could get the new parts mounted up. I had to twist and shorten my limit straps until I modify my new axles to achieve the full amount of travel. (No those are not the permananent shock or strap mounts, just mock-up) Since I went with a longer shock to achieve more lift, I'll have to temporarily mount it to the top of the strut towers instead of the bottom. Once I lower the steering components and front diff, I will be able to mount them normally. For now, I'm going to double up on the existing bolts and use 6 grade-8 3/8 bolts with lock nuts. Before everyone tells me this is a bad idea, think about the fact that there are only 4 bolts of this size that hold the lower ball joint to the knuckle torqued only to 37ft-lbs. So in theory, mounting the shock this way should be fine to support the weight of the truck at least temporarily.
Solo Motorsports kit mounted
3/12: Front suspension is on but I'm having issues with camber. Even with my lower bolts adjusted to the max, I still have positive camber on both front wheels. Finally I ended up calling Solo-Motorsports and they are going to send me their updated adjustable heimed upper control arms free of charge! These guys really stand by their stuff! Since that's getting squared away, I'm now working on a heimed steering setup. To get the height so I want out of the front end, I need to drop the front diff. A diff drop kit with an extra spacer and a quick modification to the rear mount should do the trick. Dropping the steering rack is much more difficult. So by switching over to heims instead, I should get enough angle out of the tie rods to accommodate for the extra ride height. Tomorrow my Tundra 13WL caliper and rotors should come in so I'll have that to do this week as well. Going to be a long week!
Suspension freshly installed, you can see the + camber
Sitting in the parking lot at work
First off-road test went amazing today!
Last edited: