Johnnytoofye's Build Thread

johnnytoofye

New member
I've been seeing everyone who has a build thread and finally figured it was time to give it a shot to get mine together.
I get most of my ideas from gaterose, momo.75, A_S_R, and CrimsonCountry just to name a few.
If any of you guys could help me out too, I would gladly appreciate it a whole lot.
I have owned a 1998 4Runner SR5 and a 1997 Jeep Grand Cherokee (which absolutely frustrated me).
When my birthday came around, my mom said I could get any car of my choice. I knew I wanted a 4Runner after owning one before.
They're last a very very long time if you keep it maintained.
I had no idea what all you could do to a vehicle like this until I came across websites such as:
the http://www.toyota-4runner.org forum and http://www.cardomain.com

Old Build (RIP)
Exterior
-6000k 55W HID headlights
-6000k 55W fog lights
-Borla dual exhaust
-Blacked out tail lights
-Blacked out 3rd brake light
-Blacked out emblems
-Matte black plasti-dipped wheels
-Toyo Open Country AT2 LT 265/70/17
-5% tint all around


Interior
-2 12" Kicker CVR subs
-1800 watt Class D Kenwood amp
-iPod connectivity (came with car), but now AUX cord


Suspension
-Bilstein 5100's (Front setting at 2.5)
-Daystar 1.5 Rear Spacer


Soon to Come
-Interior LED conversion (bright white)


Hope to Happen
-Rain guards
-06 to 09 18" wheels (Preferably around Alabama and Georgia) or 20" XD Monster rims
-30", 40", or 50" LED Light Bar

New Build (On Page 3)


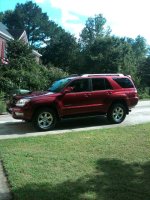
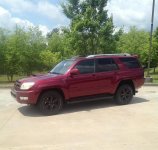
Here is my 2005 4Runner SportEdition 2WD V8 I call JJ.
Became the owner on Septmeber 17, 2011.
JJ 12.jpg


This is what it looked like when I got it from the dealer.
JJ 2.jpg
JJ 1.jpg

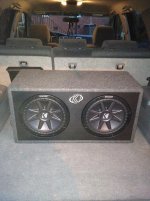
The next day after we bought the car, the first thing I did was go to Brandsmart USA in Kennesaw, GA.
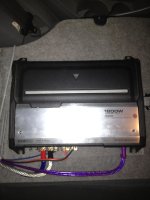
I had already owned the subs so I mainly went to get the wiring done.
Here is the setup
JJ 7.jpg
JJ 8.jpg

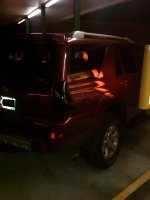
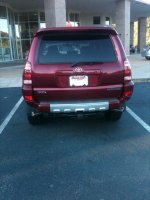
A week later I went and bought Rust Oleum's lens tint spray for my tail lgihts.
This took about and hour and a half because I had to put newspapers and magazines to mask off the tail lights.
If I could change this, I would of searched for how to take off the tail lights, but then again, I just got the car. So overall I was very happy with mod I did.
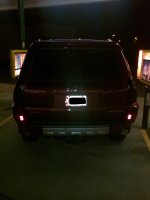
JJ 3 (tage covered).jpg
JJ 4 (tag covered).jpg

I had a pair of 6000k HID lights in my old Jeep, so I definitely was going to do the same in my new 4Runner.
It helped me see better at night compare to the dull stock lights.
So I ordered all 4 lights (head and fog lights) from eBay and had my best friend (basically like my brother) install them for me.
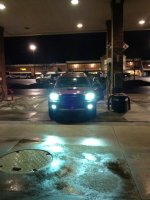
JJ 5.jpg

I still have more to add, but I have no idea to continue. Lol, :help:
 

Attachments

  • JJ 12.jpg
    JJ 12.jpg
    88.4 KB · Views: 2,572
  • JJ 2.jpg
    JJ 2.jpg
    84.7 KB · Views: 2,524
  • JJ 1.jpg
    JJ 1.jpg
    125.3 KB · Views: 2,528
  • JJ 7.jpg
    JJ 7.jpg
    136.2 KB · Views: 2,559
  • JJ 8.jpg
    JJ 8.jpg
    124.6 KB · Views: 2,537
  • JJ 3 (tage covered).jpg
    JJ 3 (tage covered).jpg
    104.7 KB · Views: 2,544
  • JJ 4 (tag covered).jpg
    JJ 4 (tag covered).jpg
    104.5 KB · Views: 2,534
  • JJ 5.jpg
    JJ 5.jpg
    94.1 KB · Views: 2,517
Last edited:
Register to hide this ad
Okay I finally figured out how to continue :whoo:

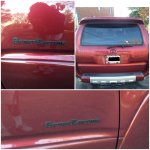
Back to where I was. Haha. The next mod I did was change my emblems.
The chrome was nice and basic, but I like to be different.
So I went to Home Depot and bought a can of plasti-dip and did them.
JJ 9.jpg

One of my friends who has a 04 SR5 did his wheels matte black.
I had contemplating on doing mine, but I said it's my car, I could care less who says anything negative about it.
Once I finished, my mom thought it made my car look a whole lot better and everyone thought I paid for new wheels.
JJ 11.jpg


February 8, 2013 I went to Walmart and bought Turtle Wax Headlight Lens Restorer for around $9.

Before (left) and after (right)
JJ 15.jpg

Final
JJ 16.jpg

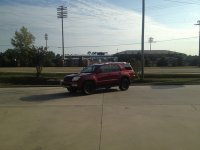
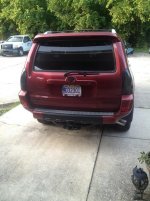
Here's just a picture of what my boy JJ looks like today.
I took this in front of Paulson Stadium at Georgia Southern University (I go to East Georgia in Statesboro) after I washed him at the car wash.
JJ 13.JPG

More shall come. I'll try to stay up to date as much as I can to show my progress.
 

Attachments

  • JJ 9.jpg
    JJ 9.jpg
    100.7 KB · Views: 2,511
  • JJ 11.jpg
    JJ 11.jpg
    118.1 KB · Views: 2,500
  • JJ 15.jpg
    JJ 15.jpg
    135.9 KB · Views: 2,491
  • JJ 16.jpg
    JJ 16.jpg
    140.6 KB · Views: 2,484
  • JJ 13.JPG
    JJ 13.JPG
    111 KB · Views: 2,477
Last edited:
Bilstein 5100s

So I was able to find a pretty good deal on a set of Bilstein 5100s shocks from the FJ Cruiser forum page.

I plan on setting the front at the 2.5 notch. I had the idea of doing FJ springs and a 1.5 rear spacer to get it close or at a 3 inch overall lift. I don't do any off roading, just normal everyday driving. I also want to see what other suggestions you guys have for a 3 inch suspension setup.

My 4Runner is a 2WD V8 and I don't want anything that's too expensive. I want to keep it reasonable.
 
5100s

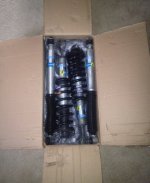
So I came home to this package waiting for me from over the weekend sense I went out of town.

JJ 17 (Shocks).JPG

Got the full set of Bilstein 5100 shocks and surprisingly got front springs with it from the guy I bought it from off the FJ forum.
This guy has no idea how much I was looking for this. Today felt like Christmas. Now I'm just waiting for my Daystar 1.5 rear spacer to come Wednesday.
 

Attachments

  • JJ 17 (Shocks).JPG
    JJ 17 (Shocks).JPG
    75.2 KB · Views: 2,276
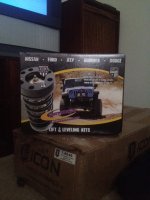
Rear Spacer

Got my Daystar 1.5 rear spacer that I ordered.
I everything that I wanted to start off for my first lift.
Now I have to wait a month or so to get it installed.
JJ 18 (Rear Spacer).JPG
 

Attachments

  • JJ 18 (Rear Spacer).JPG
    JJ 18 (Rear Spacer).JPG
    128.3 KB · Views: 2,208
Update

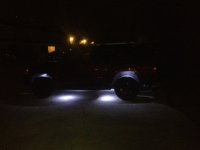
So this past weekend I installed some LED's in the wheel wells and under the running boards.
Saw that TRL DMG (tayzorz on instagram) did this so I had to do it. It was pretty nice.
Had one of my friends help me installing this and it took quite some time to do so.

JJ 19 (Lights in day).JPG
During the afternoon


JJ 20 (Lights before lift 1).JPG
At night from an angle


JJ 21 (Lights before lift 2).JPG
At night from a side view
 

Attachments

  • JJ 19 (Lights in day).JPG
    JJ 19 (Lights in day).JPG
    120.1 KB · Views: 2,128
  • JJ 20 (Lights before lift 1).JPG
    JJ 20 (Lights before lift 1).JPG
    91.6 KB · Views: 2,136
  • JJ 21 (Lights before lift 2).JPG
    JJ 21 (Lights before lift 2).JPG
    79.3 KB · Views: 2,151
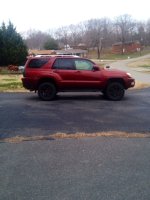
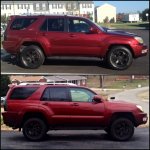
Update: Lift Finally Installed!!!

Tuesday I got my Bilstein 5100's and Daystar 1.5 rear spacer installed.
The setting for the front were already set at 2.5 with FJ coils on them (how they were when I received the package.
The mechanic said installing the Daystar spacer was pretty difficult, but was able to get it all together.
No alignment was done soooo....yea. Lol.
He also said that my XREAS were leaking pretty bad.
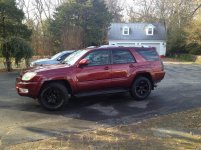
Measurements weren't done, but I will say you can definitely tell a difference. Mainly in person cause pictures don't do much justice.
I also have to say going over potholes and other bumps, it doesn't feel rough at all. The Bilstein shocks made the ride so much smoother.

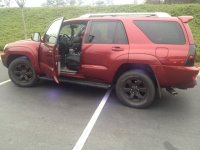
JJ 14.jpg
Before


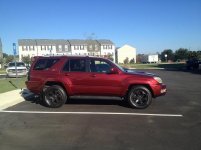
JJ 22 (Lift).JPG
After


JJ 23 (Before & After).JPG
Split picture comparison
 

Attachments

  • JJ 22 (Lift).JPG
    JJ 22 (Lift).JPG
    126.3 KB · Views: 2,118
  • JJ 14.jpg
    JJ 14.jpg
    48.9 KB · Views: 2,163
  • JJ 23 (Before & After).JPG
    JJ 23 (Before & After).JPG
    109.5 KB · Views: 2,110
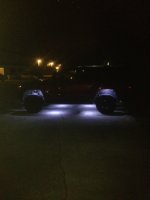
LED's After Lift

Here's what the LED's look like at night after I got my car lifted Tuesday.

JJ 24 (Lights after lift).JPG
 

Attachments

  • JJ 24 (Lights after lift).JPG
    JJ 24 (Lights after lift).JPG
    102.3 KB · Views: 2,098
Metallic Trim

So on Thursday I was contemplating back and forth on whether I should change the color of the bumper trim from metallic to black. I know the 03-05 4Runner's are the only years that have this. So after thinking for a while I went ahead and pulled the trigger.
 
Metallic Trim (Cont.)

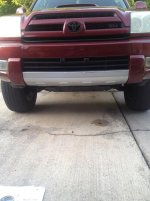
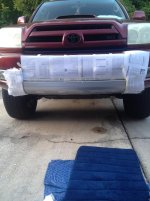
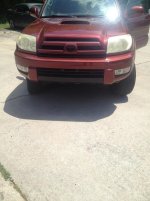
So I went ahead and pulled out the Plasti-Dip and masking tape. Prepping took quite some time cause I like things to be done right. Prepping took around 25-35 minutes. Here are some pictures before I made the change.

JJ 25.jpg

JJ 26.jpg
 

Attachments

  • JJ 25.jpg
    JJ 25.jpg
    82.4 KB · Views: 2,071
  • JJ 26.jpg
    JJ 26.jpg
    71.4 KB · Views: 2,069
Metallic Trim (Cont.)

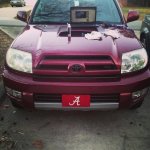
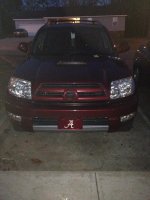
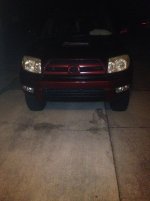
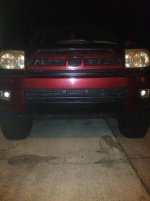
I finished the front and would just wait until the morning to see how it turned out. Here are some pictures of it at night.

JJ 28.jpg

JJ 29.jpg
 

Attachments

  • JJ 28.jpg
    JJ 28.jpg
    58.9 KB · Views: 2,069
  • JJ 29.jpg
    JJ 29.jpg
    64.8 KB · Views: 2,050
Metallic Trim (Cont.)

Went out this morning and took a look. Here it is.

JJ 30.jpg

JJ 32.jpg

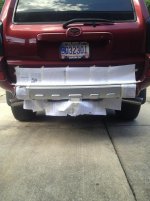
I had to make a run to Home Depot to get more Plasti-Dip to do the back bumper. Once again prepping took about 25-35 minutes. Here's a before picture.

JJ 31.jpg
 

Attachments

  • JJ 30.jpg
    JJ 30.jpg
    82.2 KB · Views: 2,059
  • JJ 32.jpg
    JJ 32.jpg
    87.8 KB · Views: 2,034
  • JJ 31.jpg
    JJ 31.jpg
    85.4 KB · Views: 2,028
Metallic Trim (Cont.)

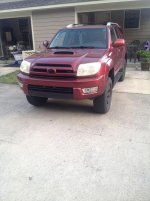
The finished product.

JJ 33.jpg


I used about 8-10 coats on the front and back bumper that was once metallic. Overall I am somewhat/kind of satisfied on how it looks. The only reason why is because of the front, but I'll be completely happy with the look once I get my headlights painted black. That's why I'm alright with the way it looks now. The front of the bumper was somewhat difficult, but the back was the easiest. I could of taken both of these parts off and been able to spray, then it would of been a whole lot easier.
 

Attachments

  • JJ 33.jpg
    JJ 33.jpg
    103.1 KB · Views: 2,263
The finished product.

View attachment 119601


I used about 8-10 coats on the front and back bumper that was once metallic. Overall I am somewhat/kind of satisfied on how it looks. The only reason why is because of the front, but I'll be completely happy with the look once I get my headlights painted black. That's why I'm alright with the way it looks now. The front of the bumper was somewhat difficult, but the back was the easiest. I could of taken both of these parts off and been able to spray, then it would of been a whole lot easier.

Looks awesome! I love that red color and it looks so much better with the black instead of the chrome.
 
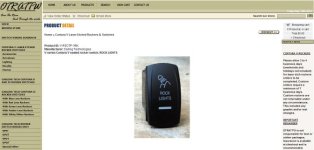
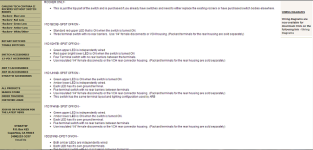
OTRATTW Contura Switches - Needing Help

I currently have rock lights installed on my 4Runner and have the switch that it came with. I have dead (blank) spots where ABS, AV12, ect. would be and want to get the OTRATTW Contura V Rocker Switch. Could someone help me please because I don't want to order the wrong thing.

3.jpg

4.png

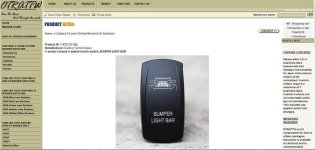
I also plan on ordering a LED light bar down the road and want to get the switches from OTRATTW. As I said in the previous picture, I don't want to order the wrong thing.

1.jpg

2.png

If you guys have any other suggestions for switches please let me know. I like hearing what everyone has to say.
 

Attachments

  • 3.jpg
    3.jpg
    27.1 KB · Views: 574
  • 4.png
    4.png
    98.7 KB · Views: 566
  • 1.jpg
    1.jpg
    31.6 KB · Views: 547
  • 2.png
    2.png
    109.6 KB · Views: 564
Materials for blacking out headlights

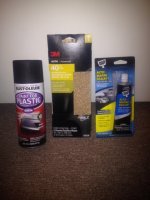
Yesterday I planned on blacking out my headlights. I came to the conclusion this had to be done. So I went to Autozone, picked up Rust-O-Leum satin black paint and sandpaper. Went across the street to Home Depot and got DAP's sealant then...it started raining. The weather killed a nice day. So I plan on doing this mod when it's a clear day where I won't have any problems weather wise.

photo (3).JPG

If you guys have any tips before I start the mod or anything please let me know. I'm using my references from these two threads:

http://www.toyota-4runner.org/4th-g...acked-out-headlight-thread-diy-lots-pics.html
http://www.toyota-4runner.org/4th-gen-t4rs/94693-blacked-out-headlights-06-sport-diy.html
 

Attachments

  • photo (3).JPG
    photo (3).JPG
    129.4 KB · Views: 594
Yesterday I planned on blacking out my headlights. I came to the conclusion this had to be done. So I went to Autozone, picked up Rust-O-Leum satin black paint and sandpaper. Went across the street to Home Depot and got DAP's sealant then...it started raining. The weather killed a nice day. So I plan on doing this mod when it's a clear day where I won't have any problems weather wise.

View attachment 120893

If you guys have any tips before I start the mod or anything please let me know. I'm using my references from these two threads:

http://www.toyota-4runner.org/4th-g...acked-out-headlight-thread-diy-lots-pics.html
http://www.toyota-4runner.org/4th-gen-t4rs/94693-blacked-out-headlights-06-sport-diy.html


i will say after you paint them before you try to put it back on the lense half make sure you have all adhesive out of the way. when i did mine i had to re paint one because i touched paint to the glue and it pulled the paint right off.
 
Blackout Headlight Mod (03-05 Models)

From my last write up I said I was going to wait until there was a clear day for me to do the headlight mod. It so happened to be the next day.
Here are the materials I used:
-Rust-O-Leum Satin Black Paint
-Sandpaper
-DAP Sealant
-Socket wrench (7/16) Bolt
-Pliers
-Flathead screwdriver
-Oven mittens
-Music
-Water and Gatorade

Total Time: 8 hours (I think, just was long)
REMEMBER: It definitely takes patience to do this. If you rush you'll break some of the clamps and your results won't come out as well.

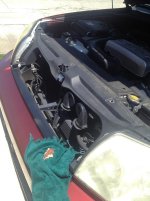
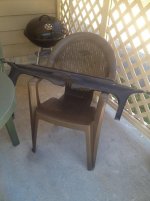
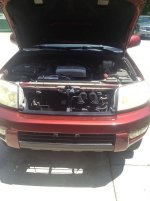
The first thing to do was to remove the clamps under the hood that are for the grill trim.

1 (1).jpg

1 (2).jpg

1 (3).jpg
 

Attachments

  • 1 (1).jpg
    1 (1).jpg
    67.2 KB · Views: 548
  • 1 (2).jpg
    1 (2).jpg
    64.7 KB · Views: 532
  • 1 (3).jpg
    1 (3).jpg
    57.8 KB · Views: 533

Members online

Forum statistics

Threads
278,305
Messages
3,554,041
Members
248,016
Latest member
Advally Service

Trending content

Back
Top