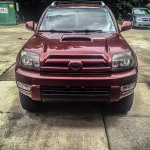
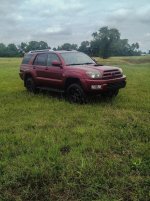
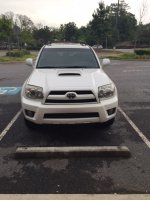
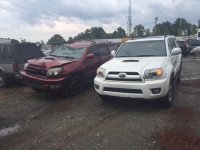
Johnnytoofye's Build Thread

Blackout Headlight Mod

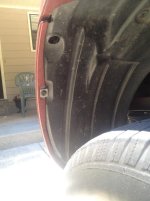
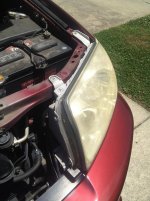
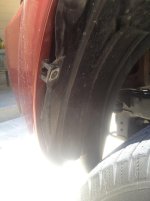
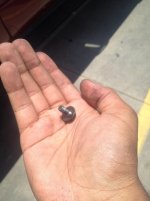
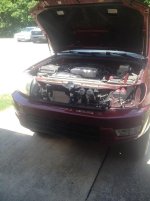
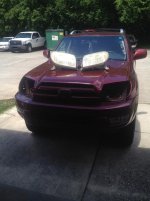
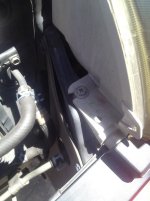
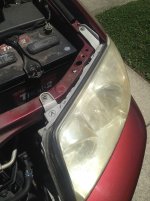
Next there were the 4 bolts that hold the headlight. The first 3 are the easiest because they are right under the hood. The 4th one however is the toughest one. You have to remove the bolt in the wheel well that holds the fender (going towards the car) then reach all the way forward where the bolt can be found. This was very difficult for me because I had the bolt, just not the socket wrench for it, but O'Riley's came in handy.
1 (4).jpg

1 (5).jpg

1 (6).jpg

1 (7).jpg

1 (8).jpg

1 (9).jpg
 

Attachments

  • 1 (4).jpg
    1 (4).jpg
    54.6 KB · Views: 517
  • 1 (5).jpg
    1 (5).jpg
    80.2 KB · Views: 532
  • 1 (6).jpg
    1 (6).jpg
    55.6 KB · Views: 527
  • 1 (7).jpg
    1 (7).jpg
    95.7 KB · Views: 523
  • 1 (8).jpg
    1 (8).jpg
    49.1 KB · Views: 545
  • 1 (9).jpg
    1 (9).jpg
    50.3 KB · Views: 530
Blackout Headlight Mod

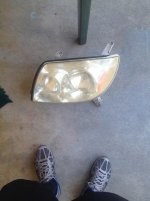
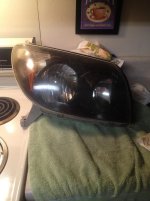
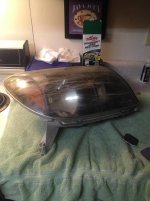
Once all 4 bolts are removed you end up with this.

1 (10).jpg

1 (11).jpg

1 (12).jpg

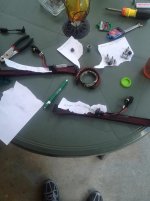
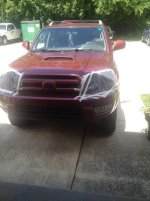
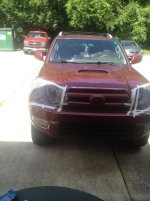
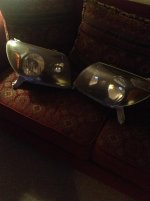
I labeled all the parts that were taken off just to be safe. Here are the 2 headlights that are removed. I went and covered the removed headlights with Walmart bags and used masking tape. The only reason for doing this is because you never know when it comes to weather. Especially being in Alabama at that.

1 (13).jpg

1 (14).jpg

1 (15).jpg

1 (16).jpg
 

Attachments

  • 1 (10).jpg
    1 (10).jpg
    66.1 KB · Views: 513
  • 1 (11).jpg
    1 (11).jpg
    68.7 KB · Views: 509
  • 1 (12).jpg
    1 (12).jpg
    102.1 KB · Views: 500
  • 1 (13).jpg
    1 (13).jpg
    60.7 KB · Views: 506
  • 1 (14).jpg
    1 (14).jpg
    67.8 KB · Views: 515
  • 1 (15).jpg
    1 (15).jpg
    83.7 KB · Views: 502
  • 1 (16).jpg
    1 (16).jpg
    87.4 KB · Views: 506
Blackout Headlight Mod

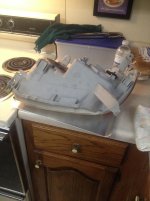
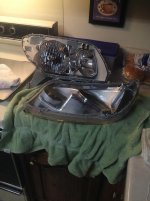
Once you remove the headlight there are 5 screws that are on the outside. You will need to remove those. Now you get to the fun part. Time to bake them. I used other threads for this process. One thread set the oven at 200 degrees for 8-10 minutes and the other thread set the oven at 250 degrees for 8-10 minutes. I went in the middle and set the oven at 225 degrees for 8 minutes. I had to put each headlight in the oven 3-4 times. Each time I took them out I slowly went back and forth with a Flathead screwdriver starting at the bottom of the headlight working my way up to the top. Once you star seeing the headlight start opening up, slowly pull the back and the cover of the headlight apart.

1 (17).jpg

1 (18).jpg

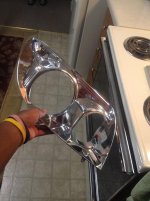
There are 2 screws that are connected to the case of the headlight. You will need to remove those. Once you do that, you finally have the housing. I also went ahead and removed the reflector & top piece (I don't know what it's technically called).

1 (19).jpg

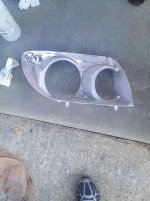
The next step is sanding. It's your choice if you want to do this or not. I only did this because I saw other people say it will stick and hold up longer. This is just what it looks like because I was in the process of sanding. Take your time sanding to remove as much of the chrome as you can (if you choose to do this).

1 (20).jpg

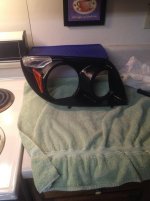
Once you complete the sanding, go ahead and spray the housing. I did 4-5 coats and waited 6-10 minutes in between coats. Put the two pieces together and you get this.

1 (21).jpg

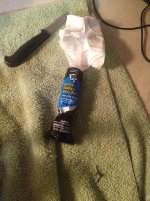
Assemble the housing back together the same way you took it apart. Set the oven at 225 degrees. Place the headlight back in for 5 minutes. Once you take the headlight out the oven immediately press it together. I repeated this process 2-3 times just to be for sure. I waited 10 minutes and used DAP sealant around the glue for an extra seal.

1 (22).jpg

Result

1 (23).jpg

My headlights were completely dull so I went ahead and used the Turtle Wax headlight restorer.

1 (24).jpg
 

Attachments

  • 1 (17).jpg
    1 (17).jpg
    58.6 KB · Views: 513
  • 1 (18).jpg
    1 (18).jpg
    67.1 KB · Views: 511
  • 1 (19).jpg
    1 (19).jpg
    66.3 KB · Views: 506
  • 1 (20).jpg
    1 (20).jpg
    108.1 KB · Views: 489
  • 1 (21).jpg
    1 (21).jpg
    69.1 KB · Views: 466
  • 1 (22).jpg
    1 (22).jpg
    127.4 KB · Views: 463
  • 1 (23).jpg
    1 (23).jpg
    68.2 KB · Views: 459
  • 1 (24).jpg
    1 (24).jpg
    75.2 KB · Views: 464
Blackout Headlight Mod

Both headlights

1 (27).jpg

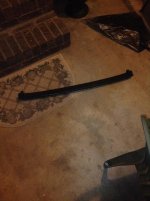
Now here was my biggest problem. I didn't have to remove the bumper trim when I removed the headlights, but I had this in the way when I needed to put them back in. I read iForce's thread when he did this mod and I was able to remove the clamps that were in the middle. I was getting frustrated because I couldn't get this piece off. 30 minutes later I found that the clips in the back of the trim had to be pushed up. Using the Flathead this helped me a whole lot. I was close to giving up honestly. This is the piece that I absolutely hated, but became happy when I removed it.
1 (28).jpg

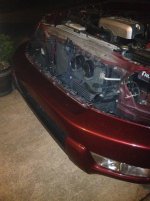
With the bumper trim removed.

1 (29).jpg

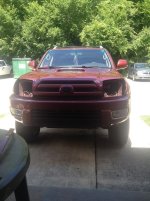
Finally got them installed.

1 (30).jpg
 

Attachments

  • 1 (27).jpg
    1 (27).jpg
    51.9 KB · Views: 473
  • 1 (28).jpg
    1 (28).jpg
    65.6 KB · Views: 453
  • 1 (29).jpg
    1 (29).jpg
    79.1 KB · Views: 458
  • 1 (30).jpg
    1 (30).jpg
    47.5 KB · Views: 458
Blackout Headlight Mod

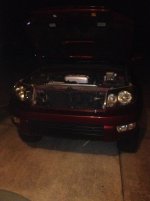
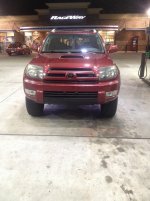
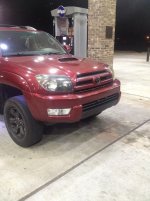
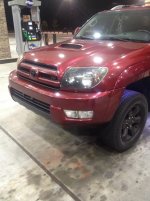
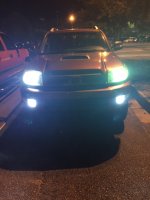
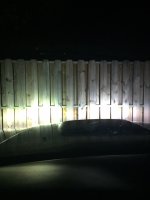
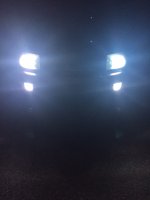
After working all day on this mod, I went to the gas station that night and bought the biggest cup possible of Powerade. Here's some shots of it last night.

1 (31).jpg

1 (32).jpg

1 (33).jpg

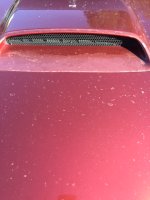
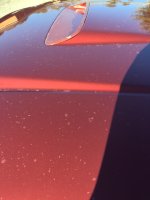
When it got to the morning, I went out to see how it hit the sunlight. I think I didn't do so bad for a mod I've been wanting to do for such a long time.

1 (35).jpg

I hope this helps anyone that is wanting to do this mod. I've only been able to find threads for this mod for the 06+ models, so if anyone with the 03-05 models that want to do this, hopefully mine can help you.
 

Attachments

  • 1 (31).jpg
    1 (31).jpg
    76.7 KB · Views: 508
  • 1 (32).jpg
    1 (32).jpg
    75.5 KB · Views: 510
  • 1 (33).jpg
    1 (33).jpg
    76.4 KB · Views: 499
  • 1 (35).jpg
    1 (35).jpg
    104.3 KB · Views: 509
After working all day on this mod, I went to the gas station that night and bought the biggest cup possible of Powerade. Here's some shots of it last night.

View attachment 121080

View attachment 121081

View attachment 121082

When it got to the morning, I went out to see how it hit the sunlight. I think I didn't do so bad for a mod I've been wanting to do for such a long time.

View attachment 121083

I hope this helps anyone that is wanting to do this mod. I've only been able to find threads for this mod for the 06+ models, so if anyone with the 03-05 models that want to do this, hopefully mine can help you.

looks good man. how about the fogs? any plan to black them out? i think it makes the 03-05 look even better. you could even amber tint them after
 
looks good man. how about the fogs? any plan to black them out? i think it makes the 03-05 look even better. you could even amber tint them after

Thank you. I plan on doing the fogs later on down the road at some point. Plus I was debating on making the amber part black or not, so I just decided to leave it the way it was. I kind of like it with the amber reflector like that.
 
How do you like the ebay lights? Are they the xenon brand? Any flickering?

Yeah the head lights are the Xenon brand. I like them, I always have this problem with my left headlight though whenever I drive. It'll come on then cut off for some reason. I usually have to turn my lights on, then crank my car in order for the light to come on. I know, sounds weird. I'm still trying to figure out that problem though.
 
Haven't updated on here in a while. Haven't done any major mods. Last mod I've done was cut the front and rear mud flaps. Definitely looks a lot better. There's a lot of mods I want to do, but you know how it is when you're in college. Haha.
If anyone has any 03-05 OME headlights that are clear they want to give away or sell for a reasonable price please let me know. My current ones are okay, but not allowing the HID's to produce it's full potential.
Also, for those running HID's are y'all having a problem with the driver side headlight coming on then cutting off instantly? Mine do this all the time unless I turn on the lights before I start the car.
Thanks everyone.
 
So from my last post I was explaining how I had an lighting issue with my left HID headlight. I ordered 55W 6000K HID lights (whole new set for all 4) and looks like my problem was solved...almost solved. One of the bulbs blew so I had one 35W HID in the driver side headlight.

IMG_3935.JPG

IMG_3937.JPG

Got new replacements and we're all good. Problem completely solved

IMG_4713.JPG

IMG_4712.JPG
 

Attachments

  • IMG_3935.JPG
    IMG_3935.JPG
    95.5 KB · Views: 537
  • IMG_3937.JPG
    IMG_3937.JPG
    64.9 KB · Views: 535
  • IMG_4713.JPG
    IMG_4713.JPG
    67.3 KB · Views: 545
  • IMG_4712.JPG
    IMG_4712.JPG
    40 KB · Views: 549
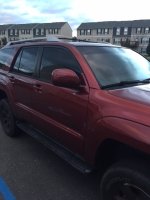
Last week I went in and got the windows tinted. 5% all around with the strip. Very happy with the work that was done.
IMG_4878.JPG


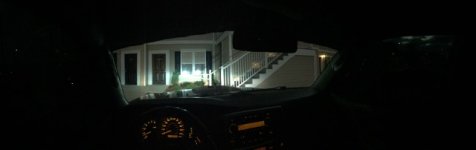
Inside panorama at night
IMG_4880.JPG


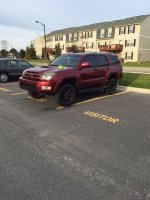
Far shot after I went for a car wash today
IMG_4921.JPG
 

Attachments

  • IMG_4880.JPG
    IMG_4880.JPG
    19.2 KB · Views: 453
  • IMG_4878.JPG
    IMG_4878.JPG
    84.3 KB · Views: 508
  • IMG_4921.JPG
    IMG_4921.JPG
    129.1 KB · Views: 511
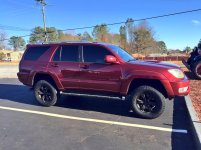
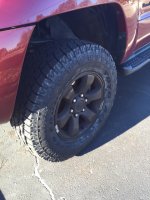
Went and got new tires installed. Searched numerous places for a week and found what I wanted. Couldn't of been any happier. Toyo Open Country AT2, LT: 265/70/17

IMG_5017.jpg

IMG_5016.JPG
 

Attachments

  • IMG_5017.jpg
    IMG_5017.jpg
    122.7 KB · Views: 501
  • IMG_5016.JPG
    IMG_5016.JPG
    130.6 KB · Views: 489
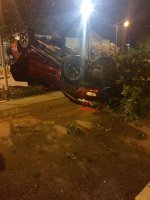
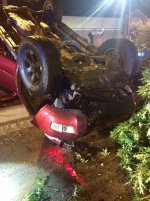
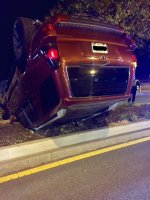
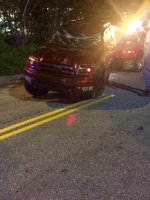
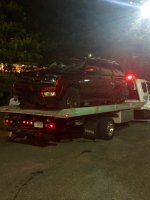
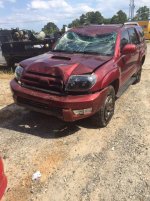
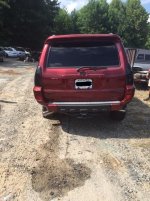
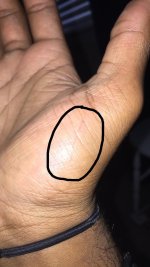
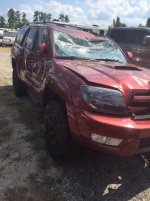
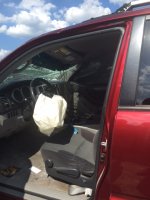
Last Saturday on the 1st at 3 AM I was a mile away from my house here in Alpharetta. I was fine my entire drive, but randomly out of nowhere I blacked out/fell asleep, ran up onto the median, took out a tree (which stopped from continuously rolling) and landed upside down. I flipped twice. Thankfully I had God watching over me. I was able to take off my seat belt, open the door, and managed to walk away with just a cut on my hand that's already healed. As I got out and looked at my car I knew it was done for. I've honestly never felt so mad, frustrated, depressed with myself building something from the ground up and still had more to do, but the most important thing is that Toyota made such a reliable vehicle that it saved my life.

The funny thing is I just finished retrofitting my headlights, wired them, and installed them hours before this happened.

FullSizeRender.jpg

FullSizeRender_3.jpg

FullSizeRender_1 (1).jpg

FullSizeRender_5.jpg

FullSizeRender_6.jpg
 

Attachments

  • FullSizeRender.jpg
    FullSizeRender.jpg
    121.9 KB · Views: 464
  • FullSizeRender_3.jpg
    FullSizeRender_3.jpg
    60 KB · Views: 444
  • FullSizeRender_1 (1).jpg
    FullSizeRender_1 (1).jpg
    120.5 KB · Views: 458
  • FullSizeRender_5.jpg
    FullSizeRender_5.jpg
    132 KB · Views: 450
  • FullSizeRender_6.jpg
    FullSizeRender_6.jpg
    97.2 KB · Views: 460
Later that day on the 1st when I went to go get my stuff out this is how it looked when it was during the day.
IMG_6299.jpg

IMG_6300.jpg

IMG_6301 (1).jpg

IMG_6302.jpg

IMG_6304.JPG

IMG_6355.jpg
Cut that's healed that I got from the accident.
 

Attachments

  • IMG_6299.jpg
    IMG_6299.jpg
    66.4 KB · Views: 414
  • IMG_6300.jpg
    IMG_6300.jpg
    55.5 KB · Views: 407
  • IMG_6301 (1).jpg
    IMG_6301 (1).jpg
    63.1 KB · Views: 416
  • IMG_6302.jpg
    IMG_6302.jpg
    47.1 KB · Views: 399
  • IMG_6304.JPG
    IMG_6304.JPG
    108.6 KB · Views: 448
  • IMG_6355.jpg
    IMG_6355.jpg
    105.9 KB · Views: 431
Last edited:
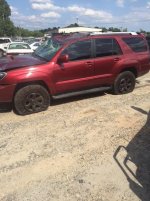
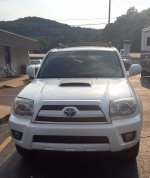
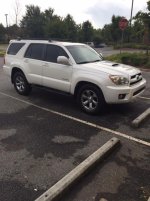
I started my hunt for a new vehicle due to me going back to school. Another 4Runner was in definite consideration, but so was a truck. After coming to a conclusion I knew my heart was on another 4Runner just knowing how well and reliable the vehicle is structured. Took days to find the right one and I was fortunate enough to get a 2008 4Runner UrbanEdition yesterday (Aug. 5th).

Already have in mind what I'm going to do with the new one, but it's just going to take time to do it. Still attached to my old 4R and trying to get use to my new one, but I know it'll just take some time.


IMG_6350.jpg
The day I got the new 4R

IMG_6352.jpg

IMG_6353.JPG

IMG_6351.JPG
My old one beside my new one
 

Attachments

  • IMG_6350.jpg
    IMG_6350.jpg
    97.2 KB · Views: 458
  • IMG_6351.JPG
    IMG_6351.JPG
    115.1 KB · Views: 449
  • IMG_6352.jpg
    IMG_6352.jpg
    47.6 KB · Views: 420
  • IMG_6353.JPG
    IMG_6353.JPG
    132.7 KB · Views: 473
So sorry to see that happen to your rig, but glad you are at least here to post thats gotta say something about the rig. And Picassao was known to smash some of his artwork to start a new canvas. I think you got this :artist2:
 
Last edited:

Members online

Forum statistics

Threads
278,306
Messages
3,554,045
Members
248,016
Latest member
Advally Service

Trending content

Back
Top