Krypto's Camping/Expedition Build

It seems like a small update but it's really a lot of thinking with a little work tossed in. Definitely the most difficult project I've taken on now.
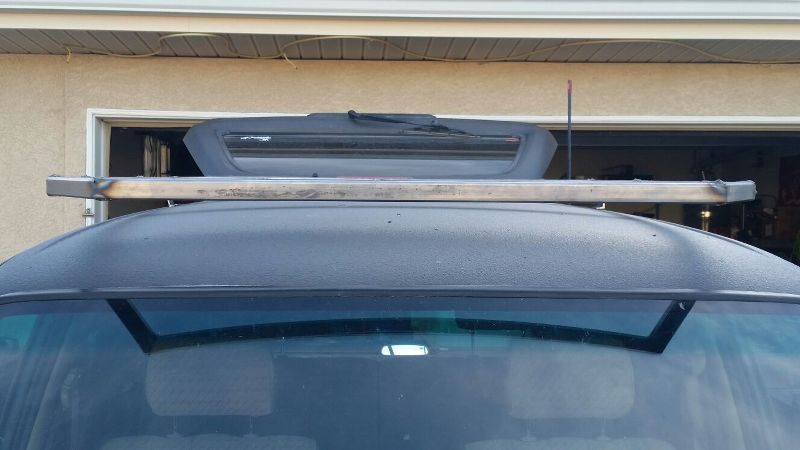
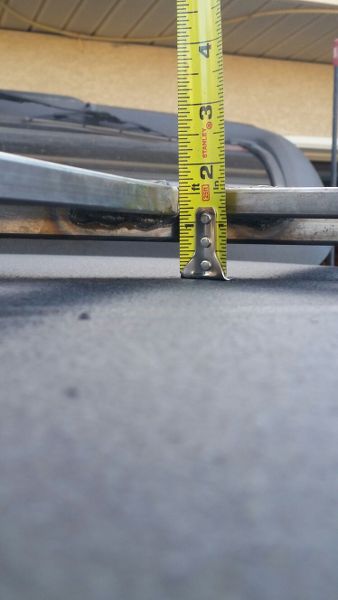

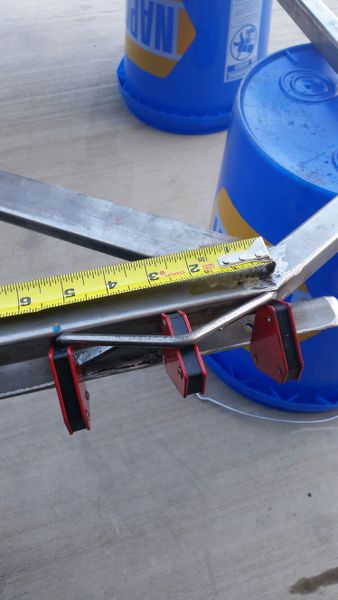
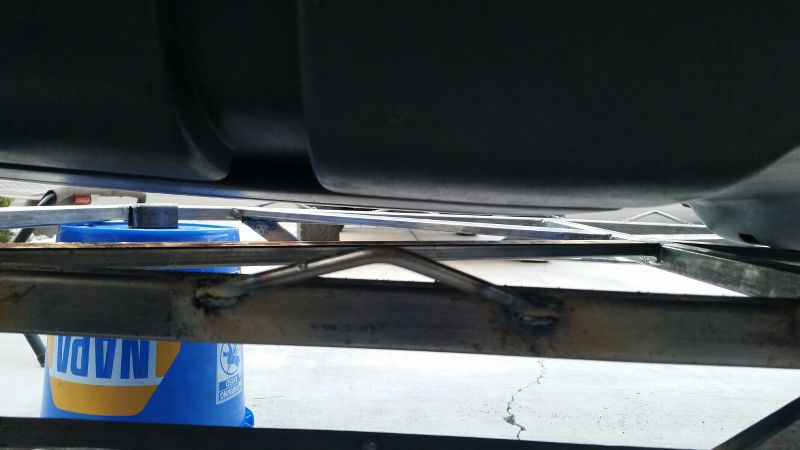
That's how little clearance there is above the roof. I like it although I think it will end up being closer to an inch.
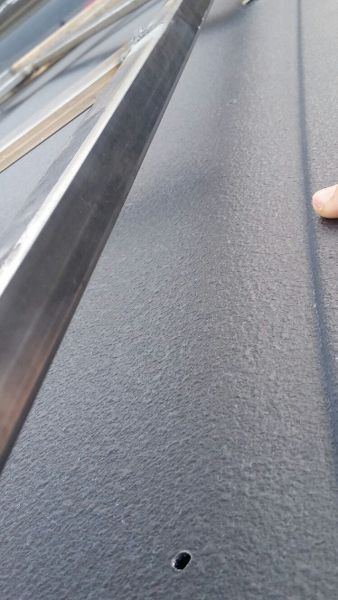
The new holes. I drilled 4 new holes and after measuring about 10 times I hit the reinforcement plates perfectly (well it was really close enough for government work but they hit all the same)

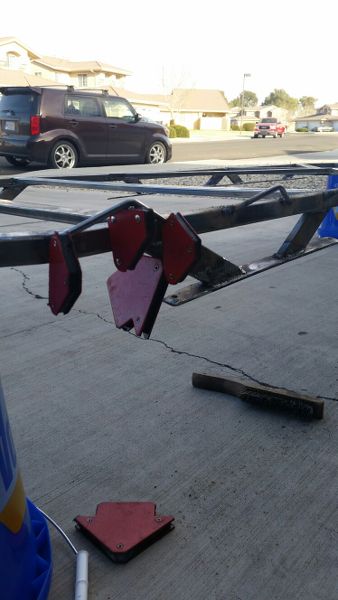
First mounting idea.....fail. Too easy to mount everything crooked and you're starting from square one for every mount.
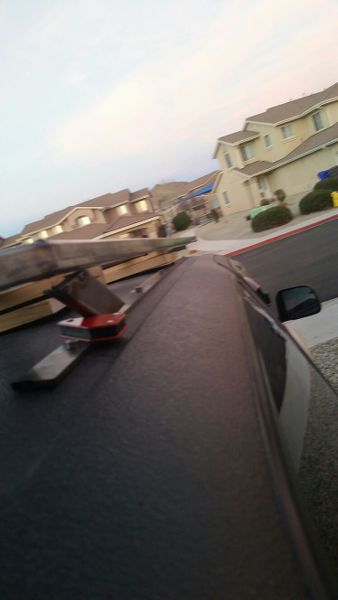
Much better idea for mounting. I took the same metal that I used under the roof and put it in the stock rail location to effectively sandwich the sheet metal in between strengthening the whole assembly considerably.
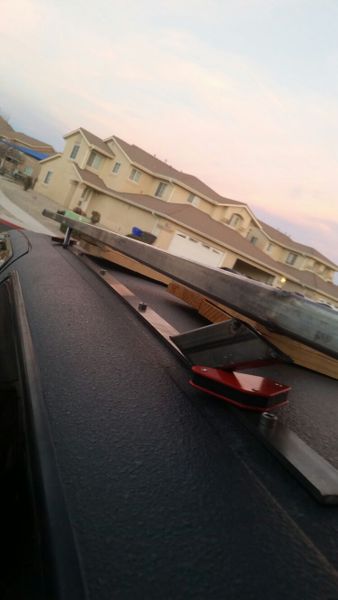
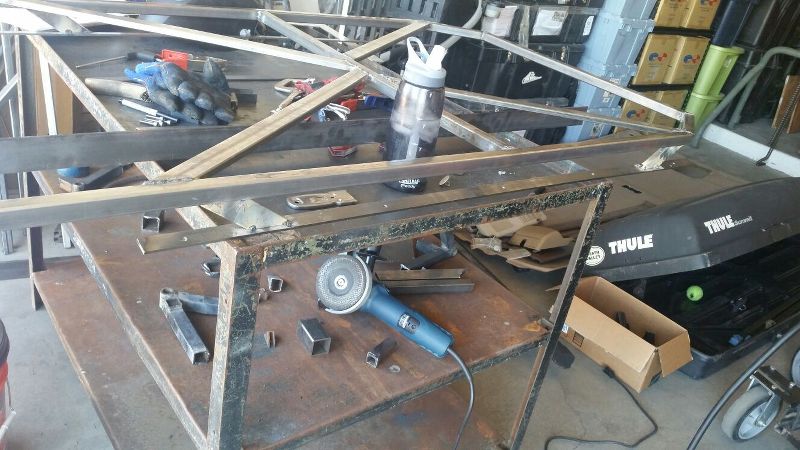
All tacked up. Note to self. Ensure that you use an old tshirt or something if you are tacking on the vehicle. Slag will melt into your window (don't ask how I know)
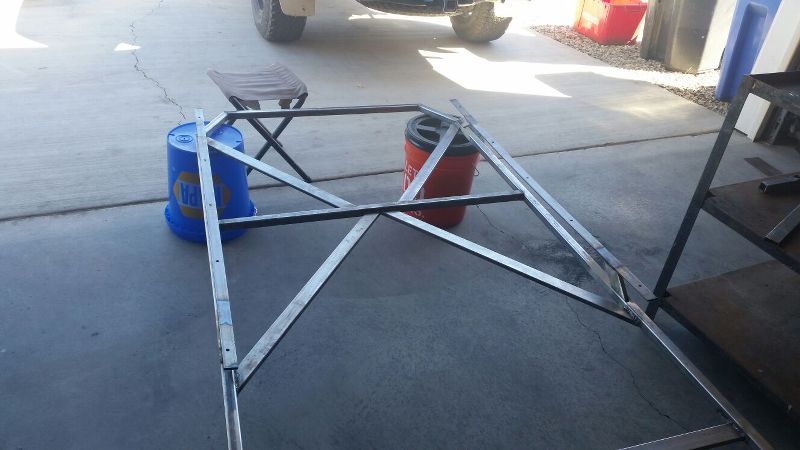
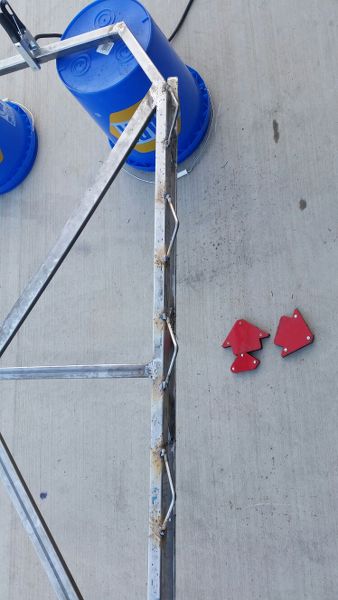
Four mounts fully welded. Fits great. Now I still have to do the center mount and then the two mounts forward. Going to do the same plan as the rear mounts but these will be considerably taller due to the curvature of the roof. Still lots of work to do but it will be made easier since the rack is somewhat secure and I can measure off of it now.
 
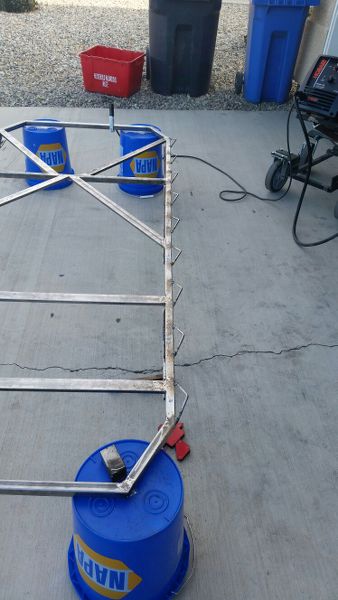
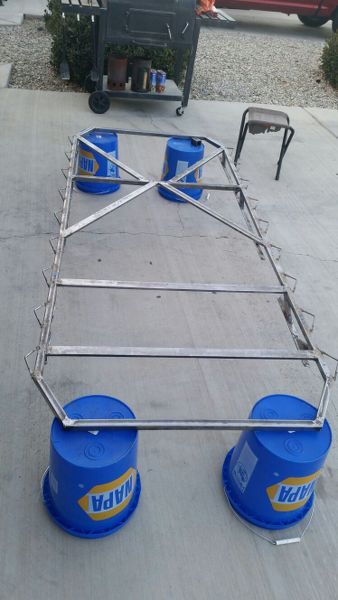
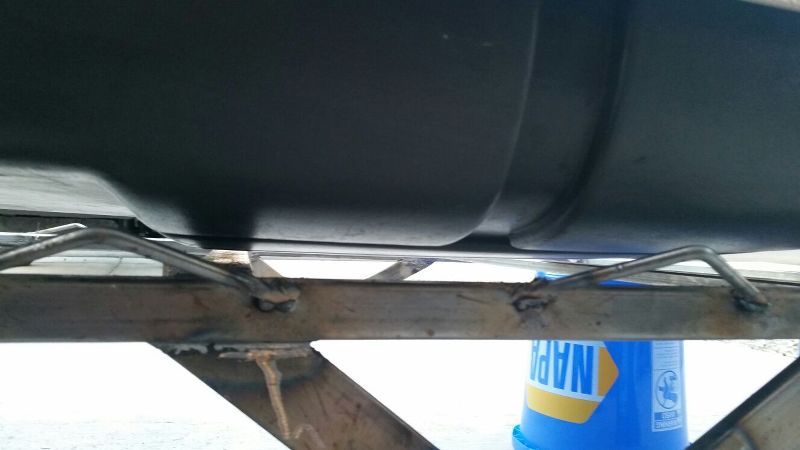
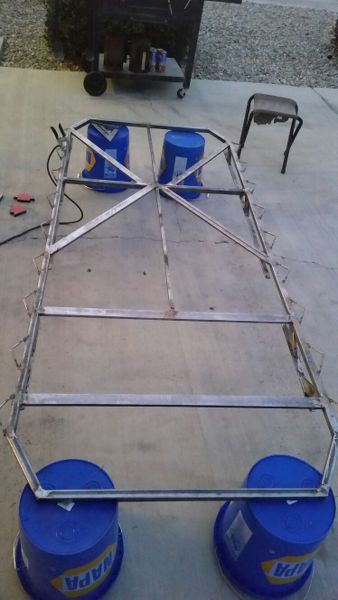
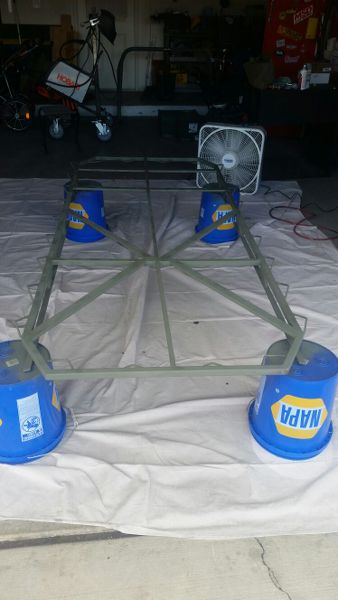
I forgot two important pics. I tested the deflection of the design by setting the roof rack on 4 buckets like you see above. I then stood on the middle of the rack and measured how much it flexed with 215lbs standing on it.

92566d3e1067dd29b9424cdb63422e4e.jpg


74f1c663896563a29d5dbc1bb91bc353.jpg


Looks like half an inch to me. I stood on the front rails as well and while the flexed much more they did not deform either. I consider the design a success.
 
When I was designing my roof rack, I came to the same conclusion about the mounting feet being attached to one long piece that sat on the roof, basically replacing the OEM track pieces. I think it makes for a much stronger assembly too. I used a 3/16" thick, 2" wide flat bar for mine. I was worried it wouldn't conform to the curvature of the roof, but it did fine. I did keep the front 2 mounts separate, so I wouldn't have to run the flat bar so close to the sunroof.

I also know exactly what you mean about weld slag ruining your windows. I ran into the same problem when welding my rack while on the truck. :gun4:

I don't know if you've seen my roof rack build thread or not, but it seems you are running into a lot of the same issues that I did.

http://www.toyota-4runner.org/3rd-gen-t4rs/125705-bandit-runners-roof-rack-build.html
 
When I was designing my roof rack, I came to the same conclusion about the mounting feet being attached to one long piece that sat on the roof, basically replacing the OEM track pieces. I think it makes for a much stronger assembly too. I used a 3/16" thick, 2" wide flat bar for mine. I was worried it wouldn't conform to the curvature of the roof, but it did fine. I did keep the front 2 mounts separate, so I wouldn't have to run the flat bar so close to the sunroof.

I also know exactly what you mean about weld slag ruining your windows. I ran into the same problem when welding my rack while on the truck. :gun4:

I don't know if you've seen my roof rack build thread or not, but it seems you are running into a lot of the same issues that I did.

http://www.toyota-4runner.org/3rd-gen-t4rs/125705-bandit-runners-roof-rack-build.html

I definitely read through it but it has been a while. I should have thought about yours since you replaced your rails as well. I used skinnier stuff 3/16 x 1" but it definitely worked.
 
Success! Well kinda. Still have 4 more mounts to do. At least I didn't warp anything lol.

c0e9b9b95fbd5fba1da58250d702a12c.jpg


d2e631edc2c969cfd184b2465c05de51.jpg


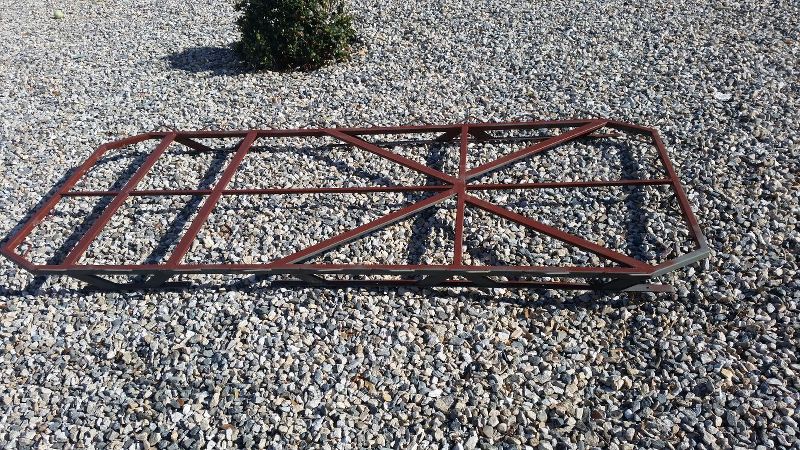
And it's sturdy. With the 4 buckets at the corner I recorded .5" and now with the side supports in I had less than .25". Guess my rack is a little high. It still sits at .75" in the center.

0b11b68e5dbb56a81fc960e0c51b5b21.jpg
 
Hey some more progress! The main welding is done so that's good. I spent about 4 hours on the grinder cleaning welds and beveling hard edges.

17ed0fb987d05a58fa0d1c6509788f9e.jpg

My anti slag solution for the windows. Not exactly flame proof but it works.

252cbfdc9a6829ae3403dcb8e608d6b6.jpg


Everything tacked up and ready for removal.

b8bed4b1de62a09db8b4340e17902eab.jpg


371530217b2fcba7bf33ed7ba2f12b40.jpg


About as far as I got today. Tomorrow will be tie downs, more grinding, and hopefully some painting. I should finish Sunday with this project.
 
Hell ya man, that's the exact welder I want! How you like it?
I love the 140! That thing melts quarter plate like butter. Very smooth arc and easy to learn with. Does great on flux (too windy here for gas mostly) and I'm sure it's just fine on solid wire too.

I am confident that when I have a little more skill it will do thicker metals with two or three passes.

If you want another opinion Bandit runs a 140 also. Pretty sure he likes his as well and he has been welding much longer than I.
 
I love the 140! That thing melts quarter plate like butter. Very smooth arc and easy to learn with. Does great on flux (too windy here for gas mostly) and I'm sure it's just fine on solid wire too.

I am confident that when I have a little more skill it will do thicker metals with two or three passes.

If you want another opinion Bandit runs a 140 also. Pretty sure he likes his as well and he has been welding much longer than I.

Agreed! The Hobart Handler 140 is a great little welder. I've been very happy with mine.
 
I got another good amount of work in today so that's a good thing. What the best thing is though is the weather. It was a wonderful 75 degrees today with a slight breeze that went away when I was welding. It couldn't get any better unless I got that weather all year round lol.

On to the pics.

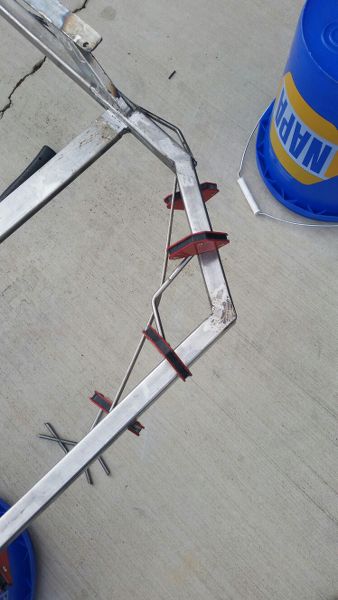
Don't hate on HF stuff. Those little magnets have proven their worth many times over. In fact I wouldn't mind having a couple more of the big ones. The small ones lack a little power at times.


Some of the more complex magnet alignments. Even if that was tricky getting the nails right by any other method would be infuriating.

One side complete

Two sides complete

Still working on the rocketbox issue. I will solve it sometime but it's not going to be next day service lol.

It sits on the rack nicely enough but I am going to have to drill new holes and re-mount everything with a few improvements to handle off-road driving better. I don't think Yakima had that in mind when they developed it 18 years ago.


It finally dawned on me that if I have the rocketbox mounted I can't strap anything down. So I tossed a 5/8" square tube down the center to assist with that issue. The only other issue I have is that I purchased 40 nails and only used 18....:der:
 
The weather wasn't agreeing with me today so I did another quick project.

9a24e3d0176bbc9d0ed982e665e7f929.jpg


Took me a minute to get them spaced right as the box is very odd for width.

35683650c19b1aa2cad476e261a16497.jpg


The wife helped me out taking pictures. I tried to get it as dark as possible but the little lights are fairly bright. I have 8 more to mount inside.

0365b520b9dd5f7c9c743c17dc44767c.jpg


All mounted and ready for switches.
 
Bad Weather

Of course it would turn cold and rain on the day I am painting....but I have pics and progress anyway.:dammit:


I added a few more tie downs to the front and rear of the rack for more cargo flexibility.


All the welding done. Time to drag out the grinder and sandpaper to finish this sucker up.


Self-etching primer down pretty easy. Cleaned it up with Marine Clean (Eastwood product that REALLY works, Awesome prep product)


I ran out of self etching so I used rusty metal primer as the solidifying coat for primer....then it rained so it cured for the rest of the day. No paint love for this guy apparently. :violin:
 
[MENTION=98374]awthorn[/MENTION] Thanks! She might not always be a 4 banger. If my cards play right for me I will have a shot at a d4d here in a few years. I do love my 3rz though. Great engine.

Finished with the roof rack for now. Going to take it out and test it with rattle can paint to make sure I like the design and that it's sturdy enough before I do any fancy chip resistant stuff.

64aa2e87a8ec5af6be40f0f0f8023835.jpg


80301367956b72b2f5c5ab6a28db5a71.jpg


c58840f8270a3832218bd0b3b6fcf69f.jpg


Now on to more leds, rear suspension, and some other camping goodies.
 
So I used the other 8 eagle eye lights that I bought off Amazon and put them in the roof. They certainly are bright! I will be wiring up the switches tomorrow morning. I got too tired from putting the interior back in.

d9f5210d861aff46a673e6c99137382c.jpg
 
So I used the other 8 eagle eye lights that I bought off Amazon and put them in the roof. They certainly are bright! I will be wiring up the switches tomorrow morning. I got too tired from putting the interior back in.

d9f5210d861aff46a673e6c99137382c.jpg

The lighting is awesome man, and your 4runner looks great. Did you wire the lights in the hatch up to come on when you open it, or did you put them on a switch?
 
[MENTION=110387]jstim[/MENTION] I haven't done the switches yet but they will be hardwired to the battery for ease of wiring and utility while camping
 
Well currently I am looking at making a rear ladder setup and tossing around the idea of a tire carrier on the rear hatch. The problem is reinforcing the hinges and securing the load properly. I think it's highly possible but it all comes down to spreading the weight out to multiple attachment points. It may even spread into a rear bumper build but not the usual swing out tire carrier either.
 
@Kryptorxx cool, I want to do something similar, but I want to wire it into the two dome lights, and use those as the switch. If you don't mind me asking how much did the lights cost?
 
@Kryptorxx cool, I want to do something similar, but I want to wire it into the two dome lights, and use those as the switch. If you don't mind me asking how much did the lights cost?


Very reasonable. Here's the link to amazon. The only thing to watch for when installing is about an inch of clearance behind the lights.

I went with the 3w vs the 9w because of the interior use. The 9w apparently get warm after a few minutes and quite honestly in your interior you want nothing "getting warm" like that lol.

Universal 12pcs High Power White 9w LED Eagle Eye Bumper DRL Fog Light Motorcycle Light Daytime Running DRL Tail Backup Light Car Motor https://www.amazon.com/dp/B00MVMRS6O/ref=cm_sw_r_awd_YPG8ub0F2C76W
 

Members online

Forum statistics

Threads
278,309
Messages
3,554,075
Members
248,016
Latest member
Advally Service

Trending content

Back
Top