Mcaz5's 01 4Runner Build

I just like the feeling knowing I paid for something and didn't have to rely on someone elses money. Except gas. That's a PITA haha
 
About to purchase my new Toytec Coilovers :guitar3:

They've been purchased!! Now the waiting game begins
 
Last edited:
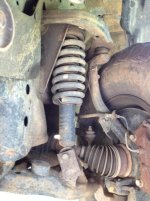
Just a little update...coilovers are supposed to come in tomorrow. I've never put on a lift of any kind, but the coilovers made it seem pretty simple, but unfortunately I'm not going to get the chance. The previous owner of my 4runner welded a rectangular piece of metal to all the front shock mounts. It looks sketchy as hell and I have no idea why anyone would do it. So I decided that since everything will be coming off to install the lift I might as well address this issue. I purchased some front LCA's from a junkyard and I'm going to let a local offroad shop install them, as I dont have to means or the know how. While they're installing the LCA's I'm just going to let them install the coilovers too. So I've got an appointment for Friday. I'll post up some pics as soon as everything gets installed.

Here's a picture of what I've been riding around on for the last year and a half... :jaw drop:
Also, if anyone is interested in purchasing the 4x2 Tundra's and/or spacers, they will be up for sale ASAP

IMG_0032.jpg
 

Attachments

  • IMG_0032.jpg
    IMG_0032.jpg
    130.8 KB · Views: 1,626
The previous owner of my 4runner welded a rectangular piece of metal to all the front shock mounts. It looks sketchy as hell and I have no idea why anyone would do it.

Looks to me like the PO altered the shock mount and actually raised the bolt hole a good inch or so...:wow2:

You might have trouble squeezing in your coilovers unless you revert that shock mount to it's original configuration.
 
By the way your rig has been such a huge inspiration for mine. It's probably my dream runner
 
Some strange man showed up at the door with a big box. It had this inside? :banana: :biggrin2: :naughty: :frog:

45f40cac-c816-04ab.jpg
 
Last edited:
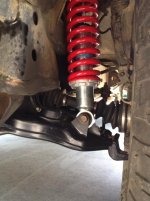
Got the new coilovers in and man are they smooth! The ride is great and I'm extremely impressed! Height wise, I'm sitting about the same at 37.5" driver and 37.75" passenger. But now I have the ability to raise it up an extra .5" because the coilovers are set at 2.5" The new LCAs i put in are very clean. Definitely an upgrade over my old ones. Since there was no real height difference, I don't really think i should post up side shots, but I can if anyone would like to see. So on to the pictures:
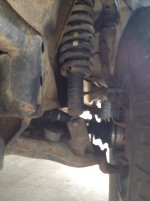
Old LCAs and 4x2 Tundras with spacer (also this is pre diff drop)
old lcas and lift.jpg
New LCAs and Toytec Coilovers (post diff drop)
new lcas and coilovers.jpg
 

Attachments

  • old lcas and lift.jpg
    old lcas and lift.jpg
    45.4 KB · Views: 2,021
  • new lcas and coilovers.jpg
    new lcas and coilovers.jpg
    76.3 KB · Views: 2,208
Also, I'm in the process of sanding down and re painting my BudBuilt skid. I haven't decided if I want to just paint it black or do something else. I have an idea I'm considering, but not quite sure if I'm gonna do it yet. Anywhere here's a few pics in the process of sanding. Sorry, not the best quality.
45f40cac-8b53-76dd.jpg

45f40cac-8b6b-0961.jpg
 
Last edited:
Old LCAs and 4x2 Tundras with spacer (also this is pre diff drop)
View attachment 69013

As you can see in this picture, the PO welded some rectangular piece of metal to all the shock mounts. I assume as some really cheap way to gain lift. So I bought the new LCAs to address that issue. And yes they are Toyota.
 
I finally got around to finishing the BudBuilt. It gives the front a much better look, the paint was starting to come off as rust was eating it, but that is now taken care of. Next is the stock belly skid. Also I'm thinking of extending my rear differential breather soon. It seems pretty straightforward. Anyway, on to the pics.
45f40cac-3d4a-3388.jpg

45f40cac-3d57-2420.jpg
 
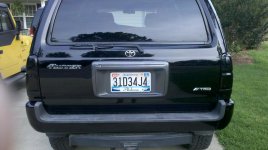
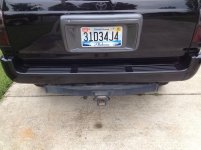
So today I painted the bumper trim on my rear bumper. It was extremely faded from the sun and really needed to be done. Overall, it was an extremely easy project. Took me all of 2 hours, but most of the time was spend waiting for paint to dry. I forgot to take a before picture but I dug up a picture of the rear.
Before:
2011-07-01_17-49-02_568.jpg

After:
repainted bumper trim.jpg

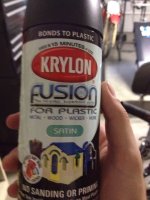
And this is what I used. It's a bit too glossy for my taste, but I think once a little dirt and dust gets on there it'll be fine.
satin black.jpg
 

Attachments

  • 2011-07-01_17-49-02_568.jpg
    2011-07-01_17-49-02_568.jpg
    135.6 KB · Views: 1,768
  • repainted bumper trim.jpg
    repainted bumper trim.jpg
    79.6 KB · Views: 1,738
  • satin black.jpg
    satin black.jpg
    131 KB · Views: 1,681
dang man, I cant believe I never seen your build. I love it, I tried so hard to get those wheels but failed and gave up. This is how I originally wanted mine to look and now some satisfaction of my imagination has been achieved! Great looking rig!
 
dang man, I cant believe I never seen your build. I love it, I tried so hard to get those wheels but failed and gave up. This is how I originally wanted mine to look and now some satisfaction of my imagination has been achieved! Great looking rig!

Thanks man! That means a lot! I do love these wheels, especially in black.
 

Members online

Forum statistics

Threads
278,310
Messages
3,554,080
Members
248,016
Latest member
Advally Service

Trending content

Back
Top