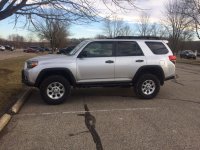
Merry Christmas to me...build thread begins

bishop4r

New member
Updated Bishops build thread...going up

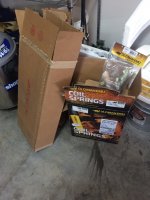
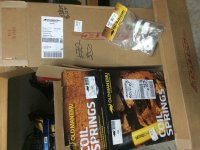
Just arrived!
OME light front springs and nitro shocks assembled by toytec
OME medium rear springs and nitro shocks and rock guards

Hopefully get started on the install this week. Thanks for the help with my decision.

Budbuilt regular bump out sliders ordered and hopefully on their way soon!:usa2:
 

Attachments
  • image.jpg
    image.jpg
    133.5 KB · Views: 630
Last edited:
Register to hide this ad
Update...OME lift and Budbuilt sliders installed

Like the title says, I was able to get the OME lift and bud built sliders installed this weekend. Started on it by myself but made better time when a couple friends showed up. Just wanted to post some pics, install notes, and driving impressions. First a few pics....

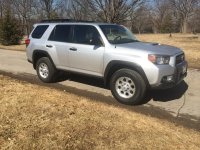
Here's how she sat when I bought her...factory everything except husky liners
 

Attachments

  • IMG_6534.jpg
    IMG_6534.jpg
    138.3 KB · Views: 387
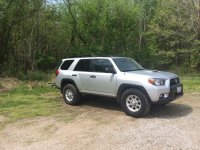
here she is a couple months later after I had 285 duratracs installed...
 

Attachments

  • IMG_7045.jpg
    IMG_7045.jpg
    137.6 KB · Views: 383
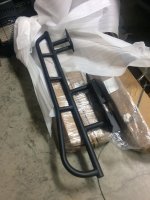
Budbuilt sliders landed...quality is excellent and one of the nicest guys I've ever dealt with. FYI these are the regular bump outs, powder coated black.
 

Attachments

  • image.jpg
    image.jpg
    126.2 KB · Views: 372
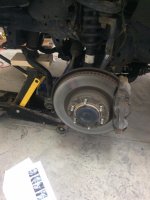
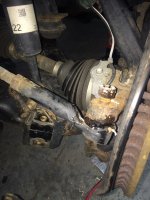
Here's a before pic of front suspension and a pic of the tie rod end that gave me the most trouble on the install. Once I picked up a ball joint pickle fork tool it was a breeze.

Huge thank you to eddiebx and the sp8ball/antman lift install threads. I basically followed a hybrid of these and the ones on slee offroads website. I will post the simplified instructions I wrote down for myself to use as an outline.
 

Attachments

  • image.jpg
    image.jpg
    126.3 KB · Views: 350
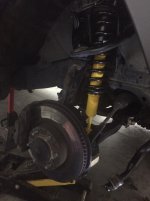
Here's an after shot of the front. I paid the extra $$ to have toytec assemble the coil over with new top hat and hardware and I'm glad I did. Some of the oem parts were looking a little rough. The hardest part of the front coil over swap was the inside nut on the top of the coilover. Not enough room for a ratchet so I had to get both sides with a wrench. A ratcheting type wrench would have been really helpful.
 

Attachments

  • image.jpg
    image.jpg
    128.6 KB · Views: 337
The rear lift install was really uneventful. I took both springs and shocks out before swapping and it gave me plenty of room. Really helped to have two extra sets of hands at this point. Sorry no pics...at this point it was crunch time to get everything finished in one night.

After the rear was in it was on to the slider install. This was exactly how everyone else said it would be, although how some of you guys do this without help is amazing! The passenger side was a piece of cake. Getting the bolts started was difficult by hand, but made easier with a ratchet.

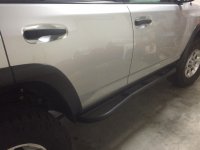
The drivers side was more of a PITA, but much easier than I thought it would be with extra hands. Started with the the front tilted up and the back down by the ground and was able to wedge it in. Here's the final product.
 

Attachments

  • image.jpg
    image.jpg
    132.9 KB · Views: 322
Performed the zero points/crawl control calibration yesterday. It took a couple tries to get the slip indicator light to go off but it did in the second try after I did the crawl control calibration. I drove it a few miles to the park afterwards to make sure everything felt right.
 

Attachments

  • image.jpg
    image.jpg
    137.6 KB · Views: 308
I'm taking it in tomorrow for an alignment, so we will see how close I can get.

My initial driving impressions are VERY positive. It is stiffer, but the body roll is noticeably improved. No wierd clunks or rattles, tracking great, and I love the look. Im sure everything will settle, but here are before and after measurements from ground to fender lip:

Before. After
Driver front 34 7/8" 37 7/16"
Pass front 35. 37 1/2

Driver rear. 37 3/16 39 3/4
Pass rear. 37 1/8. 39 3/4


Measurements were as close as I could get eyeballing it, and taken after slider install. Let you know what they are in a month or so
 
Very important note regarding alignment for people who are doing a lift install. Do yourself a favor and follow the advice in eddiebx's install write up...remove your front lower control arms IF YOU CAN and clean/grease the alignment bolts while you have the front apart.
I made the mistake of rolling the dice only to find out at the alignment shop that the passenger side rear bolt is seized. Now I have to take it apart and cut the bolt off and replace the parts.
Just do a search on "seized alignment bolts" and you will see that this is a common problem. A little preventative maintanence could save you a lot of trouble in the future.
The tech felt sorry for me at the alignment shop so I was lucky enough to get a 1 year alignment package at no extra charge, so I can bring it back when it's fixed.
 

Members online

Forum statistics

Threads
278,316
Messages
3,554,113
Members
248,016
Latest member
Advally Service

Trending content

Back
Top