R4Adventure 04 SR5 v8 Rocklander Build

R4Adventure

New member
After spending some time, just lurking and gleaning a lot of great tips from this forum, I thought it was high time that I create a profile and start giving back. I now have several years experience working on Toyota’s and many more years working on a variety of different makes.

I chose rocklander that is inspired by Nate over at Dirt Lifestyle, as this 4runner is being built to overland and rock crawl.

So hello everyone! I hope you enjoy my build thread and get some useful advice and inspiration along the way.

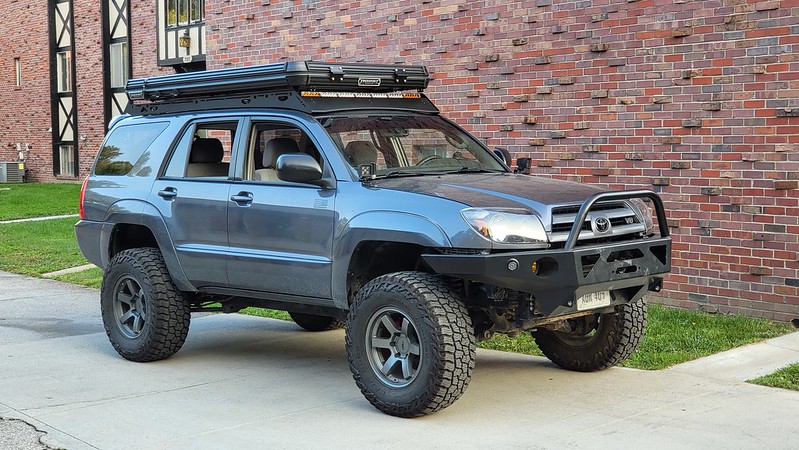
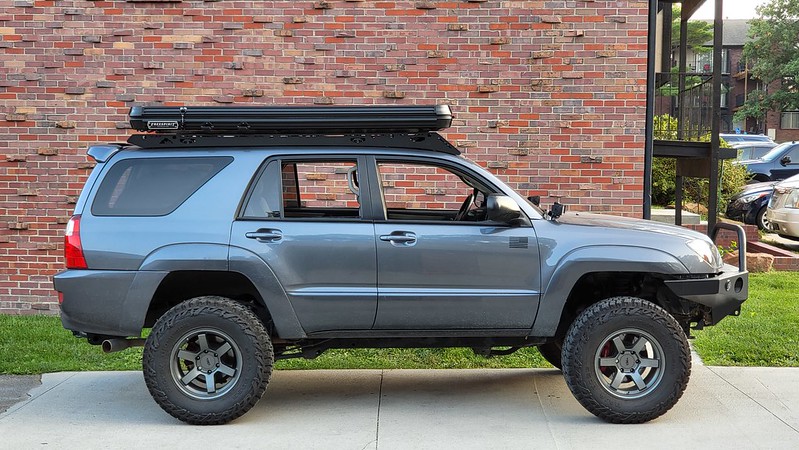
Here is my 4Runner as it stands today:
53510412312_6a5608aba0_c.jpg


List of mods - as of 03/28/2024

Exterior mods/additions:

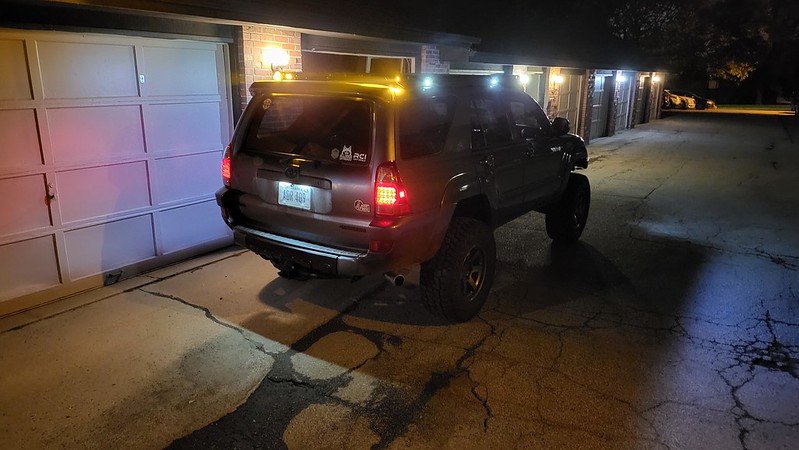
  • Sherpa Princeton roof rack
  • Extreme LED X6S Dual light bar
  • Xprite RGBW LED Rock Lights used as area lights in the roof rack
  • Blacked out grill and rear bumper trim
  • Anzo blacked out headlights
  • LCI LED tail lights
  • Body mount chop
  • Extended inner fender splash guards

Interior mods/additions:

  • SpeedoHealer v4 - Odometer and Speedometer calibration
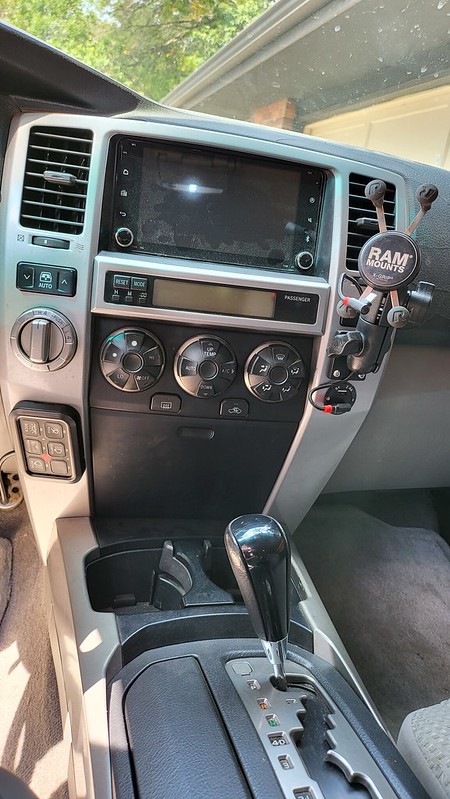
  • Auxpower 6 gang switch panel
  • Scangauge II
  • Eonon Android stereo w/backup cam and integrated dashcam
  • Desert Does It - seat risers with mole panel
  • Desert Does It extinguisher mount with Halguard extinguisher
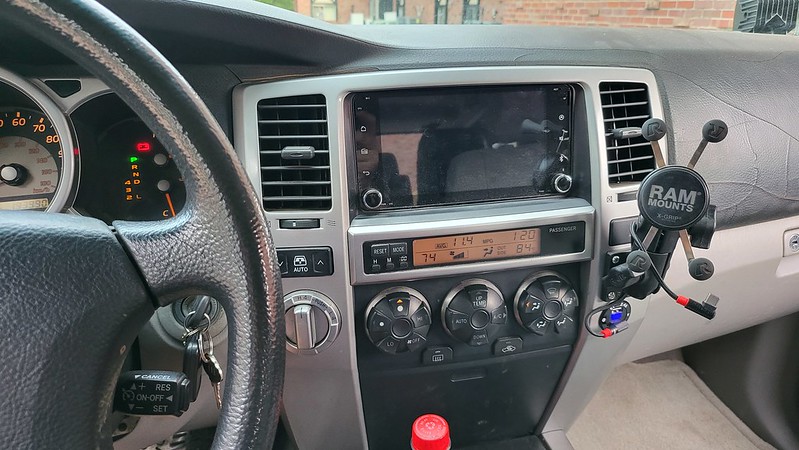
  • Ram mount mod to center console stack
    • w/12 volt usb ports and voltmeter
  • Hardwired Midland MXT75VP4 GMRS radio
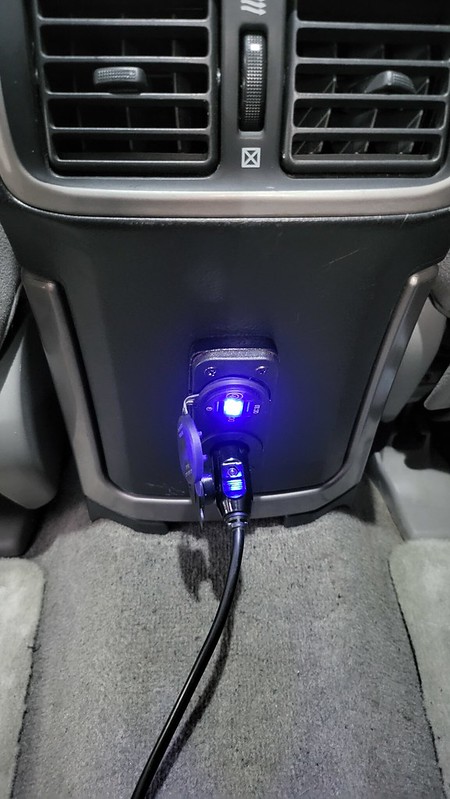
  • Dual USB and 12v outlet on back of center console
  • Factory installed DVD player delete so I have full use of the center console storage
  • Center console organizer
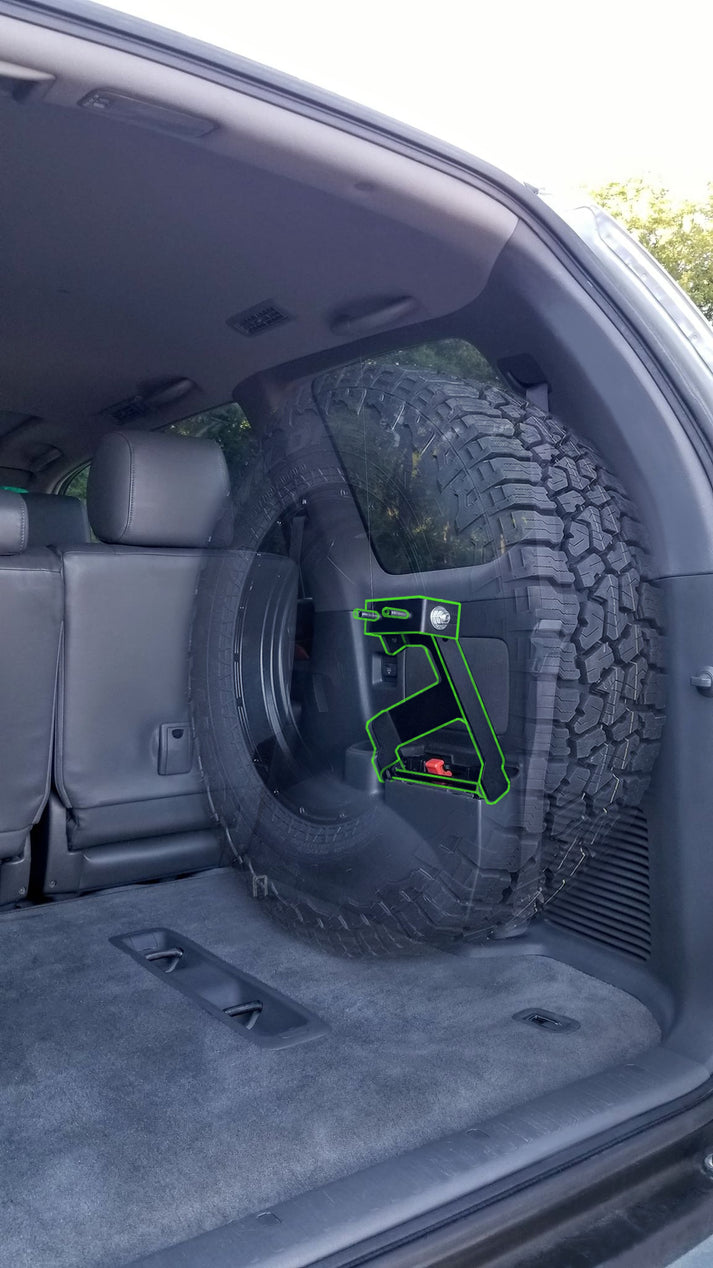
  • Cross Industries Off Road - Third Row spare tire carrier
  • Driver and Passenger side Paracord Grab handles
  • Driver and Passenger side F3Fab visor molle panels

Suspension/ wheels mods/additions:

  • Bilstein 5100 suspension lift with OME coils front (OME-886X) and rear (OME-895)
  • Front sway bar delete
  • Total Chaos upper control arms
  • Stainless steel extended brake lines, front and rear
  • Durobumps front extended bump stops
  • Timbren rear extended bump stops
  • Spidertrax 1.25” wheel spacers, front and rear
  • Mickey Thompson Baja Boss A/T 295/70R17 x5
  • Method Racing 312 17x9 wheels in bronze x5

Armor and Recovery:

  • CBI High clearance front bumper
  • Warn EVO 10s winch
  • RCI Front skid
  • RCI Transmission skid with CAT guards
  • RCI Transfer case skid (Own but not installed yet)
  • RCI Gas tank skid
  • 41.22 Hitch Slider
  • RCI DOM bolt on rock sliders (Ordered but not installed)

Engine/ drive train additions/mods:

  • Bold?? performance muffler and custom exhaust tip
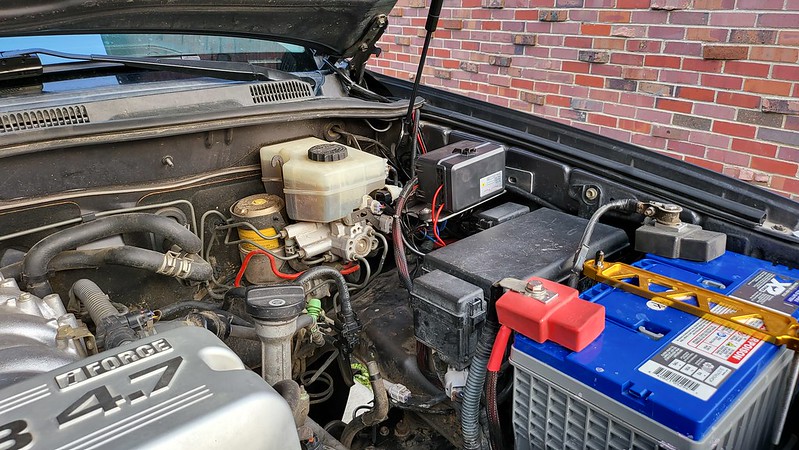
  • X2 27F AGM battery
  • Dirty Parts Toyota alternator voltage booster
  • SDHQ Aluminum battery terminals
  • Trigger 6 shooter mounting bracket modified for Auxpower relay box
    • BlueSea bus bar
  • Rear 8.2” 5th Gen 4Runner non-locking axle assembly swap
  • Front and Rear diffs rebuilt and rear geared to 4.56
  • Front and Rear diffs rebuilt and rear geared to 4.56
  • Front and rear ARB air lockers
  • ARB Twin air compressor with custom mount
  • ARB 1 gallon air tank with Mountain Off-road mounting bracket.

Overland Gear

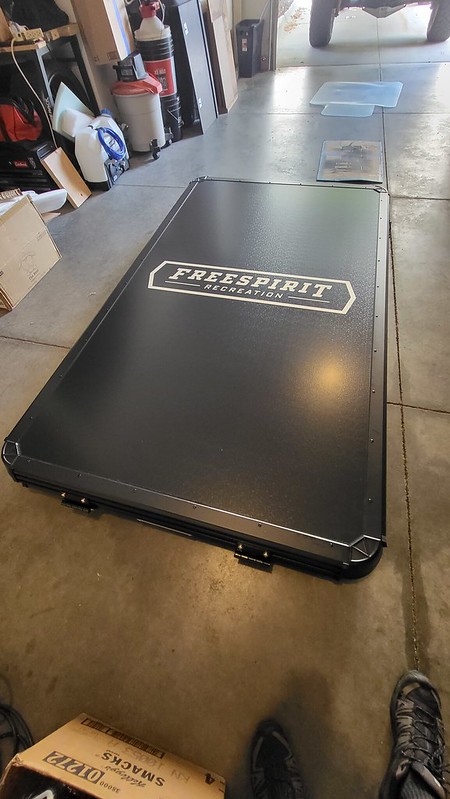
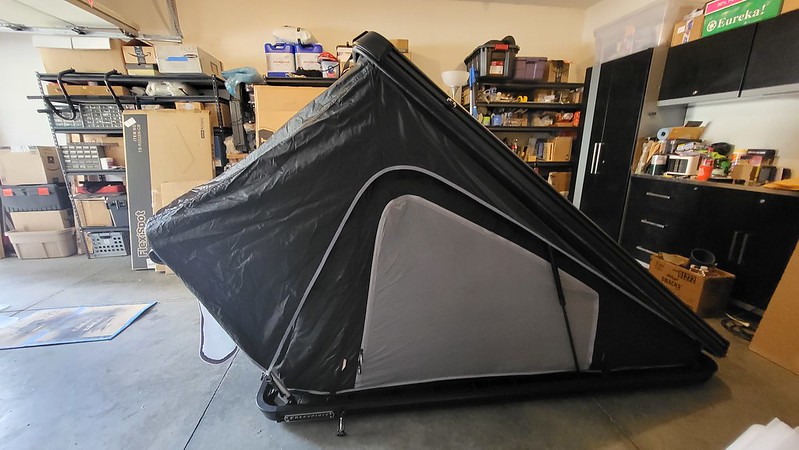
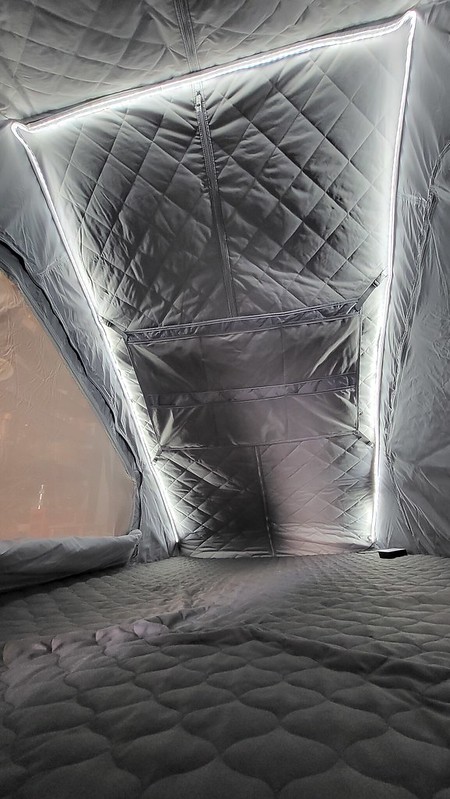
  • Freespirit Recreation Aspen 49” hardshell RTT
  • Freespirit Recreation load bars for Aspen RTT
  • Freespirit Recreation 270 awning
  • Setpower 45 Quart 12v Car Fridge/Freezer
  • Bluetti EB70s 712Wh Solar generator
  • Bluetti 200w solar panels
  • Ecoflow Wave2 Portable A/C unit
 
Last edited:
Register to hide this ad
The Journey So Far

I purchased my 04 4Runner Sr5 v8 earlier this year after returning from an awesome trip to Moab with friends from a local Toyota off road, Facebook group. At the time, I had a 2018 Tacoma TRD OR which was already on a great build path, but I built it more for overlanding, not crazy rock crawling.

How this 4Runner looked when I bought it:

53617467735_13f1510f51_c.jpg


This 4Runner already had a great foundation. A few key selling points was the v8 (of course), practically rust free frame and body (major plus living in the salt belt) and a plethora of off-road parts, which included 2.5” Bilstein lift with a 1” body lift, a CBI front bumper, full RCI skid plates, rock sliders (which I need to install) and a lot of spare parts. The previous owner had opted for the Mickey Thompson Baja Boss A/T tires (295/70r17). These tires were fairly new.

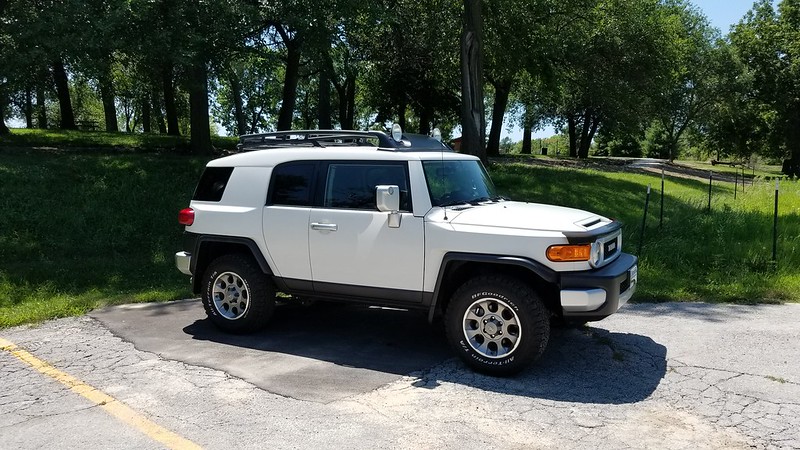
I find it ironic that I have gone full circle when I started getting into off-roading. A 4th gen 4Runner with v8 was my vehicle of choice, back in the spring of 2018. Well, I have wanted a v8 4runner for longer than that, but anyway. All I could find at the time was v6 models and GX470’s (before everyone started seeking these out). In hindsight, I should have bought the GX, but somehow ended up in a 2012 FJ Cruiser, which I miss dearly.

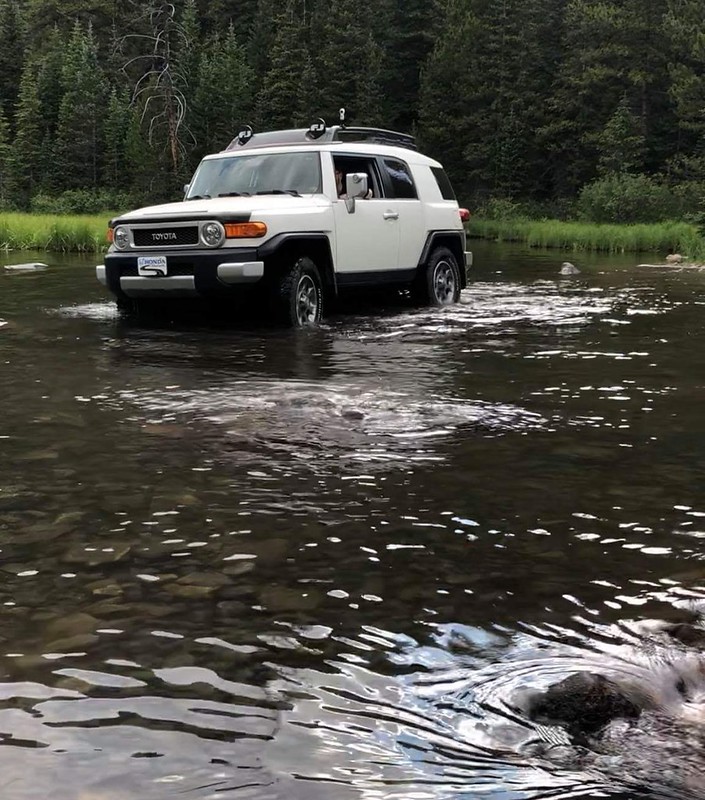
Pics of FJ Cruiser when purchased:

53617458605_f68ef7d63f_c.jpg


I only had the FJ two weeks before heading off to Colorado and hitting some trails in the Breckenridge area.

53616139557_27ffa62e69_c.jpg


53617011576_af425434bf_c.jpg


I really wanted to make the FJ work. Already had purchased an OME lift, Total Chaos UCA’s and still my favorite Method wheels, the MR312’s in bronze. I desperately needed to do the body mount chop and pinch weld mods, but surprisingly, that was all that was required to stuff 33x12.5 tires onto a stock FJ. Of course I had to add 1.5” spacers, just because.

53617221608_4b12811058_c.jpg


53617458530_40e23336e3_c.jpg


The FJ had a significant rust problem, and it was already past the recall period to have the frame replaced. Breaking bolts was a common practice and ultimately, I didn’t have the time or resources to fix the frame, though I hindsight, I regret selling my FJ.

One thing was for certain, I discovered I really enjoyed traveling to cool and scenic trails. So I splurged and traded up to a 2019 4Runner TRD ORP with KDSS.

53511840170_ec71fcb32b_c.jpg


53617224433_27d7857987_c.jpg


Fortunately, most all the parts I bought for the FJ transferred to the 4Runner. I did not install the 1.5” spacers though, as the MR312 wheel offset was perfect. The 4Runner had many of the cool features that was found on my 2012 FJ, which included a locker rear, ATRAC and the manually operated transfer case. Though the 4.0 v6 had torque, in the Colorado mountains, it seemed to run out of breath easy, but that was really only a problem on the hwy. Overall, I really liked the 5th gen platform.

Then covid hit and I was in a remote working status - which resulted in my new 4Runner just sitting. At this rate, the warranty was going to run out before I got any good use out of it. I had also recently sold my house and felt like I was using my new 4Runner more as a truck than an SUV. So I took the advice of a good friend that had been telling me for years to buy a Tacoma. It was during that time when inventory for both new and used cars was at an all time low. I was amazed to even find something close to what I was looking for and local to me. I got my money back on the 4Runner, which still had under 10k miles. The dealer sold it for 10k more than what I paid for it brand new. Crazy days we live in.

So this leads me to my 2018 Tacoma TRD OR crew cab. It felt a little cramped at first, coming from a 4Runner and being 6ft. But after getting used to it, the Tacoma is almost the perfect size. I have mostly great things to say about it, except for the normal complaints about the transmission and lack of power.

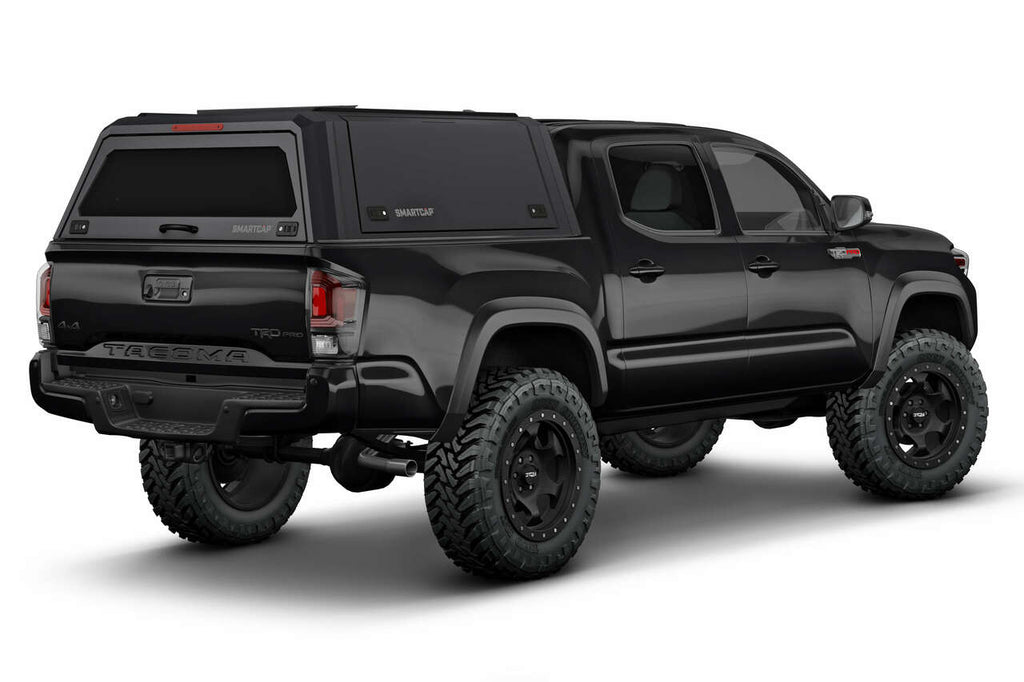
I was on a solid build path with my Taco as I had not anticipated buying another vehicle. Even had the RSI SmartCap on order to replace my Diamondback HD cover.

53617014221_920092a3ac_c.jpg


53616141917_7466193dba_c.jpg


While at Moab, I discovered a few things. One, I love crawling rocks. The Top of the world trail was an experience, to say the least. Two, going on the trail with a relatively new and clean Tacoma that still had a lot of equity was very nerve racking. I even destroyed my front, steel skid plate on the trail. It did it’s job though. Ultimately, I knew I wanted to do more trails like that, just not with such a new truck. I needed something else.

53617462310_3da240b818_c.jpg


53617462315_8e9f6b7938_c.jpg


I could probably start a build page just on my Tacoma, even though I don’t own it anymore. It’s a very capable truck that I will miss.

A friend from our Moab group owned a v8 4Runner and was getting things ready for the trip when one of his close friends offered to sell him a J80 Land Cruiser for a great price. The LC was already kitted out with oversized tires, a front bumper and winch and armor. I guess not all Land Cruisers had this, but his did have three factory lockers (front, center, rear). It was a no brainer, especially for what he bought it for.

TLDR, I bought my friends v8 4Runner and so far I have had no regrets, though it’s turned into more a project than I anticipated. Honestly, all my vehicles are projects. lol.

I had to make a tough choice. I really liked my Tacoma and had put a lot of work into it, including the high clearance front bumper and winch. I don’t have space right now to own two off road vehicles and keeping the Tacoma would mean re-purchasing a lot of parts that could be transferred to the 4Runner. So I opted to sell the Tacoma and transfer as many parts that I could. It was a lot of work, but saved me a ton of money. Sure, I could have tried selling my Tacoma with everything on it. But you will rarely get a 100% return on what you invested into your vehicle.

That was a lot but hoped you enjoyed the read. My adventure build is well on its way and I already have been making some critical choices.
 
Last edited:
First Mod - Group 27 AGM Battery

My first mod - a new battery. The old one was wearing thin and was the smaller battery size found in the v6 model. I have had pretty good experience with the X2 Northstar AGM batteries, which is what I ran in my Tacoma. After doing some digging, I found that the standard battery on the v8 equipped 4Runners, is a group 27 battery. My 4Runner even still had the larger battery tray.

53617269008_7a5a6c39f7_c.jpg


When I installed the battery, I took the opportunity to transfer the SDHQ battery terminals off the Tacoma.

53616193167_87ae88ed4f_c.jpg


The last part of this mod was installing a Dirty Parts fuse to up the output on the alternator as the AGM battery requires more than the standard 13.2 volts.

53617065391_1135e49700_z.jpg
 
Last edited:
Welcome! Nice history of Toyotas. 4th gen is lookin good!
My Dirty Parts booster mod has been working well for a few years now. I have an Arclight for the 5th gen, but their site doesn't list one for the 4th gen.

Look forward to more pics!
 
Welcome! Nice history of Toyotas. 4th gen is lookin good!
My Dirty Parts booster mod has been working well for a few years now. I have an Arclight for the 5th gen, but their site doesn't list one for the 4th gen.

Look forward to more pics!

Thanks 4RunnerAquasport!

If the 5th gen 4Runner is anything like the 3rd gen Tacoma, you need to get your ecu programmed to get the voltage boost. Never did that on my 5th gen, so I could be wrong.

I got a lot more content coming. Like 5th gen rear axle swap, re-geared front and rear diffs, arb twin custom install, front and rear lockers and sometime soon, an FJ manual tcase swap. It's going to be a good time.
 
I had not heard about programming the ecu. The Arclight booster has been working fine on my 5th gen, but it's a 2012.
Toyota may have made changes since then.
The T-case swap is one of my favorite mods I've done to the 4th gen.
 
2UZ-FE Timing Belt Replacement

I did this last year but thought it's worth posting as there might be some valuable tips for someone. Having done this job, I can also answer questions for anyone thinking about doing this. Note that this isn’t a how to, as there are plenty of detailed forum posts and YouTube videos out there already and I would be happy to share the ones I found most useful. This post is more just an overview of my experience performing this job.

When I bought my 04 SR5 4Runner, it had @ 193k miles on it. The previous owner didn’t have a record on the last time the belt was changed but had inspected it and didn’t find any excessive wear.

However, anytime I buy a used vehicle with high millage and no documentation, I like to get everything as close to current as possible. I got things into motion to replace the timing belt. While performing this job, it’s also an opportunity to inspect and replace several other important, regular maintenance parts, such as the water pump and thermostat.

To get started, I opted to go with the timing kit for the 2000-2005 2UZ from YotaShop.com

Timing Kit- Toyota V8 4.7L 2UZ Sequoia & Tundra Aisin Master Timing Belt Kit w/ Hoses (1998-2009) Kit-1151

kit-1151__51115.1707165734.jpg


This kit consisted of mostly parts from Aisin, which manufactures many of the OEM parts on the 2UZ. It included the timing belt, serpentine belt, new pulleys, cam and crankshaft seals, water pump, thermostat, pulley tensioner and upper/lower rad hoses, which are for the 1st gen Tundra and will not work on the 4Runner. So I just gifted them to a friend that has a couple Tundra’s.
 
2UZ-FE Timing Belt

If this is the first time doing this job, it’s extremely important that you spend a lot of time researching before starting and to take your time. The 2UZ- FE is a zero interface design, which means the intake and exhaust valves enter the same area as the pistons do. So if the timing belt is off, you run the risk of the valves coming in contact with the pistons. The effect is catastrophic.

Make sure you have all the minimum parts and tools at the ready and give yourself plenty of time to do this job. If additional parts aren’t required, this will probably take a full weekend.

That said, here’s a short list of highly recommended specialty tools I bought. Having the right tools makes any job easier, but I can’t say these are required.


Removing the radiator to perform this job is highly recommended for several reasons. 1. You can fit an impact gun to remove the crank pulley bolt. It’s on there very tight. 2. Less chance of damaging the radiator. 3. Good time to inspect the radiator and all it’s connections. Be sure to shield the condenser. I used a thick piece of cardboard and hung it in place.
 
2UZ-FE Timing Belt - Radiator Fun

It was time to get to work. There was a lot of dried dirt all over the engine from the last off road trip the previous owner went on. The dirt was made worse by the fact that the inner fender shields were missing and it wouldn’t have mattered after the 1” body lift. So I ordered, new extended ones already.

53624654097_218f5c06b8_z.jpg


Beyond the dirt, there was hardly any leaking oil or crud on the motor, which is a very good sign. I am optimistic that the bolts will come off easily given there is hardly any rust.

As my friend had mentioned, the belts looked to be in great shape. If I had to guess, the last timing belt job was probably done around 40k miles ago. Looks like the person or shop kept to factory parts too, not the cheaper aftermarket ones.

53625990925_05854a401b_z.jpg


I’m not out of the woods though as I noticed the radiator is in bad shape. The upper radiator hose, inlet on the radiator was missing a big chunk out of the plastic.

53625747788_0c7e9cf43e_z.jpg


The lower transmission cooler line was crushed really bad, severely limiting the flow of fluid to the transmission.

53625876694_6af2114d0a_z.jpg


And the radiator fins had a large, deep gouge in it that had already been leaking. It’s time for a new radiator.

53625876689_00d86ce9bb_z.jpg


53625550856_8805e9baa5_z.jpg


I didn’t want to skimp here nor did I want to pay top dollar for a replacement radiator, direct from Toyota. I did research going with an all aluminum CSF radiator, as I have one in my E46 M3, but I am not ready to make a significant investment just yet. After doing some digging, I came to find that Denso, which is the OE manufacturer for the Toyota radiator and it was half the price. I also read somewhere that the design is improved over the Toyota spec part. So I opted to get the Denso model (Part # 2213124) and have had no issues so far. Purchased mine through RockAuto.

After removing the radiator fan bracket and inspecting the pulley, I found that it also needed to be replaced, so I ordered the Aisin part from YotaParts. The original also had striped threads for the A/C compressor mount, so a new bracket will solve both issues.
 
Last edited:
2UZ-FE Timing Belt - Cam And Crank Seals

Got the new cam and crank seals on. Using the Lisle shaft type seal tool made this part easier while also reducing any chances of scratching the cam or crank shafts. Note, if your v8 4Runner, Tundra, GX470 or Land Cruiser has the newer VVTI equipped 2UZ (starting in 2005 on select models), replacing the cam seals requires removing the camshafts and is not worth the effort unless you have a serious oil leak in those areas. I understand that this is not a common issue though. That said, mine is an 04 and does not have VVTI, so I opted to replace all three seals.

53625747708_2385f6e9b0_z.jpg


53625747693_f1bc9d494c_z.jpg


Had to clean the area around the crankshaft seal. Water pump was starting to leak and if I had to guess, it was the original. Definitely glad I am replacing that part.

53625876534_9ca135682e_z.jpg
 
Last edited:
2UZ-FE Timing Belt - Fun Part

It’s time for the most nerve wracking part of this job and thats installing the new timing belt. Even with the tensioner not installed, it’s a challenge to do this without a third hand. I used a heavy duty, clamp to secure the belt on one pulley, while feeding it through to the crank and other pulley. It’s all about pre-setup here and keeping things aligned. I must have redid the belt install 3 times before getting the tick marks to properly line up and stay in sync.

53625876529_a1b71e93cf_z.jpg


The rest of the reassembly is pretty straightforward…. Now where did I bolt those small bolts?

Another handy tool I picked up was a spill-free funnel from Lisle (Part # 24680) that made burping the radiator a piece of cake.

53625990920_21d755ef37_z.jpg


All the homework paid off as this job went off with only a few hiccups and I should be good for at least another 90k miles. Took the 4Runner on a trip to South Dakota and everything operated as expected. Transmission even seemed to shift better with the flow to the cooler being more open.
 
Last edited:
Front Wheel Bearings And Wheel/Tire Compare

Since buying this 4Runner, I have been hearing some grinding noises that sounded like bad bearings (ask me how I know what this sounds like). I figured with nearly 200k on the clock, it was probably a good time to replace the wheel bearings, starting with the fronts.

I ordered a set of preassembled hubs using NSK bearings on YotaBearingsAndHubs.com. Price was reasonable and I received my order in a short time.

Time to get to work. You can see the small garage I have been working out of. It’s all I got and I am making the most of it until I can buy a house or land. Housing market is still crazy though.

53625751131_ca3ec716c0_z.jpg


Front hubs are an easy job. Hardest part is breaking the axle nut loose, but a good impact gun makes short work of that.

53624852437_459b11a52a_z.jpg


Old bearings didn’t look to bad but you could feel the slop in them compared to the new bearings. These may not be what’s causing the metal dragging noises, but still worth replacing.

Here’s the new hubs.

53625751001_edfe82b9b7_z.jpg


53626076639_d58c7a13b5_z.jpg
 
Last edited:
Front Wheel Bearings And Wheel/Tire Compare

While I had the wheels off, I thought I would check tire/wheel combo differences and using wheel spacers or not.

At the time, my Tacoma still had the Method MR312 17x9 wheels wrapped in Nitto Ridge Grappler 33x12.5x17. The 4Runner was still running the Level 8 MK6 17x9 wheels wrapped in the Mickey Thompson Baja Boss 295/70R17 tires.

I really liked the Level 8 wheels and they matched the 4Runner very well. However, I didn’t have another set of wheels to put on the Tacoma as I wasn’t going to sell the Method wheels either.

Comparing the tires, I have had a great experience with the Ridge Grapplers. They worked great in all seasons, though they did slip a little in the snow. On the rocks in Moab, UT, they were super sticky with loads of grip. The MT Baja Boss tires on the other hand are a little quieter, have the best winter traction rating out there for an off road tire and they are reported to be almost a 34” tire, well 33.7” but we can round up, right?

Setting the two tires side by side, you can tell that the Baja Boss’s are noticeably taller than the Ridge Grapplers.

53626190765_2e1cb12069_z.jpg


53626076734_bc4e18ffe6_z.jpg


Here you can see the drivers side with the 1” spacer and the passenger side without them. The Method 312 17x9’s are naturally going to stick out a little.

53625750996_e34ba1dfc9_z.jpg


53625946998_0968c1e7f4_z.jpg


Still debating as the spacers do give the 4Runner a more aggressive stance. TDLR on my chosen wheel/tire combo, I kept the MR 312’s and swapped over to the newer MT Baja Boss tires. Win/Win in my book.

53625959398_fbefbdbde6_z.jpg
 
Last edited:
RAM Mount and Power Port

Now for some fun mods. I need a place to mount my phone/tablet while adventuring. The 4th gen doesn’t have a lot of great options for mounting rails or such like the 3rd gen Tacoma has.

In the Tacoma, I had the Expedition Essentials accessory mount and loved it. As you can see in the pick, it was one of my first mods on the Taco.

53626153969_2a06b4d080_z.jpg


The 4th gen 4Runner requires a little more creativity and fortunately there’s plenty of great examples out there to inspire me.

My main concern is that the mounting location is just plastic, so it needs more reinforcement to handle a larger tablet, especially while traversing rocky trails.

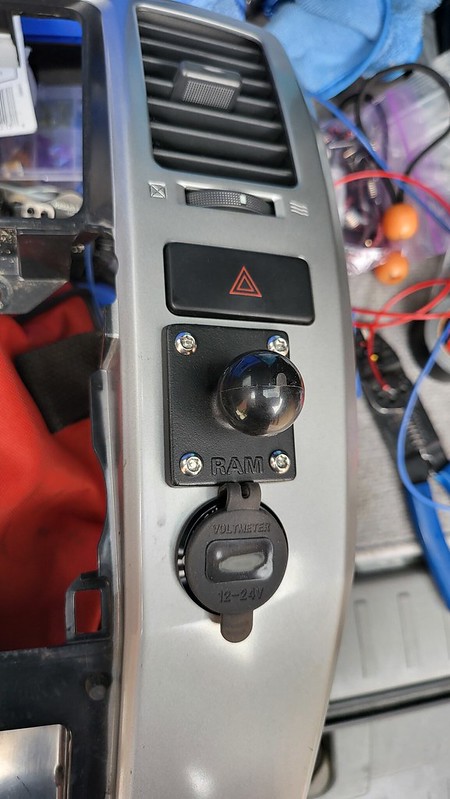
Using a piece of metal from the dvd player mount that was in the center console (dvd player was gone when I purchase the 4Runner), I cut out a small piece of metal to act as the backing support.

53625827881_6c0101b3c7_z.jpg


Then using a hand file, I made space to fit a power port, close to the mounting bracket.

53625827871_fe217ba18c_c.jpg


This looks pretty good!

53625827776_e9ff7cabaf_c.jpg


All wired up and ready to go. Now I have a voltmeter on the dash as well.

53624928882_a347990061_c.jpg


53626153789_8ee6c6b202_c.jpg
 
Last edited:
Interior Spare Tire Mount

I am not normally a fan of 3rd row equipped SUV’s that were not made for 3rd row seating. Leg room is non-existent and all storage is lost.

That said, this is a rare case where I am able to benefit from this option as my 4runner originally came equipped with 3rd row seating. The seats were gone by the time I purchased it, which made things easier.

Though I am still researching high clearance rear bumpers, it's not a high priority right now, but I still needed a solution to mount a matching spare wheel/tire.

Fortunately, I already had five of the MR312 wheels when I bought them for my FJ Cruiser. I just needed a way to mount it securely.

Enter Cross Industries Off Road, who makes a kit that utilizes the latches on the rear wheel well used for securing a 3rd row seat. This kit is made for the GX470 and 4th Gen 4Runner.

3rd Row Spare Tire Carrier - GX470 & 4th Gen. T4R
– Cross Industries Off-road


288609448_286227407030785_1796110255430853219_n.jpg


This is exactly what I was looking for. It’s still recommended to use a tie down strap to help secure the tire.

This setup works great and I can mount it on either side of the interior. Honestly, I like this setup for a multitude of reasons.
  • 1. Tire is not exposed to the elements.
  • 2. Accessibility
  • 3. Less weight hanging out on the back of the vehicle.
  • 4. Overall length of the vehicle is not extended to to spare tire carrier, which is especially important to me right now.

Only significant negative is that it takes up a lot of interior storage space.

53626906367_8ed4cc44a3_c.jpg


53628242810_f5e6b4f850_c.jpg


53628128514_63c4290acf_c.jpg
 
Last edited:
Sherpa Roof Rack, Lights and Switches

This is a foundational part and needed if I want to run the roof top tent that I bought for my outgoing Tacoma build.

53628241199_8969deaf3e_c.jpg


I looked at both the Sherpa and the Prinsu racks. I didn’t consider many of the others, like Front Runner, as I needed a lower profile rack as clearance is a concern right now. My 4Runner is currently my DD and the parking garage to my job has a low clearance and with the current lift, it’s a tight fit. This also applies to my apartment garage.

I ended up going with Sherpa. Nothing against Prinsu and though the Sherpa was more expensive, I liked the design better and the rack appears to be more solid.

That said, installation was straight forward and I was able to do this solo.

When I purchased the Princeton Sherpa rack, I also bought the ExtremeLED dual color light-bar, and I carried over the Heretic ditch lights I had on my Tacoma build and am now using them as chase lights, though I probably need something to dim them.

53627020567_90b3aa4eea_c.jpg


I also installed some amazon special rock lights that are mounted on the rack for area lights.

This did require me transferring over the Auxpower 6 gang switch kit that I had on my Tacoma. Most people choose the 8 gang switch, which the aftermarket has created a lot of bracket designs to accommodate most of these options. Long term, I plan to get a SwitchPros setup, but when I purchased the 6 gang switch, I was on a tight budget. Going the 6 gang route meant I had to get creative with the bracket.

I found a bracket for another switch that dimensionally was close to the 6 gang switch box I bought. Here's a link if your interested.

TRIGGER Toyota Tacoma Underhood Controller Bracket | Trigger Wireless Accessory Controllers

This is the bracket that I started with:
2019_Bracket_Tacoma_02.jpg


I did needed to elongate one of the front switch holes and the rear holes were almost perfect to mount a BlueSea's bus bar. I think it turned out pretty good. I also like the fact that this uses standard relays, which are easy to replace if one goes out.

53627020562_23f8356d0d_c.jpg


53628241059_74516f7c94_c.jpg


Mounting the interior switch was easy. The 4Runner center stack has plenty of open space to mount it.

53627913071_18d06ddd71_c.jpg


Overall, I am very impressed with the build of the rack. I plan on using it to run either my roof top tent or other gear depending on what adventure I am going on.

The rack light setup is pretty bright too!

53627912986_cfcfd110c1_c.jpg


53628241044_7b08b8c824_c.jpg
 
Solo Mounting My Roof Top Tent

Now that I have the rack installed, I can mount the Free Spirit Recreation Aspen v1 roof top tent that I bought while I still had my Tacoma. At the time, I had pre-ordered an RSI SmartCap and had already been waiting about 6 months.

rsi-smartcap-tacoma-evo-a-adventure_1024x1024.jpg


I was hoping to have all this before Moab, but it didn’t work out and after returning, I bought the 4Runner with plans to sell the Tacoma.

But I still had my tent and of course wanted to use it. Here’s some pics of it after I got it. Man, I miss my last garage and just seeing a Tacoma with a SmartCap, I miss my truck too.

53628268040_6ebba08bfb_c.jpg


53627825006_eca5c3024f_c.jpg


53628268050_0df0b71df7_c.jpg


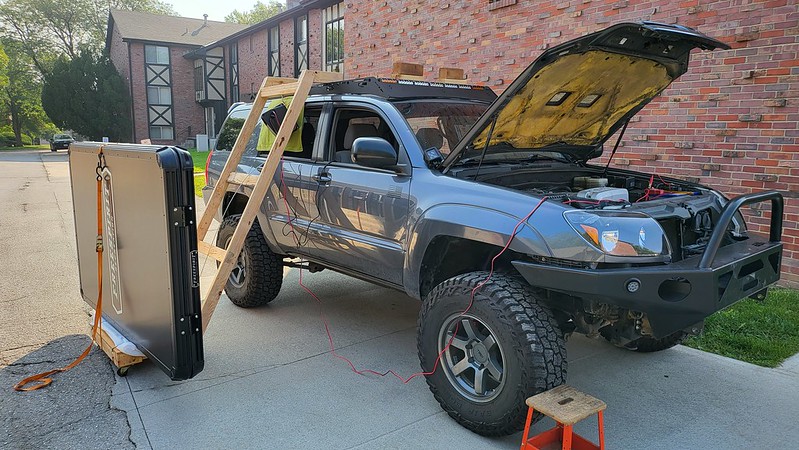
Though this is a lighter tent compared to most roof top tents on the market, it still weights about 135lbs and not something one person can just pickup and put on the top of a lifted vehicle. Sure, I can ask friends to help, but I am a very independent person and work at being creative, if I can, so that I am not any more reliant on others then I need to be.

Also, my 4Runner wont fit in my garage with the tent installed and the I am not comfortable leaving my 4runner sitting out in the parking lot here any longer then needed. We have had lots of break-ins and vehicles stolen.

So I scoured the internet because I figured I wasn’t the only person with this problem and came up with a novel solution, though still not 100% fool proof.

53627052337_1658eaa5dd_c.jpg


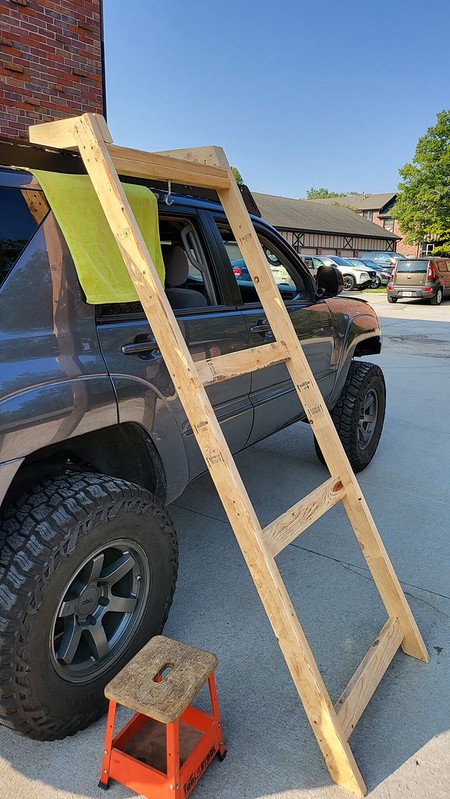
Using both a dolly/tent holder and a ladder like frame equipped with a small winch, I am able to pull the RTT up into a position that I can then push and pull the tent to a good resting spot.

53627944536_cc40214699_c.jpg


53628388295_a192f4cc0c_c.jpg


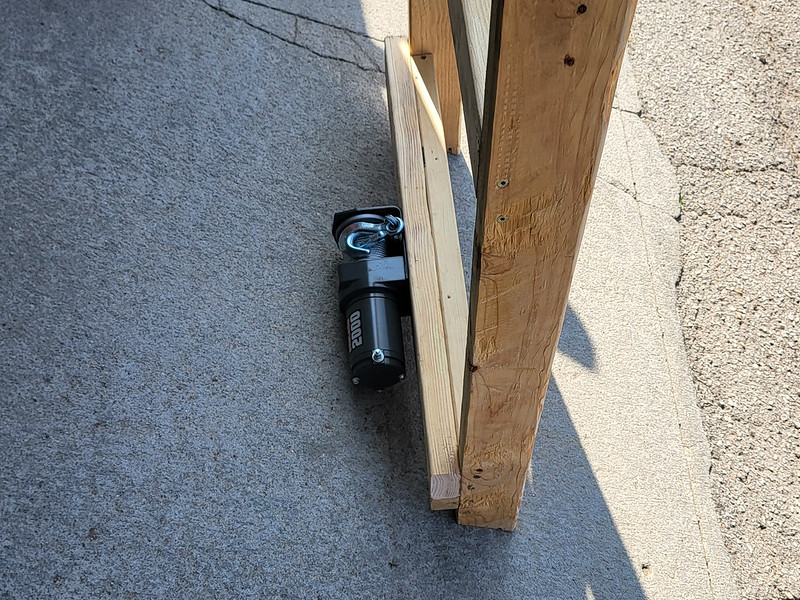
I originally had the winch mounted at the top, but the tent dolly was blocked by it. So I returned it and bought a more compact winch that is mounted at the base of the ladder.

53627052232_4a15b50f76_c.jpg


And then used a winch pulley at the top.

53627052217_d31ee97f98_c.jpg


To secure the ladder to the rack so it doesn’t shift or pull away from the car, I used some long hook bolts to secure it. Not sure how much a difference these make but I don’t trust pulling and pushing the tent dolly around without anything holding the ladder in place.

53628388255_5774436fc0_c.jpg


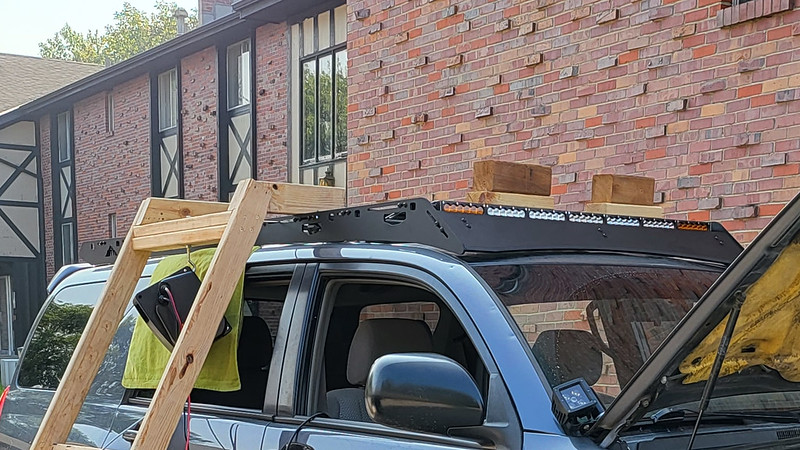
Then using blocks of 2x4’s, I support the tent while pulling the tent dolly out from under it and then remove the ladder.

I don’t have a picture doing this, but you can see in this pick that blocks positioned on the rack.

53628175338_949f65201b_c.jpg


At this point, I just need to start removing the 2x4 blocks to start lowering the tent into the roof rack. If all goes well, I have been able to install/remove my RTT in a little over an hour.

53627944381_f55d88820e_c.jpg


53628143808_abb0e8a3df_c.jpg


I have used this setup a few times now and need to do a few tweaks to the setup, but overall I am very happy with how it all works. Not as nice as a pulley system, but I don’t have a garage tall enough to do this.

That said, if anyone is interested, I am happy to share the parts I used and can even take measurements of the parts.
 
Routing Power To Solar Generator and Fridge

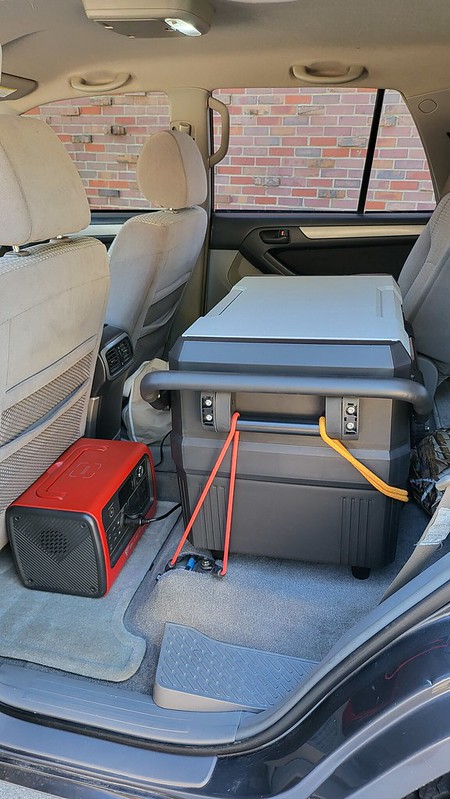
In prep for an upcoming trip to South Dakota, I needed a way to keep my solar generator charged as it was keeping my fridge running while the 4Runner was turned off.

This was not as straight forward as I anticipated. I should have guessed that behind the rear console trim was a big air tube that feeds the rear vents. This is very similar to the 5th gen I had.

53627122092_0603564d59_c.jpg


This mod will reduce the flow a little, but I don’t have rear passengers much, at least not currently. It’s hard to see in this pic, but you also need a thick backing plate for two reasons. 1. The usb and power outlets are too deep and will come in contact with the back of the console storage area. 2. The contour on the rear console trim is not flat.

I choose to use a scrap piece of wood, trimming it into shape and drilling the two, requisite holes for the power ports.

53627122087_3babe87df8_c.jpg


All in all, it came out well and does what I need it to do.

Now my Bluetti EB55 and SetPower RV45 dual zone fridge have power and are a great setup for me. I just need to build a better platform to secure them while off roading.

53628213833_9283942007_c.jpg
 
Though I am still researching high clearance rear bumpers, it's not a high priority right now, but I still needed a solution to mount a matching spare wheel/tire.

53628128514_63c4290acf_c.jpg

I love this solution. I recently mangled the hell out of my spare tire swingout so I can't use it. No third row seating in mine though so I'll have to see if I can figure out something like this.

Awesome build!
 
I love this solution. I recently mangled the hell out of my spare tire swingout so I can't use it. No third row seating in mine though so I'll have to see if I can figure out something like this.

Awesome build!

Thanks FoundedSine14.

It maybe possible to retrofit the bracket for the third row seating, but it's probably not worth the effort. That said, here's a few links I found on when I was looking for an mount. They show different ways to build out an interior carrier or mount to secure the full size spare in the interior. Perhaps you will find something that works for you.

Interior spare tire mounting | IH8MUD Forum

I really liked this one. Though it was made for a Land Cruiser, something similar could be made for a 4Runner. I'd probably start with a solid wood floor, especially if you were considering building out a drawer setup:

An interior tire carrier | IH8MUD Forum

Really, only your imagination and your pocket book are your only limits.
 

Members online

Forum statistics

Threads
278,315
Messages
3,554,102
Members
248,016
Latest member
Advally Service

Trending content

Back
Top