Mod madness!! My archive of 2nd gen. mods

v_man

New member
What's up guys, I wanted to share my experience of modifying my 1990 4runner. I also wanted to create a repository of all my 2nd gen. mods. I should start by clarifying that I'm NOT talking about big ticket modifications like lift kits, lockers, off road tires, or re-gearing.

My experience of modifying my truck has generally been based on my needs when I'm out rock crawling, 'overlanding' , or just camping with my family.

I will organize my mods into 5 categories:
1) power
2) lighting
3) communication
4) convenience
5) miscellaneous

Lastly, when I'm considering or researching a mod, I usually think of three things: How useful is it/purpose , how difficult/time consuming is it to install, and how expensive is it. I will attempt to address each of those three concerns with each mod I describe....alright enough talk , on to some mods...
 
Last edited:
Register to hide this ad
Power mods

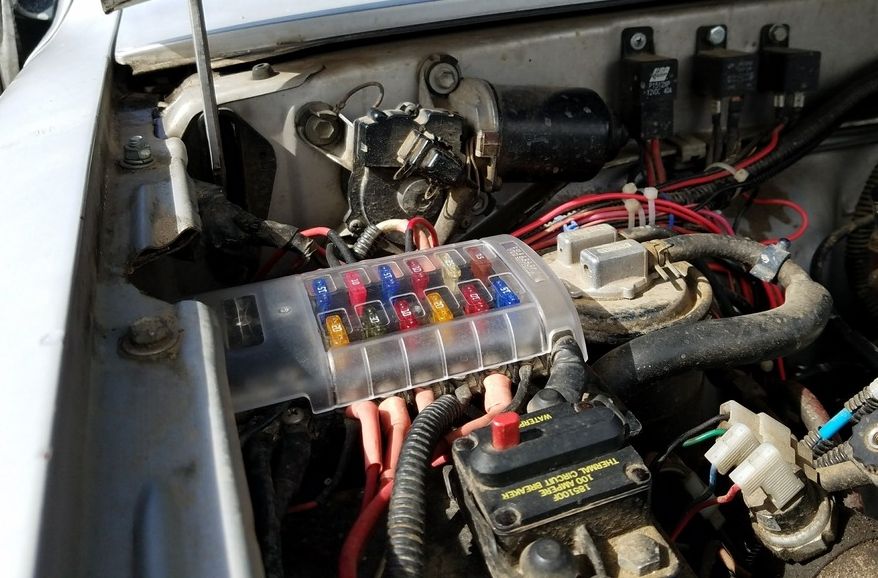
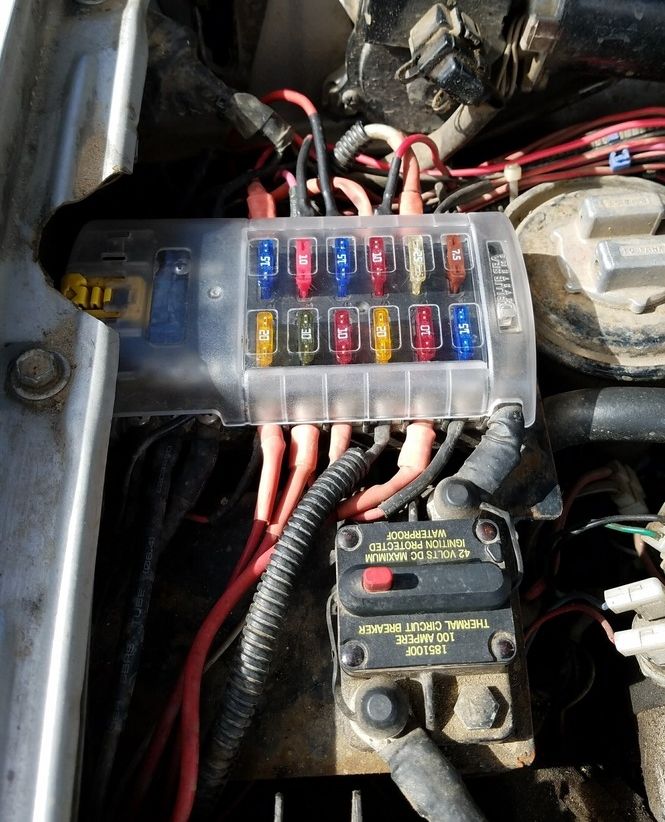
Mod: Blue Sea Auxiliary 12 Slot fuse box install
Purpose: Organize and safely power extra 12v circuits
Cost: $80 - $100 (Blue Sea fuse box $55 , Bussman 100 amp breaker $20, plus wiring, terminals, heat shrink etc, )
Mod Difficulty and time : 3 out of 5 (easier if you don't make your own tray/mount) , install time: 4-6 hours including creating the fuse box tray.
Description: I located my auxiliary fuse box behind the stock fuse box. I then ran 4 gauge wiring from the battery through a 100amp breaker and onto the auxiliary fuse box. This fuse box is always powered which allows me to run various circuits without the having the vehicle on. A simple trip of the breaker allows me to disconnect the box.

20170221_132450_zps8m1van27.jpg~original

20170221_132512_zpsdxtuvahx.jpg~original


links to parts:http://tiny.cc/blue_sea , http://tiny.cc/breaker


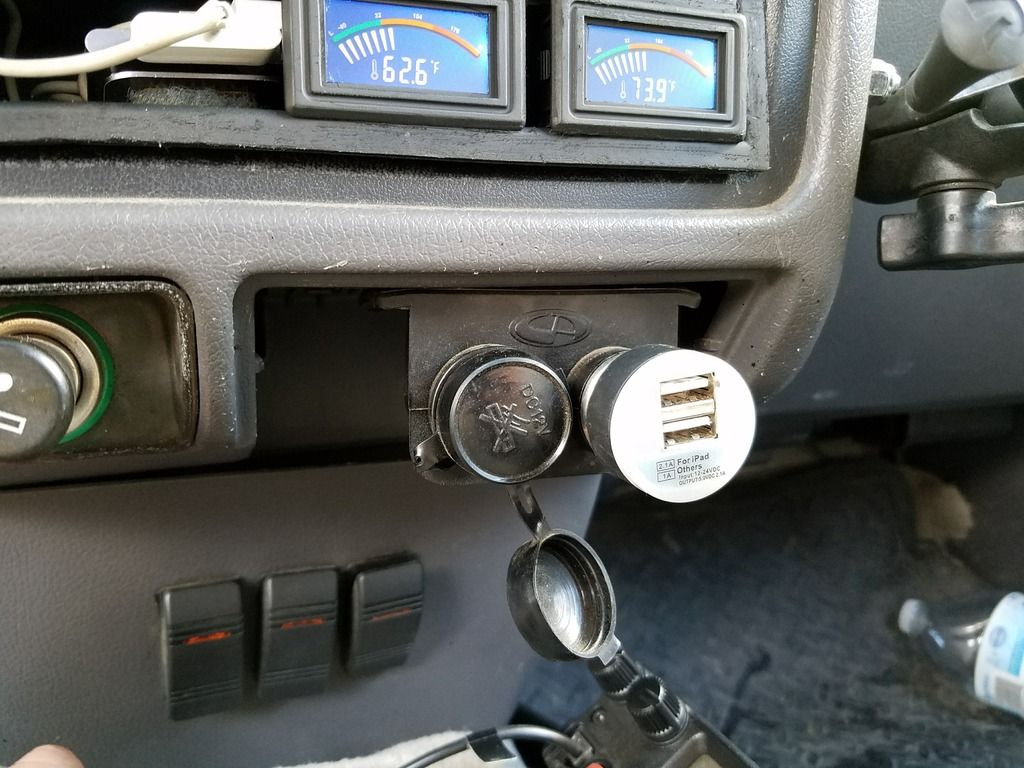
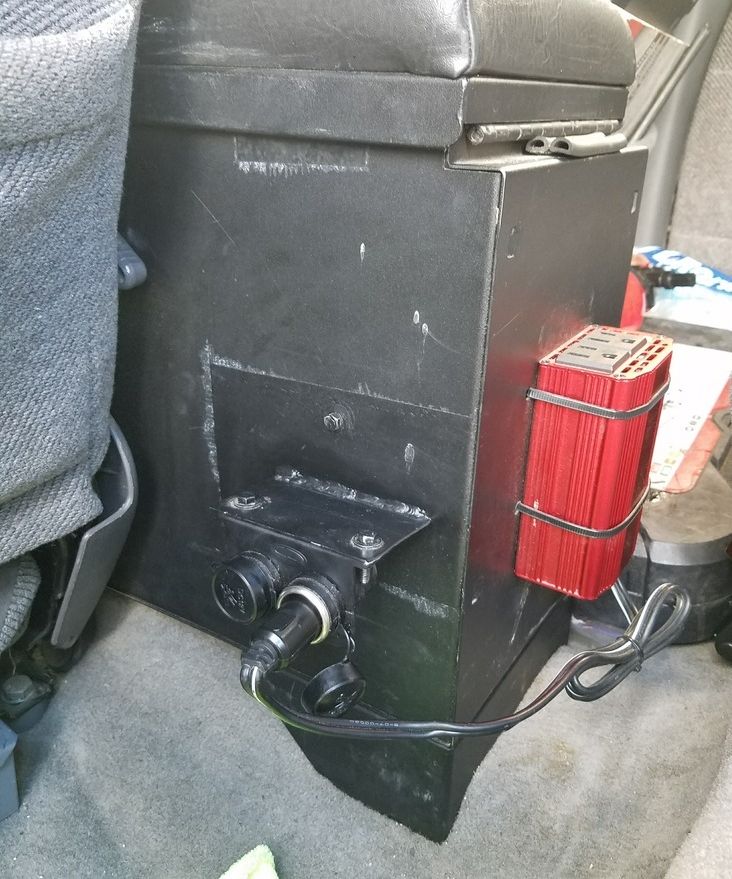
Mod: Additional 12v power stations throughout vehicle
Purpose: Power/Charge anything that is 12v
Cost: $40 (2x power stations, Bestek 300w inverter)
Mod Difficulty and time : 1 out of 5 , install time: 2-3 hours, mostly spent running wires through the vehicle to auxiliary fuse box
Description: I located one 12v power station where the ash tray used to be. The second 12v station for the back sear was mounted on my Husky Center console. I also attached a 300W inverter next to the rear power station.

20170221_132622_zpskruqpfjk.jpg~original

20170221_132830_zpsb5l56axu.jpg~original


links to parts: http://tiny.cc/8e4djy, http://tiny.cc/1f4djy


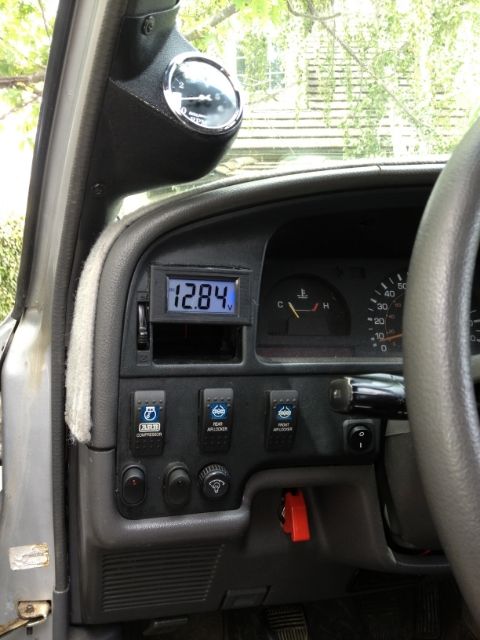
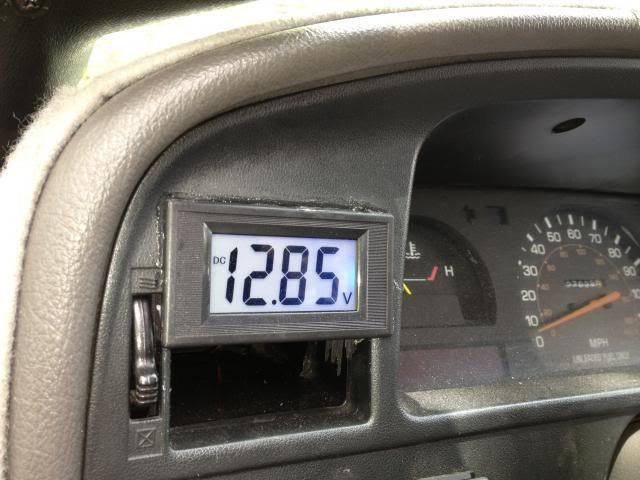
Mod: 12v monitoring gauge install
Purpose: Keeps tabs on your truck's charging system and battery health
Cost: $10-15 (8$ gauge plus wiring, glue)
Mod Difficulty and time : 2 out of 5 , install time: 2-3 hours, mostly spent fitting the 12v gauge in the driver side air vent
Description: My 90' 4runner is a base model so no 12v gauge in the instrument cluster. I installed this gauge to monitor the truck's charging system, keep tabs on the health of my battery, and monitor the draw that different circuits have on my vehicle's electrical system. The gauge was almost a perfect fit for the air vent to the left of the steering wheel. So I sacrificed that vent and used a Dremel and some glue to mount the gauge in the vent. It was then just a matter of running power wires through a switch and then onto the battery.

IMG_0964_zpsb01b7571.jpg~original

IMG_0963_zps2407f591.jpg~original


link to parts: http://tiny.cc/12v_gauge


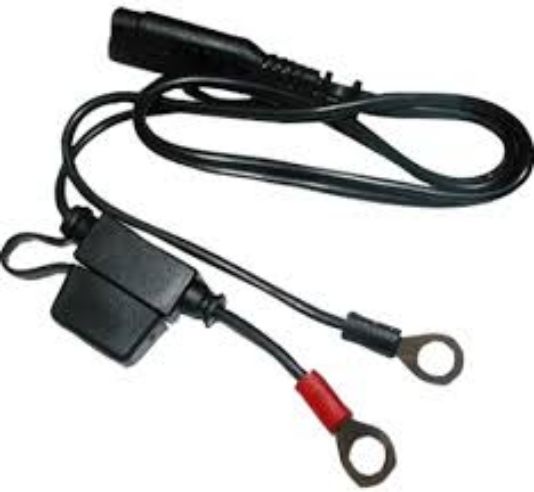
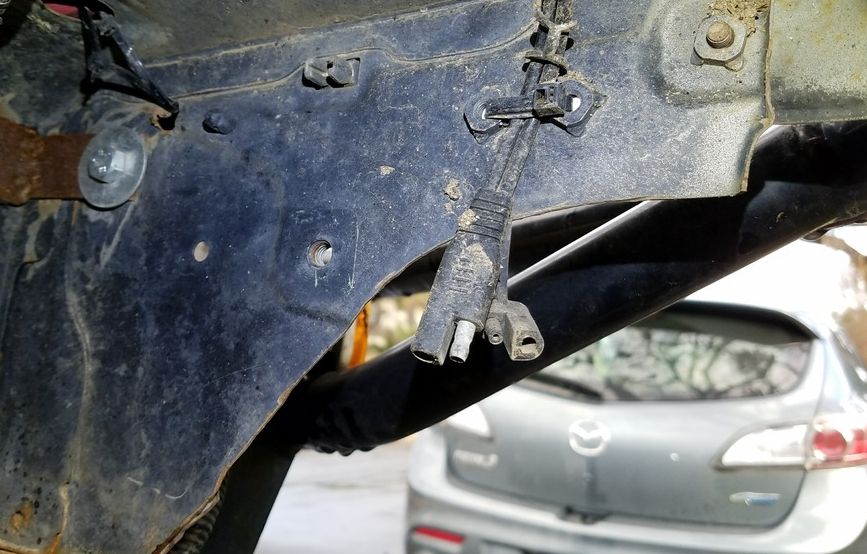
Mod: Battery tender pigtail install
Purpose: Installing a battery tender pigtail makes it easier to hook up your battery tender
Cost: $6
Mod Difficulty and time : 1 out of 5 , install time: 30 minutes
Description: I don't daily drive my truck so sometimes I like to top off my battery with a battery tender. Instead of popping the hood, alligator clipping the leads, etc., I installed a pigtail that is permanently attached to the positive/negative posts of the battery. One end of the pigtail has positive/negative ring terminals that you mount to your battery. The other side of the pigtail is just a male/female plug that you easily plug into your battery tender.

imgres_zpspnjokllq.jpg~original

20170221_155245_zpsqpphbjq1.jpg~original


link to parts: http://tiny.cc/pigtail
 
Last edited:
Lighting Mods

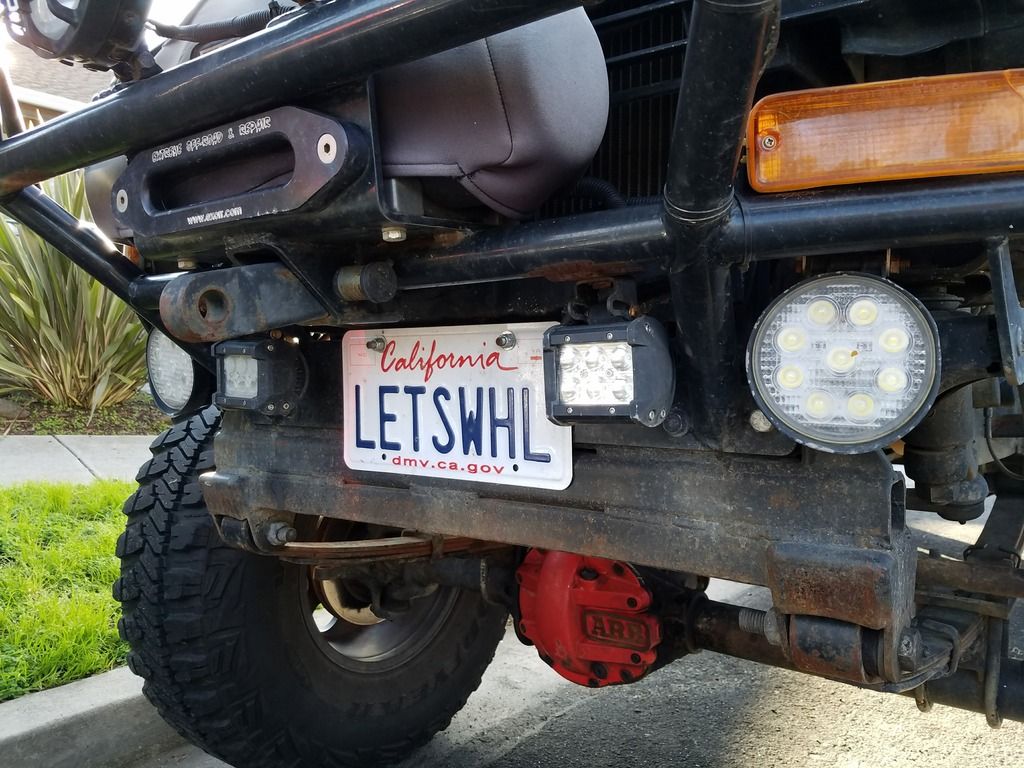
Mod: Front LED lighting
Purpose: More light up front, especially helpful when wheelin'
Cost: $60 , (4) LED lights are $27 plus misc. wiring, foot switch, relays, heat shrink , terminals , zip ties etc.
Mod Difficulty and time : 3 out of 5 , install time: 4 hours for 4 lights, including the installation of a foot switch for turning lights on/off
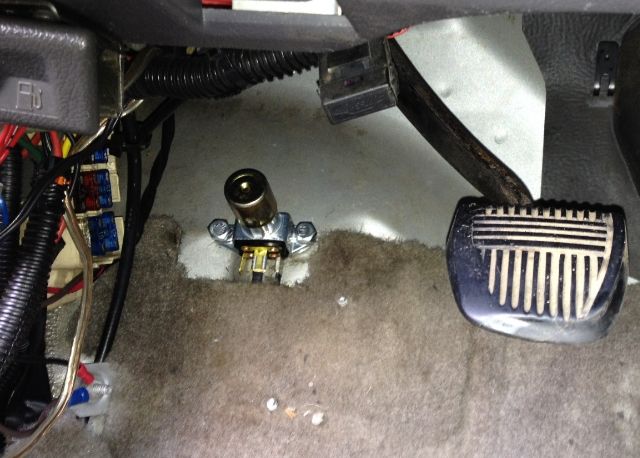
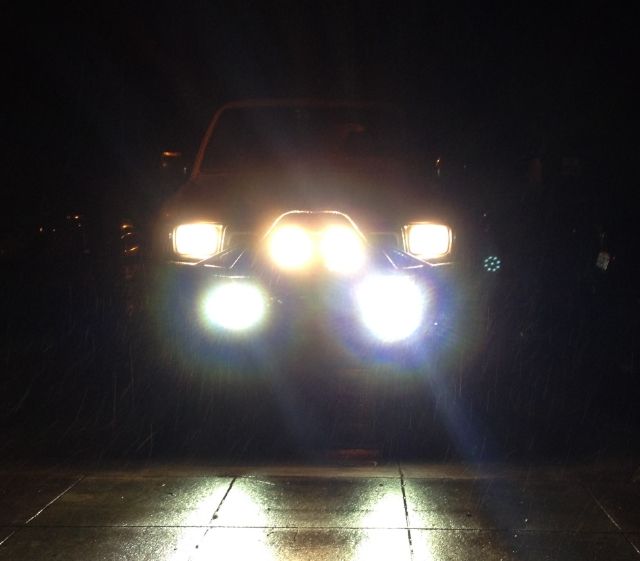
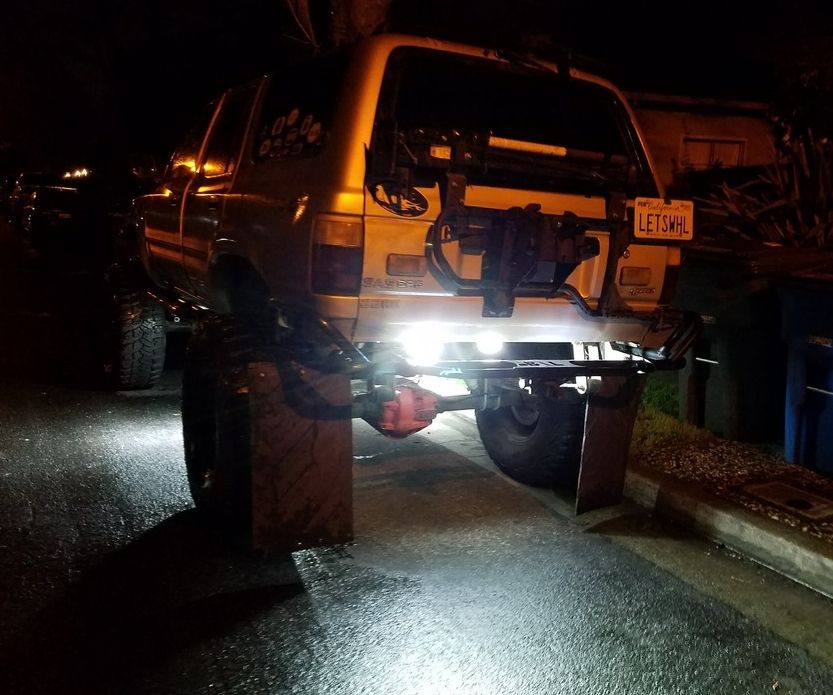
Description: I installed (4) LED lights up front on my tube bumper. These lights are very bright and not exactly "legal" for street use. While I rarely use them on pavement, I do sometimes have them turned on when traveling windy mountain roads. It was important to me to be able to quickly shut these lights off if I saw a vehicle approaching, so I wired the lights into a foot switch, also known as a stomp switch, on the floor near the clutch pedal. When I see a car approaching, I quickly tap my lights off with my foot. Install was straight forward, the lights are fused and relayed and still very low draw because they are LED.

20170223_162648_zpsoxdvseec.jpg~original

IMG_1707_zpsf55c9289.jpg~original

IMG_1713_zps1891c4e5.jpg~original


link to parts: http://tiny.cc/LED_lights


Mod: Rear and side LED rock lights
Purpose: More light = better
Cost: $50 , (4) LED lights are $27 plus misc. wiring , relays, heat shrink , terminals , zip ties etc.
Mod Difficulty and time : 2 out of 5 , install time: 4 hours for 4 lights, mostly spent figuring out where to mount your lights and running wires through the vehicle to auxiliary fuse box
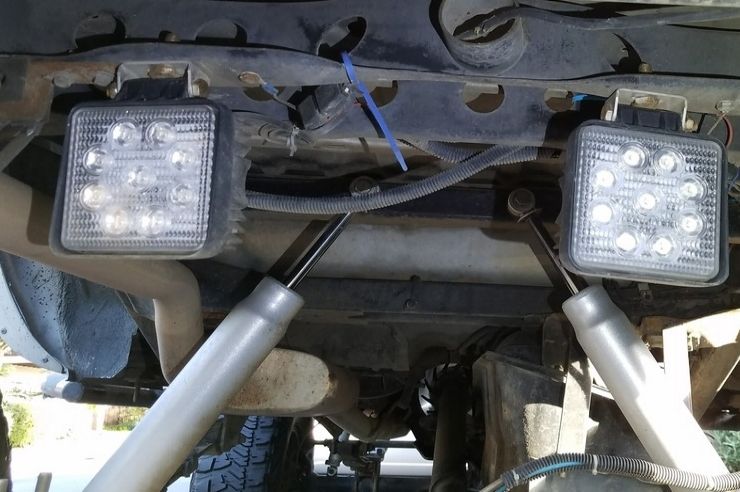
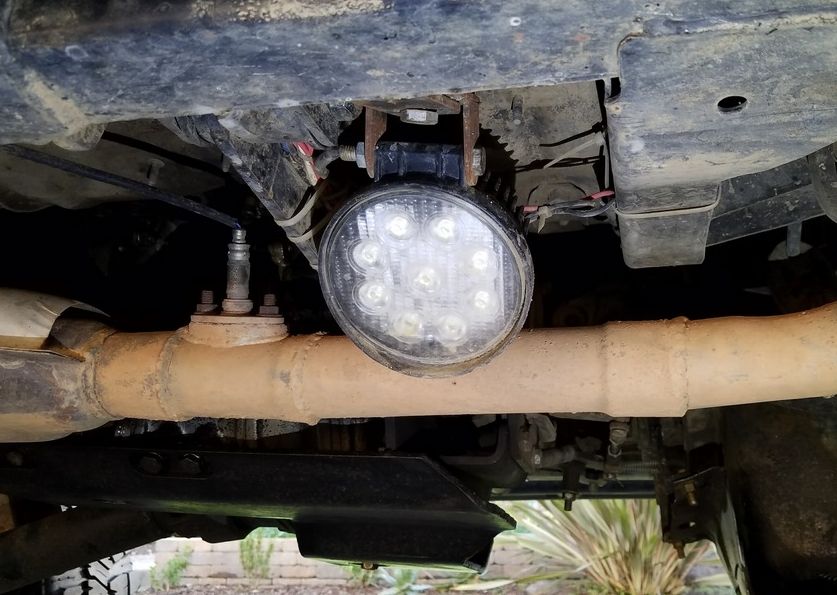
Description: LED lights are dirt cheap these days. They are low draw and very bright. They are essential when night wheelin' or just around the campsite when you need some extra light. This write up is for my two rear facing lights and two side facing lights. The rear lights are merely mounted to a frame crossmember behind the axle. For the side facing lights, I welded a tab to the frame so I could position the lights just where I wanted them. The lights are fused, relayed, and switches are located on the dash near the steering wheel.

20170222_164028_zpshnmgixr3.jpg~original

20170222_164012_zpsdpau0fwi.jpg~original

20170222_190818_zpstnw1jq8r.jpg~original


link to parts: http://tiny.cc/LED_lights


Mod: Interior LED lighting strips
Purpose: Provide tons of light inside your vehicle
Cost: $25 dollars for lights, light controller, and wiring
Mod Difficulty and time : 2 out of 5 , install time: 3 hours
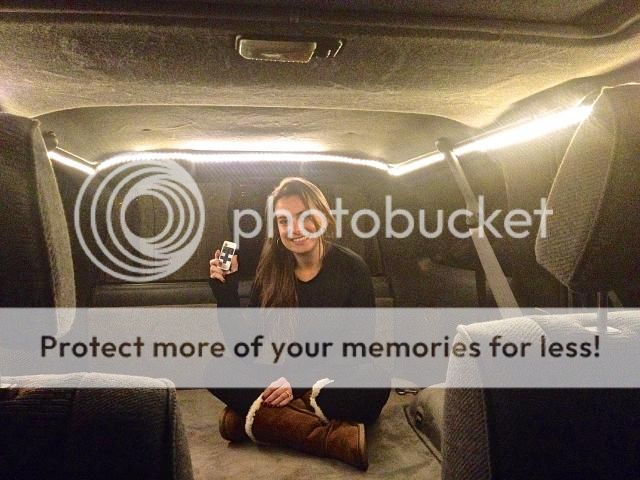
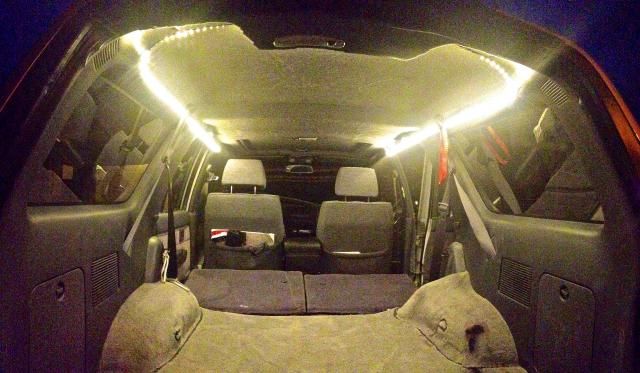
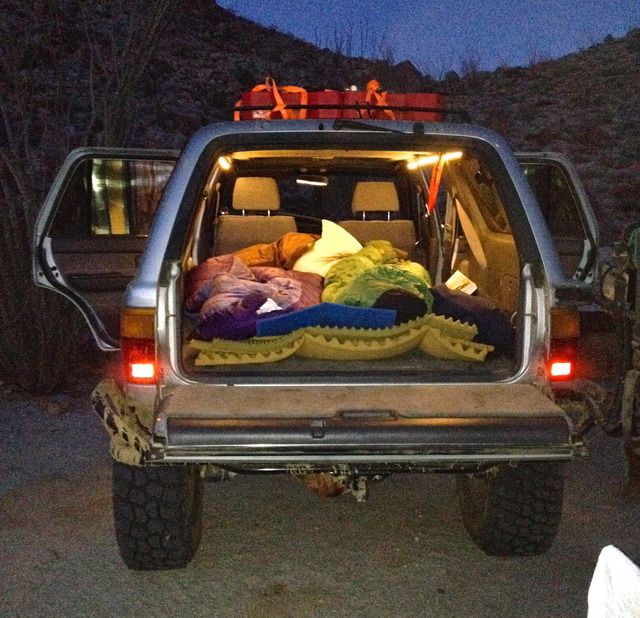
Description: I installed a 15 foot strip of thin LED lights around the inside of the truck. The LED strip lights are taped to the plastic molding of the roof with double sided 3M tape. Finally, the LED lights are controlled by a remote control which can dim them down very low.

IMG_3397_zpsf78e17bc.jpg~original

IMG_3402_zps9fcc782d.jpg~original

IMG_3547_zpsiwebr7pu.jpg~original


link to parts: http://tiny.cc/LED_strip , http://tiny.cc/controlle_r
 
Last edited:
Communication / Mapping mods

Mod: HAM radio install
Purpose: Communicate on the trail with HAM radio
Cost: $200
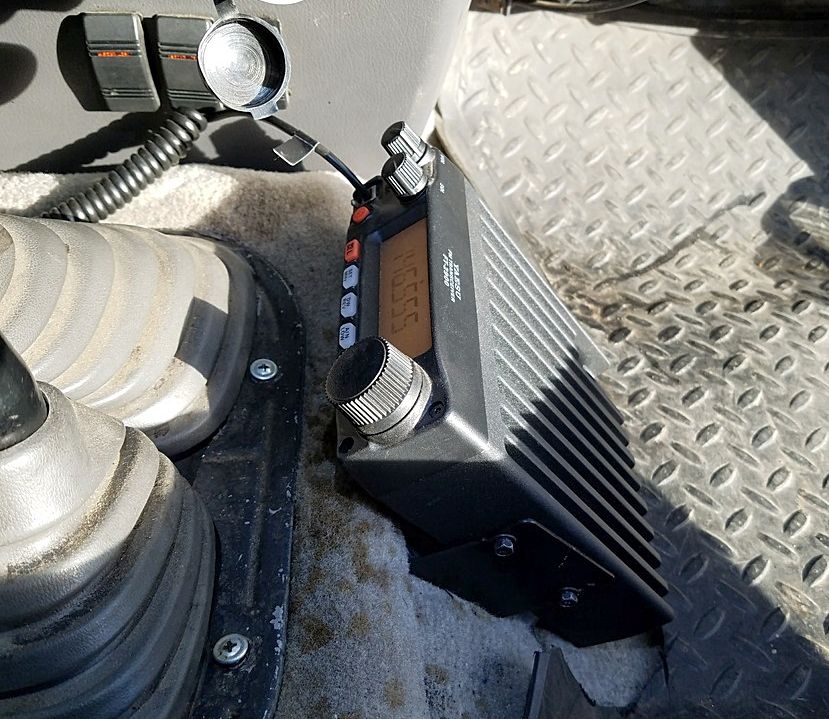
Mod Difficulty and time : 3 out of 5 , install time 4 hours, mostly spent running antenna wire through roof and mounting HAM radio bracket on transmission tunnel
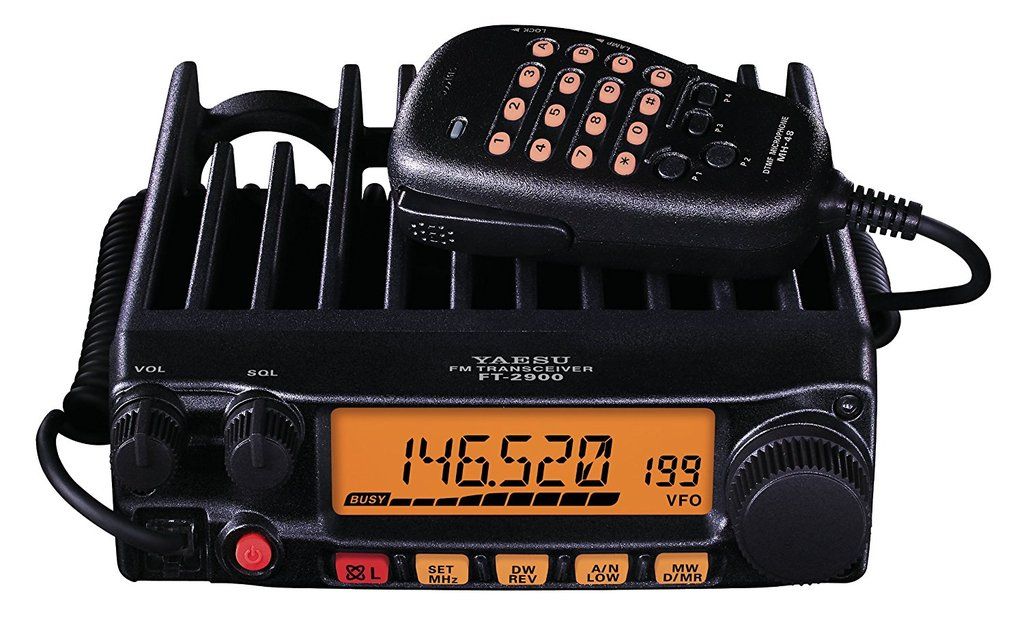
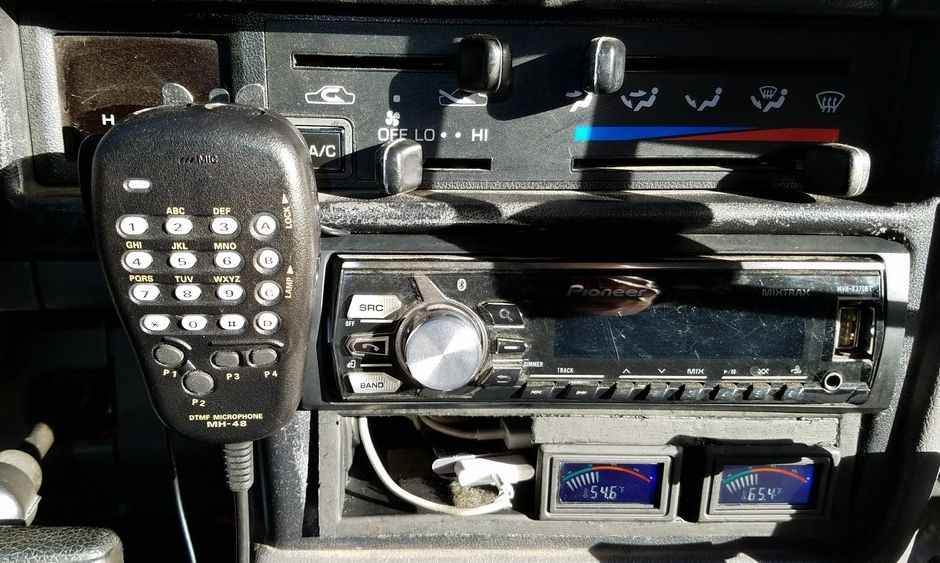
Description: HAM radio is superior to CB in every way. Distance, clarity, the option of using repeaters. If you want to be heard on the trail over longer distances, HAM is a must. That being said, you do need to obtain a HAM license through the FCC. You pay a small fee and take a test and upon passing, you're licensed to use HAM. I went with a Yaesu FT-2900r single band radio. Some people might advise getting a dual band radio with a detachable/moveable head unit, but for my needs the Yaesu single band is fine.

As for the install itself, I chose to mount my radio on the passenger side of the transmission tunnel. The Yaesu comes with a mounting bracket and hardware. It is simply a matter of mounting the bracket to the car, then the radio to the bracket. Next you run your fused power DIRECTLY to the battery. I had clarity issues when I tried to power my radio through my auxiliary fuse box. The second component of the install was setting up the external antenna. I bought a simple dual band magnet antenna that sits on top of your roof. I drilled a hole in the roof and ran the antenna cord all the way down to the HAM unit. I added a grommet and some silicone to fill the hole I made in the roof. I easily communicate over 6 miles with a friend a few towns over.

91aDuQM-g9L._SL1500__zpss4ypz3es.jpg~original

20170222_163806201_zps7io8zrcm.jpg~original

20170222_163817_zpsddwjzawu.jpg~original


link to parts: http://tiny.cc/HAM_radio , http://tiny.cc/HAM_antenna
 
Last edited:
Convenience Mods

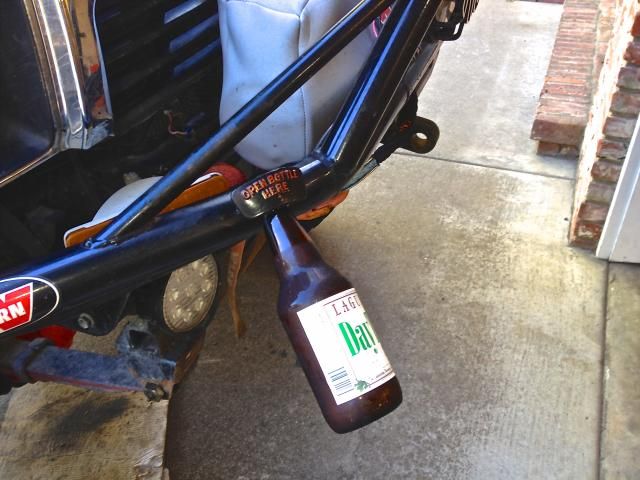
Mod: Bottle opener!
Purpose: Open bottle. Drink beer. Repeat
Cost: 9$
Mod Difficulty and time : 1 out of 5 , install time: 1 hour, OK 1 hour if you have a welder and a bumper to mount the opener to
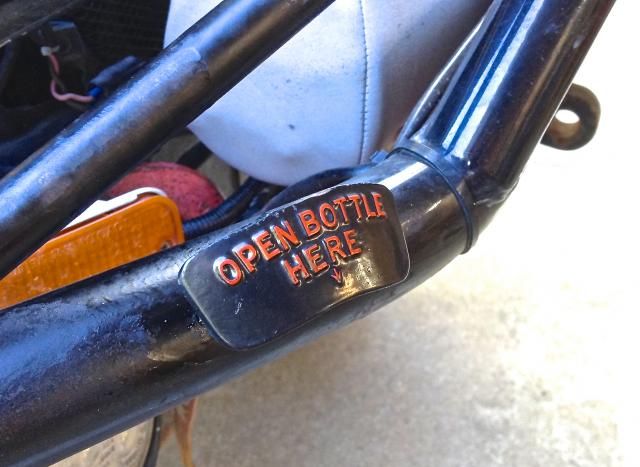
Description: Some might argue a bottle opener to be a necessity. I'll file it here under convenience. This is a very simple mod. Locate the opener of your choice, prep your bumper and bottle opener for welding. Zap the bottle opener on the bumper and throw some paint on it.

IMG_3040_zpsbaacc13e.jpg~original

IMG_3041_zps630c35ae.jpg~original


link to parts: http://tiny.cc/beer_opener


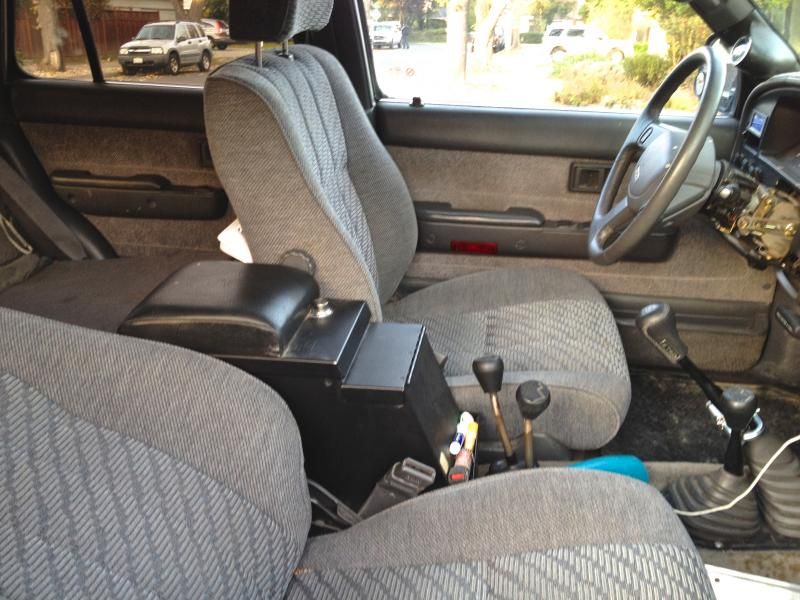
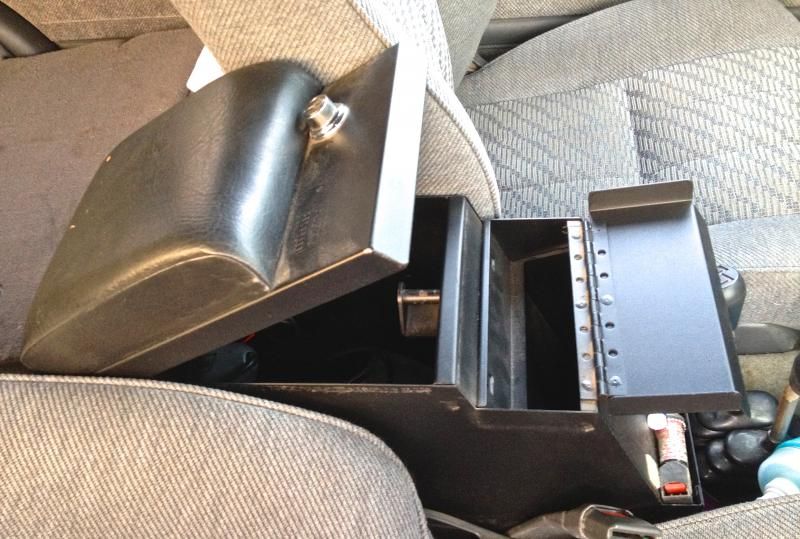
Mod: Tuffy locking center console
Purpose: A lockbox for locking valuables
Cost: approx. $200
Mod Difficulty and time : 2 out of 5 , install time: 2 hours, you need to securely attach console to transmission tunnel
Description: When I set up my dual cases, I had to relocate the stock center console area (to make way for the additional shifters). Because I no longer had any center console, I installed a Tuffy locking console. The Tuffy can easily hold a medium size purse and an iPad along with the usual valuables like a wallet and phone. It adds piece of mind when you're parked in sketchy areas. The toughest part of this mod is climbing under the vehicle to tighten the hardware you use to attach the Tuffy to the floor. One person needs to turn a wrench on top and one person needs to hold the nut under the car.

IMG_3587_zps5e1f3a65.jpg~original

IMG_3586_zps8e9f3a81.jpg~original

IMG_3585_zps00f41a20.jpg~original


link to parts: Tuffy Security Products


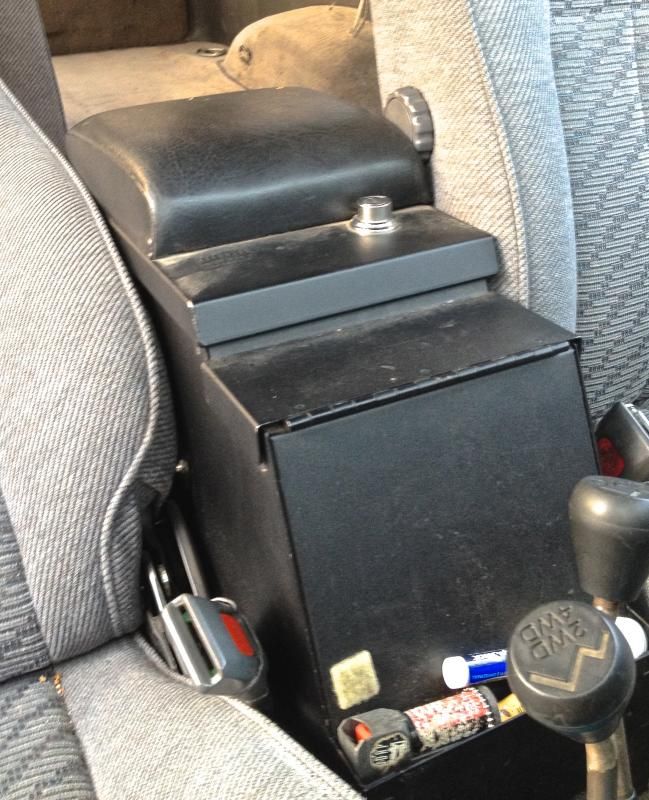
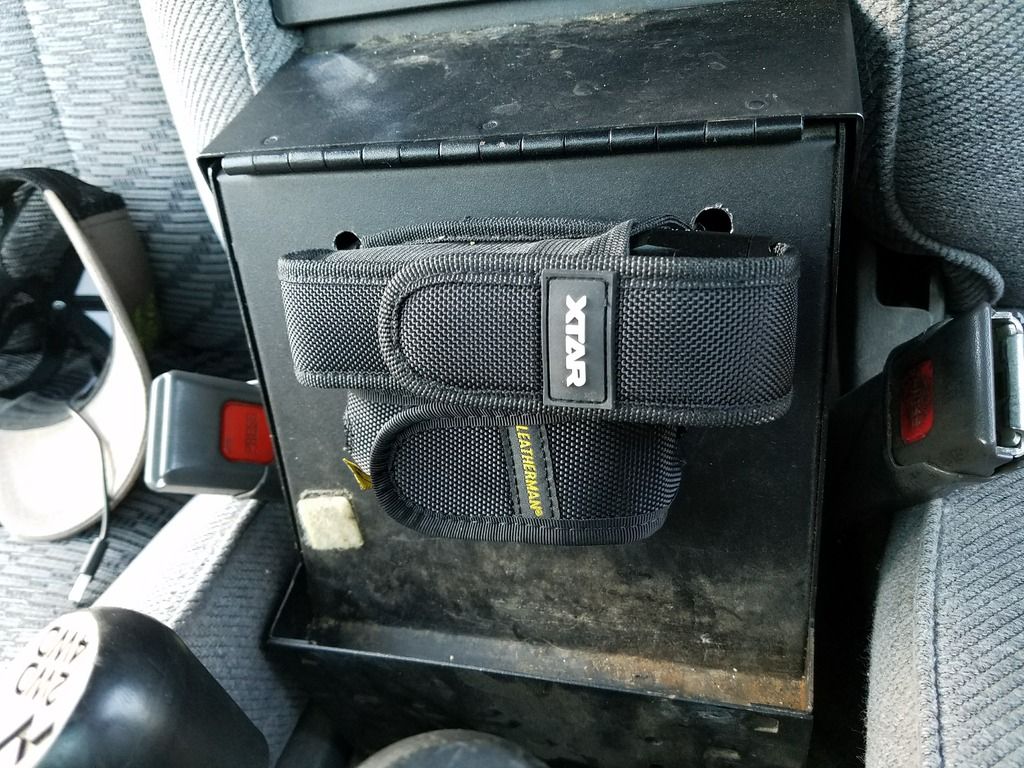
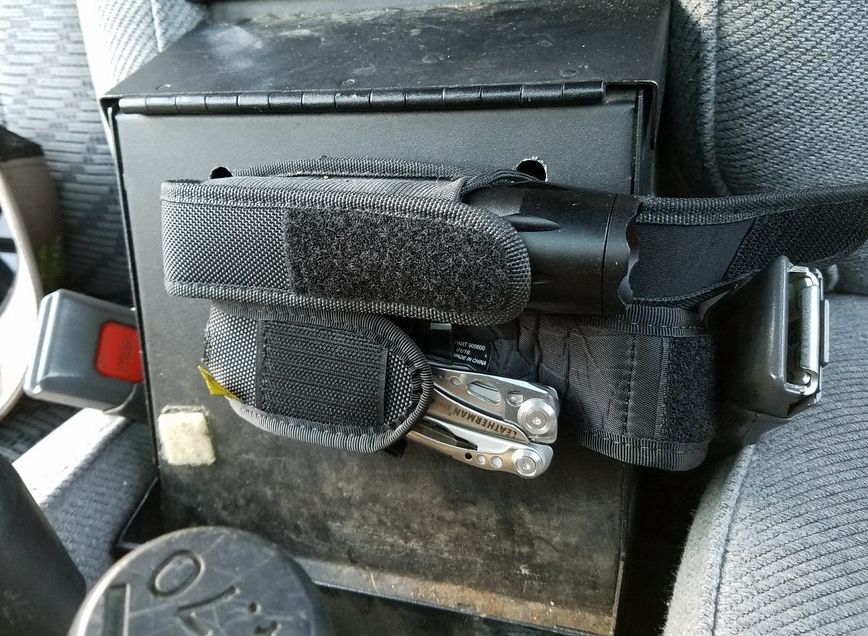
Mod: Flashlight and Leatherman sheath
Purpose: Mount a sheath for flashlight and leatherman tool for easy access
Cost: $90 (for light, leatherman, and two sheaths)
Mod Difficulty and time : 1 out of 5 , install time: 30 minutes
Description: I had a big empty space on the front of my Tuffy center console. I drilled a few holes in the console and attached two sheaths to the console. The sheaths are attached with zip ties, and they hold a flashlight and Leatherman tool for easy access.

20170222_164139_zpsi4efnzrw.jpg~original

20170222_164200_zpshb3qd8vf.jpg~original


link to parts: http://tiny.cc/LED_light , http://tiny.cc/sheath , http://tiny.cc/leatherman


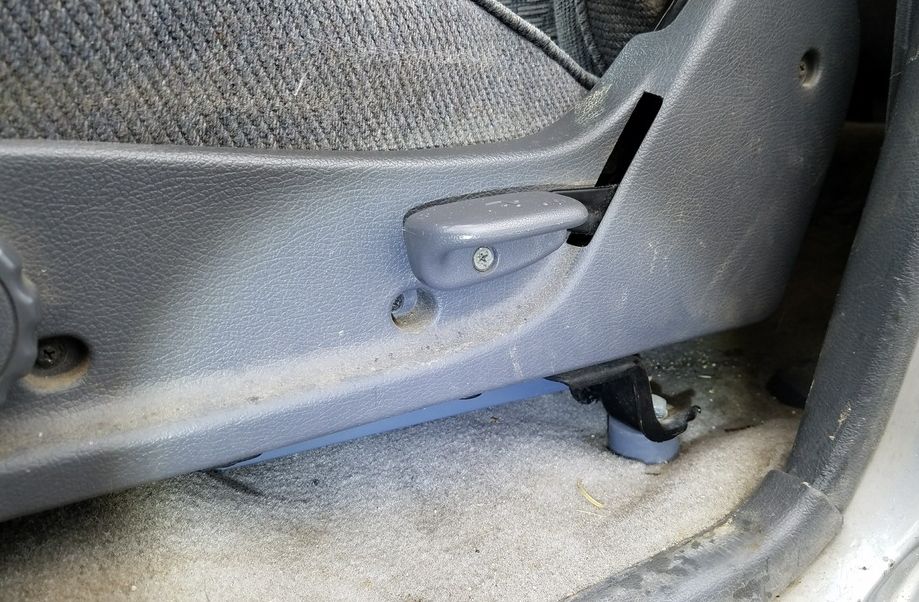
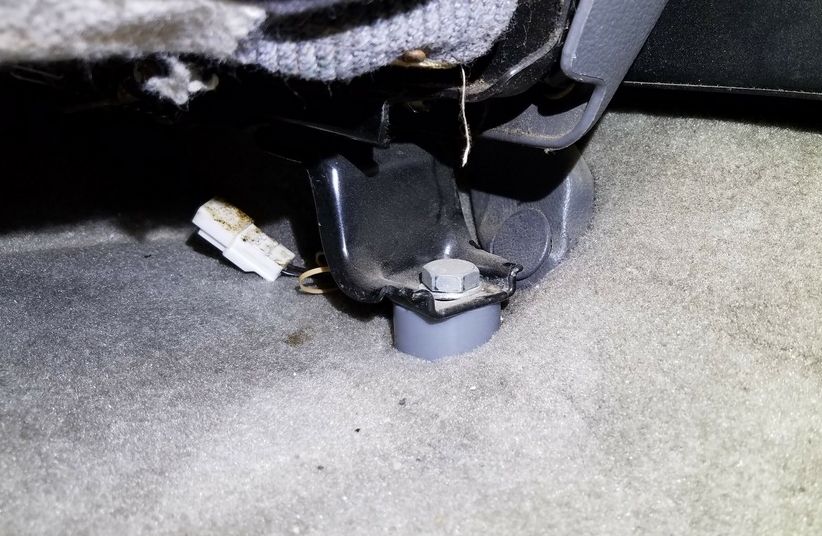
Mod: Seat lift kit
Purpose: Raise your seating position and sitting angle
Cost: approx. $20
Mod Difficulty and time : 1 out of 5 , install time: 1 hour
Description: I TAKE NO CREDIT FOR THIS MOD. Everything you need can be found at the 4crawler website: Toyota 4Runner and Pickup: Cheap Tricks
I will say that this is a very easy mod and it improves the angle of the drivers seat. The spacers go under the rear seat mounts and they essentially 'tilt' you forward a bit more. The end result is that I found it a little easier to see out the window, especially when wheelin'. You can order many different size spacers to dial in the amount of height/lift you want to achieve.

20170221_150332_zpst1ujhqgt.jpg~original

20170221_150220_001_zpsm3ighzw0.jpg~original


link to parts: Toyota 4Runner and Pickup: Cheap Tricks
 
Last edited:
Miscellaneous Mods

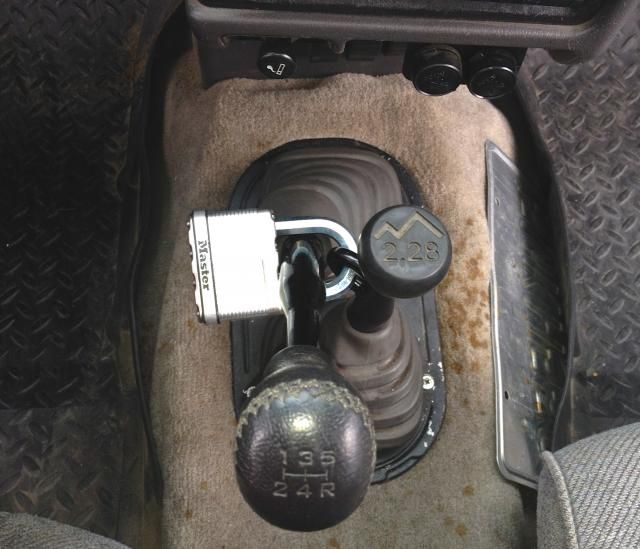
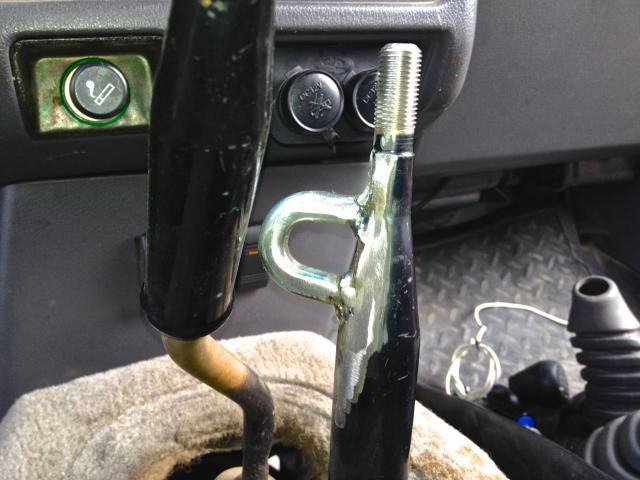
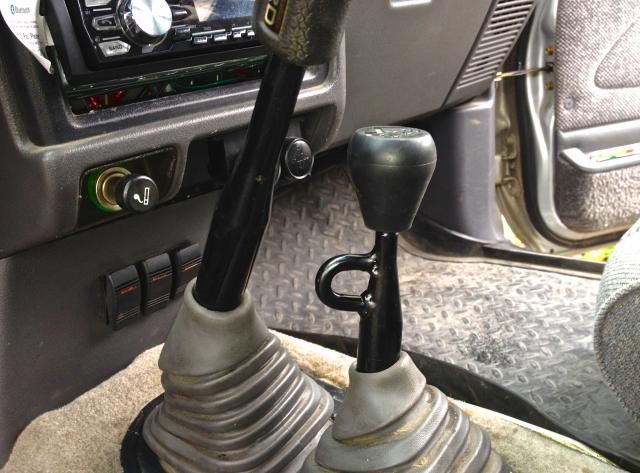
Mod: Theft deterrent shifter lock
Purpose: Lock your shifters together, makes it harder to steal truck
Cost: $5 or free, or $20 if you purchase a lock
Mod Difficulty and time : 2 out of 5 , install time: 2 hours, again you need access to a welder and this will only work on manual transmissions.
Description: These old trucks are notoriously ez to steal. While I understand no anti-theft measure is flawless, this is likely to slow down your average dumb thief....With your tranny in reverse, and with your T-case engaged, the 2 shifters are almost touching. I took a half a link of chain and welded it to the T case shifter. I was then able to essentially lock the two shifters together with the tranny in reverse and the transfer case engaged.

IMG_3493_zpse54b4c49.jpg~original

IMG_3510_zps60cbd6af.jpg~original

IMG_3512_zps59fd55df.jpg~original


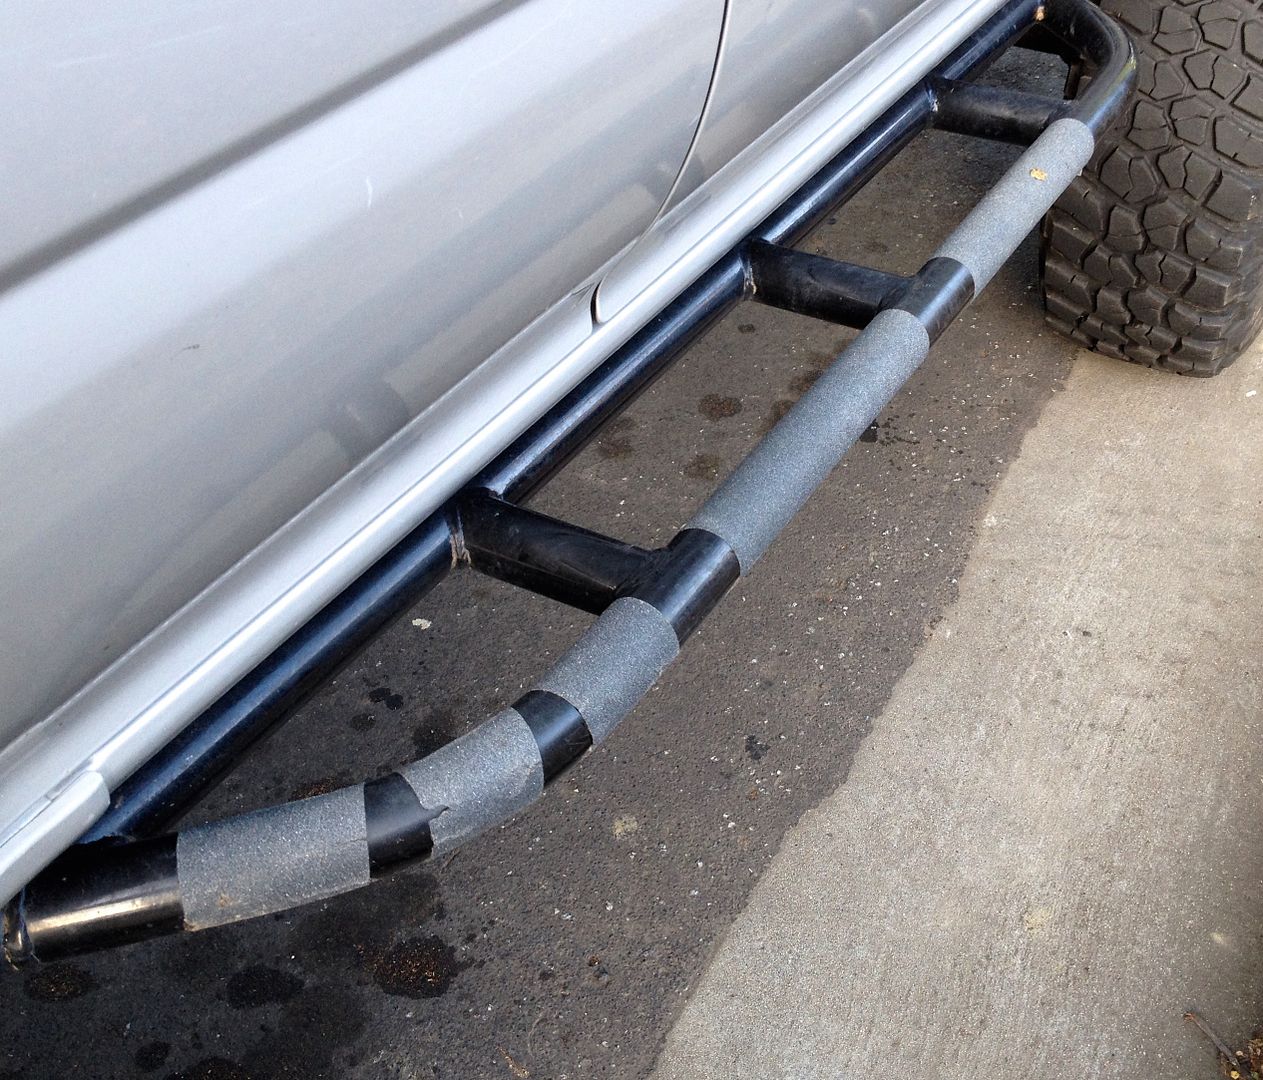
Mod: Grip tape on rock sliders
Purpose: Adds adhesion and traction to slippery rock sliders
Cost: $20
Mod Difficulty and time : 1 out of 5 , install time: 15 minutes.
Description: If you have round metal rock sliders you probably know how slippery they are when wet. By simply adhering some skateboarding grip tape, you can add instant traction to your sliders.

IMG_2226_zpspvhuixn5.jpg~original


link to parts: http://tiny.cc/grip_tape


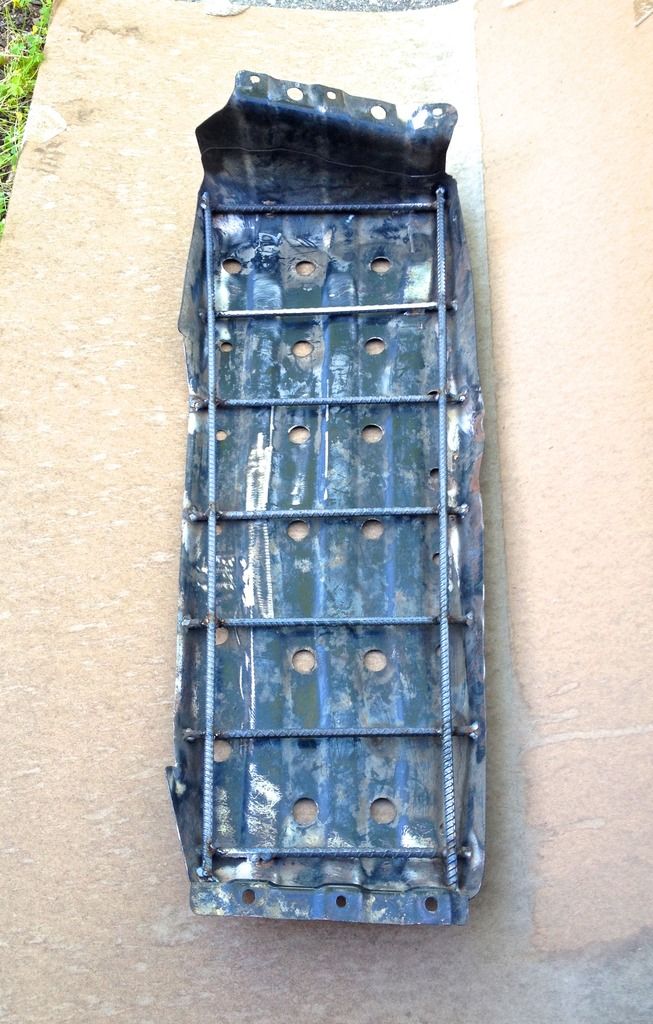
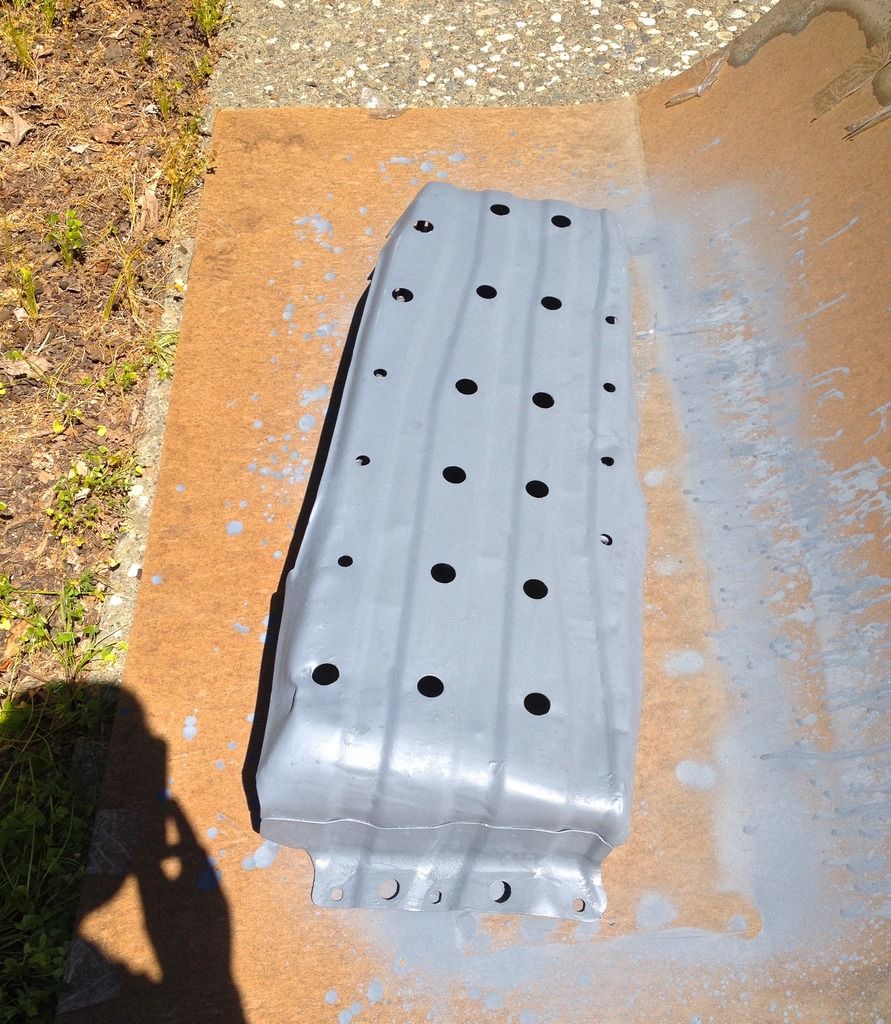
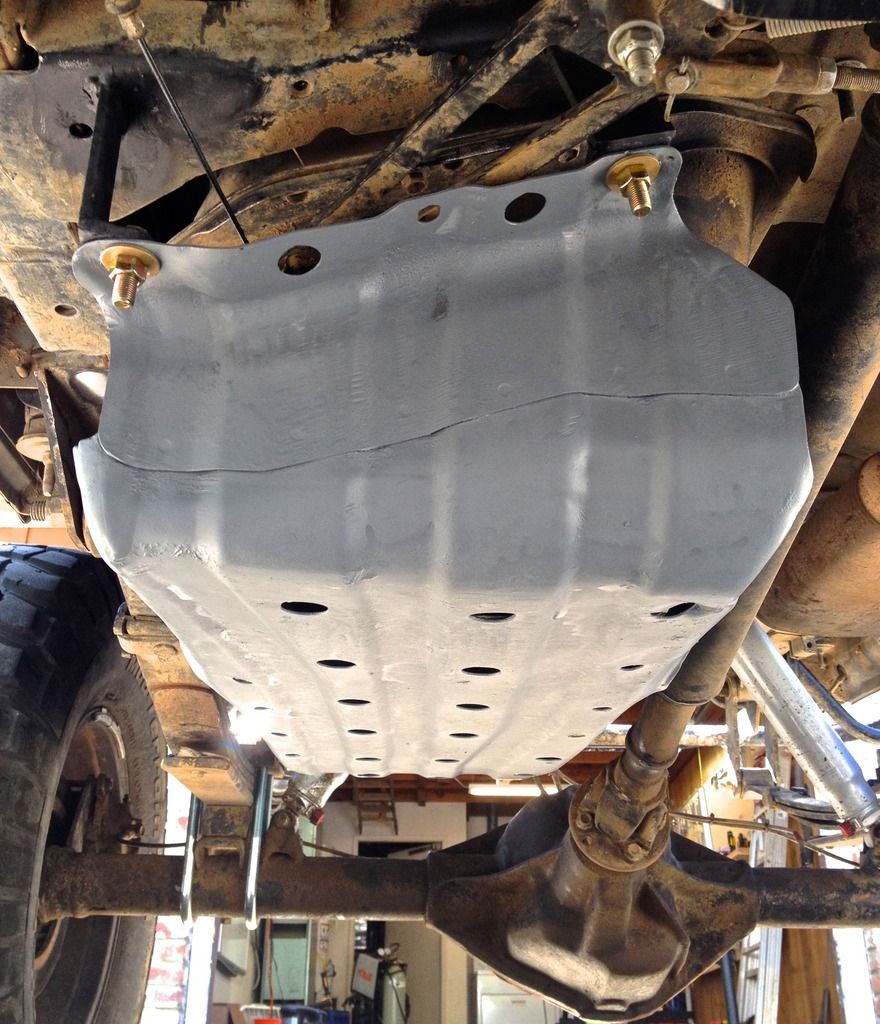
Mod: Gas tank skid plate reinforcement
Purpose: To reinforce and strengthen your stock gas tank skid plate
Cost: Approx. $20 or free if you already have rebar and spray paint
Mod Difficulty and time : 3 out of 5 , install time: 2-4 hours, again you need access to a welder
Description: The stock gas tank skid plate is flimsy and no match for boulders on the trail. I removed the skid plate and welded some #3 rebar in a grid pattern on the inside of the skid plate. This greatly increased the rigidity and decreased the "bendability" of the skid plate.

IMG_4212_zps1cb4zr88.jpg~original

IMG_4221_zpsh0766tj5.jpg~original

IMG_4223_zpsfoffslbt.jpg~original
 
Last edited:
Nice list! Looking forward to the rest of it. Just a few questions:

1) Who made those sliders and are they bolt or weld on?
2) How is the head room after installing the rear seat raise kit? I've been wanting to do something similar but with the sunroof I'm worried I'll run out of room.
 
Nice list! Looking forward to the rest of it. Just a few questions:

1) Who made those sliders and are they bolt or weld on?
2) How is the head room after installing the rear seat raise kit? I've been wanting to do something similar but with the sunroof I'm worried I'll run out of room.

1) The sliders are just your average Trail Gear tube sliders and they are welded on:
Rock Slider Kit 58" - Trail Gear

2) Good question about the headroom, I'm 5'11 on a good day , and when I wear a ball cap the top of the cap grazes the roof. So if you're a tall guy then you should take into consideration your height and the height of the spacers you go with . I went with the 1" seat spacer kit...
 
Mod: Theft deterrent shifter lock
Purpose: Lock your shifters together, makes it harder to steal truck
Cost: $5 or free, or $20 if you purchase a lock
Mod Difficulty and time : 2 out of 5 , install time: 2 hours, again you need access to a welder and this will only work on manual transmissions.
Description: These old trucks are notoriously ez to steal. While I understand no anti-theft measure is flawless, this is likely to slow down your average dumb thief....With your tranny in reverse, and with your T-case engaged, the 2 shifters are almost touching. I took a half a link of chain and welded it to the T case shifter. I was then able to essentially lock the two shifters together with the tranny in reverse and the transfer case engaged.

IMG_3493_zpse54b4c49.jpg~original

IMG_3510_zps60cbd6af.jpg~original

IMG_3512_zps59fd55df.jpg~original

I did that a few year ago in my Trekker, . it saved my truck more than once, especially when running half doors and no top. Came out from work to find the door open and the ignition destroyed, but they truck locked into double low range reverse saved it:uzi:
 
I did that a few year ago in my Trekker, . it saved my truck more than once, especially when running half doors and no top. Came out from work to find the door open and the ignition destroyed, but they truck locked into double low range reverse saved it:uzi:

I love hearing that! Add in a kill switch and you're stacking the odds in your favor against a vehicle theft....
 
I love hearing that! Add in a kill switch and you're stacking the odds in your favor against a vehicle theft....
oh believe me, they couldn't figure out the combination of switches i had in plain sight that had to be in the right combination to complete the ignition circuit and the hidden switch.
My wife thinks I am paranoid but I woke up more than once to some low life with a flash light in the driveway!


And thanks for posting your Blue Sea box, I have one to go into the 4Runner, I just ordered the Bussman Circuit Breaker off amazon. That is a great idea!
 

Members online

No members online now.

Forum statistics

Threads
278,317
Messages
3,554,129
Members
248,016
Latest member
Advally Service

Trending content

Back
Top