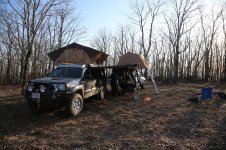
Mountain State Overland- 4Runner Build

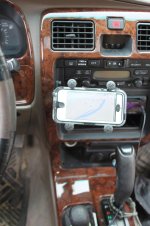
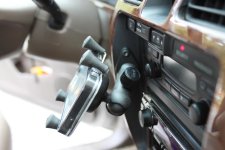
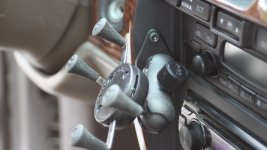
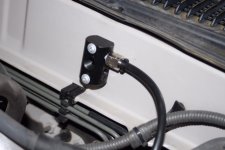
Wanted to show some pics of the Ram Mount modification we did in the T4R. Removed the "wood" trim piece and cut an aluminum back plate to go behind the mount. ordered the ball mount separately. This makes for a really solid set up. We are building and running GPX files on the GAIA GPS application. Its really perfect.
 

Attachments

  • IMG_0065.jpg
    IMG_0065.jpg
    121.3 KB · Views: 3,322
  • IMG_0058.jpg
    IMG_0058.jpg
    118 KB · Views: 2,883
Looks good. Another bracket option is the Panavise bracket. It holds your cradle on the right side of the radio and is pretty solid too. Downsides though are its a bit further away (yours is closer and easier to reach) and the passenger can end up banging their knee on it depending on how tall they are. RAM products are good stuff, enjoying watching your build!
 
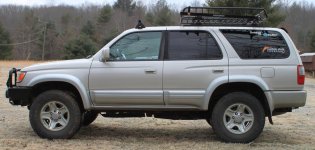
Here is a shot after the old man emu suspension addition. this is without any weight added to the rear end, which will receive some storage options and other accessories.
 

Attachments

  • IMG_7358.jpg
    IMG_7358.jpg
    144.6 KB · Views: 4,301
I used Gaia GPS while doing the Washington Backcountry Discovery Route last summer... SUCH an awesome app... Worth every penny. The ability to download the maps and be able to use them without cell reception... Awesome.
 
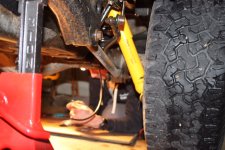
front end getting some old man emu love as well. Went with the "prado" front springs as recommended by Matt with ARB4X4 USA. Designed for holding front end weight. The rear OME's are 890's, plenty stiff for holding a lot of cargo weight.

That's a lot of cooks in the kitchen!
 
I used Gaia GPS while doing the Washington Backcountry Discovery Route last summer... SUCH an awesome app... Worth every penny. The ability to download the maps and be able to use them without cell reception... Awesome.

Does it have normal city routes (Like with any GPS) offline as well, or only mountain areas?
 
Does it have normal city routes (Like with any GPS) offline as well, or only mountain areas?

We generally use the aerial view which is essentially a satellite view and our route is overlaid. When you start tracking you can see yourself moving along the route in aerial view, which is really nice.
 
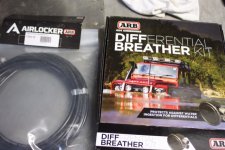
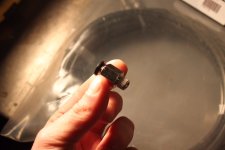
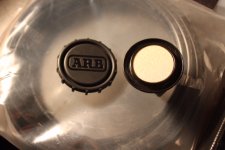
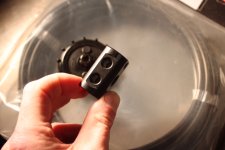
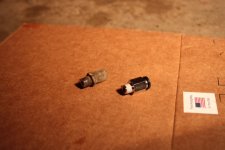
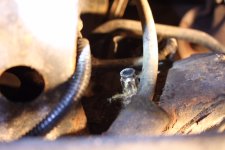
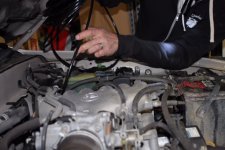
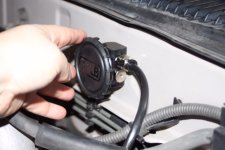
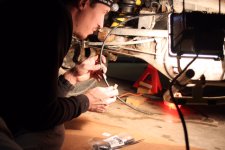
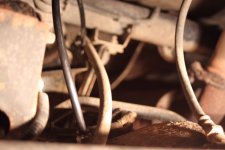
I wanted to take a minute and share some photos of the ARB Differential Breather install that we did on the 4Runner. This was a straight forward kit and was very easy to install. We opted to run the breather to the top of the engine bay with the possibility to extend the front diff breather if we really wanted too, even though it is already extended in stock form. We spend a fair bit of time doing water crossings and wanted to be sure we didnt toast our rear differential.
 

Attachments

  • diff 1.jpg
    diff 1.jpg
    107.4 KB · Views: 1,464
  • diff2.jpg
    diff2.jpg
    53.7 KB · Views: 1,295
  • diff3.jpg
    diff3.jpg
    71.3 KB · Views: 1,286
  • diff4.jpg
    diff4.jpg
    63 KB · Views: 1,425
  • diff5.jpg
    diff5.jpg
    70.7 KB · Views: 1,306
  • diff6.jpg
    diff6.jpg
    75.6 KB · Views: 1,293
  • diff7.jpg
    diff7.jpg
    91.7 KB · Views: 1,262
  • diff9.jpg
    diff9.jpg
    71.5 KB · Views: 1,309
and wrapping it all up. everything you need is in the kit and took maybe an hour to install stopping for a suds break and taking some pics. Enjoy!!
 

Attachments

  • diff10.jpg
    diff10.jpg
    76.7 KB · Views: 2,149
  • diff11.jpg
    diff11.jpg
    116 KB · Views: 1,316
  • diff12.jpg
    diff12.jpg
    87.8 KB · Views: 1,395
  • diff13.jpg
    diff13.jpg
    74.6 KB · Views: 1,275
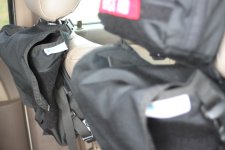
Wanted to show some of our organizational items in the rig. We came across Blue Ridge Overland Gear just out our back door (literally) and have been continuously impressed by their made in USA products. This is a photo of their headrest bag. Great for stashing on the go necessity.
 

Attachments

  • IMG_6974.jpg
    IMG_6974.jpg
    124 KB · Views: 1,267
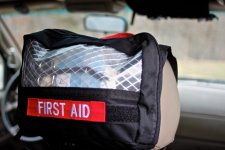
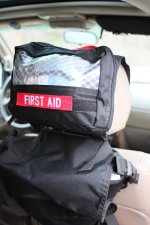
After enough incidents kayaking, mountain biking, or simple camp hijinks we have always kept a pretty well stocked first aid kit. With a headrest molle panel and first aid bag from Blue Ridge Overland Gear we are well equipped and organized for life on the trail. It is easily pulled off the molle panel and you always know where it is when things get a little serious.
 

Attachments

  • IMG_7175.jpg
    IMG_7175.jpg
    125.5 KB · Views: 1,261
  • IMG_7177.jpg
    IMG_7177.jpg
    125.1 KB · Views: 1,328
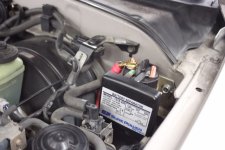
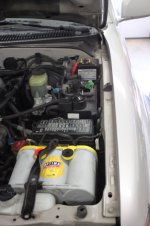
Wanted to update the build thread with some pictures of the dual battery set up that went into the 4runner. Decided to go with a SurePower 200 amp smart seperator to link the two Optimas running the "house battery" in the back. Created a better hold down for that yellow top optima after taking that picture BTW.
 

Attachments

  • dual 6.jpg
    dual 6.jpg
    87.4 KB · Views: 1,454
  • dual 7.jpg
    dual 7.jpg
    67.4 KB · Views: 1,201
Last edited:
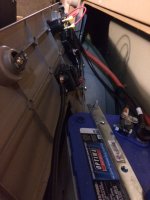
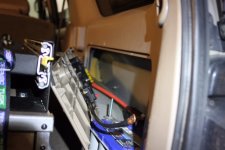
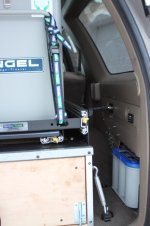
Ran #2 wire through firewall and under door sill trim to the rear of the vehicle and tied to the house battery in the back. It went pretty well, getting that heavy gauge wire through the firewall grommet on the drivers side was somewhat tricky but not terrible. We cut out the existing storage bin in the rear passenger side and strapped the battery to part of the body which creates a super heavy duty tie down point.
 

Attachments

  • dual 5.jpg
    dual 5.jpg
    119.9 KB · Views: 1,285
  • dual 4.jpg
    dual 4.jpg
    75.7 KB · Views: 1,212
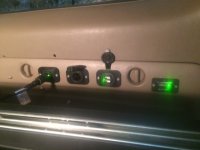
That panel allowed for mounting a couple Blue Sea DC outlets and one dual USB outlets with plenty of room to spare. Also wired in a battery meter just to keep a visual on the battery charge. A Blue Sea fuse block is mounted to the back of the panel with a 100 amp circuit breaker as well. Very happy with this install for running the Engel Fridge and charging other items on the fly like cameras/phones/tablets/Bose Soundlink etc. Will likely add an inverter at some point in that area as well.
 

Attachments

  • dual 1.jpg
    dual 1.jpg
    77.9 KB · Views: 1,201
  • dual 3.jpg
    dual 3.jpg
    59.5 KB · Views: 1,162
PS1: Test Run - Video and Trip Report

<iframe width="1280" height="720" src="https://www.youtube.com/embed/EeLksuegxsc" frameborder="0" allowfullscreen></iframe>

VIDEO

In this pre-season episode of Mountain State Overland, Team MSO hauls the camera equipment over to Greenbrier Offroad Adventures to put their recent truck builds to the test. With a few lessons to learn, the Team preps themselves for their travels in southern Appalachia during Season 2.

TRIP REPORT by Jamie - Team MSO Cook

When we started planning this excursion it was a means to an ends. We were hoping to get out in the woods and have a little fun while filming some footage and testing out some of the gear. Let me give you some details about our hosts - Chris is the owner of Greenbrier Off-Road Adventures LLC, and Tracy is one of the instructors; both a great resource when we found ourselves in a pickle. Their trails are located on the property of the world famous Greenbrier Resort. Their vehicles of choice are specially equipped Jeep Wrangler Rubicons and let me tell you one thing - they are beefy rigs! These highly trained guides accompany and instruct guests on advanced driving techniques necessary to traverse The Greenbrier's private 10,000 acre mountain preserve. The terrain varies from modest unpaved roads to some seriously extreme terrain. The thirty-mile course has rocks, ruts, creek crossings, steep hills, gulleys and mud pits. We felt this was the perfect place for us to test out our skills.

IMG_8438.JPG


In a nutshell, we had a great time with Greenbrier Off-Road Adventures LLC! They are a solid group of guys and they love getting out on the trails and showing people how it’s done. They were able to help us cut our teeth and introduce to the recovery options available when using ARB bumpers, Warn Zeon winches and Maxtrax to help navigate the obstacle that presented themselves. I'll have to tell you that they certainly didn't take it easy on us either. Within the first hour we were up to our waists in mud pits and rocky rutted terrain. There were several occasion that we got in a little over our head and thanks to the efforts and training we were able to get out of the the tight spots and keep pushing forward. The entire trip lasted around 4-6 hours. It was some of the most extreme 4X4 action that I personally have ever seen. We gained a lot of knowledge and experience that will aid us in our adventures to come for Season 2.

1429574991605


Here's some of my take aways from the trip - put a tow strap on the bumper first!! Ha, seriously though planning ahead can save you a lot of worry and damage later. As we traveled through the tight terrain and crossed streams, sometimes driving in the creek bed the entirety of that particular leg of the trail we gained confidence in our skills as a team and in our abilities to manage whatever the landscape threw at us. We used the winches a few times and tested out the suspensions and the BFG KM2’s on the Tacoma, all performed great! We learned that there will always be things that are out of our control when in the backcountry but with a little knowledge, teamwork and sound judgment we can conquer whatever we come across.

6N1A0261.JPG


Again, this was one awesome experience and I highly recommend it to anybody that wants to spend half a day on some seriously challenging terrain. The guys at Greenbrier Off-Road Adventures were nice enough to take us out on the trail at no cost to us; however, there are fees for their trips. If you want to do something really cool and you’re anywhere the Greenbrier Resort in White Sulphur Springs WV check these guys. I promise you won’t regret it!

1429574192199
 
PS2: The Build - Video and Report

<iframe width="960" height="540" src="https://www.youtube.com/embed/9pfhYLwaHiE" frameborder="0" allowfullscreen></iframe>

VIDEO

In this pre-season episode of Mountain State Overland, Jason and Jeremy highlight some of the equipment that's been installed on the Tacoma and 4Runner in preparation for Season 2.

REPORT by Jason - Team MSO Producer

If I could walk away with a few words to sum up the time we spent building up both these trucks I'd say, "at least we're done!" Honestly? Probably not, ha! We all know you're never done once you get started but I will say I haven't spent much time under the truck with a wrench since only to torque a couple bolts or run some extra wires.

1424976373853


After running a whole season through VA and WV, we had a pretty good idea of what we wanted to add to the rigs. We started it all with a list that we'd built. Each trip we'd note items we "wanted" and items we "needed." After filming Episode 7 last fall we hit the marketplace and started hunting.

SUSPENSION

When we started the build in January 2015, we both opted for OME. The Tacoma made the transition from Bilsteins and AALs while the T4R upgraded from rusted, worn out factory springs and struts. Dakar leafs and 886 OME springs would carry the load on the pickup and the Prado coils would stiffen up the spongy ride on the SUV. There were some words flying and beer bottles clanging but torches and PB Blaster made the upgrade manageable.

6N1A9479.JPG


ELECTRONICS

Fridge? Yes please! That's right, where there is beer and food there must be cold. After loading sack upon sack of ice into our coolers throughout the previous year we both opted for fridge/freezers. There's something to say for stepping out of your truck after a long day on the trail or just a long day at the office and opening the lid of fridge, especially when its in your truck.

The power supply came into play first however. Both Jeremy and I mapped out our own power management systems. Both trucks got a custom setup because the price point on some of the dual battery systems is sky high - hell, and you still have to by a battery too! Outlets in the back help us manage our electrical demands on each trip and the negative bus Blue Sea panels make adding accessories a breeze when we "want" more.

6N1A0781+3.JPG


STORAGE

I thought I had it all figured out in 2014 - one big drawer; large enough for everything and short enough for three pups to stand on but I never planned for a fridge. The new storage system started with a sketch. I went a couple inches taller but kept the same general footprint leaving the sides in the bed of the Tacoma exposed for dirty gear. I sent my plans to Goose Gear and spent some quality time on the phone with Brian. He took my vision and made it a reality - one long lock in/out sliding drawer and another smaller box in the back with hinged lid. I added some L track on top with some rubber stall matting from Tractor Supply to give the pups traction on the road.

The 4Runner went all out custom. Similar to the Tacoma's first box, the T4R went with one big drawer. Jeremy installed a divider and planed a beautiful walnut cutting board to nest inside it. His fridge and slide sit on top leaving enough room for an old aluminum military med chest beside it.

6N1A1449.JPG


PROTECTION AND RECOVERY

Winch and winch bumper definitely made the cut and we aim to use 'em. Bumper install on the Taco went fairly smooth, only one bolt took some work. On the T4R, it was a different story. We spent 2-3 days working on the front end of that chassis. The ARB Bull Bar on the T4R was built for a Taco. Things lined up good but we ditched the supplied spacers early on and wished we would have had them when it came time to mount the winch. Needless to say, it wasn't something we couldn't weld! The T4R got some sliders and the welder paid them a visit too.

6N1A9633.JPG


OTHER GOODIES

Sure, there's some fun things in the cab and up top (oh my, RTT) but keeping things organized was top priority. With all the electronics, parts, pieces and other randomness floating around in the truck we reached out to Blue Ridge Overland Gear. They helped us lay out storage in the drawers, on the backs of the seats and even on the visors. Finding what we need when we need it doesn't take much now and the system are completely customizable.

Overall, it was an experience. Have spent a thousand miles or so filming trips thus far I can honestly say all the hard work paid off. Cheers again to each of you from the mountains of Appalachia and happy trails from the boys at MSO.

6N1A0808+3.JPG
 

Members online

Forum statistics

Threads
278,312
Messages
3,554,085
Members
248,016
Latest member
Advally Service

Trending content

Back
Top