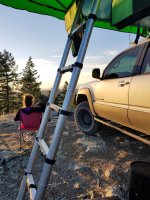
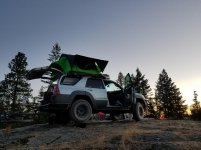
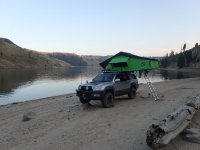
'MumTaxi' the 2003 V8 Sport Build

SunnyMcBlock

New member
Well my expo rig/daily is just about set up the way I want it for now so this might be more of a modification list than a build thread. All the same I'm sure there will be more to add.

2003 Toyota 4runner Sport Edition. I bought this rig used with around 160,000 miles on it about a year and a half ago.
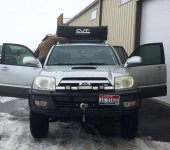
As it sat on the lot.
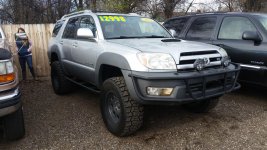
20160327_180634.jpg


Unbeknownst to me at the time this is one of the 4runners outfitted by Toyota US for the Global Extremes show in 2003.
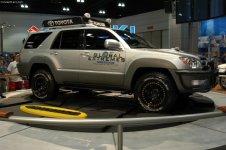
toyota_4runner_modified_global_extremes_la_05.jpg

When I bought it, from what i could tell the mod list included
-Safari Gard bumpers and sliders
-3" Toytec lift with Bilstein 5100 and front coilovers, superflex coils.
-Mojave 17" alloy wheels
-305/65R17 Dick Cepek Fun Country tires
-Magnaflow cat back exhaust
-K&N cold air intake and Jet performance MAF
-Kenwood Deck and upgraded sound system
-Weathertech floor mats
-PIAA offroad lamps
-HELLA horns

As you can see from that list, apart from the decent lift, it was set up as a strait up mall crawler.

First thing I did was order up some Cree LED spot and flood lights to replace the PIAA. I know that might seem counter intuitive but one of the PIAA lights was burnt out and to be honest LED light bars are just brighter.
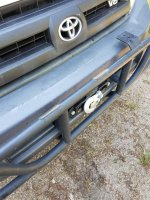
I also installed a Superwinch 8500. It bolted directly to the hidden winch plate that is part of the safari gard front bumper, it was nice not to have to drill new holes.
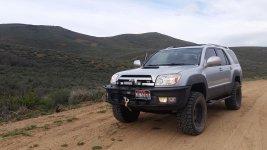
20160422_182224.jpg

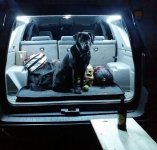
I replaced all of the interior bulbs with LED and wired LED strips to the dome light in the back. Lastly I made a small wooden table that attached to the rear slider with metal fencing brackets, I was really missing the tailgate from my 2nd gen.
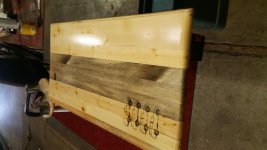
table.jpg
tent.jpg

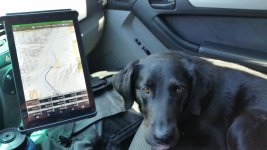
Next came a RAM mount mounted to the dash with 3M double sided tape and a couple plastic screws. It holds a 8" ASUS Zen Pad that is dedicated to run BackCountry Navigator and Torque PRO in conjunction with a OBDII Bluetooth dongle. For the money, about $200 all in all, this might be one of the most useful mods.
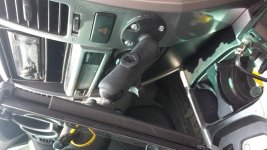
20170807_141823.jpg
 

Attachments

  • 20160327_180634.jpg
    20160327_180634.jpg
    139.4 KB · Views: 9,391
  • toyota_4runner_modified_global_extremes_la_05.jpg
    toyota_4runner_modified_global_extremes_la_05.jpg
    122.7 KB · Views: 2,185
  • 20160422_182224.jpg
    20160422_182224.jpg
    137.9 KB · Views: 4,437
  • tent.jpg
    tent.jpg
    73.5 KB · Views: 2,059
  • table.jpg
    table.jpg
    125.3 KB · Views: 2,092
  • 20170807_141823.jpg
    20170807_141823.jpg
    136.6 KB · Views: 2,136
  • dogmap.jpg
    dogmap.jpg
    126.9 KB · Views: 2,047
Last edited:
Register to hide this ad
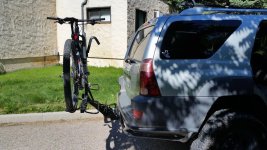
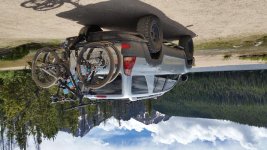
Around that time I also added a ISI Bike Carrier. These racks are made in Australia and are absolutely bomber. Designed specifically with off road use in mind this rack will take my bikes anywhere the 4runner will go. I did heaps of research and almost went with a North Shore rack but I'm really glad I got the ISI instead. It clamps into you hitch with an anti-rattle nut and there is no shaking swaying or rattling. Very cool piece of kit.
bike 1.jpg
bike 2.jpg
bike 3.jpg

I also did the jumper mod to fix my 12v outlets to be always hot.

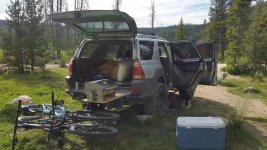
And thats how I ran it for the rest of 2016. Over 40 nights sleeping in the back of it out and about.

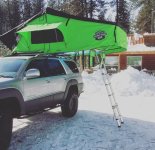
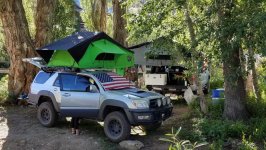
Then in January of 2017 we found a pretty decent deal on a RTT that was a demo for CBI. So the woman and I went down to Idaho falls and picked up our Mt. Shasta Summit series in NEON FREAKING GREEN.
tent instal.jpg
tent23.jpg
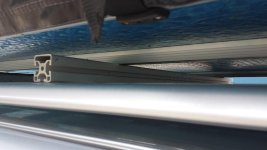
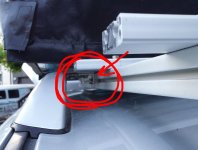
I mounted some 80/20 aluminum i had as a replacement to the standard roof rack cross pieces to handle the weight of the tent. Been running this set up for 8 months. We have had 4 full grown adults in it with zero issues. The factory roof racks are quite strong.
20170807_141848.jpg

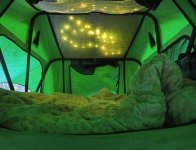
Next I lined the roof of the tent with Burlap material and some cheap LED lights. It serves 2 purposes, the burlap acts as a barrier between out hot breath and the top of the tent and cuts down on condensation, and i think it just looks cool.
ten1t.jpg

I replaced the ridiculous 305/65R17 tires with a set of 255/75R17 Wrangler Dura-trac and I have not regretted it for a second. They ride so much nicer.

Maintenance is a necessity Ball joints, CV Axles, tie rod ends and sway bar end links. It was a long day.
20170219_152542.jpg
 

Attachments

  • bike 1.jpg
    bike 1.jpg
    141.2 KB · Views: 1,981
  • bike 2.jpg
    bike 2.jpg
    138.1 KB · Views: 1,980
  • bike 3.jpg
    bike 3.jpg
    143 KB · Views: 1,953
  • tent instal.jpg
    tent instal.jpg
    71.7 KB · Views: 1,968
  • 20170807_141848.jpg
    20170807_141848.jpg
    121.7 KB · Views: 2,031
  • tent23.jpg
    tent23.jpg
    101.6 KB · Views: 1,972
  • ten1t.jpg
    ten1t.jpg
    60.7 KB · Views: 1,953
  • 20170219_152542.jpg
    20170219_152542.jpg
    138.4 KB · Views: 2,020
Great looking rig! Awesome price too considering everything that was done with it prior to purchase!

Like that tent too! [emoji1303]
 
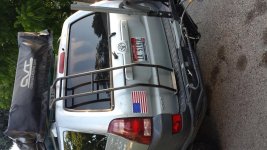
The tent has taken a lot of getting used to. Its a real pain packing it up when its so far up on the top of an SUV. Lots of people will go on and on touting how easy RTTs are and to some extent they are. But you end up crawling all over your rig to be able to reach everything. The sliders and bumpers have been a big help but getting a Gobi ladder for the hatch was a game changer.
gobi ladder.jpg

The added sway in the rig with the tent on top was mitigated by installing a set or AIR Lift 1000 airbags in the back. Another fairly cheap mod that made a huge difference in drivability.

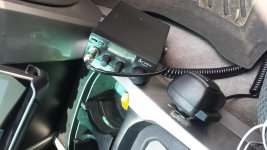
The girlfriend bought me a CB for my birthday. We typically run HAM (KI7ERI) but I was missing my old PA system... cause it was fun. So we figured why not. I installed the unit down next to the passenger side footwell.
20170807_141830.jpg
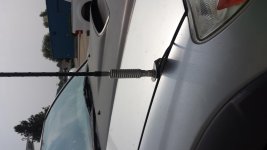
The antenna is a 4' firestik out on the front of the passenger side fender.
20170807_141842.jpg

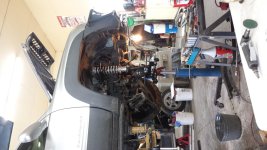
I had a bit of a disaster when my cooling fan clutch seized and the fan grenaded apart taking all kinds of important stuff with it. So I ended up with a all new cooling system. It also dented the hood from the inside out. It was repaired with some bondo and primer but before painting it I decided to try my hand at 3M wrap. Well I suck at that. Its much harder than I anticipated and the end result looks fine if you are 15' or more away or happen to have similar eye sight to Ray Charles. I also plasti dipped the grill and scoop. They turned out better.
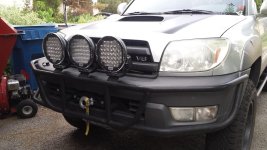
While wrapping the hood i noticed one of the brackets holding my main LED bar on was cracked. So perhaps to make myself feel better I pulled the trigger on 3ea 9" 96w LED lights. They are the ARB knock offs coming in at 1/10 the price. I love em.
lights.jpg
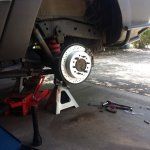
After a trip down to Flagstaff for Overland West I came to the realization/conclusion that when loaded for extended trips I am at or right over the GVRW for this rig. The only thing that hadn't already been upgraded to address this was the brakes, and I felt it in the highway hills of Southern Utah and Northern AZ. So I installed Power Stop drilled and slotted rotors with the heavy duty carbon ceramic Z36 pads. Another mod that really adds to my confidence driving this thing on longer trips when loaded.
brake.jpg

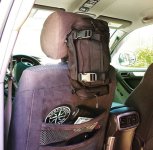
A couple quick interior things. I put together a first Aid kit that isn't buried in the back. Gloves, SAM splint, Israeli bandage, Chest seal, tourniquet, 4x4 and 4x6 sterile pads and rolls of gauze plus all the typical boo-boo stuff, band aides prep swabs tweezers scissors and clamps. Basic over the counter meds, pain killers, anti-diarrhoeal , antihistamines.... ect.
firstaid.jpg
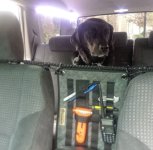
Also a took a hook and loop insert and mounted it up between the front seats utilizing a bungee cord with a solomon knot tied over it with para-cord. It works great as a divider to keep my pups grubby paws off the center console.
divider.jpg
 

Attachments

  • gobi ladder.jpg
    gobi ladder.jpg
    142.1 KB · Views: 2,042
  • 20170807_141830.jpg
    20170807_141830.jpg
    137.7 KB · Views: 2,020
  • 20170807_141842.jpg
    20170807_141842.jpg
    122.5 KB · Views: 2,010
  • lights.jpg
    lights.jpg
    139.3 KB · Views: 2,060
  • brake.jpg
    brake.jpg
    79.1 KB · Views: 1,931
  • firstaid.jpg
    firstaid.jpg
    105.3 KB · Views: 1,952
  • divider.jpg
    divider.jpg
    65.3 KB · Views: 1,938
Great looking rig! Awesome price too considering everything that was done with it prior to purchase!

Like that tent too! [emoji1303]

Thanks a lot. The deal sort of fell into my lap. It did cost me quite a bit to get all the maintenance up to my standard but all in all it was a good deal. I actually talked them down to $11,600 after it was all said and done.
 
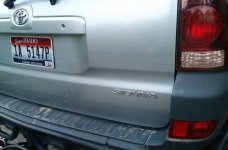
Lost a bet to a Tacoma owner.....
rebadge.jpg

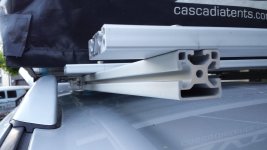
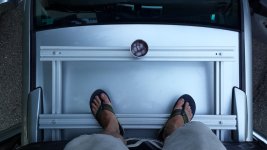
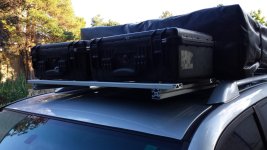
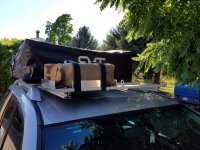
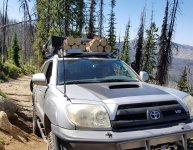
Took a trip over the Magruder corridor last month and wanted to take some auxiliary fuel. I built onto the 80/20 I had mounted across the factory roof rack and extended it out over the cab. Then using 2" aluminum angle iron I fabricated up some brackets. The whole thing is held together with the proprietary nuts that fit into the slots in the 80/20, bolts and lock washers. The rack extension easily holds my weight ~200lbs.
rack 1.jpg
rack 2.jpg
Mocked up with Pelican cases.
rack 3.jpg
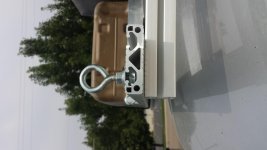
I also added some Eye bolts and tie downs on the other side.
rack 4.jpg
With the fuel can
rack5.jpg
Also worked great to haul some extra fire wood.
rack6.jpg
Ran into a spot of trouble on my trip. Hit the washboards on Magruder and lost 2ea of my light bar tabs almost immediately. Only one of the 2 broken lights was recovered.... bummer
tabs.jpg
We have since re-welded the 2 of the 3 tabs back on and reattached the 2 remaining lights.
 

Attachments

  • rack 1.jpg
    rack 1.jpg
    122 KB · Views: 1,983
  • rack 2.jpg
    rack 2.jpg
    130.4 KB · Views: 1,997
  • rack 3.jpg
    rack 3.jpg
    136.6 KB · Views: 1,999
  • rack 4.jpg
    rack 4.jpg
    120.4 KB · Views: 1,979
  • rack6.jpg
    rack6.jpg
    142.2 KB · Views: 1,974
  • rack5.jpg
    rack5.jpg
    136.6 KB · Views: 1,910
  • tabs.jpg
    tabs.jpg
    141.2 KB · Views: 1,928
  • rebadge.jpg
    rebadge.jpg
    124.2 KB · Views: 2,002
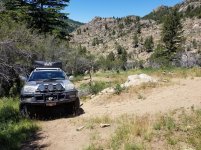
Couple pics for prosperity.
pro1.jpg
pro2.jpg
4523454352345.jpg
53527387.jpg

And just last weekend. As it sits now.
18310.jpg
 

Attachments

  • pro1.jpg
    pro1.jpg
    132.1 KB · Views: 1,925
  • pro2.jpg
    pro2.jpg
    144.3 KB · Views: 1,953
  • 4523454352345.jpg
    4523454352345.jpg
    139.2 KB · Views: 1,936
  • 53527387.jpg
    53527387.jpg
    136.4 KB · Views: 2,029
  • 18310.jpg
    18310.jpg
    131.5 KB · Views: 1,977
Last edited:
0/20 Alu roof rack

Hey man, love the build. Very cool rig. When you got the 80/20 aluminum, how exactly did you mount it to the factory rails? I like this idea, and would be interested in trying to repeat it myself. I have an awning that I want to try and mount up, and it would be nice to put my traction mats and shovel up there. Thanks

Z
 
Hey man, love the build. Very cool rig. When you got the 80/20 aluminum, how exactly did you mount it to the factory rails? I like this idea, and would be interested in trying to repeat it myself. I have an awning that I want to try and mount up, and it would be nice to put my traction mats and shovel up there. Thanks

Z

Sorry I didn't get back sooner. Thanks for the compliment. I used 2" aluminum angle iron to build brackets by cutting it into 2" lengths and drilling a hole in each side. I then used the 80/20 specific slot nuts, bolts and lock washers to mount it all up. Carriage bolts slid into the slots on the 80/20 and factory roof rails would work just fine as well.
 
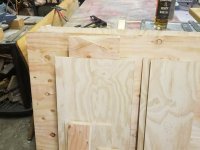
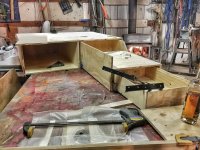
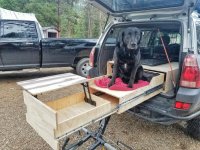
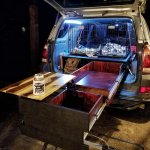
I've been quiet for a while but I thought I'd post the latest addition. Just finished up my storage system/kitchen last night. I've got about $400 and 40 hours into these. I used the plans offered up by [MENTION=165202]THead[/MENTION]ventureindex but modified them slightly to fit my needs. I have been thinking about these for over a year and finally decided on a design made it a reality.
 

Attachments

  • 30652269_10215668087756392_6443858752675250176_n.jpg
    30652269_10215668087756392_6443858752675250176_n.jpg
    72.3 KB · Views: 1,766
  • 30697931_10215668087956397_8732733303880155136_n.jpg
    30697931_10215668087956397_8732733303880155136_n.jpg
    132.3 KB · Views: 1,752
  • 30656943_10215668088476410_395236509919215616_n.jpg
    30656943_10215668088476410_395236509919215616_n.jpg
    139.3 KB · Views: 1,693
  • 30698069_10215667676986123_8210575751540375552_n.jpg
    30698069_10215667676986123_8210575751540375552_n.jpg
    134.9 KB · Views: 1,686
So cool man. I remember this rig from back in the day. There were pics of it all over the internet. That bumper guard is pretty MadMax looking!

You might be able to restore the faded trim with a product like Solution Finish, Gtechniq C4, or Gyeon Trim. Unless you want the extra protection from the bed liner.
 
So cool man. I remember this rig from back in the day. There were pics of it all over the internet. That bumper guard is pretty MadMax looking!

You might be able to restore the faded trim with a product like Solution Finish, Gtechniq C4, or Gyeon Trim. Unless you want the extra protection from the bed liner.

Thanks Timberland. Yeah I did a lot of research when I found this rig on a used lot 2 years ago. To my knowledge there were only 2 that hit the used market after the TV show and I found the other one.

If you remember any other info you stumbled across in your internet travels relating the vehicle history I would love to hear it.

I contacted Toyota USA with the VIN asking if there was any info they could give me and their response was that they do not recommend modifying their vehicles... lol

I'll do some research on those products you suggested. Thanks!
 

Members online

Forum statistics

Threads
278,316
Messages
3,554,124
Members
248,016
Latest member
Advally Service

Trending content

Back
Top