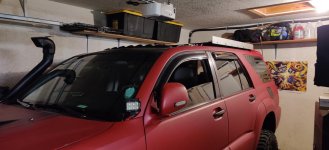
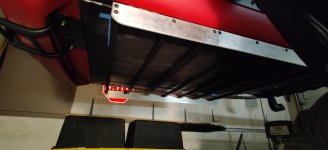
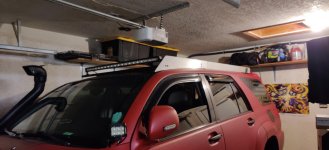
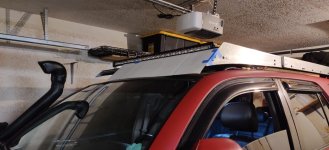
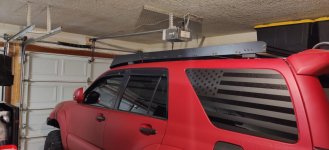
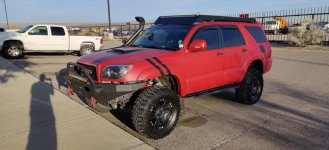
My $400 DIY Roof Rack

pefiln

New member
After liking the look of the Prinsu roof rack but not wanting to spend close to $1,000 on a roof rack I decided to set out on making my own. I found this video on youtube that got me started.

https://www.youtube.com/watch?v=ylPZkwRBA5o

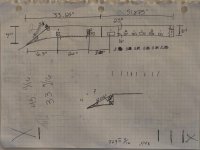
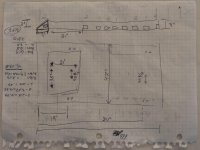
After watching this and honestly copying a lot of his ideas I started with some sketches.

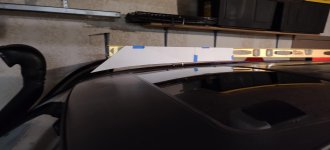
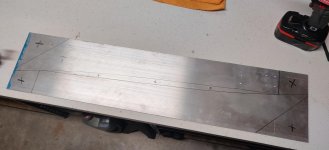
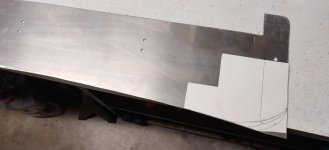
I then got some card stock and started mocking everything up to make sure it would all fit. Allowing the back hatch to open, see out the sunroof and flow with the body lines.
 

Attachments

  • IMG_20200328_111011.jpg
    IMG_20200328_111011.jpg
    119.9 KB · Views: 4,700
  • IMG_20200328_111018.jpg
    IMG_20200328_111018.jpg
    120.9 KB · Views: 4,624
  • IMG_20200208_210041.jpg
    IMG_20200208_210041.jpg
    123.8 KB · Views: 4,641
  • IMG_20200213_192820.jpg
    IMG_20200213_192820.jpg
    128.1 KB · Views: 4,671
Register to hide this ad
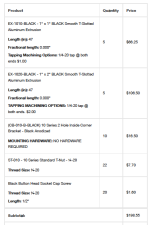
Once I felt comfortable with all the dimensions I spent about $250 at TNUTZ for the aluminum extrusions/hardware.

Another $90 from Grainger for the side panels and I had some stuff to start with.

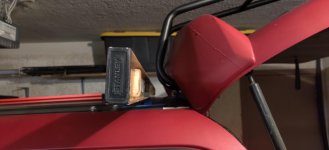
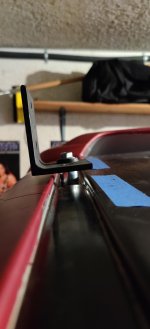
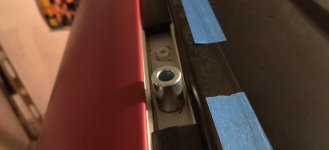
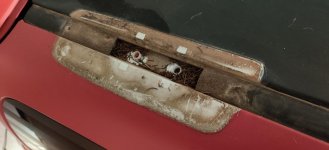
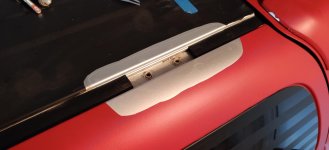
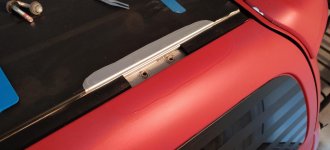
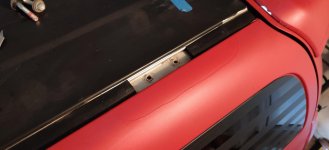
While I was waiting I got some 3" angle iron from work. Due to the slope of the roof I did have a friend bend the angle iron in slightly with their press (not pictured). Then I bought some spacers from Ace Hardware, took off the old rack, cleaned the areas, and patched int the vinyl wraps.
 

Attachments

  • IMG_20200213_193054.jpg
    IMG_20200213_193054.jpg
    126.7 KB · Views: 4,646
  • IMG_20200213_193148.jpg
    IMG_20200213_193148.jpg
    126.7 KB · Views: 4,599
  • IMG_20200208_145924.jpg
    IMG_20200208_145924.jpg
    133.1 KB · Views: 4,590
  • IMG_20200208_155041.jpg
    IMG_20200208_155041.jpg
    128 KB · Views: 4,583
  • IMG_20200208_155302.jpg
    IMG_20200208_155302.jpg
    131.6 KB · Views: 4,574
  • IMG_20200208_155738.jpg
    IMG_20200208_155738.jpg
    125.3 KB · Views: 4,562
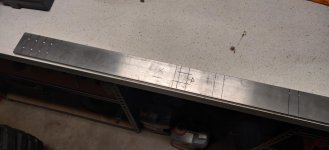
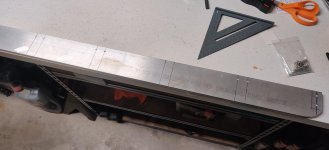
Once I got the aluminum sides I started drawing everything out on them.

Just like the original video I designed the rack to be split into two separate halves for easy assembly/storage if needed.
 

Attachments

  • IMG_20200218_201030.jpg
    IMG_20200218_201030.jpg
    136.8 KB · Views: 4,555
  • IMG_20200218_201037.jpg
    IMG_20200218_201037.jpg
    134.5 KB · Views: 4,562
  • IMG_20200218_200904.jpg
    IMG_20200218_200904.jpg
    137.3 KB · Views: 4,583
Once everything was cut I started piecing everything together and verifying all my measurements were going to fit. Somewhere along the way I decided I wanted to integrate a light bar (an extra $50 for a cheap ebay light bar).
 

Attachments

  • IMG_20200219_193859.jpg
    IMG_20200219_193859.jpg
    138 KB · Views: 4,612
  • IMG_20200219_193927.jpg
    IMG_20200219_193927.jpg
    126.6 KB · Views: 4,571
  • IMG_20200220_190057.jpg
    IMG_20200220_190057.jpg
    133.2 KB · Views: 4,620
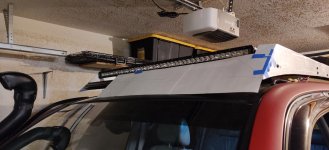
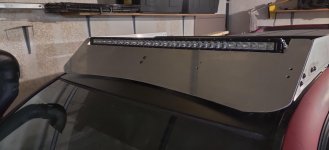
Then using a little more card stock I started to build the front wind fairing. Part of the reason for this new roof rack was for it to be more aerodynamic and have less wind noise so my goal was to get it as flush with the front as possible. This took a few tries to make it look good and push as much air over the top as possible.
 

Attachments

  • IMG_20200220_194500.jpg
    IMG_20200220_194500.jpg
    141.7 KB · Views: 4,623
  • IMG_20200220_195400.jpg
    IMG_20200220_195400.jpg
    141.9 KB · Views: 4,676
  • IMG_20200222_174238.jpg
    IMG_20200222_174238.jpg
    129.8 KB · Views: 4,528
  • IMG_20200222_180712.jpg
    IMG_20200222_180712.jpg
    129.4 KB · Views: 4,571
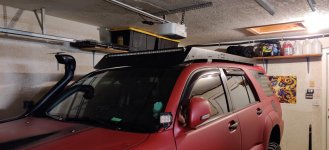
Lastly after a quick sanding, a few coats of self etching metal spray, a few coats of semi-gloss black, and some time to dry and assemble. I had a finished roof rack.
 

Attachments

  • IMG_20200303_210802.jpg
    IMG_20200303_210802.jpg
    140.5 KB · Views: 4,597
  • IMG_20200303_210812.jpg
    IMG_20200303_210812.jpg
    138.5 KB · Views: 4,628
  • IMG_20200306_072527.jpg
    IMG_20200306_072527.jpg
    143.4 KB · Views: 4,630
Looks great! I saw this video few weeks back and been thinking about making one as well. Just need to find the time lol.
 
Great job! How much did you have to bend the mounting feet? Seems the only part that might be a bit hard without access to a press. Any chance you have a picture of the finished feet?
 
That looks really good! and it looks better than some of the aftermarket racks that I've seen too. How long did it take you to build?
 
What hardware did you go with for the taps from T-nutz? Going to make something similar as well. Tap size? length of extrusion?
 
Nice Rack

Nicely done. Do-it-yourself projects are always the most rewarding. I'm hoping my Black Friday SSO rack will ship the week.
 
I love this! Did you use 1/4" aluminum? What cutting tool did you use to create the front side rails?

Yeah I just used some 1/4" aluminum that i got from Gainger. Two pieces that were 3" tall and 6' long. Then the two front pieces were cut from one piece that was 8" tall and 3' long. Used a $30 angle grinder for all of the cutting and a grinding wheel to make the radius.

I’m in Rio, what’s it gonna take to have you help me replicate this?!

Sent from my iPhone using Tapatalk

Haha typically some beer is a good start.

Great job! How much did you have to bend the mounting feet? Seems the only part that might be a bit hard without access to a press. Any chance you have a picture of the finished feet?

Thankfully I have access to a large press at work and a guy that was able to make it work. In the end they were bent at like 85 degree angle. I don't really have any pictures of that but might be able to get some?

That looks really good! and it looks better than some of the aftermarket racks that I've seen too. How long did it take you to build?

Thankfully I have a work truck so I was able to take my time with this one. Start to finish it took about 2 months. That did include changing a few things and a few orders from TNutz.

What hardware did you go with for the taps from T-nutz? Going to make something similar as well. Tap size? length of extrusion?

See below for my order. Figured that would be easier than trying to explain it
 

Attachments

  • Screen Shot 2021-03-05 at 10.09.34 AM.png
    Screen Shot 2021-03-05 at 10.09.34 AM.png
    51.7 KB · Views: 713

Members online

Forum statistics

Threads
278,316
Messages
3,554,120
Members
248,016
Latest member
Advally Service

Trending content

Back
Top