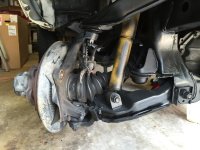
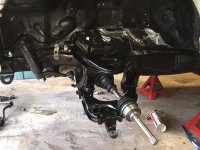
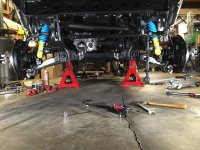
Replaced some of the front end components; replaced the original automatic hubs with manuals, new bearings, rotors, calibers, shocks, ball joints, tie rods, idler arm, damper, stabilizer, etc, etc. Not as an impressive visual transformation as some of the other things I did, but it steers and rides like a new one now.
One of the other things I did during this phase that really impressed me was replacing the shifter bushings. Super easy job, cheap, and instant gratification. It's a must do for any older 4Runner.
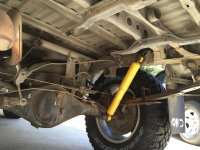
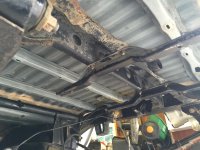
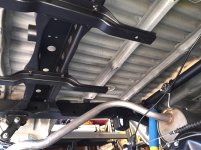
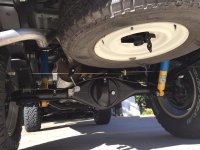
Next stop was the rear underbody, frame, suspension, exhaust, and brakes. Again replaced a lot of stuff with new Toyota parts. The most difficult part for me was replacing the universal joints and leaf spring bushings. Ended up having to torch out the old bushings. And not having a hydraulic press made these jobs more difficult.
Before I started... 30 years of dirt and grime
After a gallon of simple green and a lot of elbow grease.
After painted and some new parts installed. You can see new exhaust, parking brake cables, and new load proportioning valve assembly.
Done. Still need to replace the spare tire though.
Replaced some of the front end components; replaced the original automatic hubs with manuals, new bearings, rotors, calibers, shocks, ball joints, tie rods, idler arm, damper, stabilizer, etc, etc
Various sources but mostly online from toyotapartsdeal, even though their processing and shipping times are painfully slow. Some parts from my local Toyota dealer b/c I could get them faster, but dealers want top dollar. And sometimes I could find OEM parts on eBay and Amazon.
Wow, makes mine look waaaaay dirty lol. Like, I seriously have rig envy right now, everything is clean in yours! Mine has 2 years of dust on it and it is terrible
Various sources but mostly online from toyotapartsdeal, even though their processing and shipping times are painfully slow. Some parts from my local Toyota dealer b/c I could get them faster, but dealers want top dollar. And sometimes I could find OEM parts on eBay and Amazon.
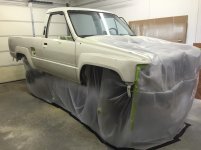
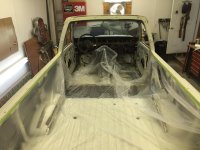
Decided to repaint the body next since I was done with the mechanical side. To get ready for the body work, I stripped all the parts off the body and covered up the work I've already done.
That black Gorilla tape I used on the floor stuck like no other. Wouldn't go back to regular duct tape after using that stuff.
Covered up most of the inside to make the dust clean-up easier. As with the Gorilla tape, the green 3M masking tape is the way to go. At first I tired using the blue painter's tape, but it wouldn't stay stuck.
Decided to repaint the body next since I was done with the mechanical side. To get ready for the body work, I stripped all the parts off the body and covered up the work I've already done.
That black Gorilla tape I used on the floor stuck like no other. Wouldn't go back to regular duct tape after using that stuff.
Covered up most of the inside to make the dust clean-up easier. As with the Gorilla tape, the green 3M masking tape is the way to go. At first I tired using the blue painter's tape, but it wouldn't stay stuck.
Yeah, that Gorilla tape is something else. I keep a roll in my cars for emergencies and one in my toolbox at home. Far superior to regular duct tape for HD applications.
I know you probably know this but the blue 3M tape comes in different adhesion levels (e.g. low tack, medium tack). They also have ratings on the # of days they can remain on the work surface before clean removal would be a problem. I think the green tape is around 2-5 days.
btw, I've used their low tack tape and found it nearly useless. I guess it would be ok for extremely sensitive applications.
Great build btw. Thanks for keeping everyone in the loop. I can't wait to see the end result. You are quite skilled.
I wish my progress was this fast. I'm actually a few months ahead of my posts. I started this project in May 2015. At this point in the thread, it was probably December 2015. And I'm still working on it to this day (mostly interior details). I only really get to work on it 2-3 weekends a month.
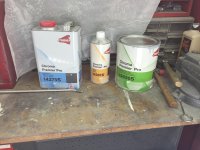
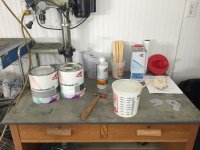
As for paint/primer... I used Cromax Chroma Premier products by Axalta (formerly DuPont). Also used a Cromax etch primer on the bare metal spots. Very expensive paint/primer, but also some of the easiest to work with and makes for a better match if you ever have to re-spray a panel. Primer sands very easily and doesn't clog up your paper. Base coat is a 1-1 mix with the reducer, and if I recall correctly, the clear uses the same reducer as the primer.
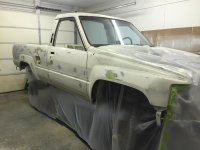
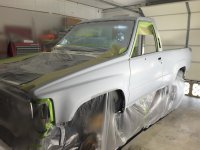
Block sanded the body all over with 320 grit. Used some of the leftover black satin I had from painting the frame as a guide coat. A couple of places had surface rust, so I sanded these spots down to the metal.
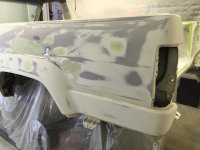
I stopped sanding once I went over it a few times and could really see the low and high spots. I then spread some Rage Gold on the low spots. There was no major body damage to the vehicle. However, there were two spots that took a lot of work to get right; one on the right fender, which you will see get bigger in later pictures, and one on the left quarter. These compound curves and body lines are tough to match for a hobby body guy like myself.
You can see some of the black guide coat on the front and top of the fender where I hadn't sanded yet.
In this pic, I had already blocked the Rage down. Used a 120 grit to knock down, then continued with the 320 grit.
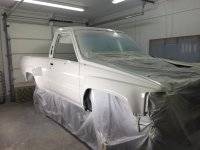
Final prime and ready for paint. Ended up blocking and priming 3 times; 2-3 coats of primer each time. Final primer prep was wet sanding with 600 grit, and good wash down, and tacked.
After 4 coats of base and 5 coats of clear. Turned out better than I expected for an inexperienced painter. (wish I knew how to make my pictures smaller on these posts?)