Axix23
New member
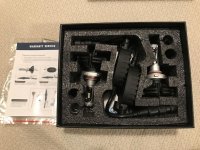
I picked up a 18 T4R Off-Road Prem with XP Predator Package and was not happy with the stock lighting. This car should of came with led/hids stock with the price we paid for. Anyways, I come from a background of Hondas/Acuras builds and I always had Hid lowbeams/fogs in them. I wanted my install as Oem looking as possible and also to look like it came like it from factory.
I started the install with only 20 miles on the odometer. LOL
The HID kit I normally run is the lifetime warranty retro-solutions 55w Digital 4300k kit. Link: http://retro-solutions.net/product-...tml=/asc_action=SetCurrentProduct/prod_id=664
I also ordered the same kit for the fogs but after having them in for 5 minutes, they were running super hot and my dumbass forget the lens was plastic and not glass like all my other Honda fog that run hids. So I ended up taking them out and swapped them for some Led bulb instead.
I been running the digital brand hid kits for over 13 years. I still have the same kit on 2006 RSX Type S with no issues.
The owner Todd is a stand up guy who will back his product 100%. I have return one ballast back to him in the past 12 years(Tech One Hid kit) and he shipped me a new one in
a few days under warranty.
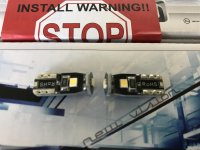
I also replaced the license plate bulb to some T-10 leds as well. These: http://retro-solutions.net/product-...8__2825_5050_PCB_LED_Wedge_Bulbs-pid2470.html. I will have some photos soon.
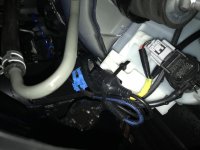
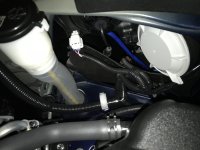
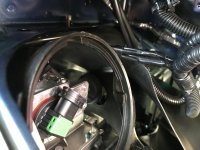
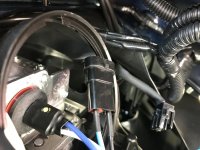
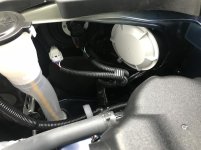
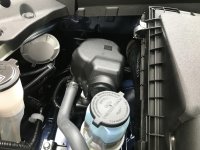
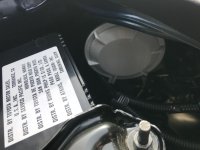
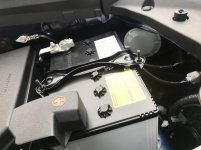
As far as the install of the hids. I didn’t not drill into the dust cover or mount my ballasts in the engine bay where it was visible. I did not want any wiring/ballasts visible at all in the engine bay. Even when you hide your ballasts under the side trim piece, your wiring will still be visible. Drilling into the dust cover makes it look non oem with the wiring coming out of the cover. The install did take me a lot longer as the hardest thing was to find somewhere to mount the ballasts with a smooth flat surface and run the wiring where it could be hidden.
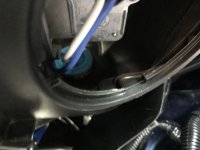
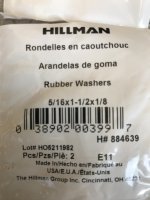
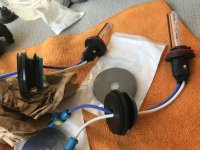
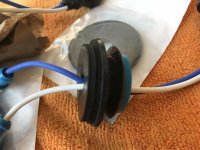
I ended up using the bottom hole of the headlights where the grommet is at and ran my hid bulb wiring out from there. I used the grommet that came with the bulb on top of some Honda oem weather seal foam tape and made me a custom grommet. I also used water proof 3m sealant tape to make sure nothing gets inside the custom made grommet.
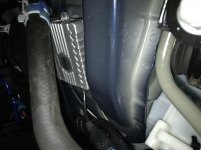
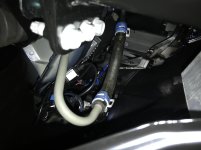
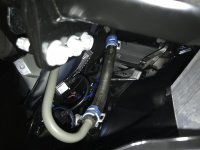
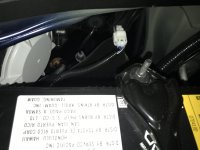
I mounted the hid ballasts on the the front lower core support behind the front bumper. (see photos below) Everything is all accessible without taking your front bumper off. I used super strong 15lb strength Scotch 3M double sided tape to mount the ballasts. I used the same tape to mount all my HID ballasts for all my cars with no issues though the years. They are actually quite hard to remove. I remeber one time, I had to use a flat head screw driver and hammer to get one ballast off.
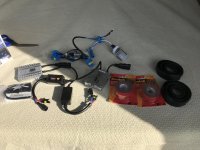
I took photos of everything to show what the install looks like.
The wiring is zip tied and out of the way.
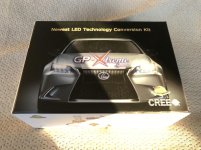
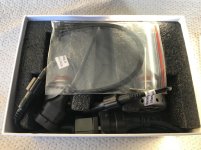
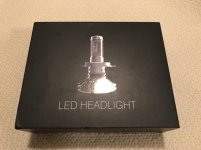
I ended up going with Gp Thunder Cree led kits for the fogs. Wiring was super easy. Way easier than HIDS. One thing I found out is the oem fog lights take h11 bulbs as well. Another thing,
the hid harness did not plug right into the oem fog light plug without modification but the led harness fit right into the h16/h11 plug. It looks like the pins on the h11/h16 are super close which makes the generic plugs not fit in property without customizing it.
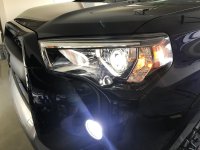
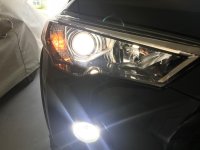
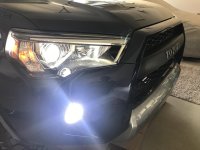
As you can see in the photos, there is no drilling, wiring, or ballasts in the engine bay. The engine bay looks completely OEM.
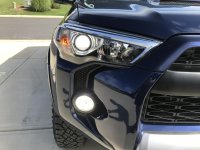
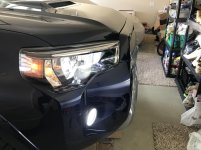
I took some daytime photos. I love the oem 4300k hid look. I wish they made 4300k leds for the fogs but oh well. I don’t like the leds bluish 6000k tint but what can you do? Lol
Enjoy the photos.
I will be installing some Retro solutions 9005 Led for the DRL/Highbeams in a few weeks.
I started the install with only 20 miles on the odometer. LOL
The HID kit I normally run is the lifetime warranty retro-solutions 55w Digital 4300k kit. Link: http://retro-solutions.net/product-...tml=/asc_action=SetCurrentProduct/prod_id=664
I also ordered the same kit for the fogs but after having them in for 5 minutes, they were running super hot and my dumbass forget the lens was plastic and not glass like all my other Honda fog that run hids. So I ended up taking them out and swapped them for some Led bulb instead.
I been running the digital brand hid kits for over 13 years. I still have the same kit on 2006 RSX Type S with no issues.
The owner Todd is a stand up guy who will back his product 100%. I have return one ballast back to him in the past 12 years(Tech One Hid kit) and he shipped me a new one in
a few days under warranty.
I also replaced the license plate bulb to some T-10 leds as well. These: http://retro-solutions.net/product-...8__2825_5050_PCB_LED_Wedge_Bulbs-pid2470.html. I will have some photos soon.
As far as the install of the hids. I didn’t not drill into the dust cover or mount my ballasts in the engine bay where it was visible. I did not want any wiring/ballasts visible at all in the engine bay. Even when you hide your ballasts under the side trim piece, your wiring will still be visible. Drilling into the dust cover makes it look non oem with the wiring coming out of the cover. The install did take me a lot longer as the hardest thing was to find somewhere to mount the ballasts with a smooth flat surface and run the wiring where it could be hidden.
I ended up using the bottom hole of the headlights where the grommet is at and ran my hid bulb wiring out from there. I used the grommet that came with the bulb on top of some Honda oem weather seal foam tape and made me a custom grommet. I also used water proof 3m sealant tape to make sure nothing gets inside the custom made grommet.
I mounted the hid ballasts on the the front lower core support behind the front bumper. (see photos below) Everything is all accessible without taking your front bumper off. I used super strong 15lb strength Scotch 3M double sided tape to mount the ballasts. I used the same tape to mount all my HID ballasts for all my cars with no issues though the years. They are actually quite hard to remove. I remeber one time, I had to use a flat head screw driver and hammer to get one ballast off.
I took photos of everything to show what the install looks like.
The wiring is zip tied and out of the way.
I ended up going with Gp Thunder Cree led kits for the fogs. Wiring was super easy. Way easier than HIDS. One thing I found out is the oem fog lights take h11 bulbs as well. Another thing,
the hid harness did not plug right into the oem fog light plug without modification but the led harness fit right into the h16/h11 plug. It looks like the pins on the h11/h16 are super close which makes the generic plugs not fit in property without customizing it.
As you can see in the photos, there is no drilling, wiring, or ballasts in the engine bay. The engine bay looks completely OEM.
I took some daytime photos. I love the oem 4300k hid look. I wish they made 4300k leds for the fogs but oh well. I don’t like the leds bluish 6000k tint but what can you do? Lol
Enjoy the photos.
I will be installing some Retro solutions 9005 Led for the DRL/Highbeams in a few weeks.
Attachments
-
 3A49644F-4314-4B4B-A41E-D87CD774ECDA.jpg138.4 KB · Views: 2,432
 -
 FCC83AF0-5826-47DB-A6AD-7B4345472634.jpg124.5 KB · Views: 2,498
 -
 5FCFDDB2-ECC7-42C8-99C3-F66A3094CBB4.jpg127.3 KB · Views: 2,522
 -
 83047DD4-EE29-4F5B-8E54-5A54DB0DF8D1.jpg116.9 KB · Views: 2,404
 -
 D8B73419-BE19-4F89-A738-98EA0CC495AE.jpg125.1 KB · Views: 2,409
 -
 B7B81D0C-7894-4581-870F-78B24001A5F1.jpg135.6 KB · Views: 2,433
 -
 FB470D98-8F88-4B9B-8384-8F013B586AA0.jpg120.7 KB · Views: 2,433
 -
 ABA3E7C7-4C04-4206-B969-448E831A797E.jpg128.8 KB · Views: 2,412
Last edited: