
Need help de-pinning connector.

Brandonium

Member
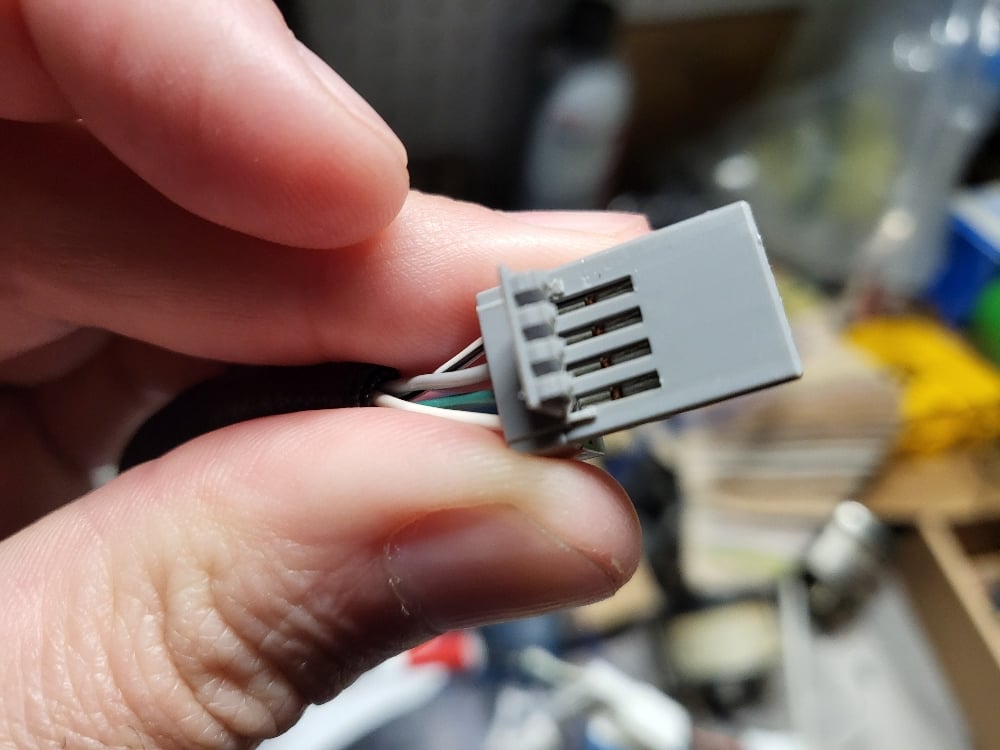
Anyone have any experience with this type of connector? I need to de-pin and re-pin it but not having much success.
1f3a2139f2a8b4a90dd6ac1ffbd106f3.jpg
09a794ae8ae1b2492e64c3966013ba35.jpg


Sent from my SM-F711U1 using Tapatalk
 
Register to hide this ad
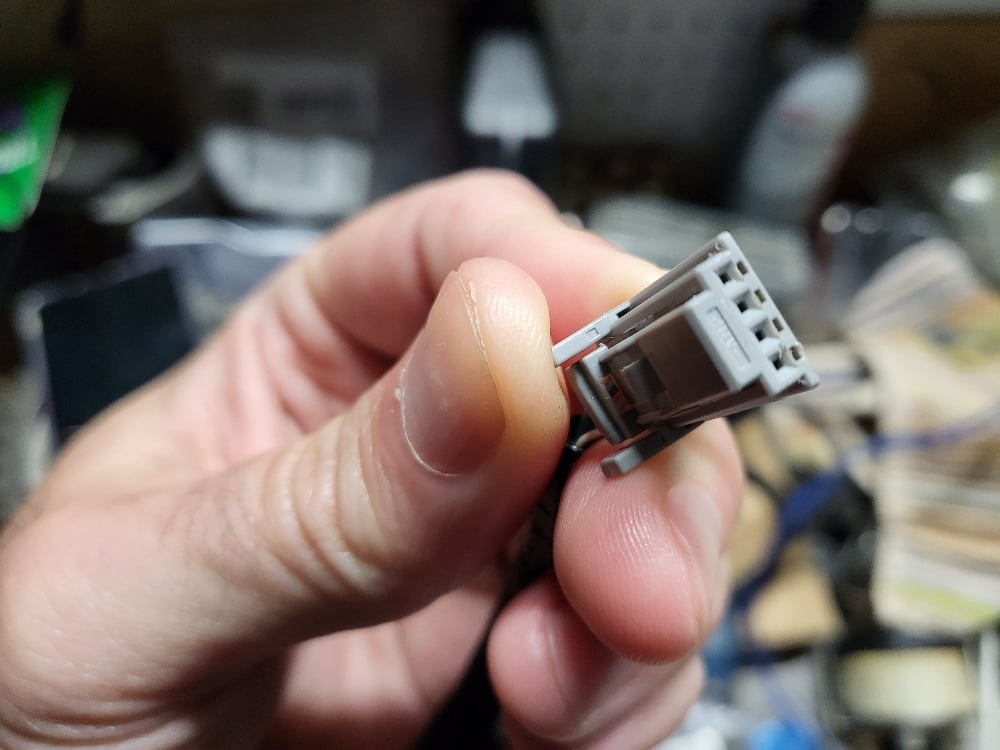
Looks like a typical JAE connector to me. You already did the first step by releasing the terminal position lock (hinged lever). Now you just need to find something long, narrow, and hardened that will fit into the small narrow slots above the square terminal cavities. Just push it in while simultaneously pulling on the wire until the terminal lock is released and the wire/terminal is pulled out.
 
Looks like a typical JAE connector to me. You already did the first step by releasing the terminal position lock (hinged lever). Now you just need to find something long, narrow, and hardened that will fit into the small narrow slots above the square terminal cavities. Just push it in while simultaneously pulling on the wire until the terminal lock is released and the wire/terminal is pulled out.

sometimes while pushing the pick in to release the wire it helps to push the wire into the connector to relieve tension
 
I agree, that looks like a front release connector. A hat pin or large needle should work to push down the locking tab to allow you to pull the wire out the back. Sometimes it helps to push/pull on the wire to help until you feel it release. If you can get a number from the plug, you may be able to look up that connector and get the part number of it and the pins/sockets of it and its mate. You might also be able to get the part number of the proper extractor tool and wire crimping info. Once you get the wire out, look at the locking tab. It may need to be pushed back out to enable it to lock securely back into the connector.
 
Anyone have any experience with this type of connector? I need to de-pin and re-pin it but not having much success.
1f3a2139f2a8b4a90dd6ac1ffbd106f3.jpg
09a794ae8ae1b2492e64c3966013ba35.jpg


Sent from my SM-F711U1 using Tapatalk

All Toyota connectors are pretty much the same. The RAV4 Wiring Harness Repair Manual shows how to remove the wire pins and install them. You need a special tool, but it also shows how to make your own tool:

https://www.toyota-tech.eu/wire_harness_rm/RM06H0E.pdf

There is probably a similar Toyota manual for the 4Runner, but I have never looked it up.
 
Very small sewing needle should do the trick (it needs to fit in that small spot above the pin opening without deforming the plastic). Push the wires forward into the connector, angle the sewing needle slightly towards the pin and you should feel it "catch" the locking tab, gently press the needle a little more while tilting it up and tug the terminal out.

Those small connectors are a pain. Why are you depinning it?
 
So weird story but I upgraded my Entune 2.0 unit to the Entune 3.0 unit and the hazard switch is different using a different connector on the switch end. The harness end is the same but my head unit did not come with the newer hazard harness and you cannot buy this from toyota as I have tried multiple times with the correct part number. The older switch connector also fits the newer switch housing but the wires need to be de-pinned and re-arranged so that the newer switch will work. It has been a fiasco!

Very small sewing needle should do the trick (it needs to fit in that small spot above the pin opening without deforming the plastic). Push the wires forward into the connector, angle the sewing needle slightly towards the pin and you should feel it "catch" the locking tab, gently press the needle a little more while tilting it up and tug the terminal out.

Those small connectors are a pain. Why are you depinning it?
 
Last edited:

Members online

Forum statistics

Threads
278,309
Messages
3,554,075
Members
248,016
Latest member
Advally Service

Trending content

Back
Top