OEM LED tail light Install w/ pics

RE: LED Tail Light Troubleshooting

Just like Javelin said, lock the little gray switch into place. It seats, but turn it some more and it locks into place. Locking the gray switch into place enables the rest of the Tail Light functions.
 
Great write up. I am looking into doing the same very soon. Does anyone have any input on the lights from rockauto.com? They are selling for 90 a piece. Seems like a good deal to me just not sure if the quality is there. Thanks
 
Installing the rear fog light from Japan on a ‘03-’05

Has anyone tried successfully installing the rear fog light from Japan on a ‘03-’05?
I am curious what was done to the re-wiring… i.e. attached to the rear lights through the hitch connection etc.

I just got my first 4Runner .. a ’05 SportsEdition -V8… w/27K-Miles…. Creating a list of upgrades to be performed…

Thanks
 
my passenger tail light started to fog up and i brilliantly tried to blwo dry and heat the fog/moisture out but melted the lens. I might be ordering some LEDs instead!

Thanks for the write up
 
This is funny ... I just did the same on my front side.... Yesterday .... Used a shop vac blowing air in while using a hair dryer ( not heat gun) on the lens ... Worked ... But root cause (water penetration) still needs to be corrected....
Thanks
 
I've been on many forums and many suffer the same moisture problem. Some try the shop vac approach, others the blow dyer. Neither work very well for most. The best way, short of completely replacing the assembly, is to place them in an oven (200-250 degrees) for about 10 minutes, remove, pry headlight clear plastic and base apart. Thoroughly clean the moisture out (if you also suffer from "yellowing plastic", get a restoration kit and/or wet sand outside AND inside the clear plastic. Then polish. When you are done, reseal with butyl. I don't have the exact steps, but if you do a search you should be able to do it!
 
Yep, I ended up taking the light assy out and stuck it in the oven .. But stayed away from 200F... 150 or less for 15-20 minutes should get the moisture out...

I inspected the assy ... No leaks that I can find.. The lens is sealed ... I used light bulb grease around the bulb socked that has the o-ring... Hope that does it ... All other light assemblies have no moisture ....
 
Just like Javelin said, lock the little gray switch into place. It seats, but turn it some more and it locks into place. Locking the gray switch into place enables the rest of the Tail Light functions.

This is key.

Thanks to the OP for the write up also.
 
Done, thanks for the writeup. It took me a while to figure out I had to plug into the bulb socket, than twist the bulb socket into the light assembly. Genius! And now I have brighter taillights for my Winter commute around the bottom of Lake Michigan.
 
Done, thanks for the writeup. It took me a while to figure out I had to plug into the bulb socket, than twist the bulb socket into the light assembly. Genius! And now I have brighter taillights for my Winter commute around the bottom of Lake Michigan.

Glad I could help! Even if it's 4 years later. :thumb:
 
Hello All,

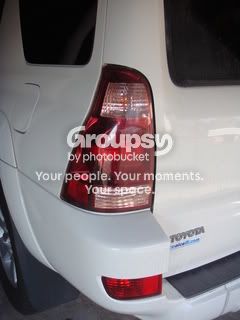
B/c I'm new here, I thought I would share this very easy mod for everyone. It is very easy to do. Someone else detailed a thread about this, but the pictures no longer work. Anyway, here it goes:

Got to get Toyota OEM:
81551-35320 (Right housing)
81561-35280 (Left housing)


1) Your 2003-2005 4Runner with the OEM lights (blah). Tools you will need (10mm each):
DSC06058.jpg
DSC06078.jpg~original


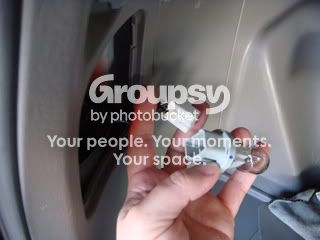
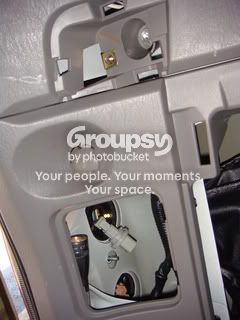
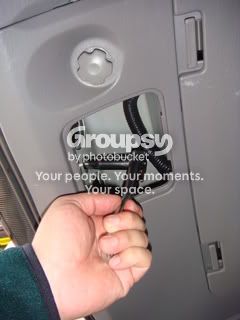
2) Starting on the driver’s side (this removable panel is identical to the one on the passenger side), remove this panel, you will then observe the “cubby space” to remove/replace the bulbs.
DSC06061.jpg
DSC06062.jpg~original


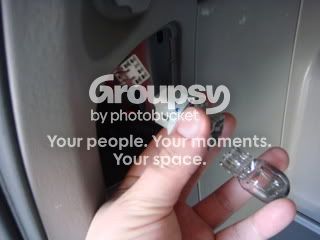
3) Remove the bulb socket, then the bulb itself!
DSC06064.jpg
DSC06066.jpg~original


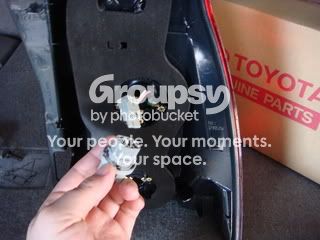
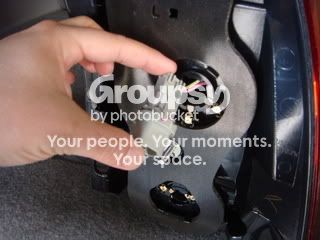
4) Now, go to your LED tail lights and connect this “bulb socket” to the “male” connector of the LED lights. You can only snap it on one way (so don’t worry if you think you will connect it incorrectly). Note: the part of the socket you are plugging in is where a normal bulb would go.
DSC06067.jpg
DSC06068.jpg~original


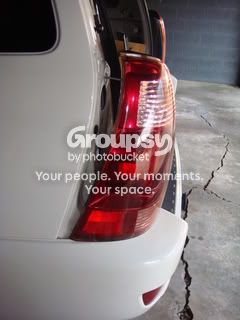
5) Proceed to remove (not necessary, but allows you to see what you are doing back there) the panel above to where a factory cargo net would attach to (see picture). As you can see, I wedged a mag-light to see where to remove the upper 10mm bolt. To remove the upper bolt, you will need a small 10mm wrench (the ratchet I had would not fit in the cubby hole) Proceed to remove the lower 10mm bolt (picture). You will use the ratchet as it easily fits inside. That is all!! When you remove the two bolts, the light assembly should come off.
DSC06073.jpg
DSC06069.jpg
DSC06070.jpg~original
.......to be continued...

CookiesRoe, I have the 2005 4Runner. I tried to search for these lights that u used to upgrade ur 2005 4Runner, Got to get Toyota OEM:
81551-35320 (Right housing)
81561-35280 (Left housing), but it says it doesn't fit for my vehicle. I love the looks of ur upgraded 4Runner and wanted to upgrade mine too
 
CookiesRoe, I have the 2005 4Runner. I tried to search for these lights that u used to upgrade ur 2005 4Runner, Got to get Toyota OEM:
81551-35320 (Right housing)
81561-35280 (Left housing), but it says it doesn't fit for my vehicle. I love the looks of ur upgraded 4Runner and wanted to upgrade mine too

When looking on an online toyota parts catalog, of course it may say it won't fit which is a lie. Follow my instructions and you are good to go! :cool:
 
I backed into the trash can on my way to work and broke the plastic housing on the drivers side taillamp. 81561 and 81551 are LED lights? I have a 2005 sport edition. Camelback Toyota lists these parts as compatible to my 4runner.
 
I backed into the trash can on my way to work and broke the plastic housing on the drivers side taillamp. 81561 and 81551 are LED lights? I have a 2005 sport edition. Camelback Toyota lists these parts as compatible to my 4runner.

Part number you listed are incomplete, it usually followed by 5 digit number. Anyway, the LED tail lights are compatible with all 4th gen years. Anyway, just use the part numbers I listed and you are set!
 
CookieRoe

GREAT write up. Thank you.

One question does all 81551-35320 and 81561-35280 include the "bulb socket" that you connect the Male socket to? I have been searching online but all the lenses that have pics of the back don't show that part. Is it something I can buy separately?
 
CookieRoe

GREAT write up. Thank you.

One question does all 81551-35320 and 81561-35280 include the "bulb socket" that you connect the Male socket to? I have been searching online but all the lenses that have pics of the back don't show that part. Is it something I can buy separately?

Thanks!

You already have the "bulb socket". When you disconnect the tail light plug, you take the socket out (it will be attached to the bulb), remove the bulb, turn this socket "around" so that it will snap into the LED tail light connector.

Good luck!
 
Thanks Cookieroe! Your illustrated instructions just helped me swap out my passenger side tail light some 6 years later.
 

Members online

Forum statistics

Threads
278,312
Messages
3,554,085
Members
248,016
Latest member
Advally Service

Trending content

Back
Top