
Official SPC(Light Racing) product update!!!

Scott@Hightech

New member
Here is the Email i received from SPC while dealing with a warranty claim.
Chris@SPC said:
Scott, the arms that need to be updated are for '05+ Tacoma and '03+ 4-runner/GX and '07+ FJ Cruiser. They would have been sold between April 2012 and November 2012. The easy way to identify them is to note that they have large washers on both sides of each bushing.

Arm kits shipped after November will either have small washers on the
inboard sides of the bushing, or no washers there at all with a little bit
of the pivot sleeve showing. Those kits are current and do not require an
update.

Anyone with large washers on both sides of each bushing should call our
Customer Service line and ask for an update kit, P/N 25478. Installation of
the update will involve replacing the pivot sleeves with slightly longer
sleeves and re-installing the arm without the inboard washers.
The kit includes a grease packet and the four longer pivot sleeves, as well
as instructions.

Performing the update will not change alignment settings.

Chris Hinds
Senior Mechanical Engineer
Specialty Products Company
1-800-525-6505

4045 Specialty Place
Longmont, CO 80504
Specialty Products Company | SPC Alignment | The Automotive Alignment Leaders
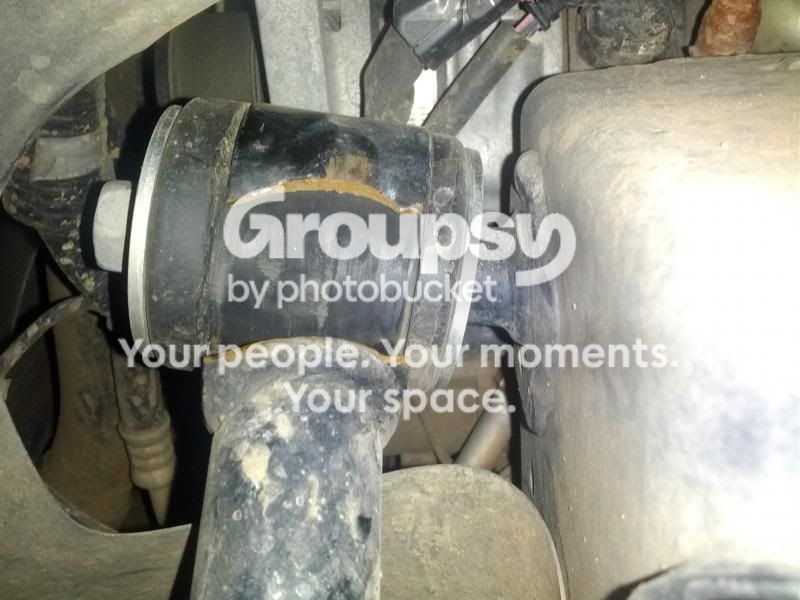
This is the bushing/washer configuration that is problematic.
IMG_20120828_152521_zps42d26a59.jpg~original

If you are unsure if this affects you, look at your upper control arms. There have been case where people replaced the original style busings with the spec ride kits and have the large washers. These also need to be updated. SPC has done a great job handling this situation, in my opinion.

Here is Ducmonsta's post that also helps outline the issue.
94927d1375817904-uca-comparison-toyota-control-arm-update.jpg


SPC's history
Version 1 - Rubber bushings, large washers on all sides (8 washers).
Version 2 - Poly bushings, large washers on all sides (8 washers). These are the ones that fail in high temp climates. The large washers "squeeze" the bushing to the point of collapse. This does not allow the control arm to pivot on the bushing. Effectively, making the control arm bend up and down at the welds.
Version 3 - Poly bushings, 4 large washers, 4 small (2 large washers on the outer most part of control arm, 2 small washers on the inside). This was SPC's solution to an extended sleeve. This does not allow the bushings to be completely compressed by large washers.
Version 4 - Poly bushings, 4 large washers (2 large washers on the outer most part of control arm). In this version the sleeve is longer and is completely butt up against the "tower tube".


Unfortunately, some of us learned at the expensive of our wallets. But I believe these are the best control arms for the money and adjustability. You just have to make sure you've got the latest version (3 or 4). Or if you're like me, I kept the rubber bushing v.1 and installed small washers.

If you are still unsure as to whether or not this applies to your vehicle, Bring your truck by the shop and we will inspect it free of charge. We have update kits in stock.

Edit: in response to this post Chris emailed me the following information
There was no bushing change between 2-3. We’ve been using the same bushing design from the beginning of SpecRide. Also, our bushings are not “poly”. Do not confuse them with Energy, Prothane, etc. When you install them with the grease we provide, they DO NOT SQUEAK. EVER. When people call the tech line for help with “squeaking bushings”, or occasionally stop by our shop, it always ends up being a rear spring, or a coilover, or a skidplate that was loose, or something like that. SpecRide is NOT “poly” and will not have the squeaking issues that are prone to poly bushings.


We really are trying to make the best product out there, and that means we constantly improve. Not only the bushings, but the boots on the ball joint, and even the arm design has been improved since I started at SPC.


Thanks for posting this info!!

Chris
 
Last edited:
Register to hide this ad
I recently removed my drivers side arm due to it squeaking severly. Upon removal I noticed the nut was not very tight. From a visual standpoint it looked tight but it had lost some of its torque. I thought that was weird. So I removed the arm and on the forward bushing the rear washer was ground down by the attach tube on the frame. I replaced the washer and lubed that area and put everything back together, retorqued the bolt and nut and everything seems good now. Definetley going to call SPC on getting the new sleeve, I'm sure the washer if left in there will grind back down causing the squeak and loss of torque on the nut.
 
I emailed SPC about the recall/upgrade and I got the revised sleeves in less than a week. The install in my driveway took about 2.5 hours, but I'm generally kind of slow. It's basically the same as installing the arms for the first time, but quicker with experience. I did not break the UCA ball joint because I still had the alignment under warranty at the place down the street. And I wanted them to try to dial in more caster anyway. I undid the big bolt at the top of the ball joint and took the UCA off that way. The new arrangement was a little easier to get on because there were fewer washer. My UCA originally came with the 4 washer / side arrangement and it was a PITA to keep all of the washers in place and get the long UCA bolt in.

After installing the new bushing the UCA seemed to move much more freely. I noticed that the wheel drooped a bit more because I had to jack up my truck more to get the tire back on.

But I guess the short story is--Get The Upgraded Sleeves!
 
Heard my passenger clunk for the first time going over speed bump on Saturday and I wondered WTH? A friend pointed out a few issues he heard about. I inspected my washers and just called them. My update kit is on the way.

I really appreciate for this thread. Thanks.
 
I just installed my update kit and it took my daughter and me about an hour. You need an extra set of hands just to avoid the frustration. I also noticed it moved freer and I have more droop..
 
I'm guessing that I need to get this update kit as well. This is the diagram on my instruction sheet and how mine are assembled.
54A38258-7354-407D-A21D-1B91238347F9-11619-00000C9BDAF1DB4A_zps2093be4a.jpg~original


I'm going to try and call them tomorrow.
 
I'm guessing that I need to get this update kit as well. This is the diagram on my instruction sheet and how mine are assembled.
54A38258-7354-407D-A21D-1B91238347F9-11619-00000C9BDAF1DB4A_zps2093be4a.jpg~original


I'm going to try and call them tomorrow.

I would absolutely do it. I can name at least 3 people who have had theirs brake.
 
Update kit (P/N 25478) is on its way and it's nice to experience such great customer service!
 
I installed the Update Kit on Saturday and just wanted to share my experience.

The entire process (wheels-up to wheels-down) only took an hour and 45 minutes by myself and being pretty meticulous. It was a straight-forward swap and I didn't need to separate the ball-joint. After getting in there, removing the long bolt (you'll need to remove the battery/battery tray to get the driver-side to slide out), and unbolting the ABS wire bracket (to move the ABS wire out of the way), I was able to pull the bushing end of the UCA up and swing it forward past the coil so that it was sitting 90-degrees from its mounted position. From there, it was easy to use an appropriately-sized socket and a clamp (one of those pistol-grip quick-clamps) to push the original sleeves out, clean up the Spec Ride Bushings, apply the new grease, and push the new sleeve in using the clamp. The sleeves need to stick out of the inner-sides of the bushings so I started them from the inside and used the clamp to push them in until they were flush with the outside of the bushing... right into the pad of the clamp. Once both sleeves were in, I just swung the UCA back into position, greased the two outer surfaces of the bushings, and slid the long bolt back in making sure to use two washers, one on each end. Torque to specification (85 lb-ft) and reattach the ABS wire bracket. Also note that to have enough room for the torque wrench on the nut, I had to remove the bolt holding the little brake system junction on each side and gently push it toward the engine... there's a little tab to position it and you have to lift slightly to clear that tab.

I may be imagining it, but I think the front end is a bit smoother now!
 
So I just gave them a call because I've narrowed the squeaking to the upper control arm and have tried everything to quiet it. I looked the thread over and while mine are from 2011 the design sounds and looks the same as the afflicted 2012 models. Seems like I may have to buy my upgrade kit, but I'm hopefully that it will help with that infernal squeak!
 
So I just gave them a call because I've narrowed the squeaking to the upper control arm and have tried everything to quiet it. I looked the thread over and while mine are from 2011 the design sounds and looks the same as the afflicted 2012 models. Seems like I may have to buy my upgrade kit, but I'm hopefully that it will help with that infernal squeak!

it's free
 
it's free

The SPC guys on the phone made it sound like I would have to buy it, mainly saying "its pretty cheap; affordable upgrade kit; ect" Not a big deal to me since mine technically is before April 2012-November 2012.

Anyways, mine has the rubber bushings vs. the "Spec-Ride" ones that the Update is meant for. I'll try to spray inside the Baljoint with some lubricant and see if that helps the squeaking, I may need new balljoints.
 
I think it's $25 for those that aren't covered by the free replacement. The free version includes 4 longer sleeves and grease because we already have the Spec Ride bushings.
 
I still dont see how they fail or why they fail? Ive seen pictures of it but cant figure out how the sleeves would have done it.
 
So I just gave them a call because I've narrowed the squeaking to the upper control arm and have tried everything to quiet it. I looked the thread over and while mine are from 2011 the design sounds and looks the same as the afflicted 2012 models. Seems like I may have to buy my upgrade kit, but I'm hopefully that it will help with that infernal squeak!

Check your ball joints, mainly under the boot! A 5th genner had one give out while out on the trail, and without much warning, see this thread for more detail: http://www.toyota-4runner.org/5th-gen-t4rs/153280-light-racing-uca-ball-joints-2.html#post1519469

I wonder how your ball joints are under the boots, would you mind reporting back and letting us know how it looks?
 
I still dont see how they fail or why they fail? Ive seen pictures of it but cant figure out how the sleeves would have done it.

the way it was designed, the washers clamped down on the bushing, didn't allow it to articulate, bushing area binds, rest of UCA tries to go up or down and welds snap.
 

Members online

Forum statistics

Threads
278,312
Messages
3,554,089
Members
248,016
Latest member
Advally Service

Trending content

Back
Top