I run a dash cam in front of my rear view mirror and have recorded several accidents. The cord needed to be routed so it wasn't in the way. I didn't want to run a wire up the A pillar in case an airbag deployed. Here is my solution...
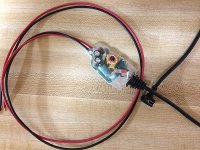
Pic 1 - Pried open the dash cam's cigar power adapter's end and found the voltage converter. Soldered new leads on it and shrink wrapped the converter. 3M outdoor mounting tape was placed on the flat side for mounting later.
I removed the two screws near the glasses holder and pulled the roof console down by the aft side and it popped off. After disconnecting the harness I took it inside.
There was a single screw in the center of the plastic bracket and the black frame had plastic catches that were released with a small flat tipped screw driver.
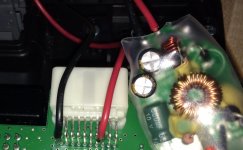
Pic 2 - Soldered the leads to the map light circuit board's main connector pins. One for ground, two for power. Check your wires to ensure the power is on both of them. The power bus feeding this is above the SOS button. If in doubt, ring them out! Reassembled the roof console. Don't forget the screw! I'm not worried about the load because the lights have been replaced with LEDs.
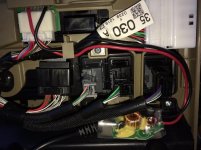
Pic 3 - Mounted the power adapter on the back of the glasses housing.
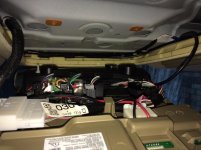
Pic 4 - Harness is reconnected and dash cam's wire is routed so it pokes out over the headliner and against the windshield above the rear view mirror.
Having the dash cam power on when the car is unlocked, and stay powered until the map lights go out at the end of the drive out, is a nice feature.
If I had access to the factory wiring diagram I would have referenced the exact pins in accordance to the diagram.
Justin
Pic 1 - Pried open the dash cam's cigar power adapter's end and found the voltage converter. Soldered new leads on it and shrink wrapped the converter. 3M outdoor mounting tape was placed on the flat side for mounting later.
I removed the two screws near the glasses holder and pulled the roof console down by the aft side and it popped off. After disconnecting the harness I took it inside.
There was a single screw in the center of the plastic bracket and the black frame had plastic catches that were released with a small flat tipped screw driver.
Pic 2 - Soldered the leads to the map light circuit board's main connector pins. One for ground, two for power. Check your wires to ensure the power is on both of them. The power bus feeding this is above the SOS button. If in doubt, ring them out! Reassembled the roof console. Don't forget the screw! I'm not worried about the load because the lights have been replaced with LEDs.
Pic 3 - Mounted the power adapter on the back of the glasses housing.
Pic 4 - Harness is reconnected and dash cam's wire is routed so it pokes out over the headliner and against the windshield above the rear view mirror.
Having the dash cam power on when the car is unlocked, and stay powered until the map lights go out at the end of the drive out, is a nice feature.
If I had access to the factory wiring diagram I would have referenced the exact pins in accordance to the diagram.
Justin