
You are using an out of date browser. It may not display this or other websites correctly.
You should upgrade or use an alternative browser.
You should upgrade or use an alternative browser.
Pearl's mod/build LT rear/DK +3.5 LT/Custom Baja Bumper/Thorley Headers/Manual T-case
- Thread starter 4RunnerAquasport
- Start date

4RunnerAquasport
Senior Member
Yea, it wouldn't be so bad if you could time travel through Texas. Takes about a day on I-10.Dang, that’s a haul !
Sent from my iPhone using Tapatalk
Have driven the 5th gen out twice before, now it's Pearl's turn to flex the V8.
4RunnerAquasport
Senior Member
4RunnerAquasport
Senior Member
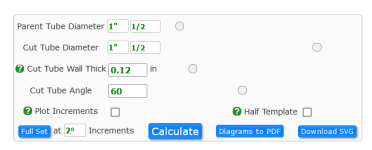
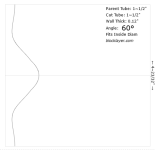
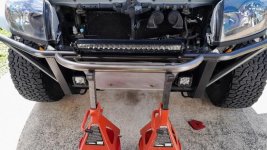
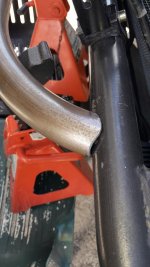
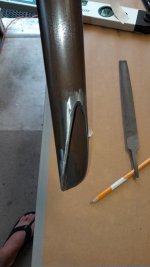
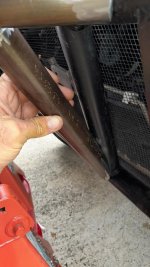
Thinking about doing a couple changes to the bumper. I found some free coping notch calculator software and tried a few experiments and think I might be pointed in the right direction. No idea what I'm doing....
Attachments
4RunnerAquasport
Senior Member
4RunnerAquasport
Senior Member
4RunnerAquasport
Senior Member
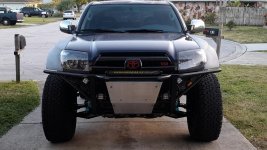
bumper face lift con't
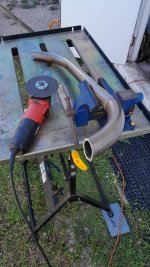
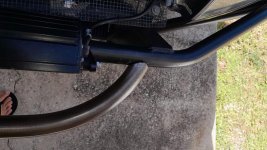
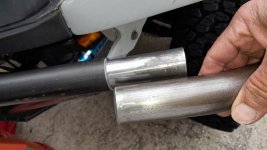
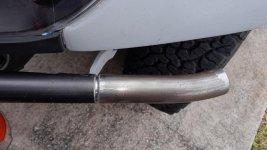
The reason all this bumper remodel is being done, I needed to extend the main tube to match the fiberglass. Had some scrap left over from the nerf bar, and ended up using them. Not perfect, but solid with the nipples working out well. I plan to do some plug welds on either side and then stitch the seam.
The reason all this bumper remodel is being done, I needed to extend the main tube to match the fiberglass. Had some scrap left over from the nerf bar, and ended up using them. Not perfect, but solid with the nipples working out well. I plan to do some plug welds on either side and then stitch the seam.
Attachments
4RunnerAquasport
Senior Member
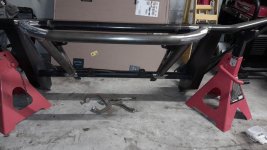
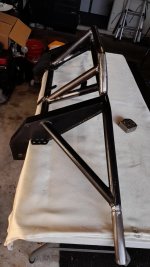
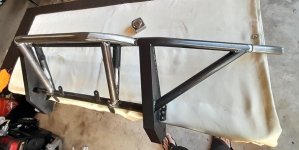
bumper face lift con't
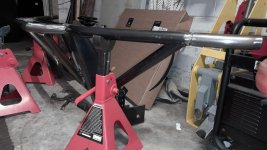
So I have everything tacked in, except for the light bar tabs and aluminum plate tabs. It's a hair off in a few places, but it might turn out to be ok. Once the welding begins is when it all goes south....SMH.
So I have everything tacked in, except for the light bar tabs and aluminum plate tabs. It's a hair off in a few places, but it might turn out to be ok. Once the welding begins is when it all goes south....SMH.
Attachments
4RunnerAquasport
Senior Member
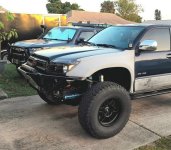
4RunnerAquasport
Senior Member
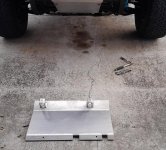
Got tired of fighting the factory skid every time I changed the oil, and it had taken a lot of hits over the years so it was due to be retired.
So I had Anthony and Josh at Apex Fabrication, Merritt Island, Fl. bend me up some aluminum. They did a great job considering the cardboard template I gave them was truly a rookie attempt. My measurements were damn close though, we only had to make one adjustment to the rear mounting tabs. Now I can replace the filter without removal of the skid. I basically copied the Bud Built pics on their site.
Bare aluminum looks pretty good under there. Sanded it down horizontally with WD40 and some used 1500, so it has a mild brushed look.
So I had Anthony and Josh at Apex Fabrication, Merritt Island, Fl. bend me up some aluminum. They did a great job considering the cardboard template I gave them was truly a rookie attempt. My measurements were damn close though, we only had to make one adjustment to the rear mounting tabs. Now I can replace the filter without removal of the skid. I basically copied the Bud Built pics on their site.
Bare aluminum looks pretty good under there. Sanded it down horizontally with WD40 and some used 1500, so it has a mild brushed look.
Attachments
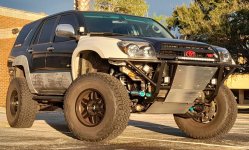
4thGenCanuck
New member
Nice! Really like that bumper
4RunnerAquasport
Senior Member
4RunnerAquasport
Senior Member
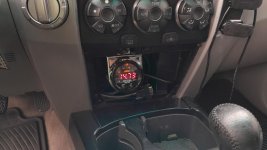
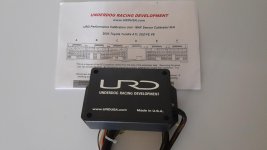
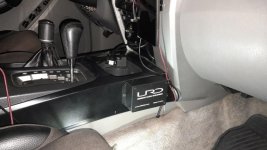
Decided to mount the URD in a location easily accessible. Did a base run on a Mustang Dyno.
I realize there won't be much more power gain out of this 4Runner in its current set up, but you gotta start somewhere. Thanks to Rolo Lopez @CentralFloridaTurbo It was basically a teaching session for him. As you can see in the video linked below, my dumb ass never went WOT on this pull...SMH. I had 3 bad pulls because of my inexperience, but I settled down on the last one and will use that as a baseline. I should have run 2 more.....
I do have to remember this MY only came 230 HP at the crank. They were made for more torque and these torque numbers on a Mustang Dyno aren't terrible.
Mustang Dyno You Tube Vid
03' 4Runner V8 w 35" tires
58* raining/intake Temps 70* to 90*
189.85 HP @ 4600 rpms
250.69 Ft Lbs @ 3900 rpms
I realize there won't be much more power gain out of this 4Runner in its current set up, but you gotta start somewhere. Thanks to Rolo Lopez @CentralFloridaTurbo It was basically a teaching session for him. As you can see in the video linked below, my dumb ass never went WOT on this pull...SMH. I had 3 bad pulls because of my inexperience, but I settled down on the last one and will use that as a baseline. I should have run 2 more.....
I do have to remember this MY only came 230 HP at the crank. They were made for more torque and these torque numbers on a Mustang Dyno aren't terrible.
Mustang Dyno You Tube Vid
03' 4Runner V8 w 35" tires
58* raining/intake Temps 70* to 90*
189.85 HP @ 4600 rpms
250.69 Ft Lbs @ 3900 rpms
Attachments
Last edited:
4RunnerAquasport
Senior Member
4RunnerAquasport
Senior Member
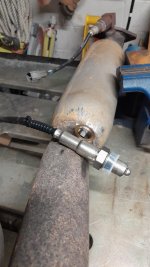
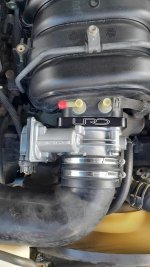
The spacer is actually an adapter to run a larger Throttle body off of the Lexus LC500/RC-F. Yes, you are correct, I had to do a little surgery to make it work for clearance.Does that URD throttle body spacer actually do any difference performance wise? Also, afraid that if I was to install a spacer, my cold air intake tube from AFE will hit the radiator fan.
I don't think there is any performance gain unfortunately. I think it's flowing a little more air, as the fuel trims changed a little, but until I learn how to tune......
I want to do some Cams w a port and valve job in the future also, so the larger TB should open things up, if I can pull that one off financially.
On the positive side is I have a brand new throttle body and it looks OK.
I figured you would have to do some surgery. Also have you looked into the Yotawerx tune?
The spacer is actually an adapter to run a larger Throttle body off of the Lexus LC500/RC-F. Yes, you are correct, I had to do a little surgery to make it work for clearance.
I don't think there is any performance gain unfortunately. I think it's flowing a little more air, as the fuel trims changed a little, but until I learn how to tune......
I want to do some Cams w a port and valve job in the future also, so the larger TB should open things up, if I can pull that one off financially.
On the positive side is I have a brand new throttle body and it looks OK.
4RunnerAquasport
Senior Member
As far as I know, they haven't developed a tune for the 03' -04'. I believe it has to do with Toyota going CAN bus in the 05' and later MY.I figured you would have to do some surgery. Also have you looked into the Yotawerx tune?
I think it's the current system protocol to date, across several models, so they have developed that tune first to serve a bigger demographic. Not that many 03' 04' owners looking for a tune I guess.
However, I might be able to clean up the fuel trims with the URD unit, so we'll see if I can get more power.
There are Piggy back and stand alone ECUs that work off of a Manifold Absolute Pressure system, which I may end up doing one day.
4RunnerAquasport
Senior Member
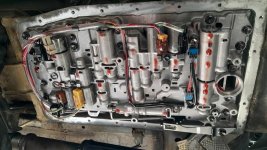
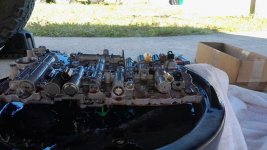
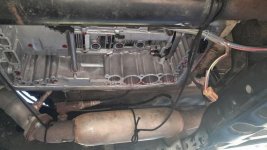
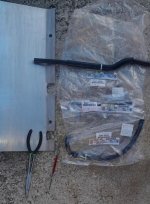
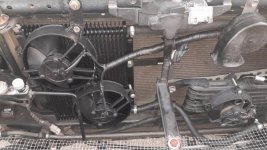
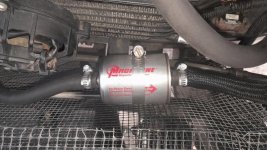
Transmission work this week. Got a mild upgrade on my valve body to firm up the spongy shifting. Also installed an 11" x 11.5" Hayden w 2 - 5.2" Spal pusher fans, switched out a few of the trans hoses, and put a Magnefine Trans Filter in line. . Truck is running good so far.
Attachments
4RunnerAquasport
Senior Member
FYI for everyone: Here is a video that John at IPT Performance Transmissions made using the valve body I purchased off Ebay and is the one I installed in the post above. I decided to roll the dice with this chinese reman, and I'm glad I sent it out for the service at IPT. The solenoids DID NOT MATCH my wiring harness, so I had to swap in my old solenoids. Truck worked fine last night on a 30 mile test drive, but I would say the Ebay Valve Body was a mistake.
What Did You Buy? Toyota A750- JUNK eBay "Rebuilt" Valve Body - YouTube
What Did You Buy? Toyota A750- JUNK eBay "Rebuilt" Valve Body - YouTube
Similar threads

Members online
Total: 3,674 (members: 6, guests: 3,668)
Forum statistics
Trending content
-

-

-
-
-
Thread 'Fixed: Dead Instrument Cluster in 2003 Toyota 4Runner (Corrosion Issue)'
- TheSpeakGeek
Replies: 9