Please check my work: Cb cable from rack into rear hatch

Vegas

New member
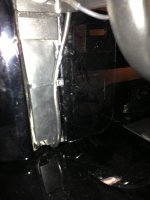
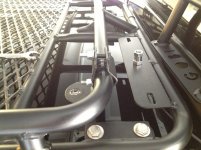
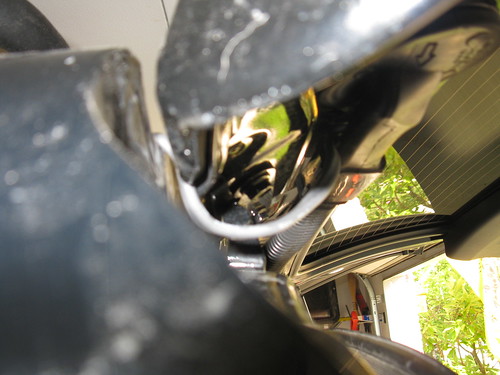
So I have looked at a few threads on how others have done this and after looking at them I have trimmed back the small black rain gutter piece twice now to try to give the cable more room to breath... but every time I open the hatch it makes a loud squeak from rubbing against the cable and I anticipate either the paint rubbing off at that spot or the cable eventually flatting out with enough opens of the hatch to fix itself... besides drilling a hole in the Fin is there a better solution? or I guess the better question is: Does the way I ran the wire look correct?
And I know these cell phone pics are terrible.. sorry... I'm sure with a little grease it could help but I am thinking once I add wires for the roof rack lights it will add to the problem.... I wanted to see how the smart kids were doing it.
Thanks!
2013-02-28 16.55.17.jpg

2013-02-28 16.53.01.jpg
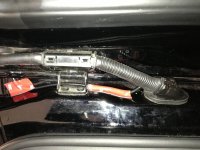
Its the only strong tape I had I need to replace it.
2013-02-17 10.46.01.jpg
 

Attachments

  • 2013-02-28 16.55.17.jpg
    2013-02-28 16.55.17.jpg
    127.7 KB · Views: 2,350
  • 2013-02-28 16.53.01.jpg
    2013-02-28 16.53.01.jpg
    120 KB · Views: 1,916
  • 2013-02-17 10.46.01.jpg
    2013-02-17 10.46.01.jpg
    134.2 KB · Views: 2,195
Register to hide this ad
I'm running mine under the rain gutter cover. that way the bends are less steep. I also have mine enter the cable tube at the square section (pics are in my build thread), but basically you have things running the way I do.

I'm running a very small diameter cable; are you running RX8? The thicker diameter cables may be a bit more of a challenge running through the gap between the body and hatch.

Okki
 
I would put the coax in split loom tubing for where it goes behind the hinge to reduce chafing.
 
I'm running mine under the rain gutter cover. that way the bends are less steep. I also have mine enter the cable tube at the square section (pics are in my build thread), but basically you have things running the way I do.

I'm running a very small diameter cable; are you running RX8? The thicker diameter cables may be a bit more of a challenge running through the gap between the body and hatch.

Okki
Hey Okki
I should have gone under like you did but I thought it would block the water channel...*Like you told me not to do in your gobi install write-up when putting sealant around the holes!
I got this cable...(below)
I read your post about the difficulties you were having when trying to make a cable so I got scared and bought the premade one.
Firestik FireRing CB Coax with FME | Right Channel Radios

I should have tried running it through the square bundle... much cleaner looking, but I tried for about a minute and wasn't sure what I might be stabbing so then I stabbed a hole in the back part... I am now like a weather man always checking to see if it rains so I can find out if I have leak.

I would put the coax in split loom tubing for where it goes behind the hinge to reduce chafing.
Good call Grant, it will protect it and look more professional than the chewing gum I thought about using.
 
My only added suggestion would be to replace the 3M tape with a cable holder. I was able to pick up a pack of 10 at Fry's and used them to hold my coax for my HAM and also the license plate light wires. That way the wire has a bit of freedom to move smoothly.
 
Kind of hard to tell from your pics but here is what I did....
I can never make you happy PhillyD the pics are either too big or too blurry and hard to see... I am going to the mall tomorrow to get some glamour shots of the truck with a sweet back drop.
Thanks for posting the photos really helpful. I knew I gave up too quickly on running wires through the square harness and I also like how flat and low profile that wire harness is you have for your roof rack lights. Not sure if that came with your ridges or not but I'll make sure to find one when I get my lights.
My only added suggestion would be to replace the 3M tape with a cable holder. I was able to pick up a pack of 10 at Fry's and used them to hold my coax for my HAM and also the license plate light wires. That way the wire has a bit of freedom to move smoothly.
Hey Mikey it was probably your build thread or someones i saw use the little square 3M cord organizers I looked at a few local stores the other day to get rid of the loud RED double sided tape but couldn't find any... Going to go with amazon.

Thanks for the help guys:clap2:
 
Looks good buddy!

THese guys are very very handy to hold down cables and such. They wear 3M adhesive on one side and just thread a good old zip tie through it to hold whatever.

McMaster-Carr

Part # 7582K11
 
Hey Okki
I should have gone under like you did but I thought it would block the water channel...*Like you told me not to do in your gobi install write-up when putting sealant around the holes!
I got this cable...(below)
I read your post about the difficulties you were having when trying to make a cable so I got scared and bought the premade one.
Firestik FireRing CB Coax with FME | Right Channel Radios

hahahahahaha you crack me up... yeah. I had some challenges making a cable myself, but it also tells you how to simply call RFParts.com and have them build it for you. :) The small diameter RG316/U Clear Jacket M17/113/RG316 Thermax cable makes it a little easier to deal with throughout the vehicle compared to an RG8.
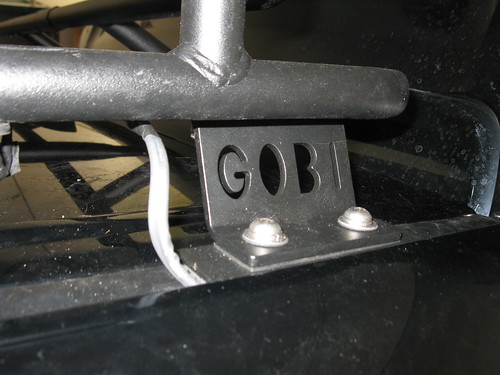
This is the power cable for my roof lights and how I ran it:
5968236511_b5beced607.jpg

Trim a hole in the rubber and exit the wires. dont forget to wirewrap them. Run them under the rubber raingutter cover. You will have to trim a corner out.
5968235927_1d4164167a.jpg

If you need specific shots, just give me a shout.

Okki
 
So can't figure out how to post multiple pics on here using my iPad without using the taptalk app (don't wanna use the app cause the pics end up huge) so guess Ill post one at a time...

image.jpg
So the cord organizer stickies didn't hold too well so back to the drawing board... And adding the cable wire wrap added more diameter to getting the to fit.
 

Attachments

  • image.jpg
    image.jpg
    137.1 KB · Views: 1,909
image.jpg

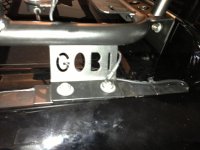
I also notice that since I have to light bracket mounts on both side that I could have used one for mounting the CB antenna... So the middle hole is a little bit bigger but I could drill out the hole closest to the Side to mount the antenna... Hmmm or I keep it where it is at and just wait a few years till ridge prices come down or till I drop enough weight to start stripping to afford them. :beer:
 

Attachments

  • image.jpg
    image.jpg
    135 KB · Views: 2,289
View attachment 84721

I also notice that since I have to light bracket mounts on both side that I could have used one for mounting the CB antenna... So the middle hole is a little bit bigger but I could drill out the hole closest to the Side to mount the antenna... Hmmm or I keep it where it is at and just wait a few years till ridge prices come down or till I drop enough weight to start stripping to afford them. :beer:

Thinking about applying for a job at thunder from down under? :)

You crack me up dude :lmao:
 
So can't figure out how to post multiple pics on here using my iPad without using the taptalk app (don't wanna use the app cause the pics end up huge) so guess Ill post one at a time...

View attachment 84720
So the cord organizer stickies didn't hold too well so back to the drawing board... And adding the cable wire wrap added more diameter to getting the to fit.

You need to replace the adhesive on the cord organizers with 3M trim tape (the real deal).

The 3M tape will hold up to the temperature extremes your car endures. Clean the mounting surfaces with alcohol first. All will be good then.
 
Have you looked into this kind of split braided sleeving? It might be able to compress down and flex a bit better than that rigid split loom kind you used...
Techflex - Flexo F6 Semi-Rigid Wraparound Braided Sleeving
That's exactly what I need to get but too lazy to make the trip to frys so amazon it is!
Thinking about applying for a job at thunder from down under? :)
You crack me up dude :lmao:
I mean SoCal has found a way to make money on the side with his fabrication skills... I just need to find something to feed the mod budget this website has really made me think about going down some dark paths to feed the mod monster... And stripping is the least of those dark paths... I mean there is always the breaking bad route (cooking meth) but lets be honest I would most likely blow myself up.
You need to replace the adhesive on the cord organizers with 3M trim tape (the real deal).

The 3M tape will hold up to the temperature extremes your car endures. Clean the mounting surfaces with alcohol first. All will be good then.

Ah ha 5 steps ahead of you for once! :hand:
Or at least on the same page as you... I order the 3m cord organizers (so I thought) the sticky wasn't as sticky as the 3M automotive tape I originally used so I cut off the cheap sticky and used the 3M on the back... I think the bulky cord protector is just getting in the way... So ill use the flex protector and redo do the 3m cord organizers... You know me why do a job once right when I can do it several times:doh:
 

Members online

Forum statistics

Threads
278,312
Messages
3,554,089
Members
248,016
Latest member
Advally Service

Trending content

Back
Top