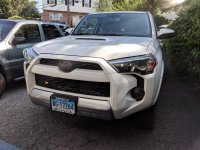
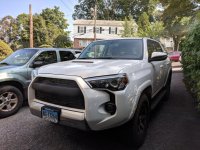
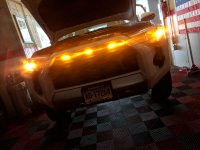
Po – My ‘18 TRDORP Build/Adventure Thread

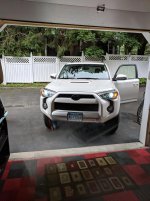
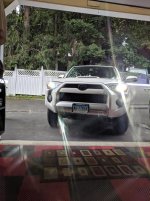
Yeah buddy! They're installing my TRD Pro lift, their slimline front winch bumper, undercoating the undercarriage, 6 shooter wheels w/ Nitto Ridge Grappler tires and blacking out the hood.

Damnnnnn that is gonna be sick. I want to black out the hood and do a slimline bumper eventually, but first I need money lmao. What color is the rig???
 
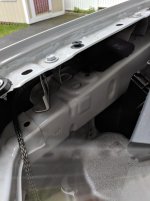
Here in Oregon we don't salt the roads, we also don't get nearly as much snow. Anyway, every year during our roughly 2-5 days with snow people freak out and start calling for salt. Some even claim it doesn't hurt modern cars... Your pics are a great example of how wrong they are. I just sold a 2007 rig that, to my knowledge, was totally rust free!
 
Here in Oregon we don't salt the roads, we also don't get nearly as much snow. Anyway, every year during our roughly 2-5 days with snow people freak out and start calling for salt. Some even claim it doesn't hurt modern cars... Your pics are a great example of how wrong they are. I just sold a 2007 rig that, to my knowledge, was totally rust free!

Yea salt is 100% a silent killer. It took my last rig from me basically. One little nick on the frame from a rock and then the snow and salt will just cause rust to spread unless you take action.

Which now means I am taking REAL good care of this one. Lesson learned once. Don't want to repeat that crap haha.
 
TRS 4500k HID Install

TRS 4500k HID Install

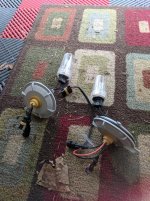
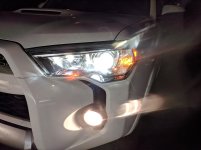
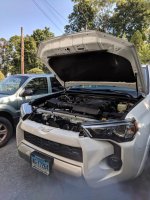
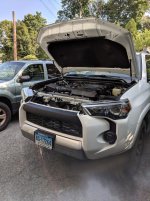
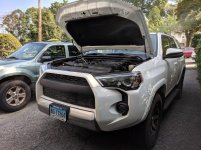
Finally got around to installing my HIDs and ho lee hell I should have done it sooner. Honestly a fantastic upgrade that is not too hard at all. I went with the Morimoto 4500k kit from TheRetrofitSource. Thought about going with 55w kits, but I decided that for my use, the 35w ballast was going to be more than enough.

Installing them was actually very straight forward. Lay everything out, drill some holes in the stock dust covers with a step bit, and then push the wires through. 7/8" was the perfect size for the grommet, although I did have to dremel out a small notch for the one side that connects to the OEM light harness.

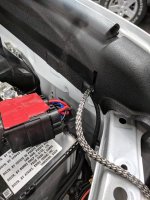
I did my best to hide all of the wires and ballasts as I am a huge fan of a clean install. I followed some other users and ended up using heavy duty 3M tape to mount the ballasts under the weather stripping, and more 3M to mount the relays between the fender and the battery. All in all it is a great kit so far and I am super happy with the output of the lights! Next up, XB LED Fogs!

IMG_20180610_144600.jpg

IMG_20180610_161529.jpg

IMG_20180610_161534.jpg

IMG_20180610_170113.jpg

IMG_20180610_170117.jpg

IMG_20180611_210656.jpg

IMG_20180611_210719.jpg
 

Attachments

  • IMG_20180610_144600.jpg
    IMG_20180610_144600.jpg
    143.7 KB · Views: 370
  • IMG_20180610_161529.jpg
    IMG_20180610_161529.jpg
    125.6 KB · Views: 374
  • IMG_20180610_161534.jpg
    IMG_20180610_161534.jpg
    137.3 KB · Views: 375
  • IMG_20180610_170113.jpg
    IMG_20180610_170113.jpg
    137.3 KB · Views: 372
  • IMG_20180610_170117.jpg
    IMG_20180610_170117.jpg
    137 KB · Views: 372
  • IMG_20180611_210656.jpg
    IMG_20180611_210656.jpg
    135.4 KB · Views: 371
  • IMG_20180611_210719.jpg
    IMG_20180611_210719.jpg
    111.3 KB · Views: 375
looks great man! I moving to a 5th gen as well, ordered an 2010 Trail from Adventure Motors. Having them put a few things on it before shipping the rig to CT.
Right on! AM is the real deal here in KC! Good people who know their Toyotas and build some pretty awesome rigs! Cheers!
 
XB LED Fogs

Morimoto XB LED Fogs

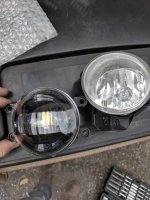
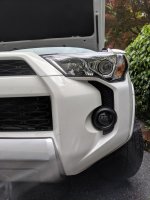
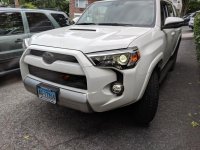
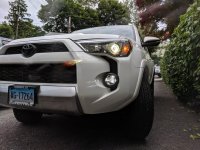
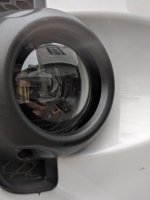
Took the weekend to install the XB LED Fog light assembles from TheRetrofitSource. Really nice housing all around and I love the look of the more tinted housing vs the stock halogen housing.

Installing them was somewhat straightforward, although still a total pain in the ass. Had to pull back the fender liners on both sides to be able to easily access the screws for the stock housings. Not to mention the annoying splash guard on the passenger side. All in all though, it probably took me just over an hour and a half to do this (granted a lot of that time was trying to figure out how to move the fender liners out of the way enough.

I was interested to see that my XB LED housings slipped right in to the housing and screwed right in. I know some people who have installed these housings have had to take a dremel and remove a small amount of material on the screw bosses, but mine popped right in to the factory location with a very satisfying click. The screws lined up and we were off to the races.

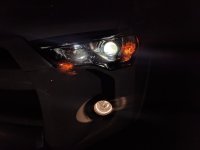
Really happy with the output on them so far. They are not a perfect match for the HIDs, but it is very close to the naked eye and they put out a lot of light with a sharp cutoff. Overall very impressed. Pics below.

1.jpg

2.jpg

3.jpg

4.jpg

5.jpg

6.jpg

And a little teaser of the next setup to get put in to the rig!
7.jpg
 

Attachments

  • 1.jpg
    1.jpg
    131.5 KB · Views: 335
  • 2.jpg
    2.jpg
    122.9 KB · Views: 332
  • 3.jpg
    3.jpg
    119.5 KB · Views: 333
  • 4.jpg
    4.jpg
    129.9 KB · Views: 334
  • 5.jpg
    5.jpg
    135.9 KB · Views: 331
  • 6.jpg
    6.jpg
    136.7 KB · Views: 333
  • 7.jpg
    7.jpg
    126.2 KB · Views: 335
ARB Twin Compressor

ARB Twin Compressor

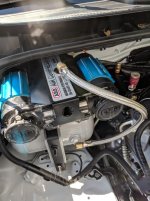
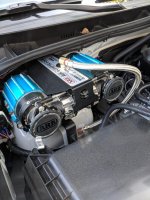
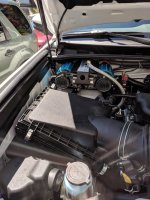
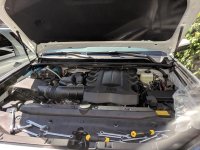
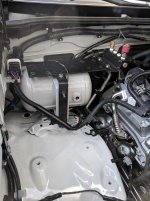
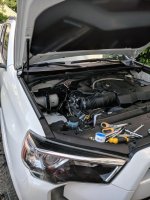
Welp, finally got around to re-installing and finishing up the wiring on the ARB Twin Compressor from my previous 4th Gen. Had a Bandi mount on the previous rig, so I knew I wanted to get one for this rig. I opted for the one with the 1 gallon tank, and installed it. All in all, I am super happy with how it all came out. It fits like a glove in the corner section of the engine bay.

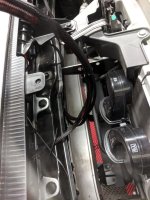
Installing it was a bit of a pain, but mainly because the clearances are so tight in that corner of the engine bay. If you do this mod, I HIGHLY recommend you take out the airbox. It is just a few bolts and it gives you so much more room to be able to install this. I tried installing a few ways, but found the easiest way was to put the mount together, install the air tank on to it, mount it in to the truck, and then mount the compressor to it. Easy is a relative term here, but I have been able to take it apart and put it back together in about 20 minutes now, so I think it is pretty easy.

Ended up running leader hoses from the ARB to the tank, and then the tank to a manifold. The tank has 4 fittings, so one is for air in, one for air out, one for a dump valve, and one is plugged. I then installed the manifold and have a safety blowoff valve on there as well as a quick disconnect for an air hose. I opted for the manifold because I may run an airline to the rear eventually and wanted the option for expandability.

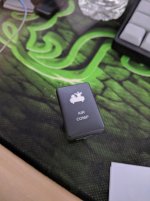
Wired everything up to an AOB switch and man, what a pain in the ass. I wired it numerous ways and finally got it how I wanted it. I wanted the AOB switch to dim with the dash lights and I finally figured it all out. To wire it up to the "Isolating Switch" part of the ARB harness, you need to do the following:

AOB Blue - Connect to ARB Blue/White
AOB Black - Connect directly to factory gray wire on wiper heater switch
AOB Red - Connect to ARB Red/Yellow
AOB Green - Connect to ARB Red

ARB Black(x2) - Tie both wires together and ground to chassis.
ARB Blue/White - Connect quick disconnect end to AOB Blue. Connect diode end to factory green wire on wiper heater switch.
ARB Red/Yellow - Connect quick disconnect end to AOB Red. Connect diode end to fuse of your picking on interior fuse box.
ARB Red - Connect directly to AOB Green

The wiring was confusing, so if anybody has any questions, let me know. Pictures of the finish product below!
ARB1.jpg

ARB2.jpg

ARB3.jpg

ARB4.jpg

ARB5.jpg

ARB6.jpg
 

Attachments

  • ARB1.jpg
    ARB1.jpg
    133.5 KB · Views: 268
  • ARB2.jpg
    ARB2.jpg
    131.3 KB · Views: 266
  • ARB3.jpg
    ARB3.jpg
    132.2 KB · Views: 266
  • ARB4.jpg
    ARB4.jpg
    137.4 KB · Views: 263
  • ARB5.jpg
    ARB5.jpg
    135.6 KB · Views: 264
  • ARB6.jpg
    ARB6.jpg
    134.4 KB · Views: 267
BlueSea Battery Monitor

BlueSea Battery Monitor

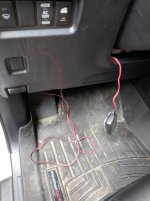
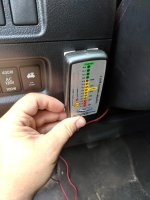
Yet again, another install from the previous rig. Had this installed in the 4th gen because I enjoyed having a battery monitor that was easy to read when out camping and potentially draining the battery.

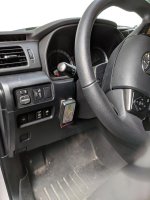
Considering I only have one battery (for now), I definitely wanted to make sure this made it's way in to Po. Running the wires is stupid easy, but finding a place to mount it was not as easy. I wanted some place that was visible, yet out of the way during day to day driving so I don't have too many things trying to grab my attention.

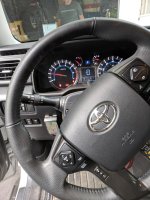
I found this spot right next to the factory switches to be perfect, as the steering wheel blocks it completely from view when driving. But I can look down or look through the window (if outside the rig) to check it without a problem. I will likely play around with the mounting position until I find exactly what I want (hence the kinda lame white 3m tape and crap).

Oh, and you can see the ARB compressor switch all wired up too!

BlueSea1.jpg

BlueSea2.jpg

BlueSea3.jpg

BlueSea4.jpg
 

Attachments

  • BlueSea1.jpg
    BlueSea1.jpg
    132.9 KB · Views: 229
  • BlueSea2.jpg
    BlueSea2.jpg
    131.4 KB · Views: 231
  • BlueSea3.jpg
    BlueSea3.jpg
    132.3 KB · Views: 234
  • BlueSea4.jpg
    BlueSea4.jpg
    138.1 KB · Views: 234
I was going through the rust photos from your 4th gen an in the back of my mind I was like "please please don't let this guy be from CT"

Sure enough you are haha. I have a 2011 5th gen and my rear diff and frame area is starting to get a little rusty and I'm not sure where to start. I had a 1st gen tacoma before that I grinded the entire frame down and applied PQR15 but I'm not sure I want to do that with the 5th gen.

What part of CT? I'm from the Danbury area
 
I was going through the rust photos from your 4th gen an in the back of my mind I was like "please please don't let this guy be from CT"

Sure enough you are haha. I have a 2011 5th gen and my rear diff and frame area is starting to get a little rusty and I'm not sure where to start. I had a 1st gen tacoma before that I grinded the entire frame down and applied PQR15 but I'm not sure I want to do that with the 5th gen.

What part of CT? I'm from the Danbury area

Haha yea sorry to be from CT :lalala:

But in all seriousness, if it is just surface rust, you could probably just take a wire brush to it all and paint over it. Or see if a shop will help you out and do an undercoat of some kind.

I'm actually originally from the Ridgefield area so not too far from you, but I live down near Stamford now!
 
TSO Pro Front Grille

TSO Pro Front Grille

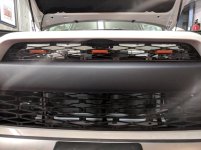
Went camping this weekend and when I got back, I had a little surprise in the mail from Trail Standard Offroad! I ordered their TRD Pro front end with their labor day deal and it shipped crazy fast!

Been wanting the TRD Pro style front end ever since I bought the rig, but I wanted it to be a little different than most other TRD Pros. Found TSO on instagram and LOVED that they offered a version without the letters. It was exactly what I was looking for, and it was cheaper than the OEM TRD Pro front end, so win-win!

Installing it was incredibly easy. Old grille out, new mesh installed, clean the front cross bar, stick the piece on, and put the new grille in. Took me about 20 minutes to do and I am super happy with how it came out. Thanks TSO!

1.jpg

2.jpg

3.jpg

4.jpg

5.jpg
 

Attachments

  • 1.jpg
    1.jpg
    138.2 KB · Views: 249
  • 2.jpg
    2.jpg
    138.3 KB · Views: 250
  • 3.jpg
    3.jpg
    139.3 KB · Views: 248
  • 4.jpg
    4.jpg
    138.9 KB · Views: 250
  • 5.jpg
    5.jpg
    139.5 KB · Views: 247
RCI Skids

RCI Skid Plates

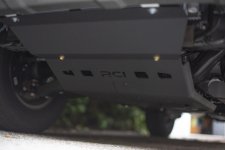
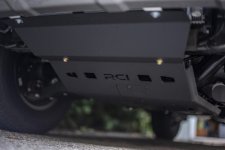
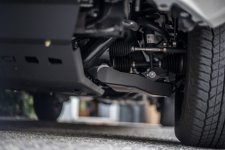
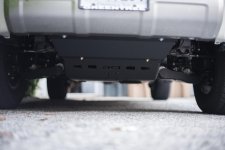
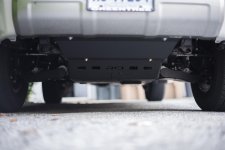
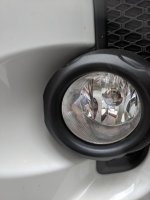
Finally got around to painting and mounting the RCI skids I picked up from the labor day sale. I just wanted some basic protection to start with, so I went with the RCI Front Skid, A Arm skids, and the Filler Plate. The Filler Plate comes powdercoated black, but I got the other skids in raw aluminum.

I mainly went with aluminum because I'm not going be doing a ton of hardcore rock crawling and I wanted to save some weight. Plus these northeast winters with the salt suck ass, so I wanted to avoid having to deal with corrosion.

I went to the hardware store and got some cans of rustoleum flat black spray paint and I really like how they came out. Nice and low profile look without being too flashy or glossy or anything. I did 3 coats on the front skid and the a arm skids, and while they aren't perfect, they came out pretty great. Check out some pics of everything mounted below!
JMR_4237.jpg

JMR_4240.jpg

JMR_4244.jpg

JMR_4247.jpg

JMR_4252.jpg

And a little sneak peak of the next mod on the list!

JMR_4256.jpg
 

Attachments

  • JMR_4237.jpg
    JMR_4237.jpg
    102 KB · Views: 196
  • JMR_4240.jpg
    JMR_4240.jpg
    118.1 KB · Views: 195
  • JMR_4244.jpg
    JMR_4244.jpg
    131.3 KB · Views: 192
  • JMR_4247.jpg
    JMR_4247.jpg
    109.5 KB · Views: 189
  • JMR_4252.jpg
    JMR_4252.jpg
    102.4 KB · Views: 188
  • JMR_4256.jpg
    JMR_4256.jpg
    127.4 KB · Views: 186
RCI Skid Plates

Finally got around to painting and mounting the RCI skids I picked up from the labor day sale. I just wanted some basic protection to start with, so I went with the RCI Front Skid, A Arm skids, and the Filler Plate. The Filler Plate comes powdercoated black, but I got the other skids in raw aluminum.

I mainly went with aluminum because I'm not going be doing a ton of hardcore rock crawling and I wanted to save some weight. Plus these northeast winters with the salt suck ass, so I wanted to avoid having to deal with corrosion.

I went to the hardware store and got some cans of rustoleum flat black spray paint and I really like how they came out. Nice and low profile look without being too flashy or glossy or anything. I did 3 coats on the front skid and the a arm skids, and while they aren't perfect, they came out pretty great. Check out some pics of everything mounted below!
View attachment 313712

View attachment 313713

View attachment 313714

View attachment 313715

View attachment 313716

And a little sneak peak of the next mod on the list!

View attachment 313717

Looks good, I need some RCI skids.
 
Switch Pros SP9100 Install Pt.1

Switch Pros SP9100 Install Pt.1

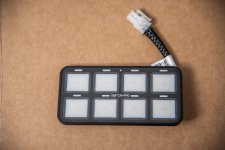
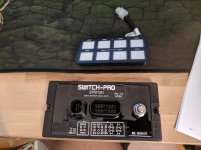
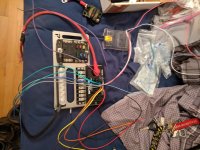
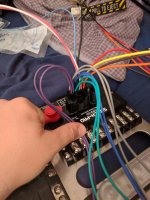
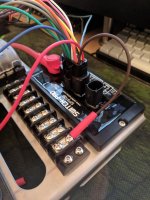
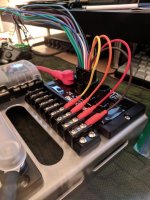
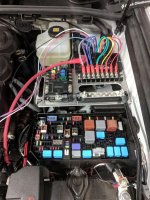
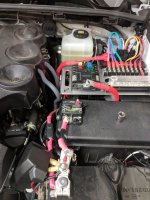
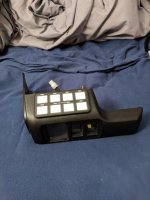
Well, finally got around to doing all of the wiring and such on the Switch Pros SP9100. I really wanted to start this rig off right with a proper and well-thought out electrical system. I wanted to have clean wiring all around and wanted to do this before I installed an electrical accessories.

I went back and forth between a DIY solution, an sPOD, and a Switch Pros. In the end, I went with the Switch Pros because lots of people seem to have good experiences with them, Powertray and SDHQ designed mounts around them, and I had some overall positive experiences using them in the past in friends' rigs.

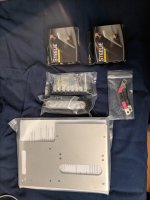
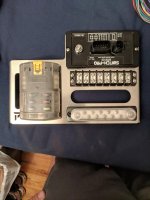
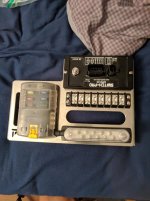
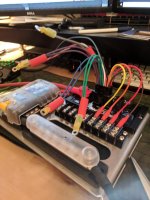
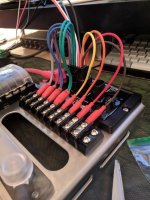
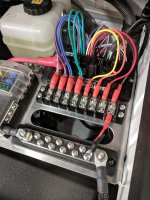
The build consists of some parts from my previous 4Runner, including a Blue Seas Fuse Block and Circuit Breaker. I ordered some additional parts to make this happen, including a PowerTray, a couple of Blue Seas bus bars, and the dash mount that SDHQ makes for the SP9100.

My favorite part about building this entire system was that I could build it outside of the rig before installing it. Getting everything cut down, lined up, crimped and heatshrunk, etc etc etc is so much nicer when doing it from the comfort of your own house.

Below (and in the next few posts) are a bunch of pictures of the build and install process!
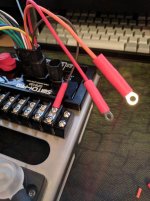
A few of the parts coming in for the build!
1.jpg

2.jpg

Laying out some parts!
3.jpg

Getting a few wires attached...
4.jpg

...and some more wires....
5.jpg

...AND SOME MOAR....
7.jpg

Testing out the lengths that I might want to trim the wires to
8.jpg

The first cut was pretty scary, but I was happy to make some progress!
9.jpg
 

Attachments

  • 1.jpg
    1.jpg
    131.2 KB · Views: 119
  • 2.jpg
    2.jpg
    129.9 KB · Views: 119
  • 3.jpg
    3.jpg
    133.3 KB · Views: 119
  • 4.jpg
    4.jpg
    128 KB · Views: 118
  • 5.jpg
    5.jpg
    132.9 KB · Views: 117
  • 7.jpg
    7.jpg
    136 KB · Views: 117
  • 8.jpg
    8.jpg
    128.4 KB · Views: 118
  • 9.jpg
    9.jpg
    128.9 KB · Views: 118
Switch Pros SP9100 Install Pt. 2

Switch Pros SP9100 Install Pt. 2

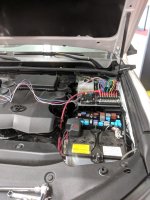
And here are some more pics of the install, including the ones of me finally getting it in to the engine bay.

Getting a few more wires trimmed up, crimped and heatshrunk!
10.jpg

11.jpg

12.jpg

Everything is wired up and I am super happy with how clean it is all looking
13.jpg

Getting this sucker installed in to the engine bay. Those two lower bolts are kinda hard to reach, but I eventually wrangled a rachet in there.
15.jpg

Looking pretty clean!
16.jpg

So much easier to work around the PowerTray if you remove the fuse box lid.
17.jpg
 

Attachments

  • 10.jpg
    10.jpg
    126.7 KB · Views: 119
  • 11.jpg
    11.jpg
    130.7 KB · Views: 117
  • 12.jpg
    12.jpg
    126 KB · Views: 118
  • 13.jpg
    13.jpg
    131 KB · Views: 118
  • 15.jpg
    15.jpg
    132.6 KB · Views: 117
  • 16.jpg
    16.jpg
    132.5 KB · Views: 117
  • 17.jpg
    17.jpg
    138.7 KB · Views: 118
Switch Pros SP9100 Install Pt. 3

Switch Pros SP9100 Install Pt. 3

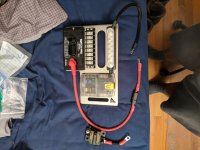
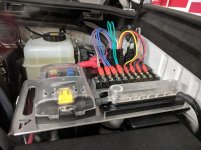
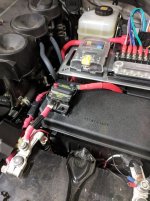
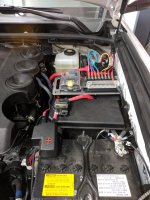
And here are the final touches to the electrical system. I have the Switch Pros and the Blue Seas fuse block wired up independently for my purposes. All of my lights are going to be controlled by my SP9100, and I made that entire unit ignition-switched so it would shut things down if I turned the 4Runner off. However, for the fuse block, I wanted constant power for certain accessories that I might want to run with the rig off. My CB, HAM, and Dash Cam are examples of accessories that I want the ability to run directly off the battery if needed.

I re-used a circuit breaker from my previous rig and simply used high-strength velcro on top of the factory fuse box. This makes it super easy to just pull the breaker off and move it (since I have extra slack in the cable from the Blue Sea Fuse Block) in case I need to access the factory fuses/relays.

All in all, super happy with how this system came out!

18.jpg

19.jpg

20.jpg

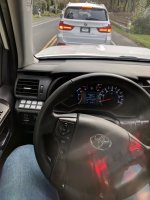
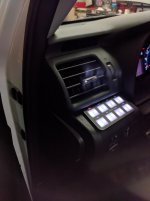
Got the SP9100 panel installed in to the SDHQ dash mount and it looks clean as hell.
6.jpg

How it looks while stuck in traffic! Love how it seems like it is a factory part of the dash!
21.jpg
 

Attachments

  • 18.jpg
    18.jpg
    134.7 KB · Views: 116
  • 19.jpg
    19.jpg
    135.4 KB · Views: 116
  • 20.jpg
    20.jpg
    135.7 KB · Views: 114
  • 21.jpg
    21.jpg
    131.3 KB · Views: 114
  • 6.jpg
    6.jpg
    125.8 KB · Views: 115
Front Marker Light Install

Front Marker Light Install

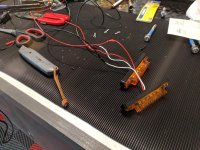
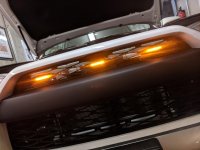
After installing the SP9100, I wanted to install my first set of lights, so I put in the typical "Raptor" marker lights that most people do. I had them on my 4th gen 4Runner and absolutely loved the look. So I decided to get myself some new ones and trim them down to put them on the 5th gen and I am loving it so far!

Wiring them in to the SP9100 was stupid easy. One wire to the power bus bar. One wire to the ground bus bar. And booyah, we are in business. I loved how easy it was to wire it all in, and then turn it on with a simple press of the button!


Extending the wires on the amber lights. Pretty easy to just solder on some new wires and heatshrink them.
2.jpg

Started building a wiring harness to get all of these wired together
3.jpg

3.5.jpg

Wiring could not have been easier. Power. Ground. Done. It is really that simple and I am so excited for how easy this is going to be in the future.
1.jpg

Turned on the ignition for the moment of truth, and it all worked! The SP9100 fired right up with its bright backlighting and I pressed switch 1 and it worked right away. Awesome
7.jpg

Freakin love the look on the 5th gens with the TSO Pro Grille
4.jpg

5.jpg
 

Attachments

  • 1.jpg
    1.jpg
    139.4 KB · Views: 109
  • 2.jpg
    2.jpg
    142.1 KB · Views: 111
  • 3.jpg
    3.jpg
    130.2 KB · Views: 111
  • 3.5.jpg
    3.5.jpg
    127.9 KB · Views: 110
  • 4.jpg
    4.jpg
    119.3 KB · Views: 110
  • 5.jpg
    5.jpg
    134.3 KB · Views: 111
  • 7.jpg
    7.jpg
    111.3 KB · Views: 112
How bright is the switch pro command module at night? Looks like it would illuminate the whole inside!


Sent from my iPhone using Tapatalk
 
How bright is the switch pro command module at night? Looks like it would illuminate the whole inside!


Sent from my iPhone using Tapatalk

It's actually not too bad at all! I have it wired in to a factory dimmer wire that only receives 12v when the dash lights are on. When the dash lights are off, the Switch Pros defaults to 70% brightness for the backlighting, which I think is great for the daytime. At night, you can change it to anything between 5% and 100% brightness, either in the app or on the panel itself. I did it in the app and found that 5% was the perfect amount for absolutely dead of night kind of driving.
 

Members online

Forum statistics

Threads
278,316
Messages
3,554,110
Members
248,016
Latest member
Advally Service

Trending content

Back
Top