Post pics of your drawer/storage system

What did this cost you to build if you don't mind?

[MENTION=90454]fltoyo[/MENTION]..

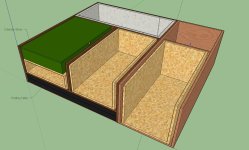
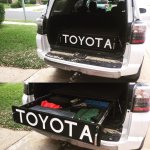
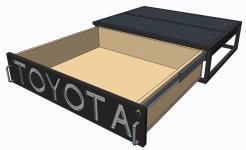
Send me your email addy and I'll get you the Sketch Up file file. I know you asked about the material cost, and I don't know what your expertise is, but I used all 9 ply Baltic birch ply, Accuride 24" full extension slides. On the new set I built for 2016 Trail, I used a locking handle that worked well. I have links to everything except the plywood, that could be had trough a wholesale distributor or a cabinet shop. I'd steer clear of big box store plywood.

Just my 2 cents
 
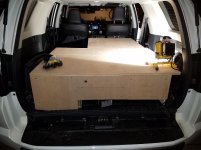
Still a work in process but this is what I've got going so far. It was very uncomfortable to lay in the back due to the step up where the seat would fold down. So the idea was to build this box to level out the trunk. It is only 4" deep but the plan is to get foam cut out for my gun's to be secured below a hidden door. So far it works out nicely to sleep evenly in the back while on the trail.

cyxqMd.jpg


t5NcK2.jpg


gFjfrM.jpg
 
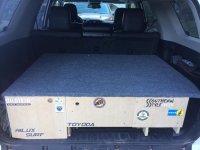
Threw this together before heading to Utah. It doubled as a sleeping platform which was really nice on a few cold stormy nights.

Pre-Carpet_50P.jpg
IMG_0417_50P.jpg
Final Draft.jpg
 

Attachments

  • Pre-Carpet_50P.jpg
    Pre-Carpet_50P.jpg
    106.9 KB · Views: 9,652
  • IMG_0417_50P.jpg
    IMG_0417_50P.jpg
    139.6 KB · Views: 9,436
  • Final Draft.jpg
    Final Draft.jpg
    133.5 KB · Views: 9,644
How is everyone securing your boxes to the 4Runner? Are you bolting the bottom to the 4Rubber or using turnbuckles to secure it?
 
How is everyone securing your boxes to the 4Runner? Are you bolting the bottom to the 4Rubber or using turnbuckles to secure it?

I used turnbuckles to the factory tie down points, then one additional to the child seat latch for the sleeping platform portion.
 
How is everyone securing your boxes to the 4Runner? Are you bolting the bottom to the 4Rubber or using turnbuckles to secure it?

Some people are through bolting, I struggled with coming up with an idea and couldn't - other than the turnbuckles on the factory tie downs.

Went with the Goosegear plate. holy crappola, its engineered perfectly and has a ton of threadserts all over to mount your own system or theirs. $400 seems steep, but to solve the problem with no work or trial and error - totally worth it in my book.
 
Threw this together before heading to Utah. It doubled as a sleeping platform which was really nice on a few cold stormy nights.

View attachment 221674
View attachment 221675
View attachment 221676

Man this forum is great. You just gave me a great idea with the Coleman stove I have my dad's old stove from the 60's still works like a dream. Going to incorporate something to work that in.

Anyone have any neat ideas for multiple rifles? The caveat is I need to keep my back seats up and in useable orientation. My deer guns are too long to put in lengthwise with that consideration from 44 to 45" long. So my only idea would be to pout in a multi level drawer setup with a thin drawer where I might be able to put a couple on the diagonal? I know someone here has put this idea to the test with a much better solution than mine. Thanks in advance for the answer.
 
Last edited:
I am taking a short 6 week metal working class and am fabbing up a drawer for the back of my 5th Gen Trail. I am using 1" square tube and then plan on covering it up with baltic birch. My dimension are going to be 43" x 36" x 11" exterior. I still haven't decided on the drawers, but will probably do those in baltic birch and use bearings instead of $150 heavy duty slides.

I'm just taking it one step at a time. I like the idea of leaving the metal frame exposed so that if I want to add a sliding tray I could add it later.
 
Figured this thread should get bumped since there seems to be alot of threads being created asking similar questions or looking for ideas.

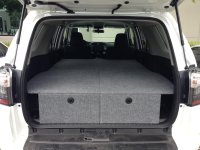
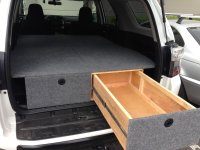
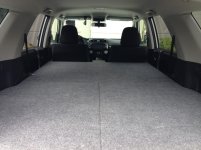
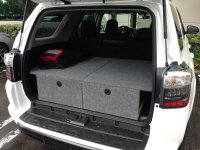
I finally finished up my sleep platform and drawer system. Its a two piece system, so for everyday driving the drawers live in the back and dont interfere with the rear seats. The top is at the same height as the wheel wells and follow the contour of the panels.

When its time for a trip I install the sleep platform. Im 6'3" so I wanted as much leg room as possible...which means the seat bottoms need to be removed. Not a big deal, 4 bolts and they pop right out. This gives me a 6' platform that goes all the way to the back of the front seats (in their driving position), and with the passenger seat tilted and slid forward, I have 6'10" of leg room.

As far as construction goes, I wanted to keep things light, so the drawer frame was made from 1x2's and 1/2" plywood on top. The drawer were also made by 1x2's and have 1/8" plywood sides. The drawers are 35" deep and I used 100lb 28" drawer slides from Amazon. I could only find 500lb full length drawer slides and the price was way too much compared to the 100lbs. The latches are made by Southco.

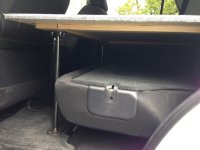
The sleep platform is also 1/2" plywood with some 1x3's along the bottom to help support it. One end rests on a lip on the drawer frame and held with two 1/4"-20 counter sunk screws, the other end is supported by 1/2" x 18" steel pipe with threaded floor mounts.

The entire system can be installed or removed in a couple minutes. The only modification is removing the seat bottoms....which to me, is worth it for a good nights sleep so I can stretch out.

I still have some tweaking to do on the inside of the drawers and how I want to mount my camp stove and some general organization dividers, but all in all, Im psyched on how it turned out.

 

Attachments

  • 1.jpg
    1.jpg
    134.4 KB · Views: 9,871
  • 2.jpg
    2.jpg
    133.3 KB · Views: 10,146
  • 3.jpg
    3.jpg
    137.1 KB · Views: 8,673
  • 4.jpg
    4.jpg
    141.1 KB · Views: 8,507
  • IMG_2985.jpg
    IMG_2985.jpg
    135.5 KB · Views: 12,273
Last edited:
The dimensions of the platform are 72" long x 53" wide. From the platform to the headliner is 28".

Obviously 28" isnt a ton of headroom, but for me, it fits my needs of having a comfy place to sleep at night without having to setup camp.

For the last 6 years or so Ive used a cheap ikea full size mattress for throwing in the back of trucks or vans. Its super comfy, 4" thick, 100 bucks or so.
 
Last edited:
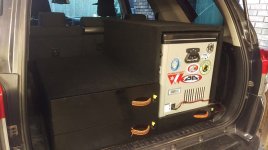
Finished the drawer system today, only thing left is to finish it. Probably won't happen until the middle of May or so. Next step is to get a ARB 50qt and get the fridge drop slide installed as I sold my Smitty ARTEC fridge. Pretty happy with how it turned out.


I love what you're doing here. I want to do something very similar. Do you have a thread for this or a build thread to follow your progress on this?

Still a work in process but this is what I've got going so far. It was very uncomfortable to lay in the back due to the step up where the seat would fold down. So the idea was to build this box to level out the trunk. It is only 4" deep but the plan is to get foam cut out for my gun's to be secured below a hidden door. So far it works out nicely to sleep evenly in the back while on the trail.

cyxqMd.jpg


t5NcK2.jpg


gFjfrM.jpg
 

Man I love your build, I was on track to do something similar, but my wife told me I should just build a teardrop trailer so I went with a basic drawer set up.

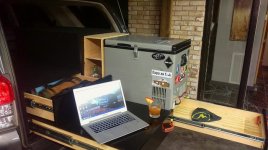
Update: I thought I was 100% done with the build yesterday, but it just occurred to me I hadn't attached the table face yet or installed my Stone Brewery bottle opener. My wife was kind enough to let me have a few hours this afternoon.


I also put the fridge drop slide in, still trying to decide which side to mount it to.


Or passenger side


After seeing everything I think I'm leaning towards the passengers side. The pros are: weight offset by gas tank, can still use top table if not fully removed, water tank is tucked behind the fridge slide so its out of the way (but still accessible when fridge is pulled out), and I can still fold down the 40/20 seats on the drivers side to sleep or pass through. The Con: I will no longer be able to see over my right shoulder when switching lanes.
 
Just finished mine last week :dancin:

Went with a welded steel frame so I could have one large drawer than can be partitioned anyhow I please rather than be stuck with two equal sized drawer. So far so great!
 

Attachments

  • 17884288_10154516784927157_5836503623227119220_n.jpg
    17884288_10154516784927157_5836503623227119220_n.jpg
    122.2 KB · Views: 7,350
  • 2017-03-31 20_48_03-CARGO4 (Active) - Creo Parametric.jpg
    2017-03-31 20_48_03-CARGO4 (Active) - Creo Parametric.jpg
    121.1 KB · Views: 7,345
Figured this thread should get bumped since there seems to be alot of threads being created asking similar questions or looking for ideas.

I finally finished up my sleep platform and drawer system. Its a two piece system, so for everyday driving the drawers live in the back and dont interfere with the rear seats. The top is at the same height as the wheel wells and follow the contour of the panels.

When its time for a trip I install the sleep platform. Im 6'3" so I wanted as much leg room as possible...which means the seat bottoms need to be removed. Not a big deal, 4 bolts and they pop right out. This gives me a 6' platform that goes all the way to the back of the front seats (in their driving position), and with the passenger seat tilted and slid forward, I have 6'10" of leg room.

As far as construction goes, I wanted to keep things light, so the drawer frame was made from 1x2's and 1/2" plywood on top. The drawer were also made by 1x2's and have 1/8" plywood sides. The drawers are 35" deep and I used 100lb 28" drawer slides from Amazon. I could only find 500lb full length drawer slides and the price was way too much compared to the 100lbs. The latches are made by Southco.

The sleep platform is also 1/2" plywood with some 1x3's along the bottom to help support it. One end rests on a lip on the drawer frame and held with two 1/4"-20 counter sunk screws, the other end is supported by 1/2" x 18" steel pipe with threaded floor mounts.

The entire system can be installed or removed in a couple minutes. The only modification is removing the seat bottoms....which to me, is worth it for a good nights sleep so I can stretch out.

I still have some tweaking to do on the inside of the drawers and how I want to mount my camp stove and some general organization dividers, but all in all, Im psyched on how it turned out.
I like how you did this. But in the pic I can't tell; do you just remove the forward section when you use the rear seats? I want to hinge one to fold back but don't know if that will work.
 
Still a work in process but this is what I've got going so far. It was very uncomfortable to lay in the back due to the step up where the seat would fold down. So the idea was to build this box to level out the trunk. It is only 4" deep but the plan is to get foam cut out for my gun's to be secured below a hidden door. So far it works out nicely to sleep evenly in the back while on the trail.

Did you remove the cargo area carpeting or did this go right over the stock cargo area?


Beautiful, this will def need a build log.

Love seeing all these good cargo drawer systems. Each are very unique!!
 
Update: I thought I was 100% done with the build yesterday, but it just occurred to me I hadn't attached the table face yet or installed my Stone Brewery bottle opener. My wife was kind enough to let me have a few hours this afternoon.


After seeing everything I think I'm leaning towards the passengers side. The pros are: weight offset by gas tank, can still use top table if not fully removed, water tank is tucked behind the fridge slide so its out of the way (but still accessible when fridge is pulled out), and I can still fold down the 40/20 seats on the drivers side to sleep or pass through. The Con: I will no longer be able to see over my right shoulder when switching lanes.

I would go passenger side for the same reasons you mentioned. I often have a north face duffel on top of my fridge compartment which completely blocks that window and I still see out the passenger rear door just fine for switching lanes for what it's worth.
That's a dope little pull out table, where did you scoop that?
 

Attachments

  • 6 carpet installed.jpg
    6 carpet installed.jpg
    122.5 KB · Views: 7,195
  • copy.jpg
    copy.jpg
    111.2 KB · Views: 7,035

Members online

Forum statistics

Threads
278,316
Messages
3,554,120
Members
248,016
Latest member
Advally Service

Trending content

Back
Top