Post pics of your drawer/storage system

I am not. Didn't feel like dealing with them. Ran about 1000 miles onroad and 300 miles offroad with setup so far. Use it often... no need for brackets. Just make sure you get the power cord out of the slider way. Slider chewed up my power cord. I now use some bungees strategically placed and have no issues.


Thanks. I was thinking that it may be something for smaller fridges (like 20-30L) since with 45-50 L there isn't a whole lot of room for them to slide around. I'll also keep an eye out for the wiring and may just run some protection around it just to be safe.
 
Just installed my storage system in and received my fridge as well. Will be tinkering around with the setup and need to figure out how to tie stuff down and maximize space but so far so good. I have a BROG Attic going in there as well. The fridge, my house battery, and a plano trunk can fit within the space which is exactly what I was hoping would work.

What height drawers are you running??? Do you like what height you have?
 
What height drawers are you running??? Do you like what height you have?

I'm running the 8" drawers from goose gear. It was difficult deciding between 8 and 10" and in hindsight I think my fridge would have cleared even with 10" but it would have been close especially with a BROG attic installed. 10" is more flexible since you loose internal storage capacity (its 4.5" usable for 8" drawer and 6.5" usable for 10" drawers) but if you are planning to do boxes on top then you can probably make either work. I won't be carrying a fridge in there full time so a slightly low profile setup allows me more flexibility when storing other things in the trunk. One advantage with their 10" drawers is that they are compatible with their sleeping platform so if you want to head in that direction eventually then its a better investment.
 
Last edited:
2016 Trail Premium Storage Drawers

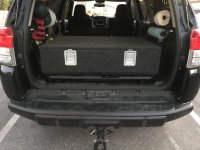
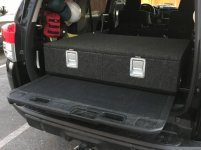
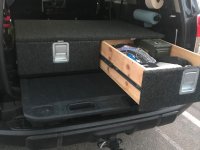
Finished up the storage drawers/camp kitchen. I wanted to be able to keep functionality of the factory sliding tray, as well as have it removable if desired. I will end up making modular panels/platforms for the front so that 1 or 2 people could sleep.

I made a ~46 page pdf with 3d model, parts list, cut list, dimensions, step by steps and additional pictures if anyone is interested I can send you the information/price on that. $30 for basic materials and dimensions, $50 for everything else. Cheers!

cuJQJ4v.jpg

vzVP7O7.jpg

p4I4cnF.jpg

qtTeAeL.jpg

Dc9SndV.jpg

QuDLQAD.jpg

IL433MM.jpg

S04Wbi3.jpg

HHZo6ru.jpg
 
With all these "pull out kitchen" style ones, aren't you getting grease/smoke/etc. into the cabin of the car? That seems like it would be impossible to get rid of it!
 
Finally! Found someone that kept the sliding tray in and built above it! Slept in the Huntrunner this past deer season but decided to upgrade the whole build. Might have to get the plans from you just to save time. really nice build!!!! Text me at 912-223-3149- can’t post pics. Thanks, mark
 
Here are pics of my setup which is able to sit above and retain the factory sliding tray.

I also wanted to keep the functionality of the cargo tray so I built a metal frame over it (inspiration from 4ShoreRunner) and then built the drawers on top of the frame. The box attaches with toggle latches to the frame so I don't need any tools to pull it out if I ever need to. I actually find myself using the tray much more now than I did before. Also, the sound the paddle latches make when the drawers close is so satisfying.
 

Attachments

  • IMG_2104.jpg
    IMG_2104.jpg
    126.3 KB · Views: 1,446
  • IMG_2103.jpg
    IMG_2103.jpg
    127.9 KB · Views: 1,454
  • IMG_2100.jpg
    IMG_2100.jpg
    128.6 KB · Views: 1,463
I also wanted to keep the functionality of the cargo tray so I built a metal frame over it (inspiration from 4ShoreRunner) and then built the drawers on top of the frame. The box attaches with toggle latches to the frame so I don't need any tools to pull it out if I ever need to. I actually find myself using the tray much more now than I did before. Also, the sound the paddle latches make when the drawers close is so satisfying.

That turned out great! Awesome work!

FWIW readers, my setup is for sale for pickup in Northern VA.
 
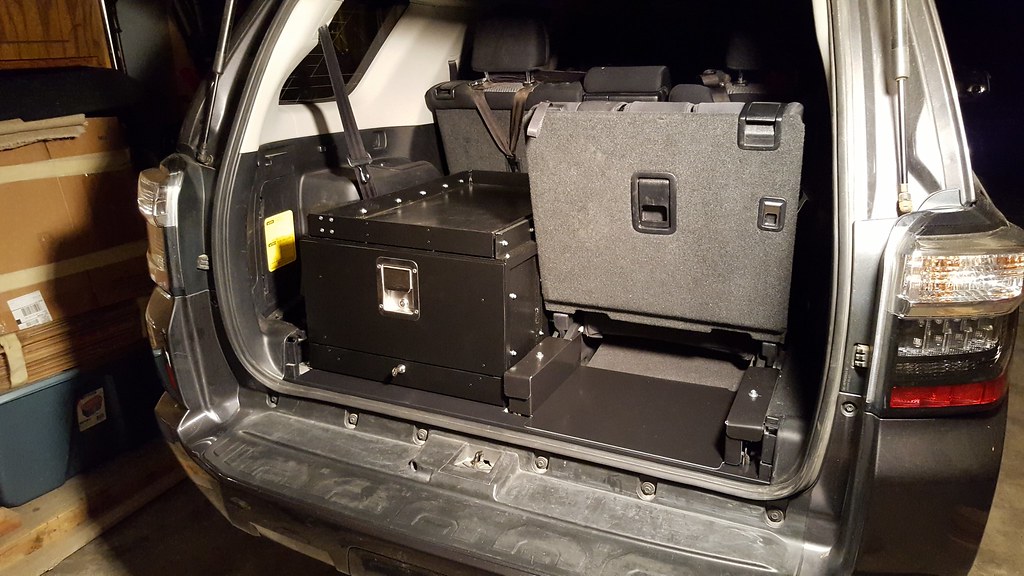
I finally installed my custom storage solution today. I removed my factory sliding tray as I didn't think it was particularly useful. I took inspiration from several other members to come up with this design. I got 4x 4' long L-track pieces from US Cargo Control and cut them down with a hacksaw. I have a decently full woodworking setup in my garage so I was able to make the wood structure pretty easily. I got the tops of the hatches and the hinge section sprayed with Line-X by a local Line-X shop that mostly sprays Jeeps and pickups. The Line-X is actually very easy to cut with a saw or a router. The hardware, hinges, latches, and gas springs are all from McMaster-Carr, which I use heavily at work. Everything is approximately level and even with the seats when they are folded so I can still lay down a sleeping pad and sleep in it. I made the hatches as wide as possible so that I can hopefully screw a fridge slide into one later on down the line. I haven't actually driven with it yet but the items inside will probably make noise bumping around on the sheet metal. Once I get my sound deadening installed, that will go away.
0ffde6324feeda9ce776a43ef95ab4c3.jpg
64ec8a6b9bc9d0073042d0a2cc6add69.jpg
8ce53fe26f26e9c10fa367d1ec725636.jpg
b8a3123284f0ec29f7bc98fdcb5183f1.jpg
0bc92af70cb37367505661747b0bd603.jpg
2f0e0edb0ce566acb99e15d38c3eb5a7.jpg


Sent from my Pixel 2 using Tapatalk
 
I finally installed my custom storage solution today. I removed my factory sliding tray as I didn't think it was particularly useful. I took inspiration from several other members to come up with this design. I got 4x 4' long L-track pieces from US Cargo Control and cut them down with a hacksaw. I have a decently full woodworking setup in my garage so I was able to make the wood structure pretty easily. I got the tops of the hatches and the hinge section sprayed with Line-X by a local Line-X shop that mostly sprays Jeeps and pickups. The Line-X is actually very easy to cut with a saw or a router. The hardware, hinges, latches, and gas springs are all from McMaster-Carr, which I use heavily at work. Everything is approximately level and even with the seats when they are folded so I can still lay down a sleeping pad and sleep in it. I made the hatches as wide as possible so that I can hopefully screw a fridge slide into one later on down the line. I haven't actually driven with it yet but the items inside will probably make noise bumping around on the sheet metal. Once I get my sound deadening installed, that will go away.
0ffde6324feeda9ce776a43ef95ab4c3.jpg
64ec8a6b9bc9d0073042d0a2cc6add69.jpg
8ce53fe26f26e9c10fa367d1ec725636.jpg
b8a3123284f0ec29f7bc98fdcb5183f1.jpg
0bc92af70cb37367505661747b0bd603.jpg
2f0e0edb0ce566acb99e15d38c3eb5a7.jpg


Sent from my Pixel 2 using Tapatalk

Okay...that's pretty slick. Good work.
 
I finally installed my custom storage solution today. I removed my factory sliding tray as I didn't think it was particularly useful. I took inspiration from several other members to come up with this design. I got 4x 4' long L-track pieces from US Cargo Control and cut them down with a hacksaw. I have a decently full woodworking setup in my garage so I was able to make the wood structure pretty easily. I got the tops of the hatches and the hinge section sprayed with Line-X by a local Line-X shop that mostly sprays Jeeps and pickups. The Line-X is actually very easy to cut with a saw or a router. The hardware, hinges, latches, and gas springs are all from McMaster-Carr, which I use heavily at work. Everything is approximately level and even with the seats when they are folded so I can still lay down a sleeping pad and sleep in it. I made the hatches as wide as possible so that I can hopefully screw a fridge slide into one later on down the line. I haven't actually driven with it yet but the items inside will probably make noise bumping around on the sheet metal. Once I get my sound deadening installed, that will go away.

Amazing work! Would you mind posting the part #s for the hinges, latches and gas springs? I'm considering raising my 3rd row delete platform for something like this.
 
Okay...that's pretty slick. Good work.

Thanks for the praise.

This is sweet. I might consider getting rid of my tray for this setup; how much?

Line-X a 4' x 4' sheet of plywood: $150
4-piece L track kit from US Cargo Control, plus extra tie downs to get free shipping: $220 incl. tax
McMaster-Carr hardware & components: $250
Wood: $whatever from the hardware store
Looks like it ran me $600+. You could definitely save some money over this approach by being smarter about the specific component prices and doing your own bedliner.

Amazing work! Would you mind posting the part #s for the hinges, latches and gas springs? I'm considering raising my 3rd row delete platform for something like this.

Latches: 1065A44
Hinge: 1569A169
Gas springs: 4138T581
Gas spring mounting brackets: 9512K95
I used a bunch of thread inserts for wood so that I could screw everything together with machine screws rather than wood screws because it is a little better for disassembly purposes which I had to do several times. All the wood-to-wood hardware is wood screws, though.
 
Finally completed the install of my first of two drawer modules for use with a 3rd row seat model. Big shout out to [MENTION=107460]Magnetic4R[/MENTION], [MENTION=130932]wild_turkey[/MENTION], [MENTION=15690]jerad[/MENTION], and many others who have posted inspiration along the way.

42353021065_071cf81a3c_b.jpg


From... https://www.toyota-4runner.org/5th-...our-drawer-storage-system-17.html#post3022144

^^ 3 YEARS after this project started I am finally getting to finish the passenger side module.

50960571403_39c3ea8b5b_b.jpg


50960571318_c7954373f3_b.jpg


Glad for the delay to be honest. This is my wife's daily driver. With a new pup and kennel residing in the back full time now, another tall drawer module was a no go. What started life as another one piece frame, 13" tall module with two drawers, was converted to a two piece modular unit by essentially cutting the sides of the frame in half and adding a mounting flange between each. The other third row seat will get removed and the bottom drawer unit will mount in its place. Should be little additional height added.

50960571253_bed8fce627_b.jpg


50961273371_8a7a96ed8b_b.jpg


While I primarily wanted a single deep drawer on the driver side, with the narrow tray below largely considered bonus space so I thought (this has turned out to be incredibly useful), the goal for the passenger side unit was a drawer deep enough to house my stove, a full length prep surface incorporated as a drawer cover, and a medium depth top drawer.

50961375827_b2456d5bdd_b.jpg


I had some extra slides, so doubled them up on the bottom drawer for extra stability.

50961375787_cf917db25d_b.jpg


Full extension is nearly five feet! :D

50961375762_f6c610264b_b.jpg


All slides are 28"... the longest in a "value" length.

50960571053_e8265a13d8_b.jpg


The bottom drawer unit will stay mounted in the truck full time and has a removable 1/2" thick acrylic top (had it laying around) with an aluminum channel perimeter frame. The top unit will be mounted as needed for trips only.

50961375697_3fe3ac5341_b.jpg


50960570993_259e38ee85_b.jpg


50961273126_30e842b210_b.jpg


50961273086_3649bc3a8f_b.jpg


Using XL 1/4" x 7" hex bolts to mount the two units together. Once the powder coating is done, I'll add rivet nuts on the bottom unit. We'll see how the theory of ease of assembly plays out in real life, mounted in the back of the truck with minimal access and visibility.

50960570903_389d304547_b.jpg


50961375527_337ae4c4db_b.jpg


Anxious to get it all mounted up, but it will be a few months till I get this powder coated and installed. Other projects in the hopper to go for coating at the same time too.

 
Last edited:
Using XL 1/4" x 7" hex bolts to mount the two units together. Once the powder coating is done, I'll add rivet nuts on the bottom unit. We'll see how the theory of ease of assembly plays out in real life, mounted in the back of the truck with minimal access and visibility.

wow.. nice work. question... wouldn't welding a nut on the lower drawer frame be a safer option? Rivnuts are good for areas that are not accessible, but in your case, if the rivet ever comes loose, you may not be able to loosen the upper half
 
Thanks. Can't say I'm too worried about a spinning a knurled rivet nut in this scenario. They are plenty stout and grippy, and not like this will be a high torque condition. I'll take my chances vs the potential for easily cross-threading aluminum threads (welded nut).
 

Members online

No members online now.

Forum statistics

Threads
278,316
Messages
3,554,120
Members
248,016
Latest member
Advally Service

Trending content

Back
Top