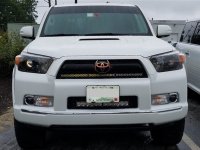
Post your pictures of “behind the grille” lightbars

iwishiwasbigger

New member
Post up your pictures and brief description how you installed it.

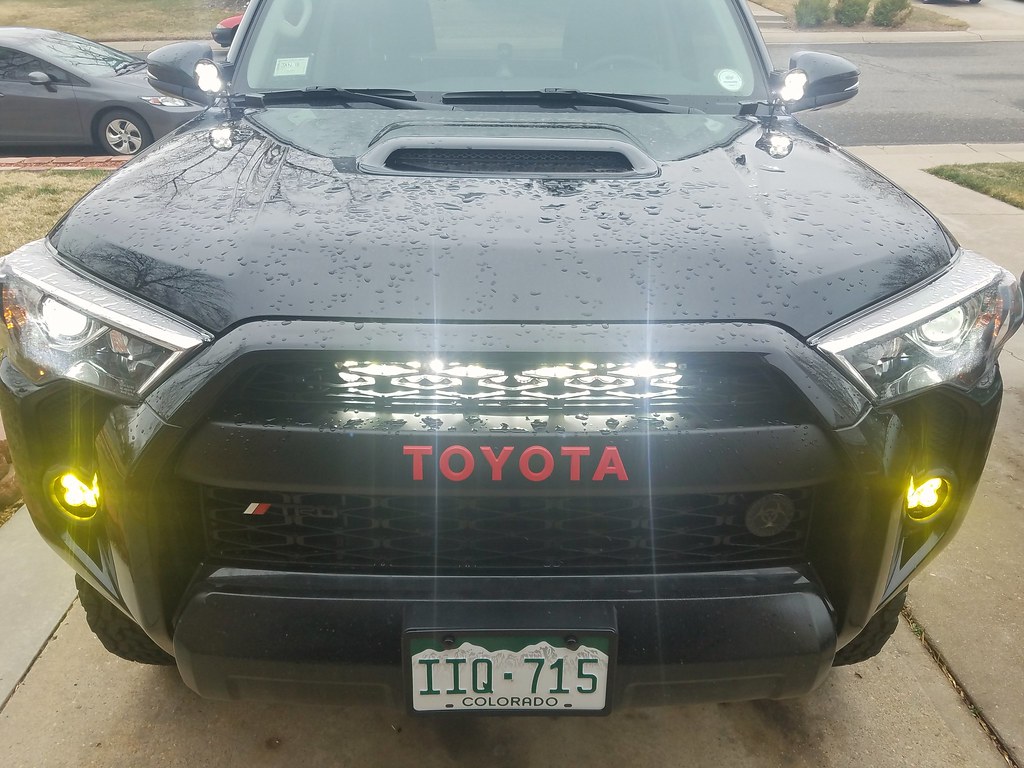
I used like many others the Cali Raised brackets. I chose the rigid radience 30” adual stage Amber backlit bar. Main light is spot only. Flood to me is worthless honestly since I’m mostly looking for large wildlife on the road... the instructions say to remove the bumper cover... er no.... get yourself a 24”Extension a friend with small hands to cut a little plastic and you can do it all from above. It takes a little longer but, to hell with taking the bumper cover off. I also bought the two switch harness from rigid and ran it through the firewallrubber knockout, I used a pre-threaded hole on the driver side engine bay to mount the relay etc... I love this light, I roll it all the time with just the amber, breaks necks like a mofo! Hahahaha

Here’s a picture of the mall crawler
 

Attachments
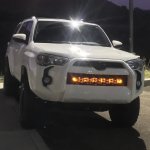
  • 765A9D50-EA61-4E59-9CA7-0EF5CFE51957.jpg
    765A9D50-EA61-4E59-9CA7-0EF5CFE51957.jpg
    102.3 KB · Views: 2,069
Last edited:
Register to hide this ad
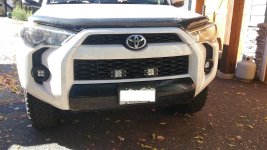
I suck at following directions, so here is a pic of my 15 SR5P with Rigid flush mount lights. I had to fabricate some brackets to mount them to the grill and more importantly, mount them to the aluminum bumper structure. I also replaced the original fogs with some Rigid amber LED's. They are wired with individual switches armed by the park lights so that I cant forget and leave them on. They both also come on automatically with the high beams if desired. While adding all the extra wiring, I wired the factory low beams with 10awg wire to eliminate voltage drop at the bulb, still controlled by factory switching.
That ought to fix the somewhat lacking factory headlights.
 

Attachments

  • 20171010_100937.jpg
    20171010_100937.jpg
    141.5 KB · Views: 1,968
Cheap chinese light bar and $8 worth of 2"x 1/4" aluminum flatstock

Not sure how anyone could install it without pulling the bumper, I was pissed when the bolt rattled out on the longest washboard trail and trying to squeeze my hands in there to ziptie it so it wouldn't smash my radiator.

36371471103_550402a3e7_b.jpg
 
Made my own brackets. Used metal from Home Depot and made L brackets. 10 inch Rigid Spot
IMG_4771.jpg

IMG_0049.jpg
 

Attachments

  • IMG_4771.jpg
    IMG_4771.jpg
    128.1 KB · Views: 1,921
  • IMG_0049.jpg
    IMG_0049.jpg
    132.4 KB · Views: 1,921
Just curious why you didn't want to remove the front bumper cover? It's like 15 bolts and clips, unhook the fog lights, and pull it off.

Rago Fabrication Hidden Bumper Brackets Installation

I also suck at following directions lol. No but in all seriousness, I didn’t have another set of hands. I take bumper covers off all the time on Subaru’s to do grille and horn installs. I usually have an additional set of hands. I usually always break body clips if I attempt it myself so no to that nonsense.
 
I'll play..................

Baja Designs Stealth 30" driving/wide combo & OnX6 20" spot, wired to a single switch (all time power) AND wired into high beam circuit. Not to mention high & low beam upgrades, Morimoto D2S 4.0 HID with shield mod, V-LED high beams

Go ahead don't turn off your high beams, I triple dog dare ya :lasercannon:
 

Attachments

  • 20170930_125513.jpg
    20170930_125513.jpg
    112.3 KB · Views: 1,769
Last edited:
I'll play..................

Baja Designs Stealth 30" driving/wide combo & OnX6 20" spot, wired to a single switch (all time power) AND wired into high beam circuit. Not to mention high & low beam upgrades, Morimoto D2S 4.0 HID with shield mod, V-LED high beams

Go ahead don't turn off your high beams, I triple dog dare ya :lasercannon:
Dayum
 

Members online

Forum statistics

Threads
278,316
Messages
3,554,121
Members
248,016
Latest member
Advally Service

Trending content

Back
Top