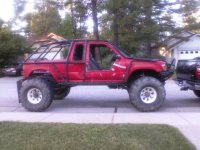
Project 1Ton "build thread" Many Pic's!

GonOvr

New member
Well i guess it being Friday night and i might have to work in the morning i might as well start a build thread for my current ridiculous project.

First off i'm a overboard type guy. Usually things work out for the better sometimes not so much. I know this type of build isnt for everyone. That's ok though, i didn't build it for you i built it for me. I like building things that flashy, fast, and capable. I also find the most expensive to build things, so if you have to ask how much then probably it's way too much.

This build will be for anyone that is looking to do any of the modifications that i have done to further help them in their decision making. Plus it will give a better idea of what all is involved.

Lets begin!

Basic 1992 4runner SR5 w/everything except leather and sunroof. Very well maintained and very clean inside. It had a 3.0l/auto combo, my headgasket wasnt blown but i had a bent exhaust valve on no.4 cyl, it was leaking fuel from under the intake and it couldnt hold power steering fluid to save it's life.
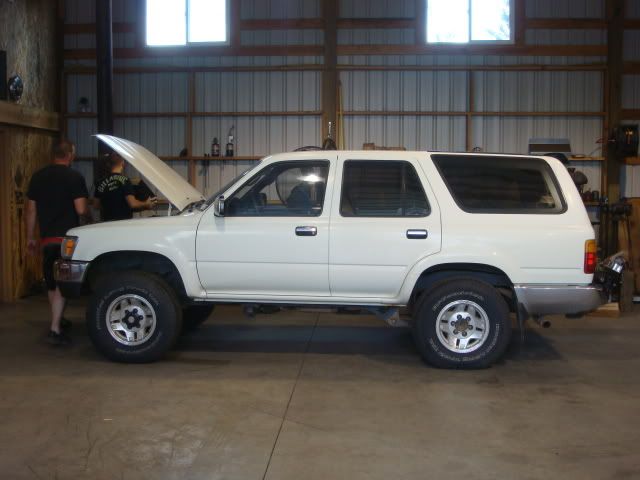
DSC03082-1.jpg~original

Now comes the body lift (3") yes i know and i hate them but its the only way to keep your heater and clear the chevy distributor on the firewall.
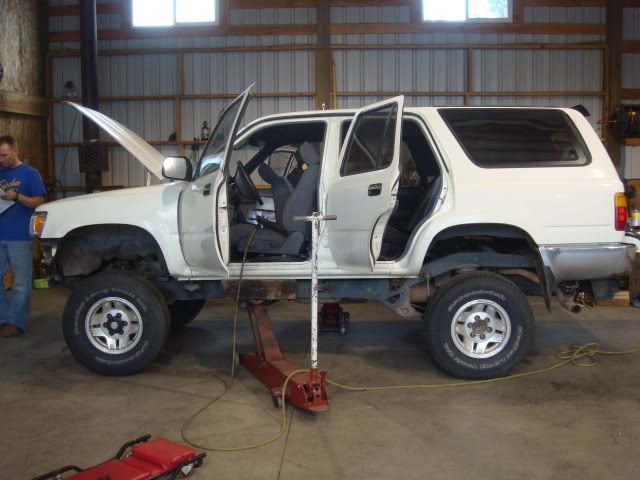
DSC03100.jpg~original

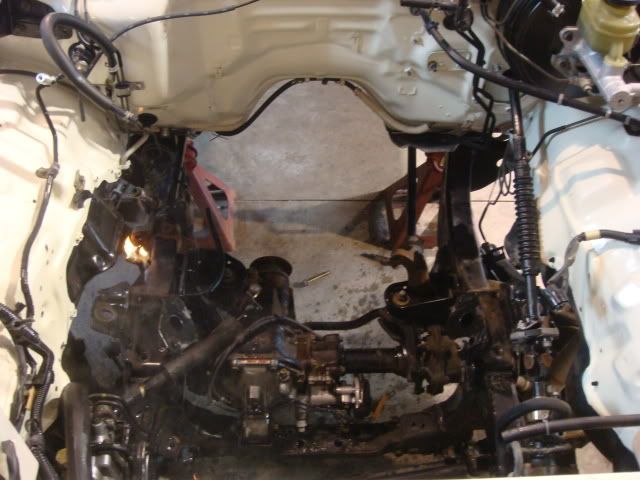
Next was the powerplant removal. Typical engine removal except i pulled the engine, transmission, and t-case out as a whole. My yota friends robbed what i didnt need everything else went to the scrap yard.
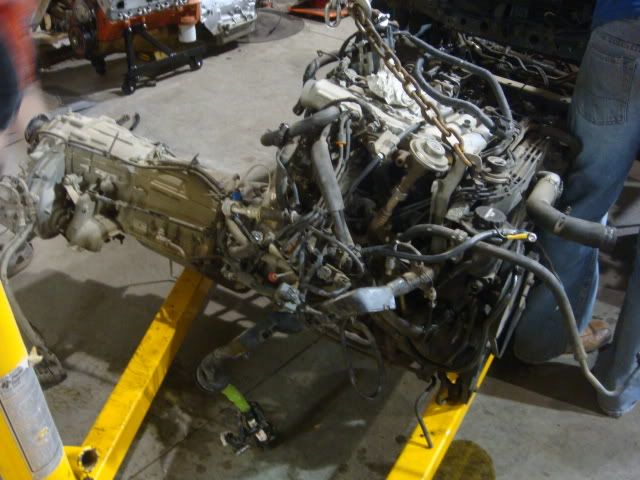
DSC03121.jpg~original

Just a thought... when you have the engine out it would be a great time to clean the engine bay up. I couldn't believe how clean it was afterword!
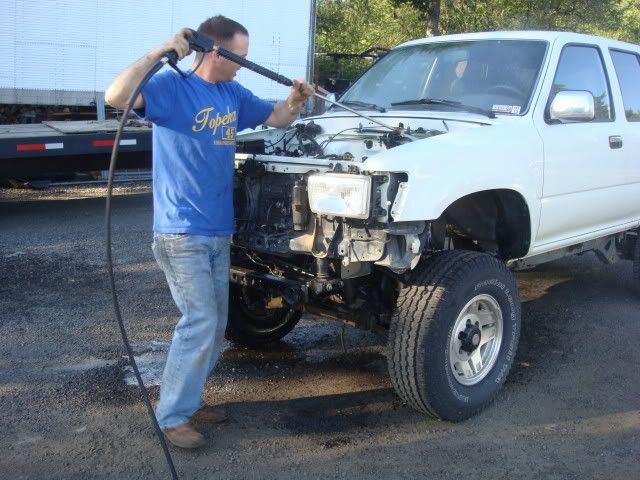
DSC03148.jpg~original

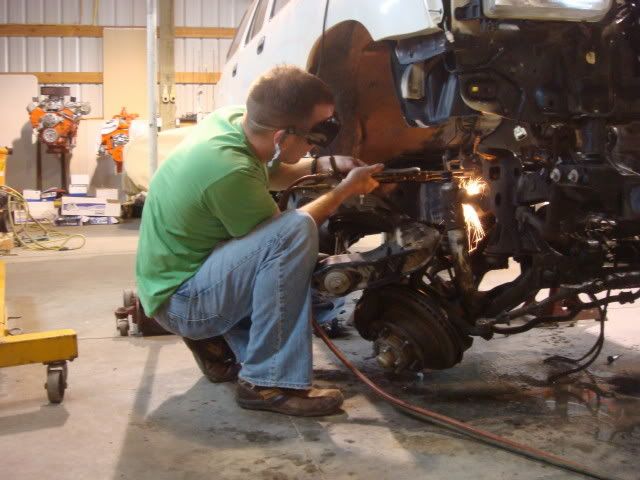
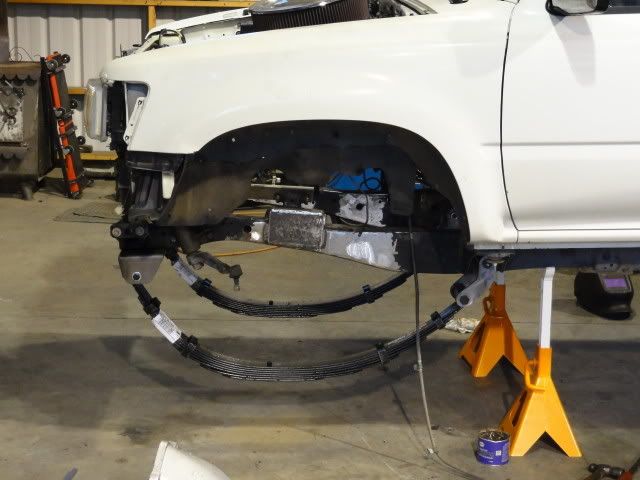
With IFS
DSC03163.jpg~original

Deleting IFS
DSC03161.jpg~original

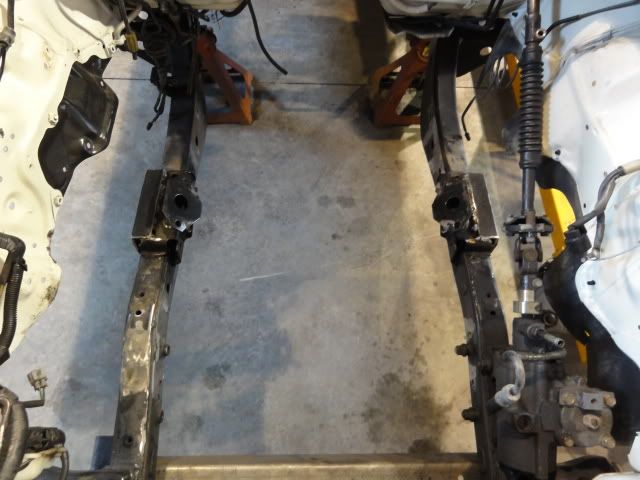
IFS Gone
DSC00017.jpg~original

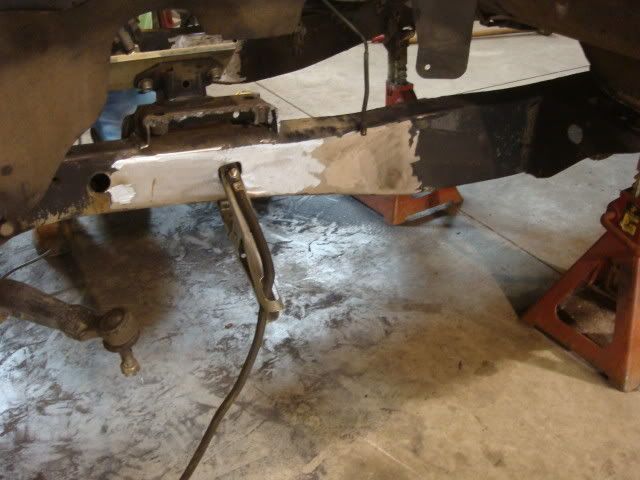
Next i smoothed the frame rails with a grinder and many hours. This is very time consuming!
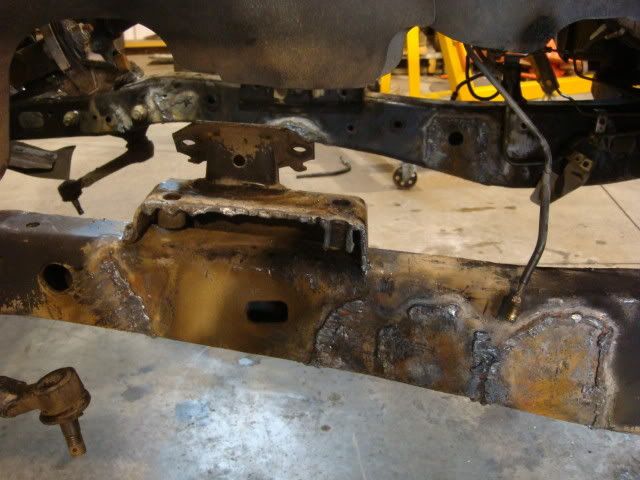
DSC03179.jpg~original

DSC03261.jpg~original

Boxed the motor mounts in with 1/8" plate steel and 1/8" strap steel on top
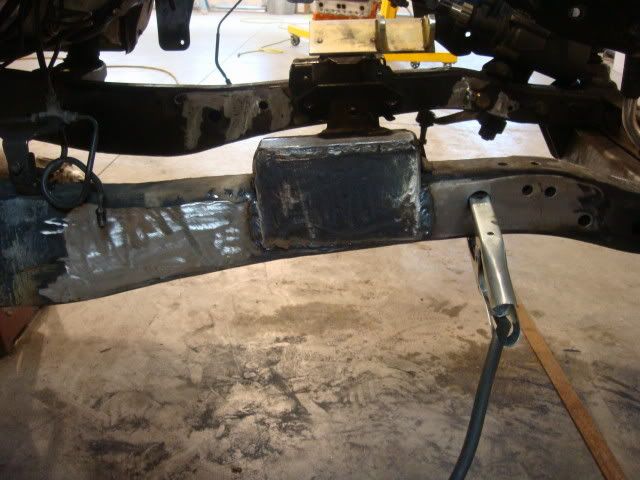
DSC03263.jpg~original

I used SKY manufacturing for most of the conversion suspension wise. They are local in my home state and great guy's to work with!
The front hanger actually bolts into the factory cross member so you can set it flush, 1" forward or 2" forward. I set mine flush since my springs have centering pins 2" forward. Bolting it to the cross member takes the guess work out of making sure its aligned.
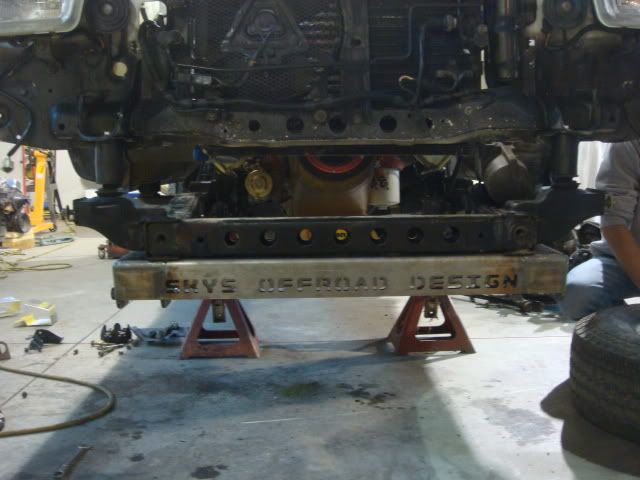
DSC03217.jpg~original

Only picture I have of the shackle mount. It's a typical sleeve through frame mount but Sky uses boomerang shackles.(side note if you use these the long portion mounts to the frame. I had to flip mine later, the picture is the wrong way!)
DSC00099-1.jpg~original

Next Post I will start cutting out the Rear!
 
Register to hide this ad
OK, had some dinner now moving onward.
Since the front was setup for springs i moved to the rear.
With a lot more torching, grinding, i removed the rear by cutting the trailing arms, pan hard bar and shock shafts.
DSC00068.jpg~original

DSC00072.jpg~original

DSC00085.jpg~original

DSC00088.jpg~original

Then I finished off the brackets and smoothed the frame out which brings us to zero running gear.
DSC00098.jpg~original

Moving back to the front end, i start hanging springs. If you do a SAS weld your shock hoops/towers in until you have the vehicle weight on the springs. This could put your shocks at an angle binding the bushings.
I chose Alcan springs because they really know springs. Mine are 8" custom packs with centering pins 2" forward. They are very soft!
DSC00099-1.jpg~original

Springs are hung, now time to work on the front axle!
My front is a Dana 60 chevy pass. drop axle. Im not running full width springs, instead i made my 60 fit my 4runner. I narrowed my axle tubes 2.75" on the passenger side and 5.75" on the drivers side so i can use the factory cast in perch and my axle is 61"WMS which is 1-2" wider than a toyota axle. I also rotated the outer C's 8* to get my pinion angle up without messing with my steering geometry.
DSC00016.jpg~original

DSC03240.jpg~original

I also had my inner shafts cut down to match. Dutchman axles took care of this.
DSC00015.jpg~original

I went with an Eaton E-locker w/4.88 yukon gears. They had pretty good reviews and i didnt want to run an air system since i retained my A/C, so ARB was a No-Go for me.
DSC00019.jpg~original

Riddler Diff Covers! Are ridiculously awesome alone.
DSC00126.jpg~original

All finished with assembly and under the runner.
DSC00107-1.jpg~original

Next up... Powertrain but that will have till tomorrow.
 
And then I said

GODD@MN!

nice all around setup, unlimited funds looks like good clean fun! Keep us posted brother!:beer:
 
Good Morning Korea... Actually thats a lie it's never a good morning here.
Moving forward to powertrain!
Might as well start with the engine. I decided a good ol 383 was in order for this build. I wanted goobs of low end torque with plenty of High End HP
Block:3970010 High nickel casting, most sought cast iron 350 block. This one happens to be out of a '69 Camaro (sorry Camaro guys) 4-bolt main.
Full forged, Full roller
Lunati rowdy idle bump stick (cam)
Cloyes adjustable timing gears, chain, and cover
Canfield monster valve aluminum heads (ported & Polished).
Weiand single plane high rise manifold (ported & Polished)
Proform Race 850 Carb
Sanderson Headers (Port Matched)
MSD Ignition (6AL)
March Serpentine Conversion
DSC00029.jpg~original

DSC032753.jpg~original

For powertrain conversion i went with Advance Adapters. I only used bolt in motor mount adapters for the engine.
I did have to "massage" the firewall very little. I had to dimple the hump right by where the A/C lines go into the firewall to give the passenger side valve cover some room. I also used Big Block motor mounts to get the engine alittle lower in the engine bay.
DSC00116.jpg~original

DSC00117.jpg~original

DSC00118.jpg~original

DSC00115.jpg~original

Now for the Transmission
This was a 2wd Th400 that I converted to a 4wd trans (replaced tailshaft and removed tail cone).
It has a full manual reverse valve body, all the moving parts are billet and kevlar, TCI torque converter, deep aluminum pan.
DSC00111.jpg~original

installed, this is about where the transmission will sit complete, as you can see there is plenty room all around... again thanks to the body lift. When doing a conversion like this make sure your transmission pan is level with the ground. alittle angle is ok but dont get crazy.
DSC00119.jpg~original

DSC00120.jpg~original

DSC00121.jpg~original

Next up is the T-Case
I chose an Atlas II because they are Bad-A$$ and are Me proof.
This one gets a Two-Speed 4.3 Case with upgraded shafts and 1350 1-Ton Yokes.
DSC00147.jpg~original

DSC00149.jpg~original

I used advance adapters Th400 to Atlas adapter since it is their T-case.
I had to clock the T-case down 25* to get it to fit. Even with the body lift there isnt much room for this hunk of billet.
I used a toyota 4cyl cross member and modified (more metal and welding) it to accept my new mount bushing.
You probably seeing tires on, well i didnt have any other pictures but dont worry i'm coming back to that.
DSC00207.jpg~original

DSC00209.jpg~original

DSC00295.jpg~original

Coming up next Tires, Wheels, and Rear Axle.
 
Why did you decide to cut the axle's down so far?

I set it up to be legal in most states. I like saying I have a Toyota width 1Ton. I'm not a fan of having full width axles under a mini truck. If I wanted a strictly crawler rig I'll build a buggy with mog axles (which will happen). I wanted something i could cruise around, play in most wheeling environments, not worry about breaking and not have to worry about getting harassed by the police.
 
I set it up to be legal in most states. I like saying I have a Toyota width 1Ton. I'm not a fan of having full width axles under a mini truck. If I wanted a strictly crawler rig I'll build a buggy with mog axles (which will happen). I wanted something i could cruise around, play in most wheeling environments, not worry about breaking and not have to worry about getting harassed by the police.

Sound's good. Keep posting picture's. :cheers:
 
OK now that i had breakfast.
Tires!
40x14.50R18 BFG Mud-Terrain KM2
DSC00112.jpg~original

DSC00113.jpg~original

Make believe test fit... i think they will clear just fine. That's me and i'm 6ft. flat to give you an idea.
DSC00102.jpg~original

DSC00104.jpg~original

DSC00103.jpg~original

Wheels are Ion Forged Thunder's 18x10 -25mm offset
DSC00143.jpg~original

If you look you will see the shackles are now flipped the right way.
DSC00141.jpg~original

Front wheels are on and back on the ground.
DSC00144.jpg~original

Time for a rear axle break down.
I chose a dana70U rear axle mainly because i have a really good friend in colorado that gave me one. It also has a smooth bottom for sliding off rocks and such.
This axle was actually a utility van dually axle out of a late 70's van.
I narrowed this axle 1" passenger side and 3.5" on the driver's side for another 61"WMS. 4.88:1 Yukon gears and a detriot locker.
DSC03241.jpg~original

Since the rear will be used the most i put 35 spine yukon chromoly axles in.
DSC03243.jpg~original

Since it wont be a dually anymore i did a disc brake conversion out back using 3/4ton chevy front calipers, caliper brackets from great lakes offroad, '76 ford dana 60 front rotors, machined the hubs 1mm to accept the rotors and pounded shorter studs in. End product, a disc brake single wheel dana 70U.
Another Riddler diff cover!
DSC00127.jpg~original

Next up Rear axle and spring mock up!
 
Ok we went from this
DSC03082.jpg~original

To this
DSC00159.jpg~original

Rear axle mockup was not as easy as the front axle since the front axle spring hanger bolted in, it took the guess work out of alignment.
The rear axle has to be aligned.
First thing we got the axle under the truck.
Since i dont have a 2-post lift we used a bobcat and an engine hoist to pick up the rear.
DONT TRY THIS! HYDRAULICS FAIL!
DSC00175.jpg~original

To get the rear axle aligned we hung a washer with fishing line on each side in the center of the wheel well opening.
Line up the washer to the axle tube and your centered in the wheel well.
If you look close my friend steve is pointing directly at the fishing line.
DSC00187.jpg~original

Spring hanger and shackle hanger are tacked in. Dont weld up up on the first try, more than likely you will get it wrong like i did. Its alot easier to break tack welds than grind full ones.
Now that vehicle weight is on the springs you can see the shackle angle. In my case i had too much shackle angle and i had to break off my shackle mounts and move them back 3/4" .
DSC00190.jpg~original

Being satisfied with that. We put the wheels on the back and put it on the ground. I have 8" springs all around. As you can see you have to lift the rear higher than the front. In my case i had a 4" rake to the rear.
DSC00206.jpg~original

Since i already paid 1k in springs i had to lift the rear end up. Toyota 4" blocks go in. Once i got the pinion pointed at the T-case i burned everything in.
DSC00286.jpg~original

Now we are here.
DSC032731-1.jpg~original

DSC032742.jpg~original

From this
DSC03082.jpg~original

To this
DSC032764-1.jpg~original


Next up Fuel, Exhaust, Shocks.
 
Oh gawd, brace yourself for people hating on your use of lift blocks... I made the same mistake (shackle angle) when I did my rears. Your not alone. Im excited to see your drive shaft and steering solutions. cool rig,color me jealous!
 
Last edited:

Members online

Forum statistics

Threads
278,310
Messages
3,554,080
Members
248,016
Latest member
Advally Service

Trending content

Back
Top