Project Light Runner: the $600 E-locker TuRD

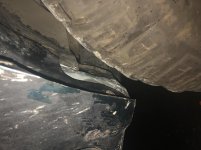
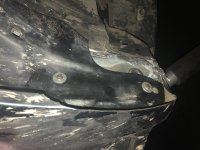
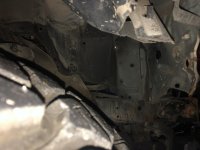
WOOOOOOOW LOL. Man its had a hard life, I guess its been hit left right and front. Who knows on mileage or whats original. Looks like they threw a different gauge cluster in it for every inspection LMAO. Good thing is it runs and drives awesome with no issues anymore.
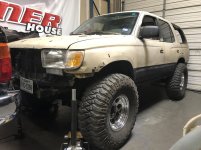
 
Now to do some test fitting with the new wheel tire combo. With tape weight on the inside of the wheel it is going to require more grinding to clear the caliper. To help off set that I’ve tried out 1/4” and 1” wheel spacers.

1/4” wheel spacer

pros:

Less cutting required on the fenders
Less strain on steering and bearings
Less mud will get flung up the side and in the windows
Will track better down the road

Cons:

Closer to rubbing the frame
More grinding the caliper required to clear 15” wheels

1” wheel spacer

Pros:

Plenty of frame clearance at full lock
Less grinding on the calipers

Cons:

More strain on steering and bearings
Will throw mud everywhere
May cause rear tires to rub on body instead of tuck.
Fenders/body mount will need a good hacking
May not track as well down the road.

Now many of these pros and cons are not a big deal as I don’t mind hacking anything and everything on this already mangled body. It’s also not a daily or someone else’s car so grinding the brake calipers is not a big deal.

The whole idea here is to keep the truck as low as possible for a low center of gravity. In doing so it will allow more down travel not having the front or rear control arms near the limit.

Running 15” wheels on 35” tires will give the truck the most sidewall rubber while pushing the reasonable limit of tire height. I am curious to see how the 4.30 gears handle 35s. Typically a full weight 3rd gen on 4.10s and 33s always needs to be regeared to at least a 4.56 if not 4.88. I may be able to get away with 35s since the truck is 600 lbs lighter than stock. As of right now the truck really scoots so I definitely have room for a larger tire. If anything it may just be slightly slower than a bone stock truck.
 

Attachments

  • 5E08AF87-9E48-4437-8FAB-2C92B3DF796E.jpg
    5E08AF87-9E48-4437-8FAB-2C92B3DF796E.jpg
    132.4 KB · Views: 333
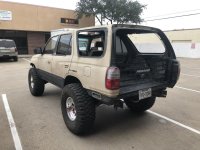
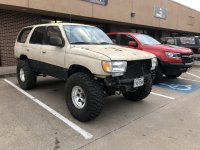
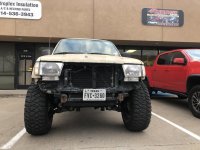
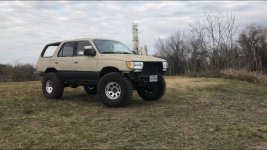
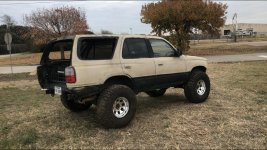
Man what a difference the net gate and wheel/tire combo made in the looks department. Still much more cosmetic work to go. I was able to pull it off with no wheels spacers which is a big bonus. For stock gearing it actually drives pretty good and has decent power.
 

Attachments

  • 97717952-5120-4103-AA0D-268CB026E871.jpg
    97717952-5120-4103-AA0D-268CB026E871.jpg
    135.3 KB · Views: 275
  • 312FB6BB-5908-4971-A477-7E6CF4BD13E9.jpg
    312FB6BB-5908-4971-A477-7E6CF4BD13E9.jpg
    137.3 KB · Views: 275
  • 7C916B16-FD28-4F08-AD77-502476B4831A.jpg
    7C916B16-FD28-4F08-AD77-502476B4831A.jpg
    134 KB · Views: 321
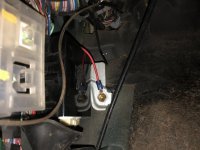
So I can use the E-locker in 2wd I grounded the blue w/ red stripe wire on the 4wd module to its mounting bolt. Only takes about 3 minutes to do it if you have the supplies and tools handy.
 

Attachments

  • 8A94B974-8BEE-4CEB-B7C0-D2A930AC715F.jpg
    8A94B974-8BEE-4CEB-B7C0-D2A930AC715F.jpg
    133.4 KB · Views: 273
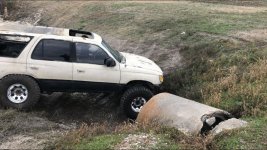
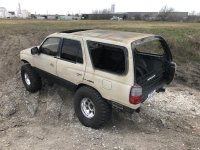
Took it thru a little ditch crossing to test the flex and see where the fenders need to be trimmed. Just a bit up front will clear the fenders. The rear will need about 3/4” trimmed out of the fenders which will allow the tire to just clear on full stuff.
 

Attachments

  • 079FE50E-A32F-4430-8128-407D6C898245.jpg
    079FE50E-A32F-4430-8128-407D6C898245.jpg
    113.9 KB · Views: 313
  • EBEDE4C0-7AFE-4B34-9ECC-023A127E1A3C.jpg
    EBEDE4C0-7AFE-4B34-9ECC-023A127E1A3C.jpg
    139.1 KB · Views: 315
  • BDC6D2B1-7CDC-462A-A2E0-D52DDC4F2C15.jpg
    BDC6D2B1-7CDC-462A-A2E0-D52DDC4F2C15.jpg
    137.9 KB · Views: 301
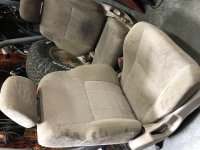
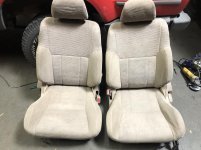
I got some seats for it thru my buddy and man were they in disgusting shape. I was all ready to spray them down with spot shot to clean them but didn’t even use it. Somehow I got all these stains off scrubbing them with just a hand broom LOL.they came out great although I’d still like to vacuum and clean them a little more
 

Attachments

  • C8352CB5-5DB0-45A3-ABAC-75E6CC434462.jpg
    C8352CB5-5DB0-45A3-ABAC-75E6CC434462.jpg
    137 KB · Views: 294
  • 6912595D-F111-402E-A36D-8D28599EE8CA.jpg
    6912595D-F111-402E-A36D-8D28599EE8CA.jpg
    136.2 KB · Views: 290
I got some seats for it thru my buddy and man were they in disgusting shape. I was all ready to spray them down with spot shot to clean them but didn’t even use it. Somehow I got all these stains off scrubbing them with just a hand broom LOL.they came out great although I’d still like to vacuum and clean them a little more

do you know what year style those seats are? My PO put them in mine and I have no idea what seat covers to order cause they aren't the stock seats for my yr/model.
 
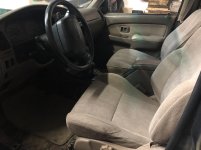
The horrendous seat job is halfway gone now. I had to first fix the drivers seat because the lower seat adjustment had come out of gear when someone pulled it with the front right bolt still in place. Wasn’t hard to get it back into place just had to take the rail partially apart. The truck is no longer a rolling death trap, at least for the driver for now.

Also sold the spoiler just now for $60, so that’ll come off the total investment.
 

Attachments

  • B8247205-AE4D-4BAC-A5B8-5DAD5712567F.jpg
    B8247205-AE4D-4BAC-A5B8-5DAD5712567F.jpg
    126.9 KB · Views: 278
  • 418EF190-A07D-42FA-8AB3-AD789653B266.jpg
    418EF190-A07D-42FA-8AB3-AD789653B266.jpg
    132.4 KB · Views: 278
The horrendous seat job is halfway gone now. I had to first fix the drivers seat because the lower seat adjustment had come out of gear when someone pulled it with the front right bolt still in place. Wasn’t hard to get it back into place just had to take the rail partially apart. The truck is no longer a rolling death trap, at least for the driver for now.

Also sold the spoiler just now for $60, so that’ll come off the total investment.

What's up with the passenger seat bolted to a 2x4? Lol.
Looking forward to this, how much more do you plan to strip out?
 
What's up with the passenger seat bolted to a 2x4? Lol.
Looking forward to this, how much more do you plan to strip out?

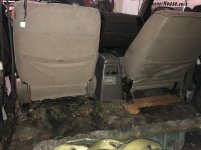
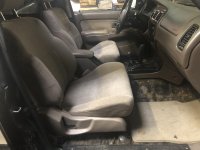
The passenger seat is how the driver seat used to look, complete Frankenstein job. Now if I get in an accident the seat and I won’t go out the windshield together LOL. Going to sort the passenger seat tomorrow, clearance the fenders and fix the washer bottle motor that got knocked off due to the core support being pushed back. She’s almost ready for the trails
 
Alright finally both the horrendous 2nd gen wood block seat swap jobs are gone. Must of saved a at least a few pounds delete all the 2x4’s and excessively long bolts used to halfway hold the seats in place
 

Attachments

  • 5B944A31-BB32-45F4-B998-7B11174E27B2.jpg
    5B944A31-BB32-45F4-B998-7B11174E27B2.jpg
    129.3 KB · Views: 252
Also clearanced both front fender wells by trimming on the lower side of the fender. I cut the pinch welds down and massaged them back with a sledgehammer then trimmed the inner fender liners. Fastened the liners back onto the body and now I’ve got at least an inch of clearance at full lock. Before it would rub halfway before full lock by at least 1/4”. Good enough for now
 

Attachments

  • AFBBA7E0-9611-4770-ABA8-A57AAB3B2997.jpg
    AFBBA7E0-9611-4770-ABA8-A57AAB3B2997.jpg
    127 KB · Views: 238
  • C0E4236A-3216-4888-9AFF-A37C283D1028.jpg
    C0E4236A-3216-4888-9AFF-A37C283D1028.jpg
    132.1 KB · Views: 235
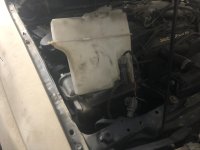
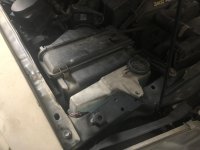
When I got back from testing the truck before any fender work I noticed the washer reservoir leaked out. Due to the core support being shifted back from a wreck the reservoir was just close enough to the tire at full lock that it pulled the motor out.

So I decided to relocate the washer reservoir up in front of the air box. I took one I had on the shelf from an 84-88 pickup and mounted it in the same location as it would have been on a pickup. I re routed the wiring and hoses back up thru the inner fender and it all worked out perfect. Before installing I swapped in a nice original Toyota motor and rubber ring to ensure it wouldn’t leak for a long time. The original washer motor in the 4Runner was rusted frozen. Now no more risking damage to the washer bottle. Had the core support not gotten bent in an accident I could have used the factory 12mm hole to fasten the bottle down. All good tho it’s not a daily and it’s not going anywhere with the hood down
 

Attachments

  • D9E8C97C-052B-45EE-A24E-562883604977.jpg
    D9E8C97C-052B-45EE-A24E-562883604977.jpg
    117.2 KB · Views: 248
  • 57605043-D92D-43C7-AF0C-37E0D27B5748.jpg
    57605043-D92D-43C7-AF0C-37E0D27B5748.jpg
    126 KB · Views: 246
  • 5532FCB6-FC87-4282-BC1A-8723DECD3843.jpg
    5532FCB6-FC87-4282-BC1A-8723DECD3843.jpg
    122.8 KB · Views: 244
A bunch of of are supposed to be going out Sunday. I’ve got a ton going on so if I can I’ll go this weekend. If not then we are going next weekend
 
So I drove it home today and got a chance to really test it out on the road. It definitely carries its weight fine even on 35s. It will still spin the tires if you punch it at 20mph. On the highway it cruises 75mph with little effort.

I will need to look over the front end as it seems to have something loose. It wants to wander on the highway when the surface is uneven. Most likely it’s a lower control arm but we’ll see. Uniball upper arms are next on the list.

So far the total investment is at $1075. As soon as I break below $1000 from selling parts I will spend more on suspension mods. Track bar drop, heim joint rear arms, longer shocks, uniball arms, etc are on the list.
 

Attachments

  • D4824A8E-3FBF-4490-A90E-6594F37B3855.jpg
    D4824A8E-3FBF-4490-A90E-6594F37B3855.jpg
    139 KB · Views: 184

Members online

No members online now.

Forum statistics

Threads
278,309
Messages
3,554,071
Members
248,016
Latest member
Advally Service

Trending content

Back
Top