Johns06yota
Member
Hello all I thought I would give a guide on how to replace the needle bearing on our 4th gen 4runners. I was suffering from the whomp whomp vibration in 2wd that immediately went away in 4wd and came back once 2wd was engaged. This guide will work if you have a 4runner with part time 4 wheel drive. This is not for the models that have the AWD system as they have a different style front diff. I decided to go with the ECGS kit as it was the logical choice to completely eliminate the needle bearing.
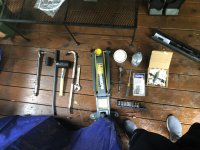
The tools you will need are as follows
-2 floor jacks (or one floor jack and one bottle jack)
-a 35 mm 1/2 inch socket for the cv axle nut
-cotter pin replacement
-large flat head screwdriver
-lug nut wrench
-torque wrench
-metric socket set
-1/2 inch extension
-socket wrench
-pry bar
-rubber mallet
-open ended wrench
-white lithium grease
-75w90 gear oil
-ECGS replacement bushing
-ECGS needle bearing removal tool
-metal punch tool
-hammer
-10 mm hex nut
OPTIONAL
-replacement dust cap
-replacement diff seal
-ratchet strap
-clip on tool
Step one
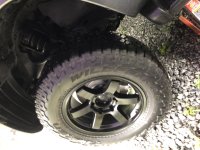
-remove jack the vehicle up from the frame and remove the tire
Step two
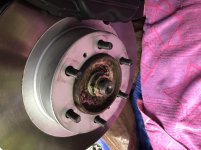
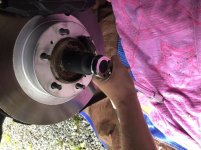
-use a flat head screwdriver to remove the dust cap then place the crowbar wedges against the lug bolts then place the torque wrench on the 35 mm nut and turn it counterclockwise to remove it. It does take a lot of force so don’t be afraid to give it a good tug
Step three
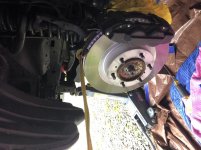
-disconnect the sway bar end link from the a-arm and also disconnect the lower ball joint bolts. (I replaced my sway bar end links so all three bolts were 19 mm)
Step four (ratchet strap optional)
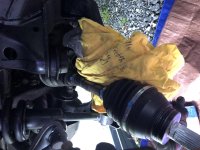
-use ratchet strap to lift the a-arm up and away so that you can use the metal punch to push the driver side cv-axle out. Next remove the 10 mm bolts on the rear skid plate to remove it. Then use the large screwdriver (place it on the groves on back of cv axle) with the hammer and give it several good hits. It will begin to come free from the c-clip holding it in place. Use a towel or old shirt to keep the cv axle from tearing a boot.
Step five
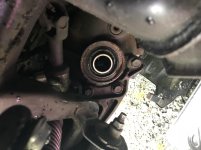
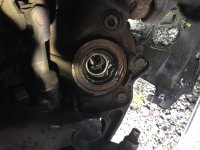
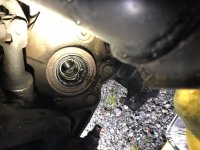
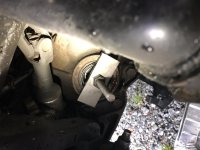
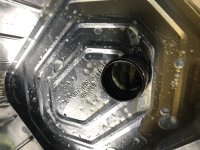
- once the cv axle is out stuff a piece of paper towel or plastic bag inside the diff to avoid issues later in this step. Next I used a spring loading clip tool to place the ECGS tool into the diff. When seated properly it should be pointed straight out. Next thread the supplied bolt and metal plate on to remove the old bearing. Use an open ended wrench for this step. The old bearing should come out relatively easily. If it begins to bind realign the tool and try again. Also note a metal pan can be used to catch the dripping gear oil.
Step six
-next remove the plastic or paper towel you placed in the diff and begin to put the new bearing in. The side that is flat will be facing out. I used the 35 mm socket to put mine in. Also if your diff seal is leaking this would be the time to replace it. Mine still looked good so I didn’t mess with it. The new bearing is longer than the old one so make sure to check often that it doesn’t go in any further than the first metal lip on the diff.
Step seven
-place the cv axle back in place and use the same screwdriver and hammer to get it back in place (MAKE SURE THE SPLINES LINE UP) next ones it snaps in place the other end back through the a-arm and snug the 35 mm nut back on. Next reconnect the lower ball joint. An extra jack significantly helps with this part. Once done tighten the axle nut to 181 ft/lbs or if your torque wrench doesn’t be go that high to 5 Ugga duggas lol. Next use a 10 mm hex nut to refill the diff with 75w90 gear oil as you will have lost some in the process. Next reconnect the sway bar end link and re-bolt on the skid plate. Now my dust cap was in terrible shape from a shady mechanic so I replaced it and put a good amount of white lithium grease on the axle nut to keep it from rusting. Use the rubber mallet to put it back on.
Next replace your tire and you are all set!
Now you 4Runner with drive smooth with no vibration whatsoever!
If you have any suggestions on my writup please feel free to add!
The tools you will need are as follows
-2 floor jacks (or one floor jack and one bottle jack)
-a 35 mm 1/2 inch socket for the cv axle nut
-cotter pin replacement
-large flat head screwdriver
-lug nut wrench
-torque wrench
-metric socket set
-1/2 inch extension
-socket wrench
-pry bar
-rubber mallet
-open ended wrench
-white lithium grease
-75w90 gear oil
-ECGS replacement bushing
-ECGS needle bearing removal tool
-metal punch tool
-hammer
-10 mm hex nut
OPTIONAL
-replacement dust cap
-replacement diff seal
-ratchet strap
-clip on tool
Step one
-remove jack the vehicle up from the frame and remove the tire
Step two
-use a flat head screwdriver to remove the dust cap then place the crowbar wedges against the lug bolts then place the torque wrench on the 35 mm nut and turn it counterclockwise to remove it. It does take a lot of force so don’t be afraid to give it a good tug
Step three
-disconnect the sway bar end link from the a-arm and also disconnect the lower ball joint bolts. (I replaced my sway bar end links so all three bolts were 19 mm)
Step four (ratchet strap optional)
-use ratchet strap to lift the a-arm up and away so that you can use the metal punch to push the driver side cv-axle out. Next remove the 10 mm bolts on the rear skid plate to remove it. Then use the large screwdriver (place it on the groves on back of cv axle) with the hammer and give it several good hits. It will begin to come free from the c-clip holding it in place. Use a towel or old shirt to keep the cv axle from tearing a boot.
Step five
- once the cv axle is out stuff a piece of paper towel or plastic bag inside the diff to avoid issues later in this step. Next I used a spring loading clip tool to place the ECGS tool into the diff. When seated properly it should be pointed straight out. Next thread the supplied bolt and metal plate on to remove the old bearing. Use an open ended wrench for this step. The old bearing should come out relatively easily. If it begins to bind realign the tool and try again. Also note a metal pan can be used to catch the dripping gear oil.
Step six
-next remove the plastic or paper towel you placed in the diff and begin to put the new bearing in. The side that is flat will be facing out. I used the 35 mm socket to put mine in. Also if your diff seal is leaking this would be the time to replace it. Mine still looked good so I didn’t mess with it. The new bearing is longer than the old one so make sure to check often that it doesn’t go in any further than the first metal lip on the diff.
Step seven
-place the cv axle back in place and use the same screwdriver and hammer to get it back in place (MAKE SURE THE SPLINES LINE UP) next ones it snaps in place the other end back through the a-arm and snug the 35 mm nut back on. Next reconnect the lower ball joint. An extra jack significantly helps with this part. Once done tighten the axle nut to 181 ft/lbs or if your torque wrench doesn’t be go that high to 5 Ugga duggas lol. Next use a 10 mm hex nut to refill the diff with 75w90 gear oil as you will have lost some in the process. Next reconnect the sway bar end link and re-bolt on the skid plate. Now my dust cap was in terrible shape from a shady mechanic so I replaced it and put a good amount of white lithium grease on the axle nut to keep it from rusting. Use the rubber mallet to put it back on.
Next replace your tire and you are all set!
Now you 4Runner with drive smooth with no vibration whatsoever!
If you have any suggestions on my writup please feel free to add!
Attachments
-
 939F25C3-C2F2-4191-B569-E2DE4C353A89.jpg135.8 KB · Views: 5,160
 -
 5A4599BC-A95D-4535-A5FC-358D7A98EDAF.jpg131.5 KB · Views: 5,376
 -
 68BC5612-297D-4D5E-94C2-25465B3503E3.jpg128.8 KB · Views: 5,188
 -
 C9B8930B-3464-4450-B748-1CD93CBA092C.jpg138.7 KB · Views: 5,332
 -
 EC278C92-CB38-400E-ACC5-5F6B4875970B.jpg132.5 KB · Views: 5,153
 -
 3E9CBE78-BA4A-42BE-BE09-A6F19363069A.jpg128.7 KB · Views: 5,984
 -
 AE632E30-7C07-4547-BA1A-C2132B99AF6B.jpg124.6 KB · Views: 5,457
 -
 83D53392-7CF5-4426-B59D-4F7DCF98BD4B.jpg131.9 KB · Views: 5,222
Last edited: