

Rockdawg84
New member
So I had to do rear axle seals (been leaking for a while now) So I thought what the heck I'll do a rear disk conversion. I was actually inspired by some 1st gen guys on Pirate.
First pull the axle shafts and do axle seals. Done :tongue:
Next use a cutoff wheel or plasma cutter, or torch to cut around the mounting flange taking care not to put too much heat into the bearings and keep a fire extinguisher handy. rear axle oil is flammable.
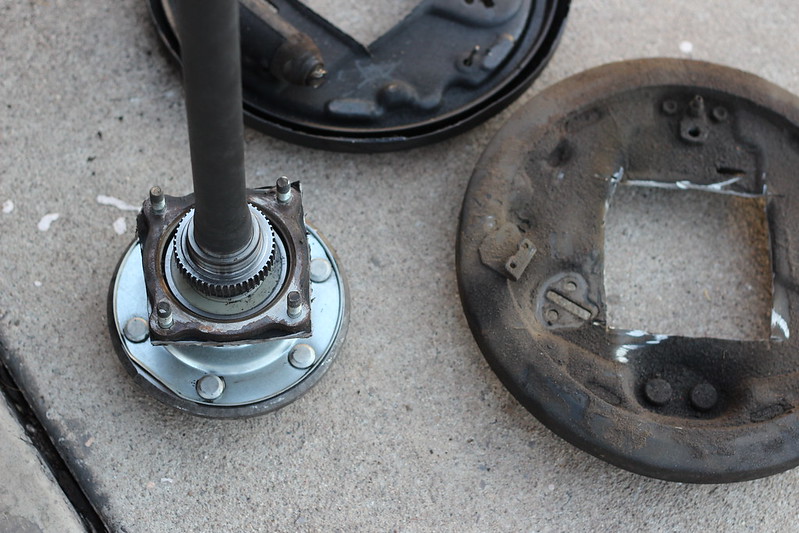 Rear Disk 1 by Sam Wright, on Flickr
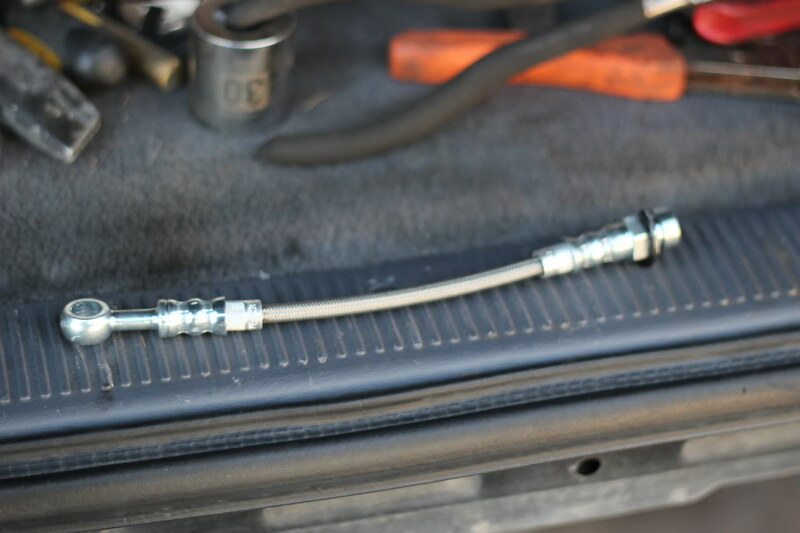
I used the following parts. brake rotor from the rear of a 94 Montero Sport. Rear Caliper from 94-04 Mustang Gt. Custom flex line with banjo connector.
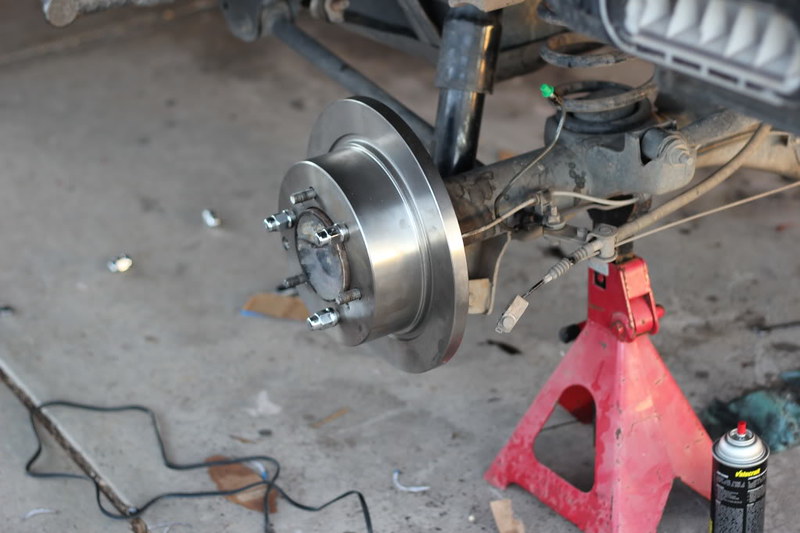 Rear Disk Brake 3 by Sam Wright, on Flickr
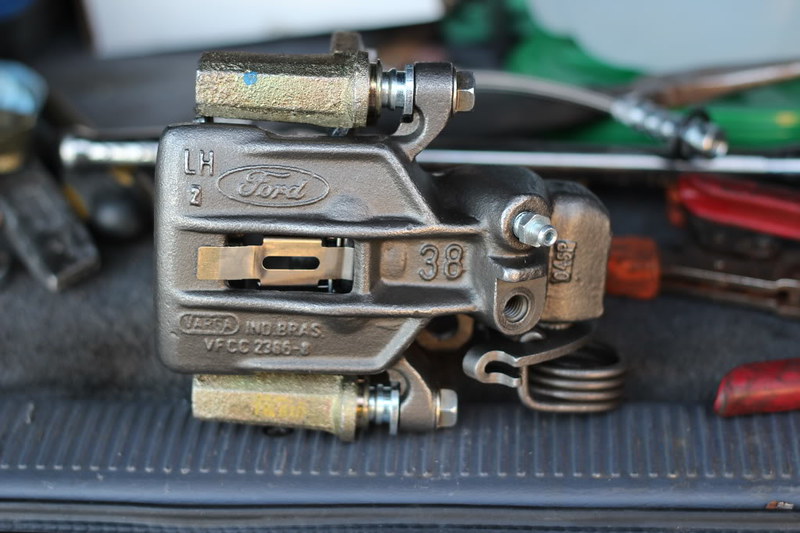 Rear Disk Brake 7 by Sam Wright, on Flickr
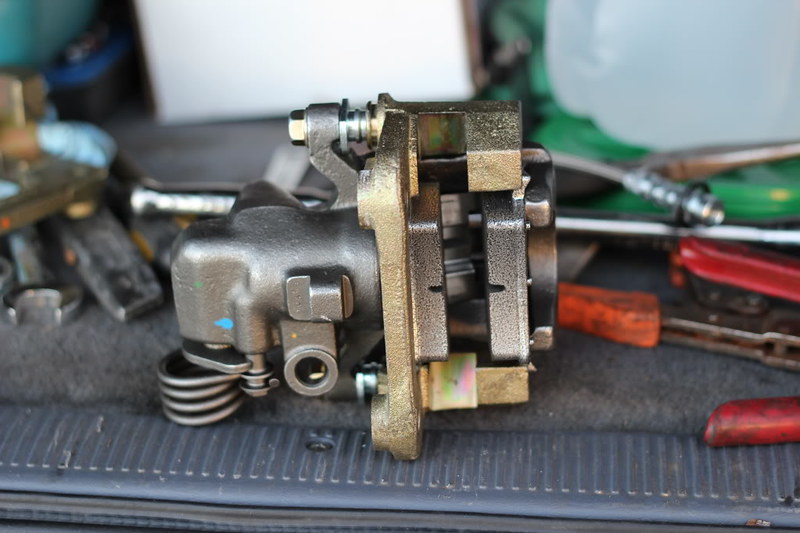 Rear Disk Brake 8 by Sam Wright, on Flickr
 Rear Disk Brake 5 by Sam Wright, on Flickr
Next you have to remove 2 of the axle bolts. We used a air hammer, but it is possible to install the axle shafts and only bolt in the bottom 2 and then drive out the top 2. These will be replaced later.
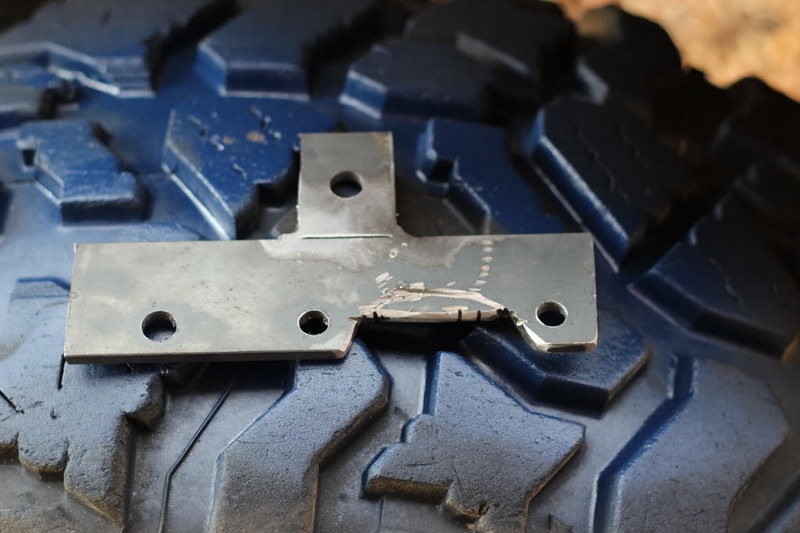
Then you have to build a bracket to hold the caliper.
Here is my prototype
 Rear Disk Brake 20 by Sam Wright, on Flickr
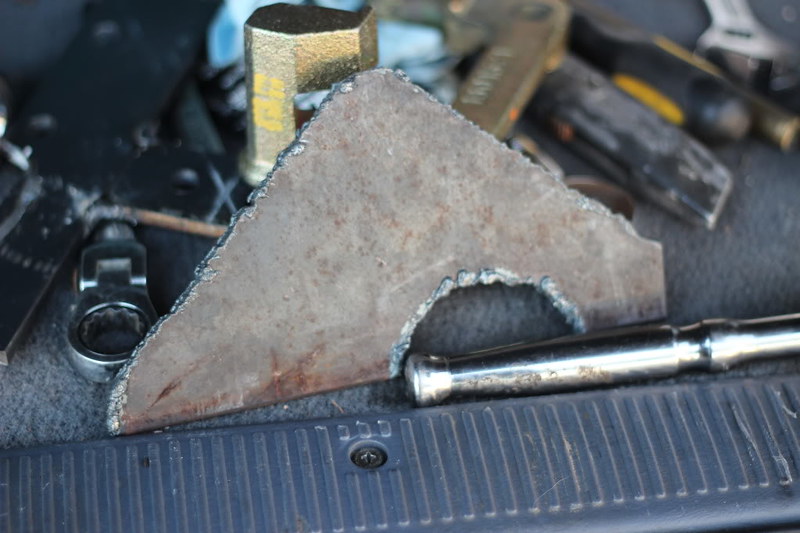
Here is the torched bracket made of 1/4" plate
 Rear Disk Brake 4 by Sam Wright, on Flickr
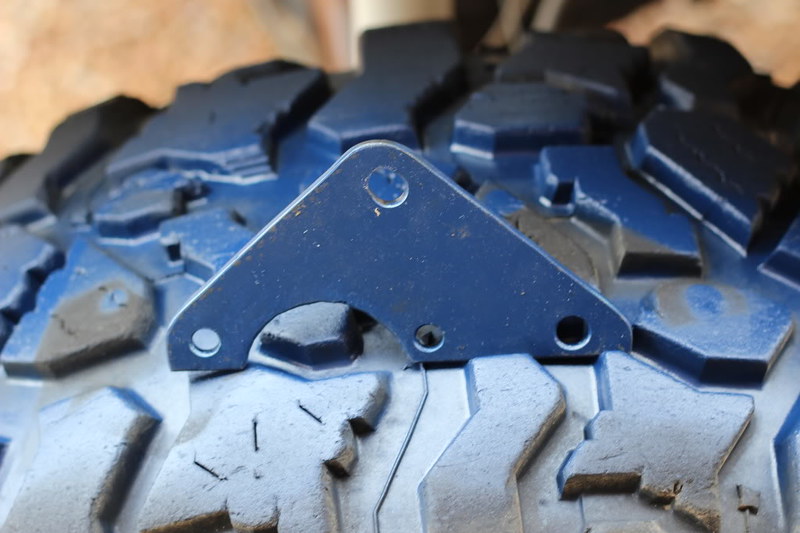
cleaned up and drilled and painted
 Rear Disk Brake 11 by Sam Wright, on Flickr
Now you have to shim the caliper bracket so the Caliper is centered on the rotor.
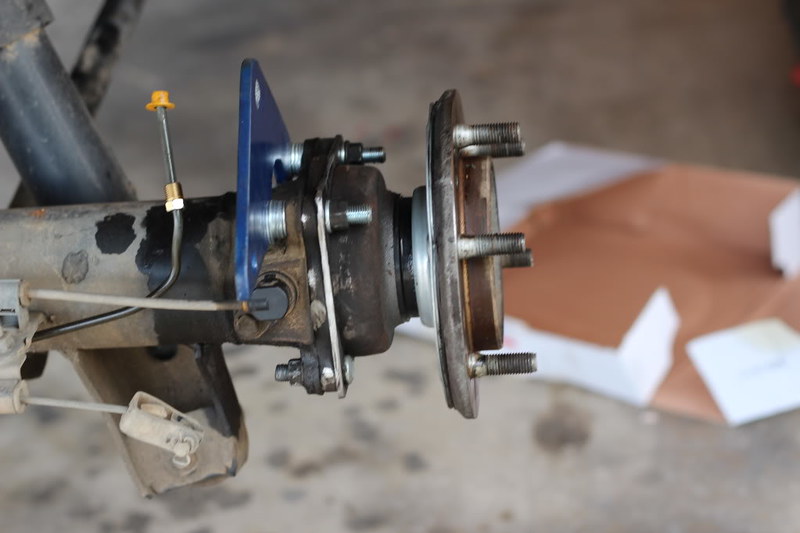 Rear Disk Brake 14 by Sam Wright, on Flickr
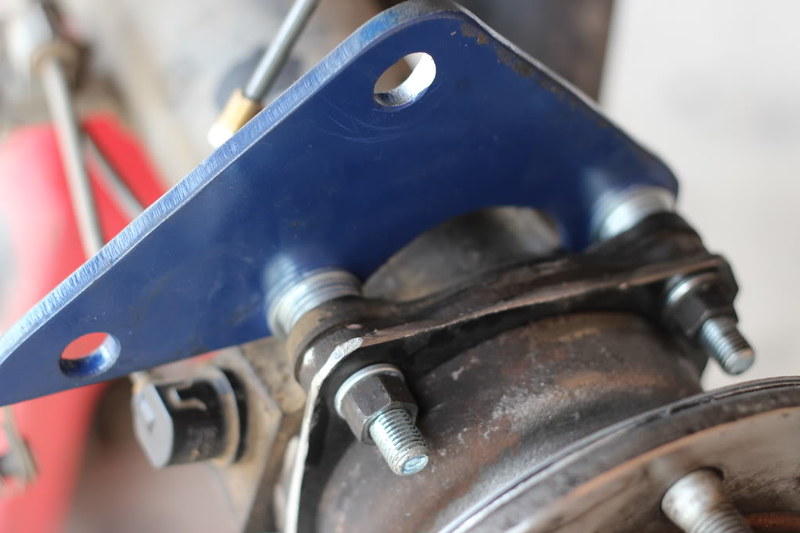 Rear Disk Brake 13 by Sam Wright, on Flickr
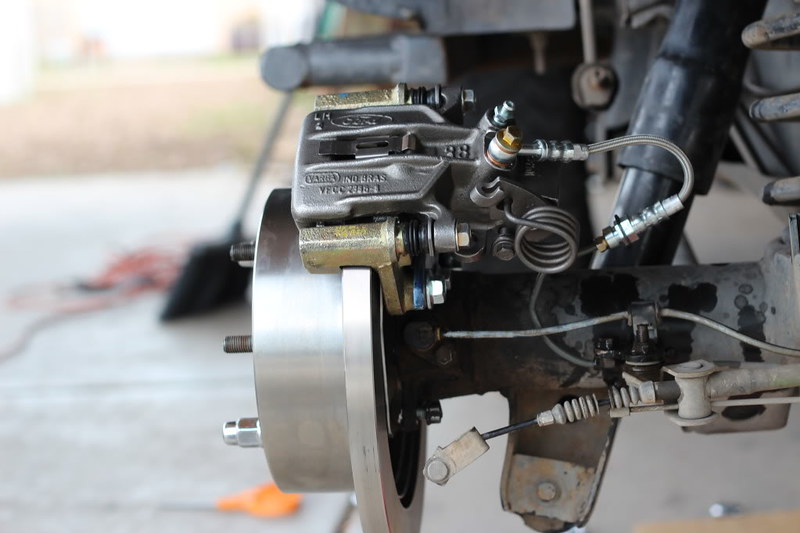 Rear Disk Brake 10 by Sam Wright, on Flickr
I cut and reflared the hard line to create a better angle for the flex line.
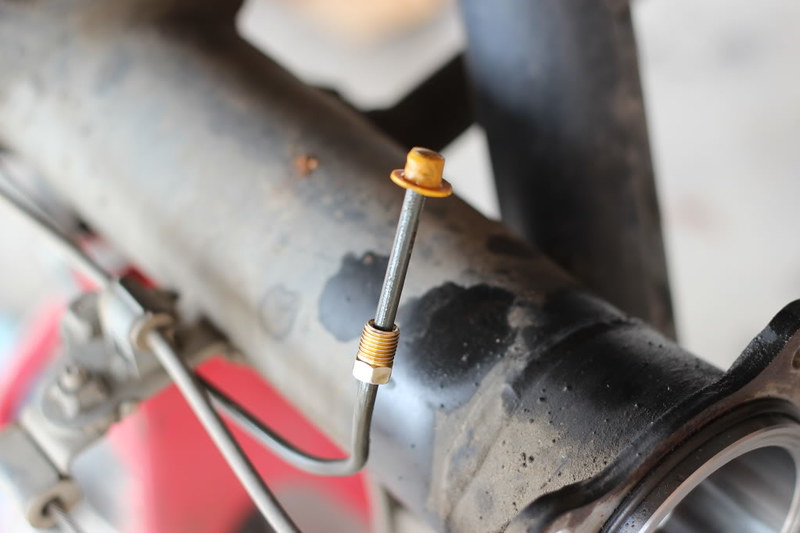 Rear Disk Brake 9 by Sam Wright, on Flickr
Bolt it all together, bleed the brakes and there you go.
Rear Disk Brake 10 by Sam Wright, on Flickr
Reinstall the tire and enjoy extra stopping power, Brakes that don't cake up in mud and snow, and you can work on the rear end with out cracking open the brake system.
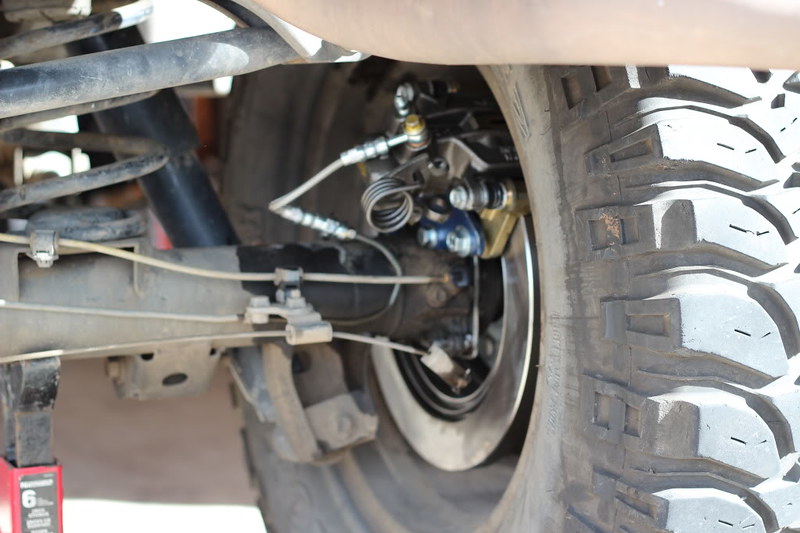 Rear Disk Brake 15 by Sam Wright, on Flickr
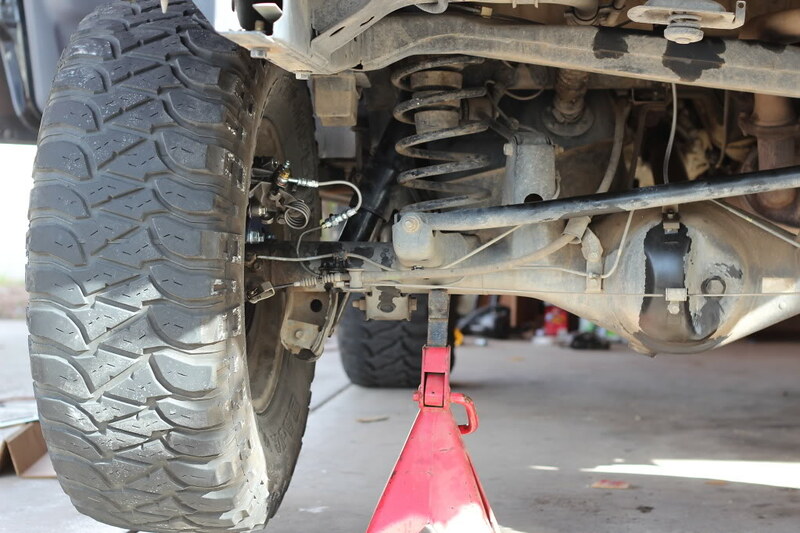 Rear Disk Brake 18 by Sam Wright, on Flickr
Edit: So over 9 years later I got part 2 completed. Jump to page 17 to see part 2.
First pull the axle shafts and do axle seals. Done :tongue:
Next use a cutoff wheel or plasma cutter, or torch to cut around the mounting flange taking care not to put too much heat into the bearings and keep a fire extinguisher handy. rear axle oil is flammable.
Rear Disk 1 by Sam Wright, on FlickrI used the following parts. brake rotor from the rear of a 94 Montero Sport. Rear Caliper from 94-04 Mustang Gt. Custom flex line with banjo connector.
Rear Disk Brake 3 by Sam Wright, on FlickrRear Disk Brake 7 by Sam Wright, on FlickrRear Disk Brake 8 by Sam Wright, on FlickrRear Disk Brake 5 by Sam Wright, on FlickrNext you have to remove 2 of the axle bolts. We used a air hammer, but it is possible to install the axle shafts and only bolt in the bottom 2 and then drive out the top 2. These will be replaced later.
Then you have to build a bracket to hold the caliper.
Here is my prototype
Rear Disk Brake 20 by Sam Wright, on FlickrHere is the torched bracket made of 1/4" plate
Rear Disk Brake 4 by Sam Wright, on Flickrcleaned up and drilled and painted
Rear Disk Brake 11 by Sam Wright, on FlickrNow you have to shim the caliper bracket so the Caliper is centered on the rotor.
Rear Disk Brake 14 by Sam Wright, on FlickrRear Disk Brake 13 by Sam Wright, on FlickrRear Disk Brake 10 by Sam Wright, on FlickrI cut and reflared the hard line to create a better angle for the flex line.
Rear Disk Brake 9 by Sam Wright, on FlickrBolt it all together, bleed the brakes and there you go.
Rear Disk Brake 10 by Sam Wright, on FlickrReinstall the tire and enjoy extra stopping power, Brakes that don't cake up in mud and snow, and you can work on the rear end with out cracking open the brake system.
Rear Disk Brake 15 by Sam Wright, on FlickrRear Disk Brake 18 by Sam Wright, on FlickrEdit: So over 9 years later I got part 2 completed. Jump to page 17 to see part 2.
Last edited:


