rigtec
New member
Hi team,
I received a pm regarding a recent thread that I posted on called: Center console swap - Toyota 4Runner Forum - Largest 4Runner Forum. In that post, I mentioned that I had screwed up (Biblical scale) a project that I was working on that involved drilling two small holes in the center console upper trim panel. After I did it, I was unable to locate a replacement panel to get it resolved so I had to fix that one. The person that sent the pm was inquiring as to the paint I used to finish the job. He alluded to the fact that these upper trim panels scratch sooo very easily, to which I totally agree. So to those of you who will need to re-finish the "Center console upper trim panel", Here's what I did...
First, I removed the original panel so that I could ruin it, using a trim panel removal tool; cost was about $5 dollars for a two piece set:

Just insert anywhere, pry gently all the way around the edges (you'll here/feel the clips unlatching) and lift slightly as you go. There are two short electrical harnesses beneath this panel; 1 for seat heater dials/rear window control switch, and 1 for the transfer case control knob (if applicable), so once it's unclipped you'll need to reach under it and unlatch the connectors. To release the primary connector's latch, use your thump to depress this button (below) and pull (lower photo):


Now the second one, the T/C knob. Just do the same thing as before, depress the release latch and pull. Now you're free to remove the panel for dismantling. With the bottom side up, you'll see the small clips holding the switches and rear cupholder in place, just use your thumb or small screwdriver to unlatch each one. Now the front cupholder is held in by several philips head screws. Remove them all and the black insert will come out!

When I drilled the holes, even though I used a piece of pvc electrical tape to mark the proper size hole cutting edge, I allowed the bit to begin beveling for the next size hole; which happens before the uni-bit begins cutting :redface: totally heartbroken... "should have drilled the holes from the bottom".
: /
Now just to show the mess I made BEFORE the repair, here it is:
Before


"What a mess"
Because I now had two 'curiously freakish' looking holes in my console, I had to find a way to fill them. Using a two part epoxy by "JB Weld, I simply mixed a small portion on a pallet :artist: filled the holes by spreading it w/ a putty knife and let it dry overnight.

Then I filed it down flat the next morning and sanded it until smooth as glass! But this thread isn't about filling holes, it's about the finish, so once that was done, I wiped the 'now repaired' trim panel clean using a wet paper towel, dried it off and took it into a dust free environment for several coats of a premium trim panel paint. Here's what I used:

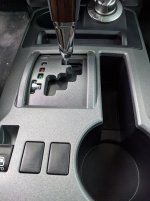
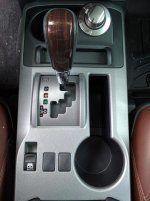
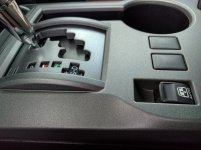
The color is called "Gun metal met" (Met for metallic). It's not an exact match, but I tried (bought) several other paints before choosing this one and this one's so close it's hard to tell. I actually like this better than the original because it's a bit richer/deeper to the eye. But the important thing is... it will match and only you will detect the difference! Take a look:
After


I used three coats of paint on this application, spacing the coats about 20 to 30 minutes apart. Just be careful not hold the can too close to the surface of the panel. The temptation will be to use one very heavy coat to save time, but trust me, the finish won't be nearly as smooth as using three or four ultra thin coats... feels like satin and looks just as good as the factory finish!
So now you're ready to install your trim panel back into the console. There's no real need to show you how to put it back in your truck, most of you guys (and gals) are perfectly capable... but if you do have trouble you can always pm me for help (P'sst!... and I won't tell anybody that you did!) lol! "And don't forget to reconnect those two wiring harnesses before you close it up! Happy motoring team! :car:
rigtec, cheers
I received a pm regarding a recent thread that I posted on called: Center console swap - Toyota 4Runner Forum - Largest 4Runner Forum. In that post, I mentioned that I had screwed up (Biblical scale) a project that I was working on that involved drilling two small holes in the center console upper trim panel. After I did it, I was unable to locate a replacement panel to get it resolved so I had to fix that one. The person that sent the pm was inquiring as to the paint I used to finish the job. He alluded to the fact that these upper trim panels scratch sooo very easily, to which I totally agree. So to those of you who will need to re-finish the "Center console upper trim panel", Here's what I did...
First, I removed the original panel so that I could ruin it, using a trim panel removal tool; cost was about $5 dollars for a two piece set:
Just insert anywhere, pry gently all the way around the edges (you'll here/feel the clips unlatching) and lift slightly as you go. There are two short electrical harnesses beneath this panel; 1 for seat heater dials/rear window control switch, and 1 for the transfer case control knob (if applicable), so once it's unclipped you'll need to reach under it and unlatch the connectors. To release the primary connector's latch, use your thump to depress this button (below) and pull (lower photo):
Now the second one, the T/C knob. Just do the same thing as before, depress the release latch and pull. Now you're free to remove the panel for dismantling. With the bottom side up, you'll see the small clips holding the switches and rear cupholder in place, just use your thumb or small screwdriver to unlatch each one. Now the front cupholder is held in by several philips head screws. Remove them all and the black insert will come out!
When I drilled the holes, even though I used a piece of pvc electrical tape to mark the proper size hole cutting edge, I allowed the bit to begin beveling for the next size hole; which happens before the uni-bit begins cutting :redface: totally heartbroken... "should have drilled the holes from the bottom".
: /
Now just to show the mess I made BEFORE the repair, here it is:
Before
"What a mess"
Because I now had two 'curiously freakish' looking holes in my console, I had to find a way to fill them. Using a two part epoxy by "JB Weld, I simply mixed a small portion on a pallet :artist: filled the holes by spreading it w/ a putty knife and let it dry overnight.
Then I filed it down flat the next morning and sanded it until smooth as glass! But this thread isn't about filling holes, it's about the finish, so once that was done, I wiped the 'now repaired' trim panel clean using a wet paper towel, dried it off and took it into a dust free environment for several coats of a premium trim panel paint. Here's what I used:
The color is called "Gun metal met" (Met for metallic). It's not an exact match, but I tried (bought) several other paints before choosing this one and this one's so close it's hard to tell. I actually like this better than the original because it's a bit richer/deeper to the eye. But the important thing is... it will match and only you will detect the difference! Take a look:
After
I used three coats of paint on this application, spacing the coats about 20 to 30 minutes apart. Just be careful not hold the can too close to the surface of the panel. The temptation will be to use one very heavy coat to save time, but trust me, the finish won't be nearly as smooth as using three or four ultra thin coats... feels like satin and looks just as good as the factory finish!
So now you're ready to install your trim panel back into the console. There's no real need to show you how to put it back in your truck, most of you guys (and gals) are perfectly capable... but if you do have trouble you can always pm me for help (P'sst!... and I won't tell anybody that you did!) lol! "And don't forget to reconnect those two wiring harnesses before you close it up! Happy motoring team! :car:
rigtec, cheers
Last edited:

 imp:
imp: