
Here's a quick write-up on removing the 5th Gen T4Rs stock head unit for those of you who wish to install an aftermarket stereo or simply obtain access to the head unit for installing an aftermarket amp / sub combination.
Step 1
Remove the panels surrounding the AC knob controls. This is the trickiest part. Even though the panel is only held in place using pressure clips, it is hard to grip in order to get enough leverage to pull out easily.
TIP - If you have fat fingers, then use a small flat head screwdriver with some electrical tape covering the head to prevent scratches and wedge behind the panel once you are able to get the bottom corner separated by hand.

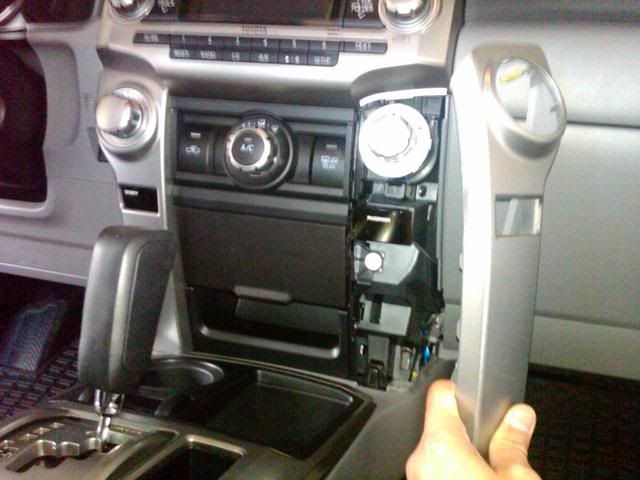
Step 2.
Repeat the process for the other panel.
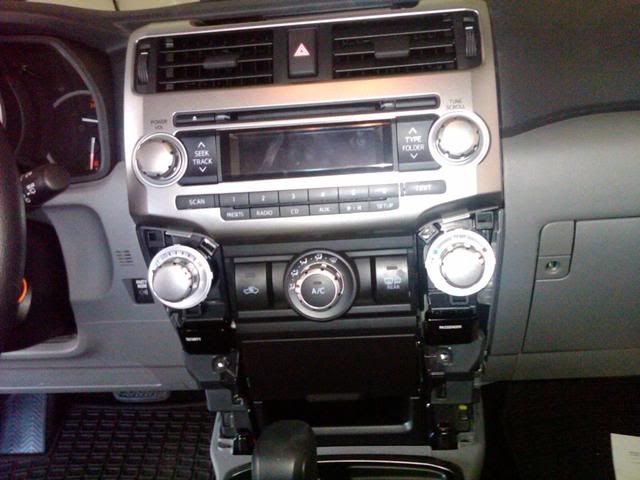
Step 3.
Pull out the AC control unit. This should come out very easily asit is held in only with pressure clips. You can either leave this hanging or disconnect any wires and set aside. I was working on a SR5, so there was only one plug to disconnect.

Step 4.
Using a 10mm socket wrench, remove the four bolts holding the head unit in place.
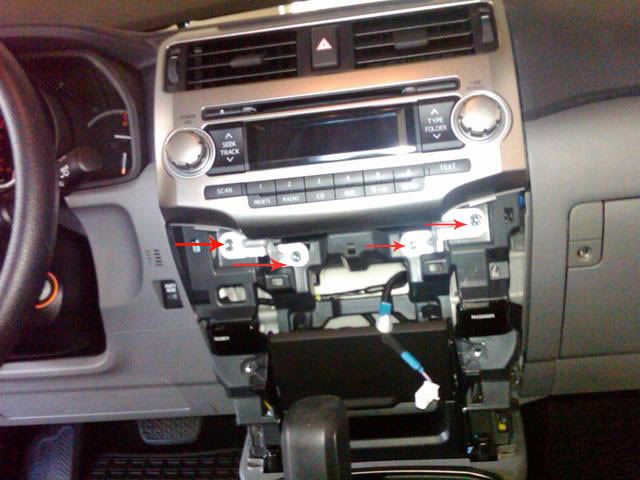
Step 5.
Pull the stereo away from the dash. The center vents are attached to the assembly.
TIP - There are a few pressure clips near the top of the assembly that will tend to stick. A good firm yank straight backwards will cause them to release.
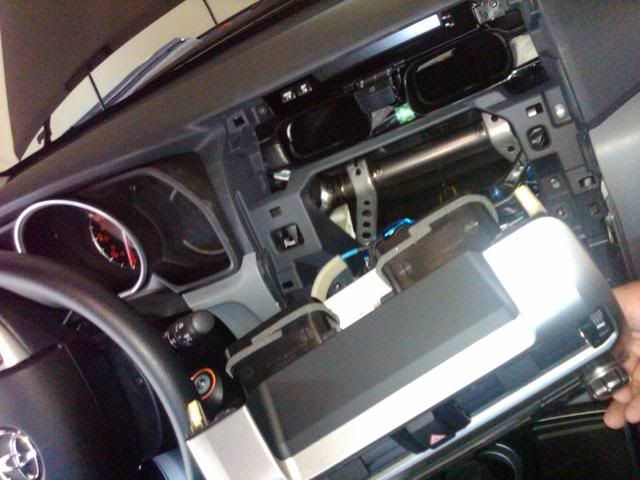
DONE!
Here's what it looks like completely removed.

Reverse the process to reassemble.
Bonus Tip
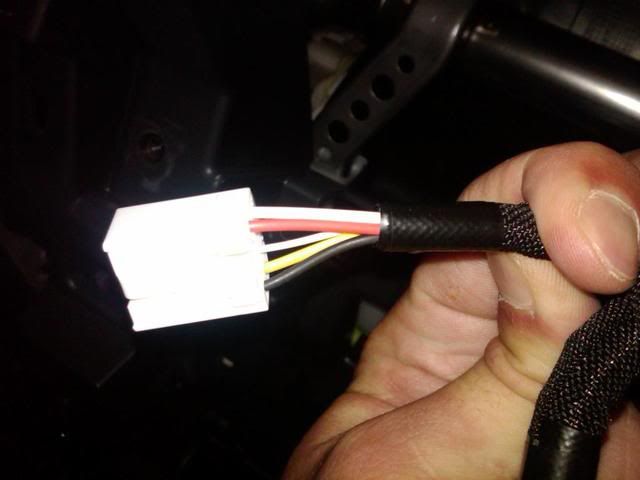
For those of you wanting to tap the rear speaker wires to add an aftermarket amp via high level inputs (as did I), then here are your rear speaker wires (non-JBL system).
Step 1
Remove the panels surrounding the AC knob controls. This is the trickiest part. Even though the panel is only held in place using pressure clips, it is hard to grip in order to get enough leverage to pull out easily.
- Grip the panel firmly with your hand at the lower portion of the panel and pull away from the center console
- The panel should begin to separate at the inside bottom corner
- Wedge your finger behind the panel and continue to pull outward until the the panel separates completely
TIP - If you have fat fingers, then use a small flat head screwdriver with some electrical tape covering the head to prevent scratches and wedge behind the panel once you are able to get the bottom corner separated by hand.
Step 2.
Repeat the process for the other panel.
Step 3.
Pull out the AC control unit. This should come out very easily asit is held in only with pressure clips. You can either leave this hanging or disconnect any wires and set aside. I was working on a SR5, so there was only one plug to disconnect.
Step 4.
Using a 10mm socket wrench, remove the four bolts holding the head unit in place.
Step 5.
Pull the stereo away from the dash. The center vents are attached to the assembly.
TIP - There are a few pressure clips near the top of the assembly that will tend to stick. A good firm yank straight backwards will cause them to release.
DONE!
Here's what it looks like completely removed.
Reverse the process to reassemble.
Bonus Tip
For those of you wanting to tap the rear speaker wires to add an aftermarket amp via high level inputs (as did I), then here are your rear speaker wires (non-JBL system).
- Black = Rear Left Positive (+)
- Yellow = Rear Left Negative (-)
- Red = Rear Right Positive (+)
- White = Rear Right Negative (-)
Last edited:


