Replace receiver drier

hearno

Senior Member
I've been searching/googling for the last half hour or so and can't find much about this, esp not for the 4th gens. I'm going to have my a/c serviced and saw that replacement of the receiver drier is a good idea (Iguess?). I found the part online but can't find any info on replacement steps. Anyone have any insight on whether or not this is a good idea or a waste of time/money. Additionally, the sequence of replacement would help. I'm guessing evac the system, replace part, recharge?
 
Register to hide this ad
whoever is servicing the system should do it. Anytime you open up the system you need to replace it and pull vacuum on it. you should evacuate the system, do whatever work you are doing, replace R/D, then pull vacuum and recharge.
 
The receiver/dryer is located on the passenger side of the evaporator coil, located behind the front bumper. You do not need to replace the complete evaporator coil. It is fairly easy to replace the desiccant, it’s in a bag. If you look at the bottom of the round cylinder on the side of the core you’ll see a plastic cap with a female allen socket. Like IoPturbo said you need evacuate the system and pull a vacuum on the system after you open it up.
 
It is fairly easy to replace the desiccant, it’s in a bag. If you look at the bottom of the round cylinder on the side of the core you’ll see a plastic cap with a female allen socket.

I was not aware of that. Thank you for the tip.
 
Last edited:
You can get an entire condenser/dryer for about $80.00. I would replace the whole unit IMO. Bent fins, dirt and debris build up and trash between the condenser and radiator.

The industry standard is to always replace the condenser/dryer if anything ever fails minus electrical. An example would be to always replace it if your compressor went south.
 
The receiver/dryer is located on the passenger side of the evaporator coil, located behind the front bumper. You do not need to replace the complete evaporator coil. It is fairly easy to replace the desiccant, it’s in a bag. If you look at the bottom of the round cylinder on the side of the core you’ll see a plastic cap with a female allen socket. Like IoPturbo said you need evacuate the system and pull a vacuum on the system after you open it up.

Reviving an ancient thread. Has anybody done this and can give cliffs notes?

And where can I locate the dessicant? Doesn't seem worth replacing the whole thing if the dessicant can be done separately along with some fresh o-rings.
 
Download entire repair manual and find PDF to replace that part.

https://www.toyota-4runner.org/3895755-post7.html

gOhWIdJ.jpeg
 
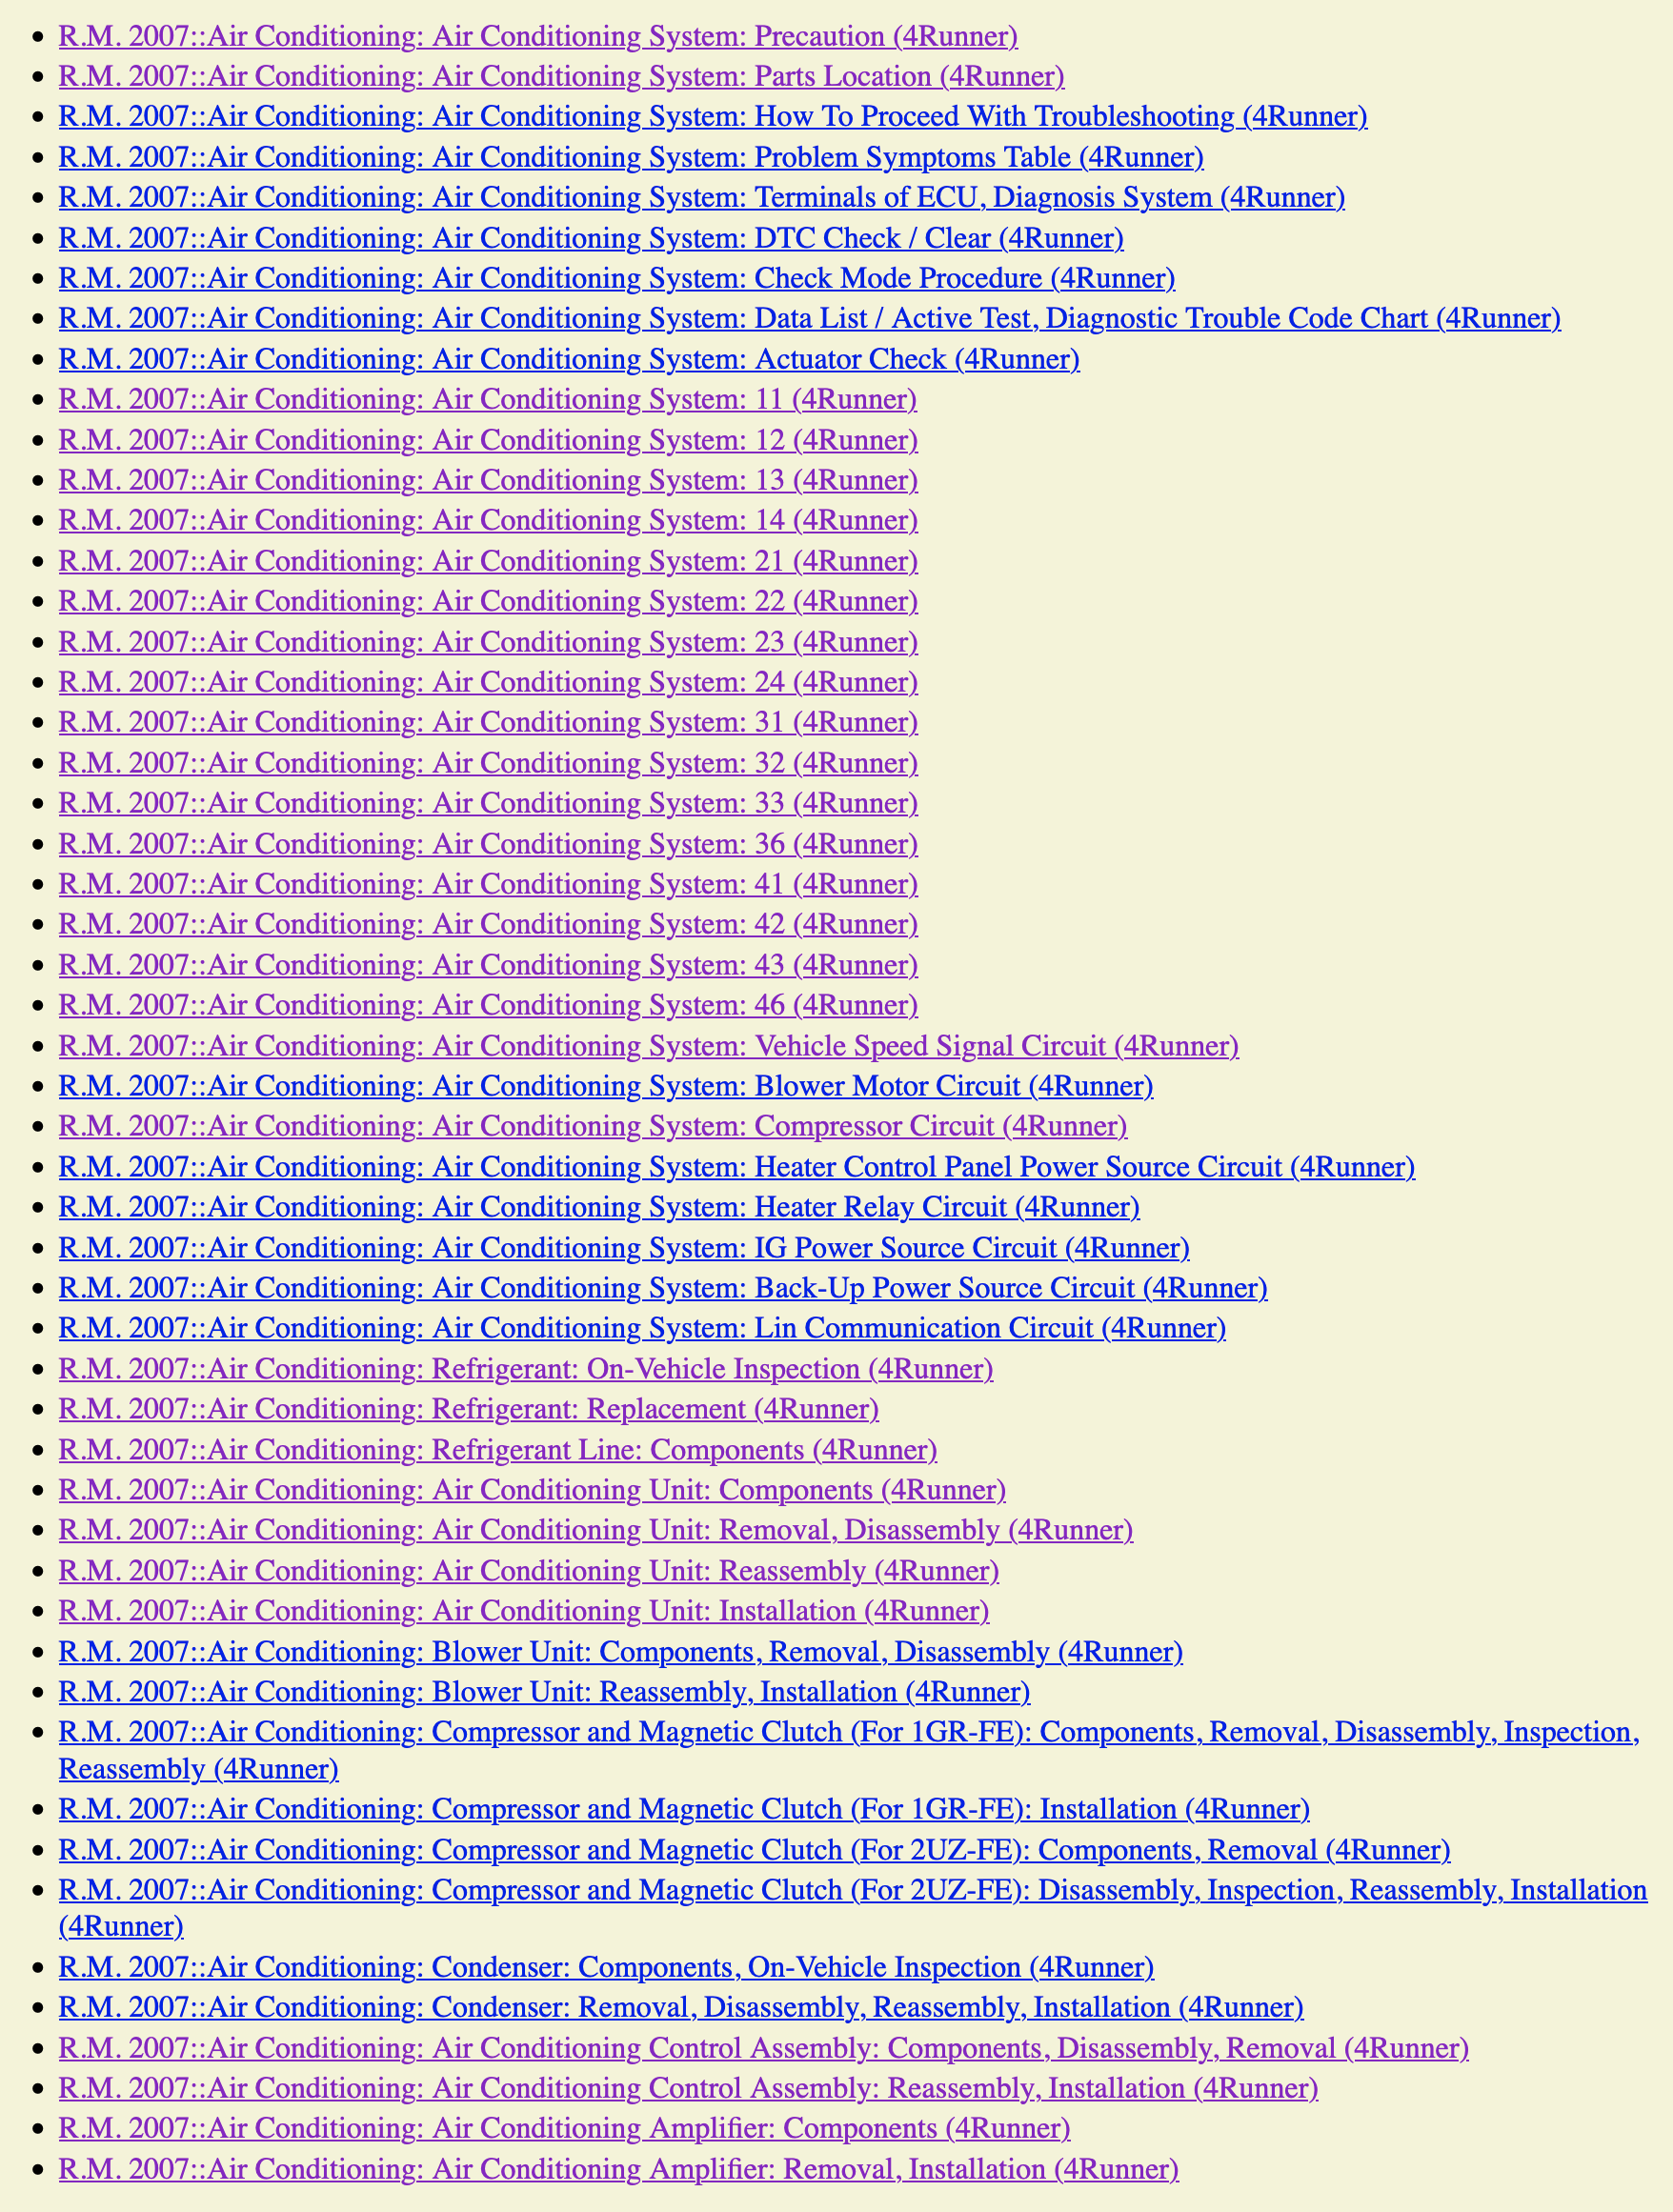
Yeah that manual's a mess. Reason I asked if anyone had done the job.

9wt1xt.png


You see a drier in here? Yeah me neither.
 
Yeah that manual's a mess. Reason I asked if anyone had done the job.

9wt1xt.png


You see a drier in here? Yeah me neither.

I guess you'll have to keep looking. Lol

Took less than 1 min to find the correct PDF in repair manual.

Could not be any easier to find.
 
Last edited:
I commented so you might actually find the info yourself, before I got home from work. Lol

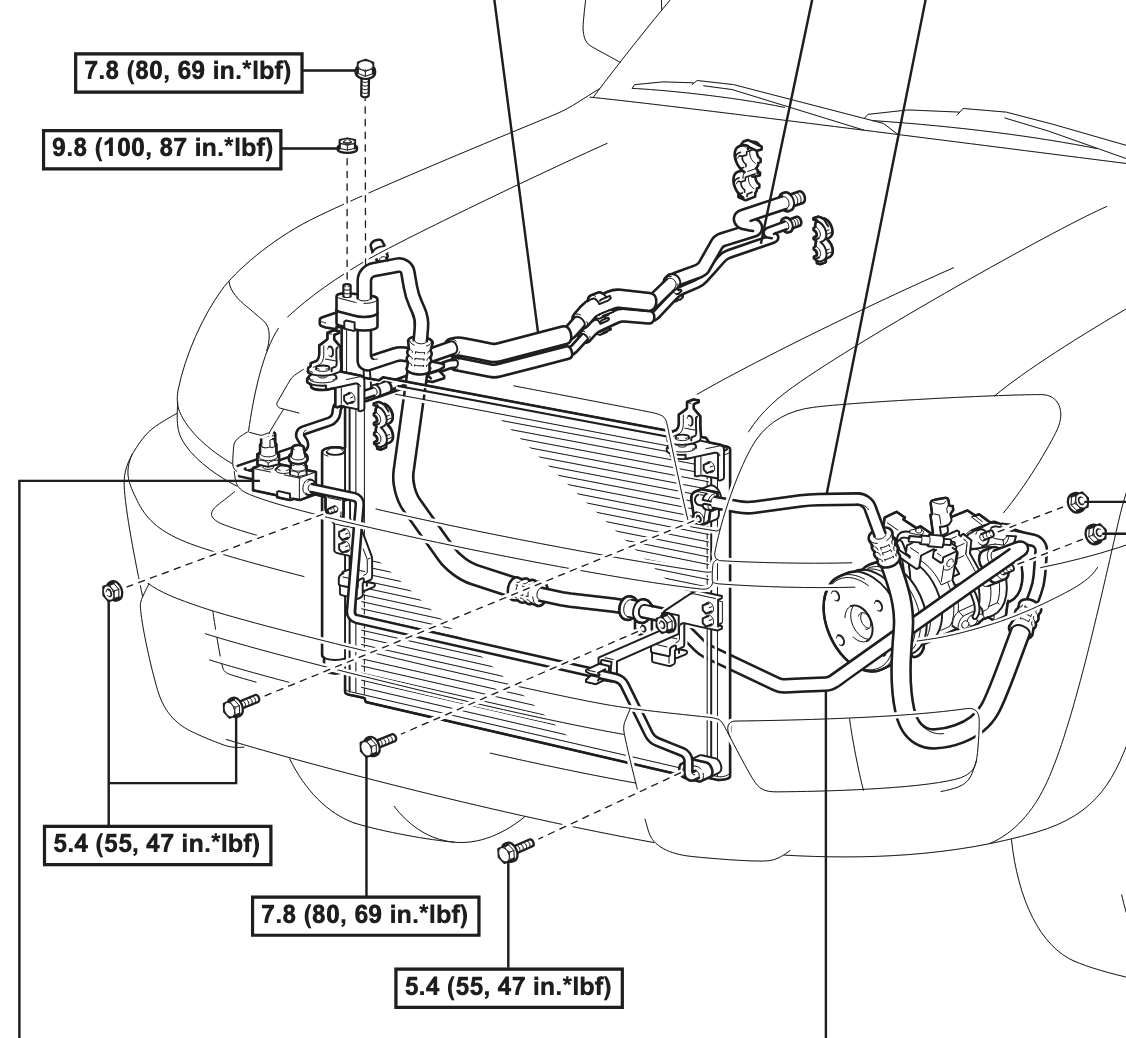
Air Conditioning: Condenser: Removal, Disassembly, Reassembly, Installation

ileaf/07toyrm/07toypdf/07rmsour/4runnerr/0430038.pdf

From the PDF

REMOVAL

1. DISCHARGE REFRIGERANT FROM REFRIGERATION SYSTEM (See page AC-103)

2. DISCONNECT DISCHARGE HOSE SUB-ASSEMBLY

(a) Remove the bolt and disconnect the cooler refrigerant discharge hose sub-assembly from the cooler condenser assembly.
(b) Remove the O-ring from the cooler refrigerant discharge hose sub-assembly.

NOTICE:

Seat the opening of the disconnected parts using vinyl tape to prevent moisture and foreign matter from entering.

3. DISCONNECT AIR CONDITIONING TUBE ASSEMBLY

(a) Remove the bolt and disconnect the air conditioning tube assembly from the cooler condenser assembly.
(b) Remove the O-ring from the air conditioning tube assembly.

4. REMOVE COOLER CONDENSER CUSHION NO. 2

(a) Remove the nut and cooler condenser bracket No. 1.
(b) Remove the 4 bolts, nut and cooler condenser 33500

AIR CONDITIONING – CONDENSER AC–141

5. REMOVE COOLER CONDENSER CUSHION NO. 1

(a) Remove the 4 bolts and cooler condenser cushion No. 1.

6. REMOVE COOLER CONDENSER CORE
(a) Remove the cooler condenser core.

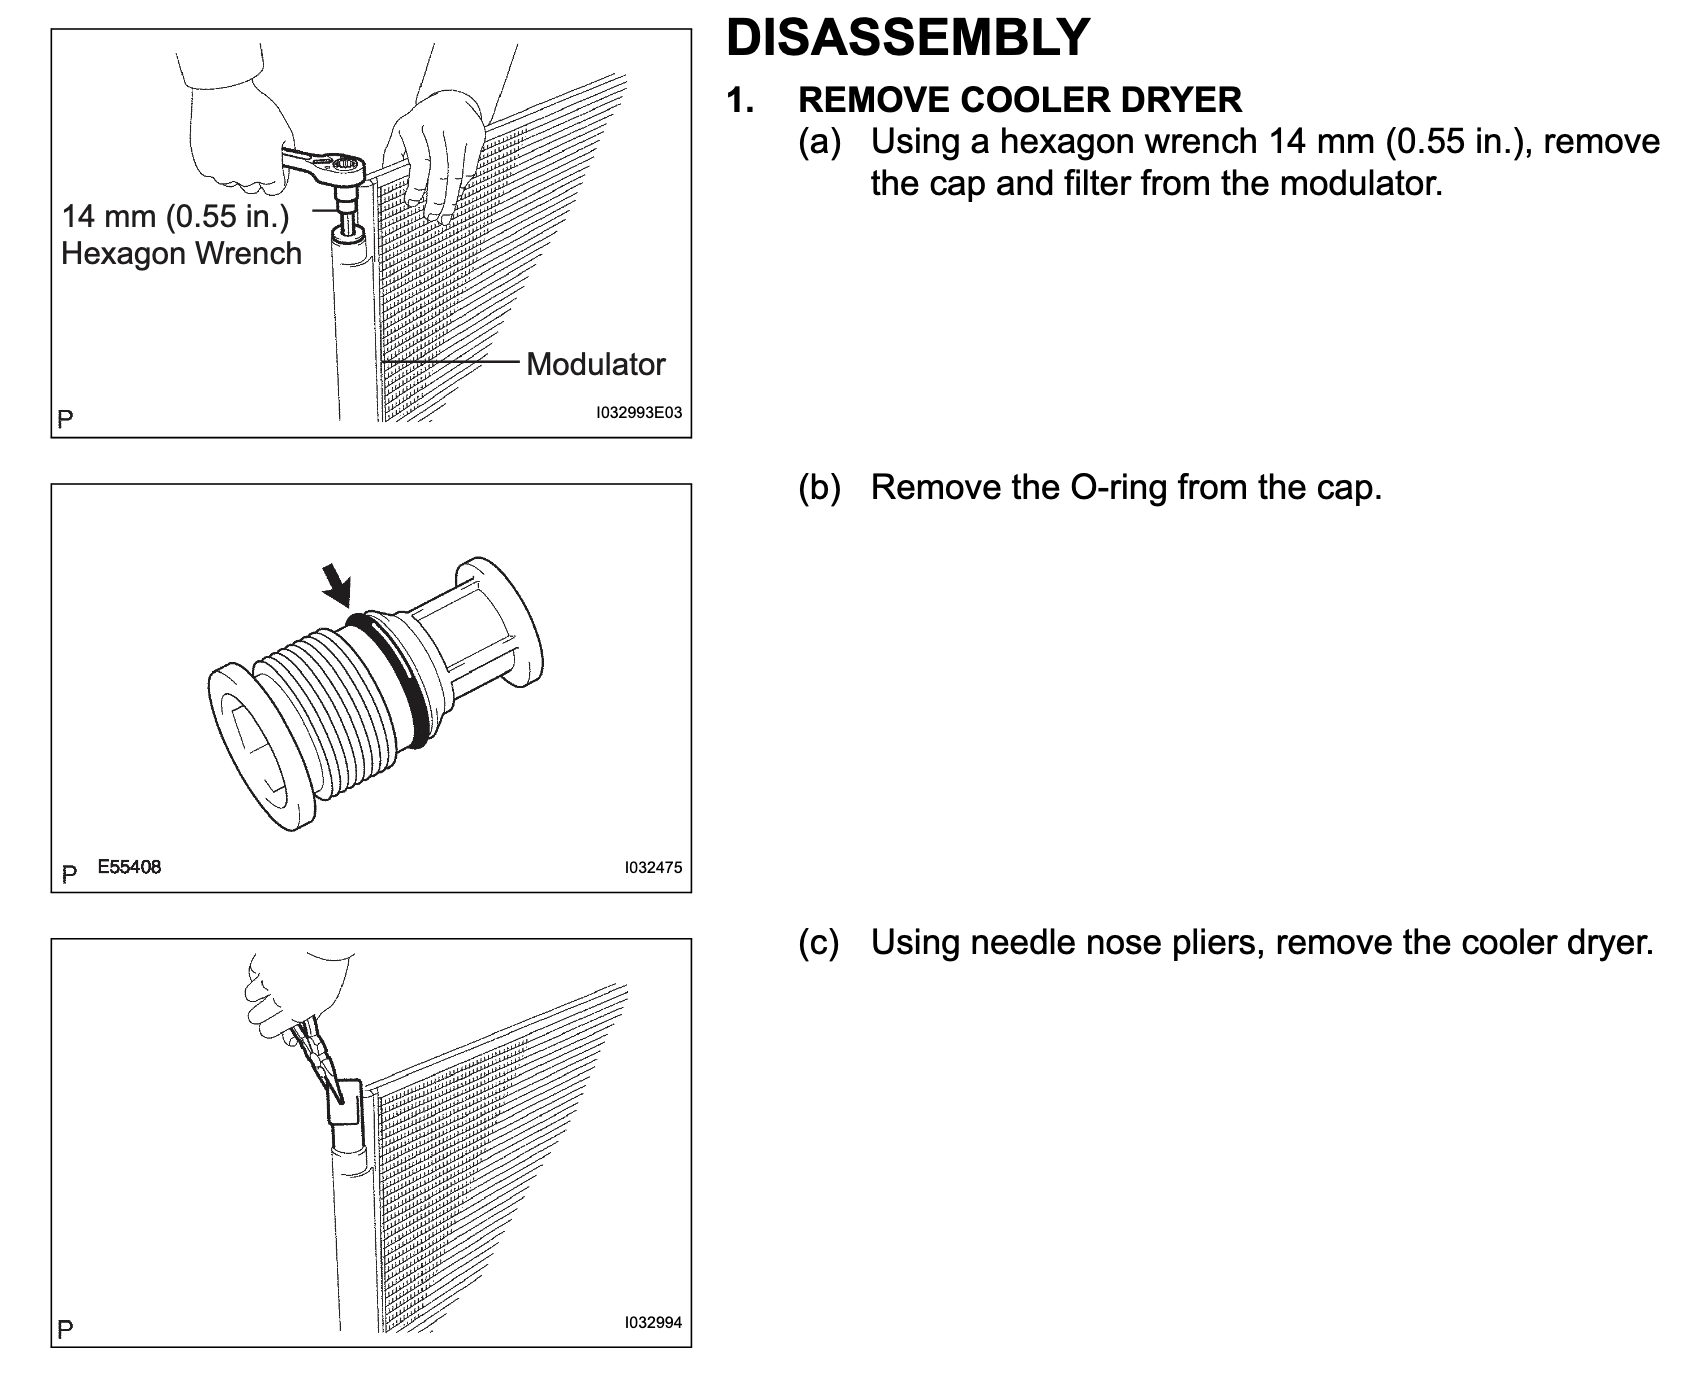
DISASSEMBLY

1. REMOVE COOLER DRYER

(a) Using a hexagon wrench 14 mm (0.55 in.), remove the cap and filter from the modulator.
(b) Remove the O-ring from the cap.
(c) Using needle nose pliers, remove the cooler dryer.

...

 
Last edited:

Members online

Forum statistics

Threads
278,304
Messages
3,554,041
Members
248,016
Latest member
Advally Service

Trending content

Back
Top