Beach4RunnerNC
New member
Hey guys, the difficulty of this project would be a 2/10. If you can change a tire you can do this job. To skip my life story, jump down to the pics below to begin the tutorial.
New member here. I’m a long time lurker of this and many other 4runner forums. I recently purchased a 2001 4runner 2wd, sport package with 160k on the clock. I’ve been going through the motions doing a few of the recommended updates and maintenance.
About a week ago I began having a bad vibrations in my shifter when accelerating accompanied by an overall loss of power. According to online comments, worn u-joints display these symptoms when beginning to fail. Upon inspecting mine, the rear joint was clearly busted. At one of the ends of the joint, several small metal rod bearings were making their way out of the rubber covering. Failure of the joint was imminent.
As it is never a good idea to drive a broken vehicle, I took the car to the shop. Their diagnosis though was a little different. They confirmed that my rear u joint was worn but in addition my drive shaft was bent. Since they weren’t busy that morning and I was waiting in-shop for my ride, they were able to bring me to the back and show me the problem. On the lift with the car running (and drive shaft spinning), it was clear that there was about a ¼ - ½ inch ‘wobble’ at the rear third of the shaft. This wobble was the source of the vibrations.
They quoted me the cost to repair... $850!! A little more than the $220 I had been quoted to replace the u joints. I knew the part needed to be repaired, having inspected the wobble first hand. But in the meantime, I had to get back to work. So a friend picked me up, and I told them to put it on hold and I would think it over and get back to them asap. I knew I wasn’t ready to spend that kind of money, so I hopped online and started looking for DIY guides and a replacement shaft.
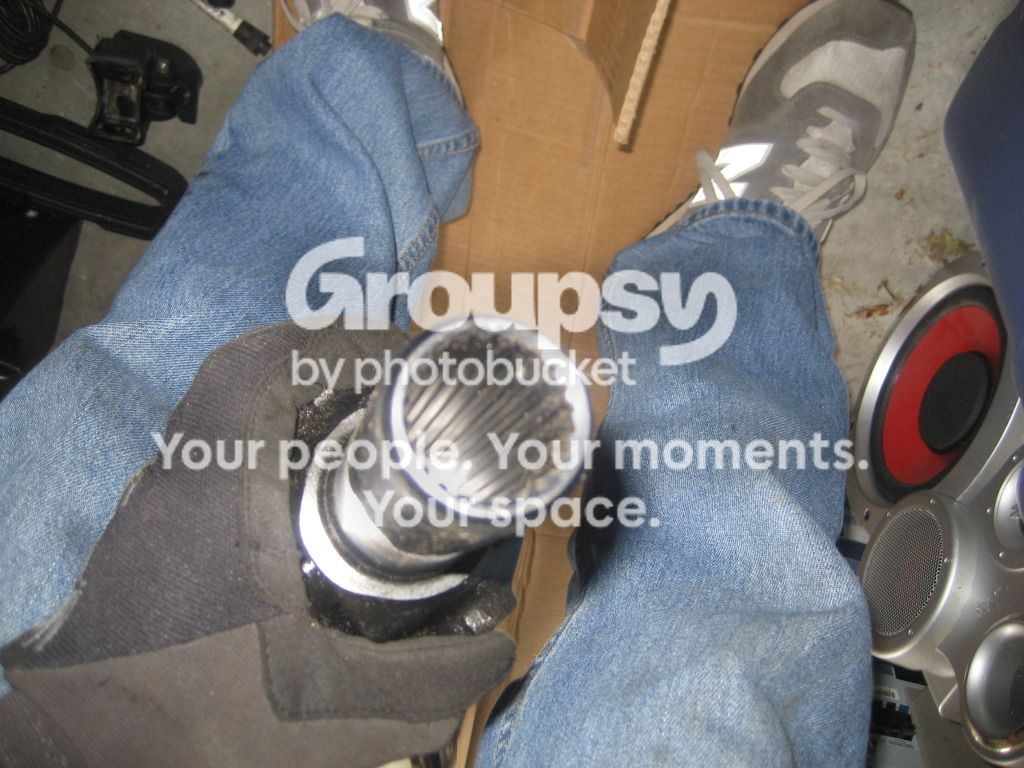
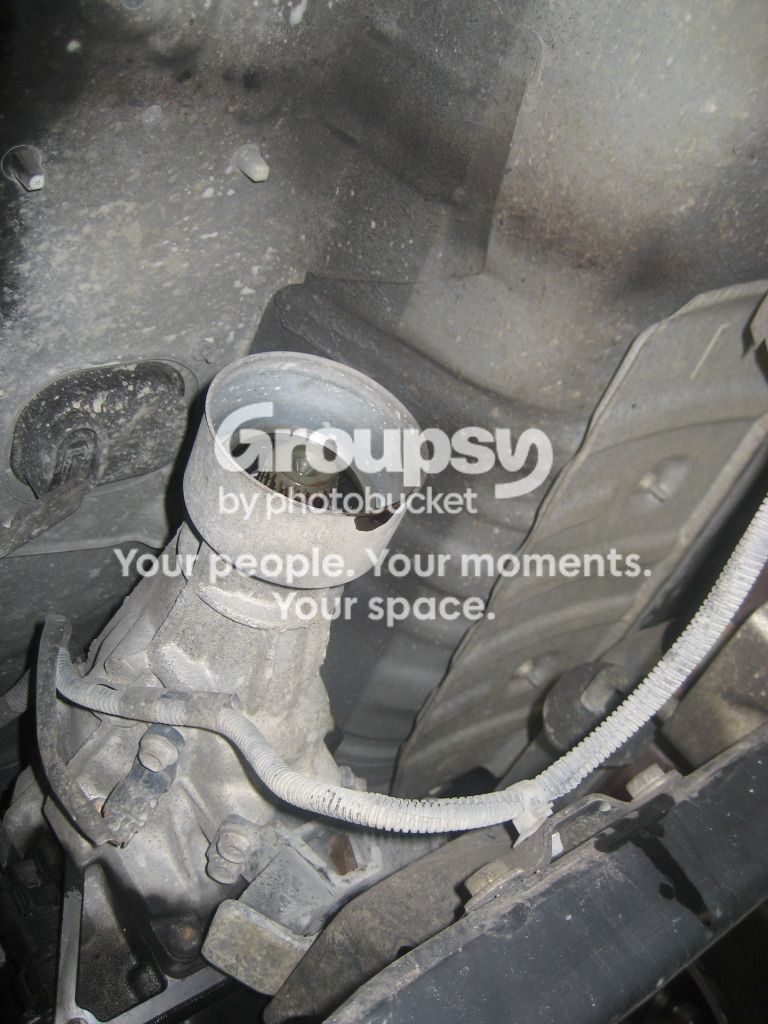
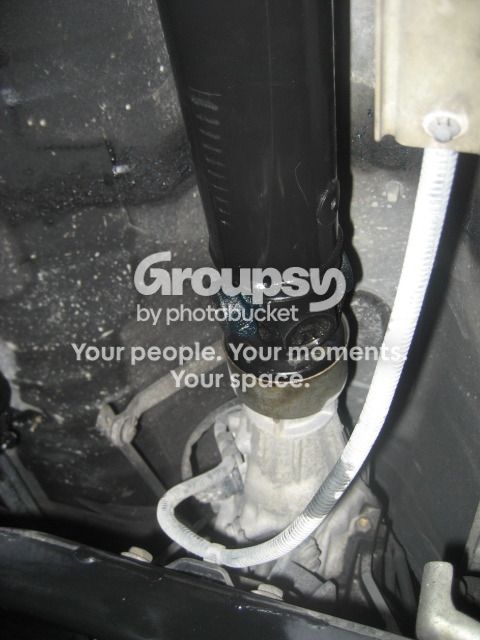
I learned a few things in the process: for one, the 2wd 4runners have a different drive shaft than the 4wd versions. The 2wd version has a single-piece, straight tube design. It is a 'slip-yoke' drive shaft, meaning that the front connection slips on to the male end of the transmission, without the need for fasteners (See pic). The rear end of the shaft is then fastened by four 14mm bolts.
Luckily, there are a few good video walk-throughs for similar drive shafts. They can be found here:
Replacing a Rear Axle U Joint : Installing a Drive Shaft to the Transmission - YouTube
Driveshaft REMOVE and INSTALL how to - YouTube
Next I needed to find the part. According to the guy at the shop, the replacement drive shaft made up $750 of the total repair cost, i believe they were going straight to the Toyota dealer for it, OEM. I was able to find a replacement online for $350, with tax and shipping. With this information, I decided I would be doing the job myself!
The only thing left to do was bolt it on.
So now what you’ve all been waiting for:
You will need the following items for this job:
2 Jack stands
1 Lift
2 Tire stops (I used two pieces of wood)
2 14mm box wrenches
1 13-15mm box wrench or similar size to add leverage to your 14mm wrench (see below)
1 Rubber mallet
1 Flat-head screwdriver
Tip: It is always a good idea to fully research a project and gather any necessary materials before beginning. Always inspect the replacement part to make sure it matches your vehicles part before disassembling anything.
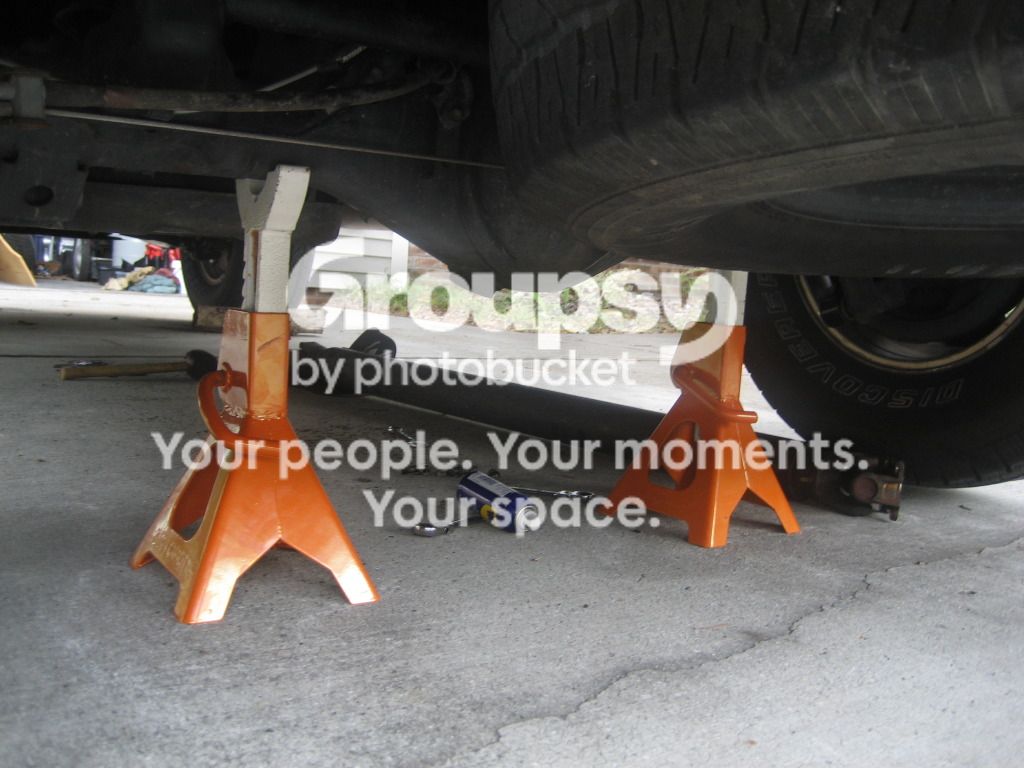
Step 1: Put your vehicle in park with the e-brake on. Put tire stops behind the front tires. Next, put the rear axle on jack stands. You need both wheels off the ground, so that they can spin freely when the vehicle is
in neutral.
Step 2: Loosen the two accessible bolts on the drive shaft's rear joint. You will only be able to reach two of the four. You will likely need to use a second wrench and 'hook' it on your 14mm wrench to break the bolt free. Only break them loose, do not remove them.
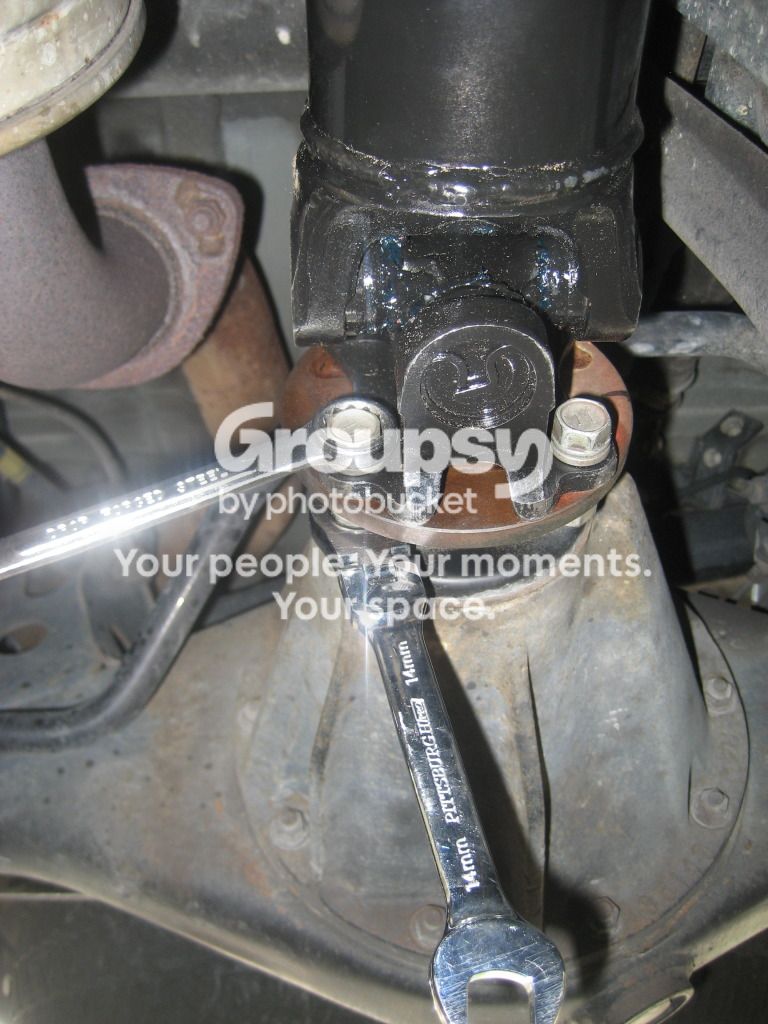
(Pic is on the new shaft, for illustrative purposes)
‘Hooking’ the wrenches:

Step 4: Put the car in neutral and release the e-brake. Go under the car and turn the drive shaft to expose the other two bolts.
Step 5: Put the car back in park with e-brake and break loose the two other bolts in the same fashion. Fully remove the bolts.
Step 6: Put the car back in neutral. Turn the drive shaft back to the two remaining bolts and fully loosen them, but do not remove. Take your rubber mallet and strike the joint till it breaks free from the rear differential. Be careful to fully support the shaft so that it doesn’t fall. Remove the bolts and set the rear on the ground.
Rear differential with drive shaft removed:
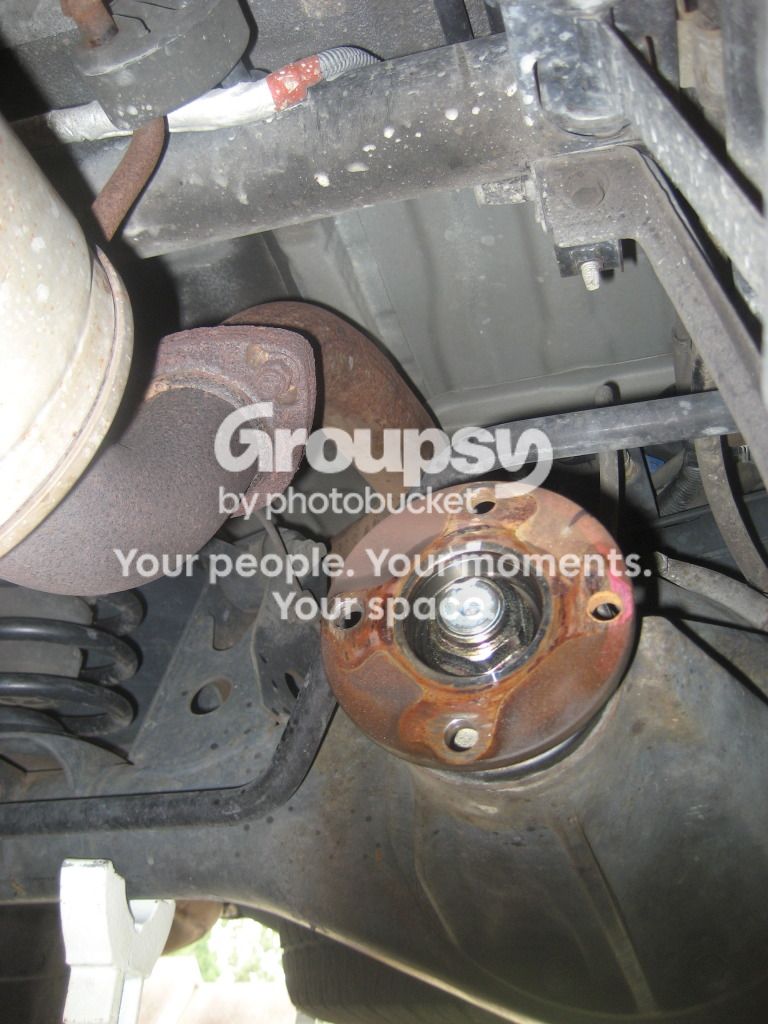
Step 7: With the rear of the drive shaft on the ground, slowly slide out the front yoke out. Some ATF fluid will drip out, this is normal. Inspect for discoloration.
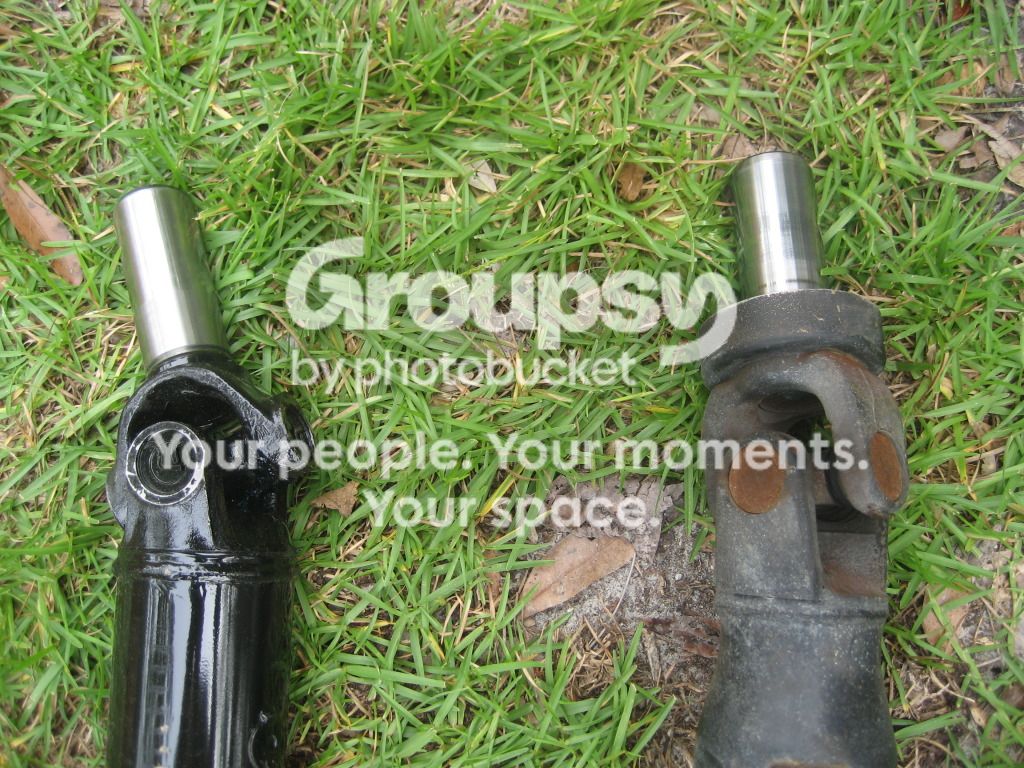
Step 8: Inspect the old shaft and compare to the new one. It was apparent that my rear joint was shot. The way to tell is that each joint motion should move freely, or else its bad. The front end would move side to side each way with ease. The rear would not budge in one direction.
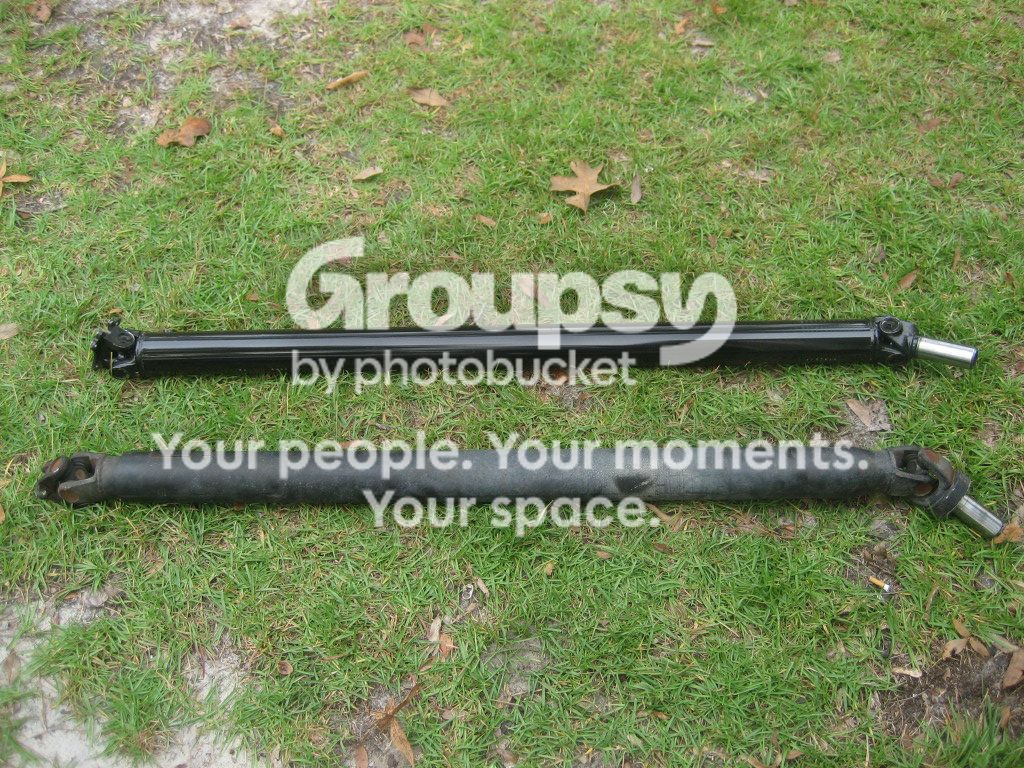
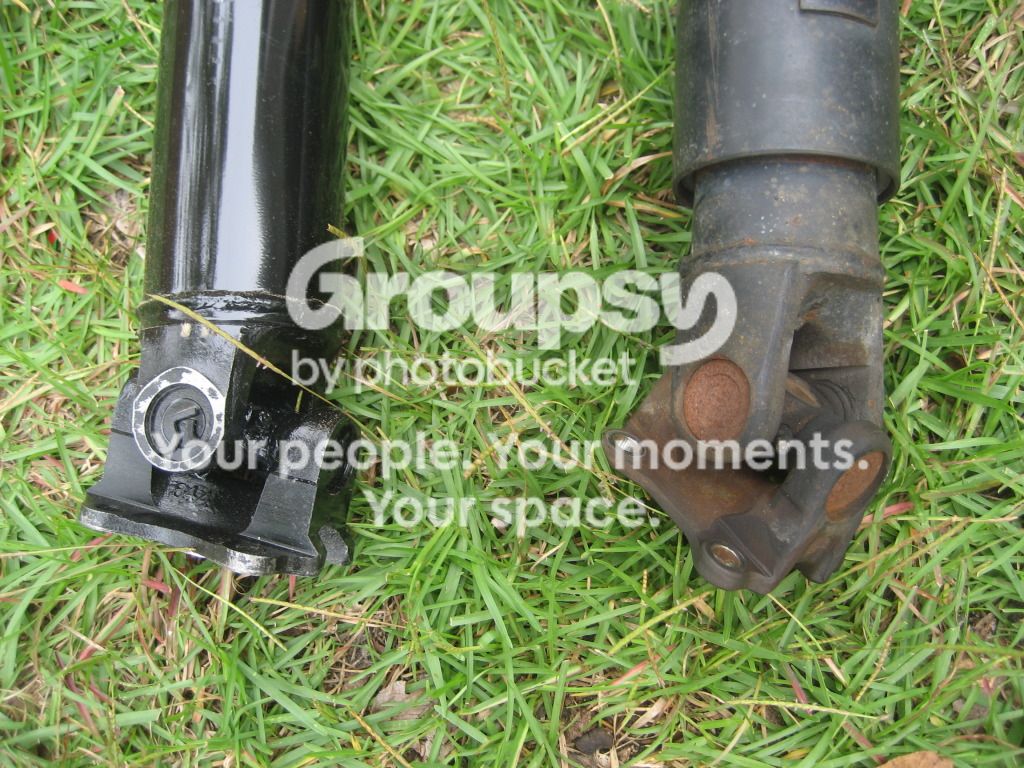
Area where rod bearings were escaping.
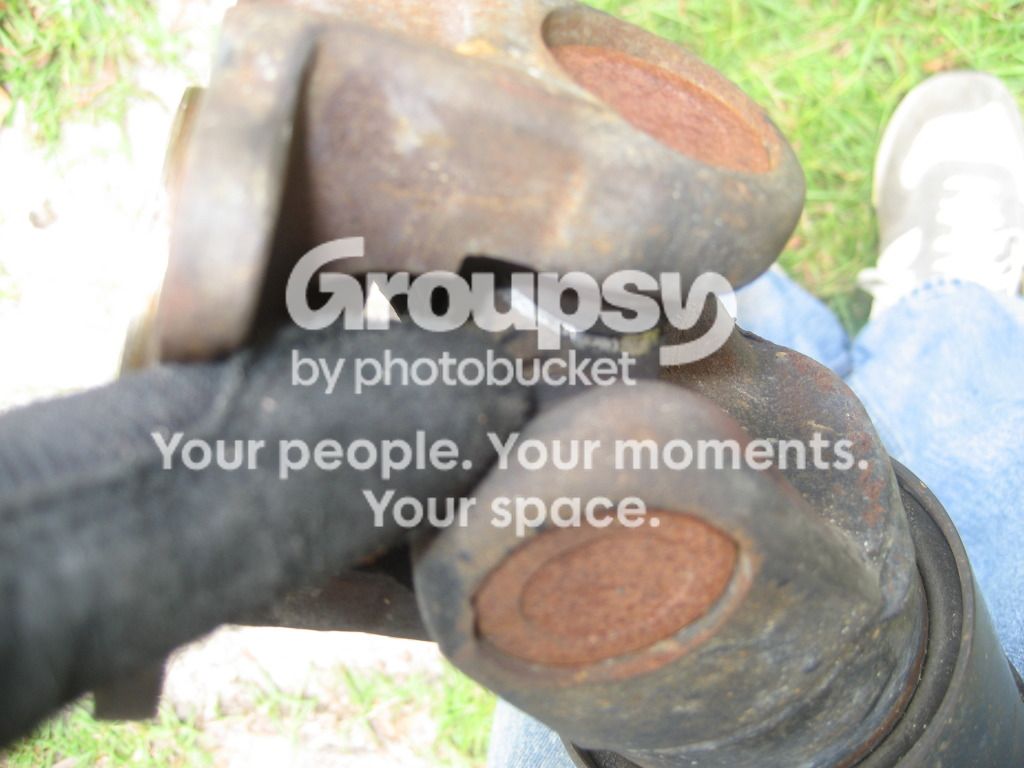
Step 9: Remove the guard piece for the front yoke from the old drive shaft and replace on the new. This is where the screwdriver comes in. Use it to pry the old one off. I had to hit it with the rubber mallet to start it then slowly wedge around. Took a minute. Replace on the new one by evenly beating it on with the rubber mallet.
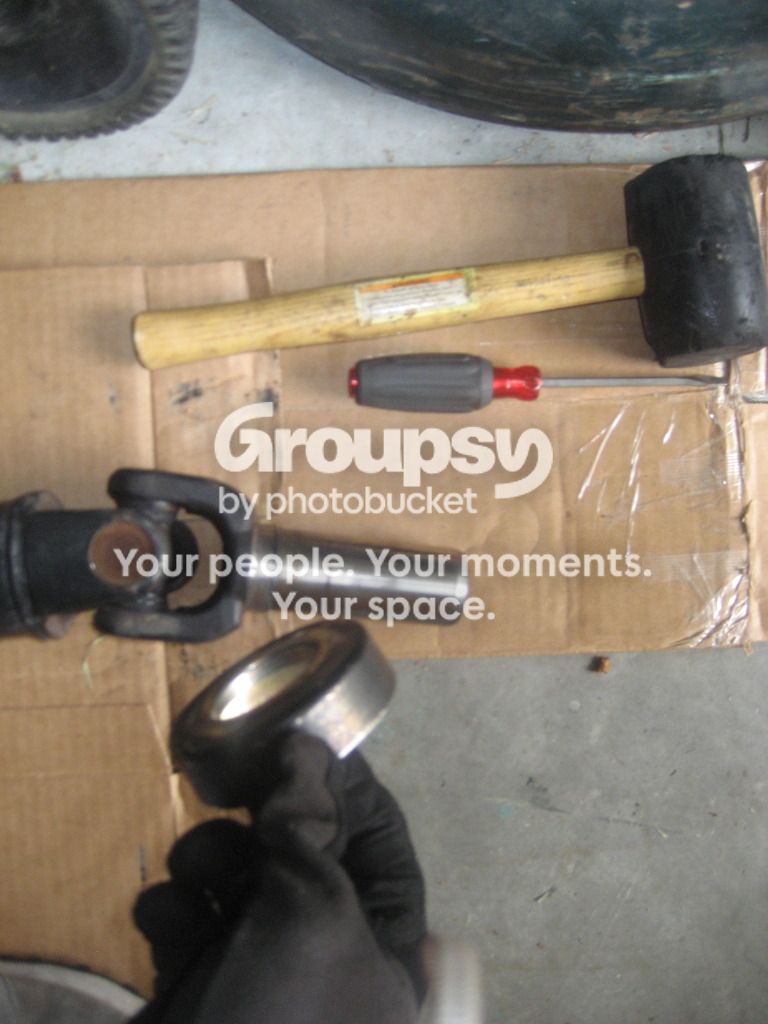
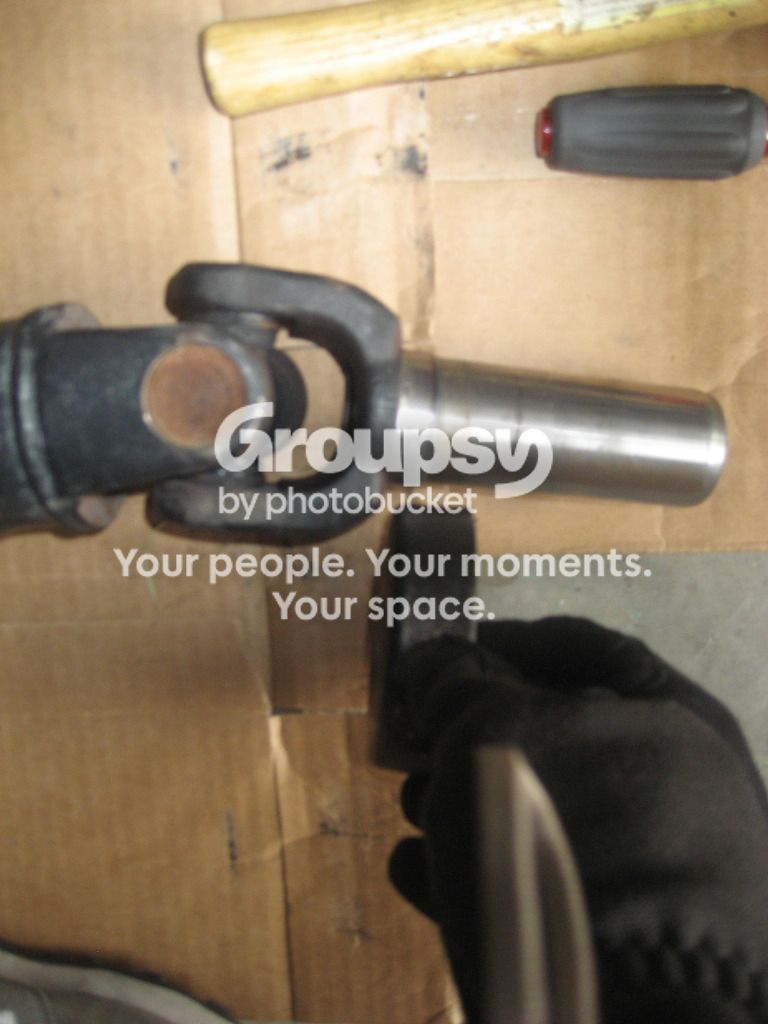
Step 10: Reassemble. The front yoke will slide right in. Since this is a complete replacement, it doesn’t matter how the yoke goes in. Some drive shafts are ‘keyed’ and have a missing spline or ridge in the yoke which needs to be matched up. 2wd 4runners don’t have this. I’m not sure about 4wd.
Splines:
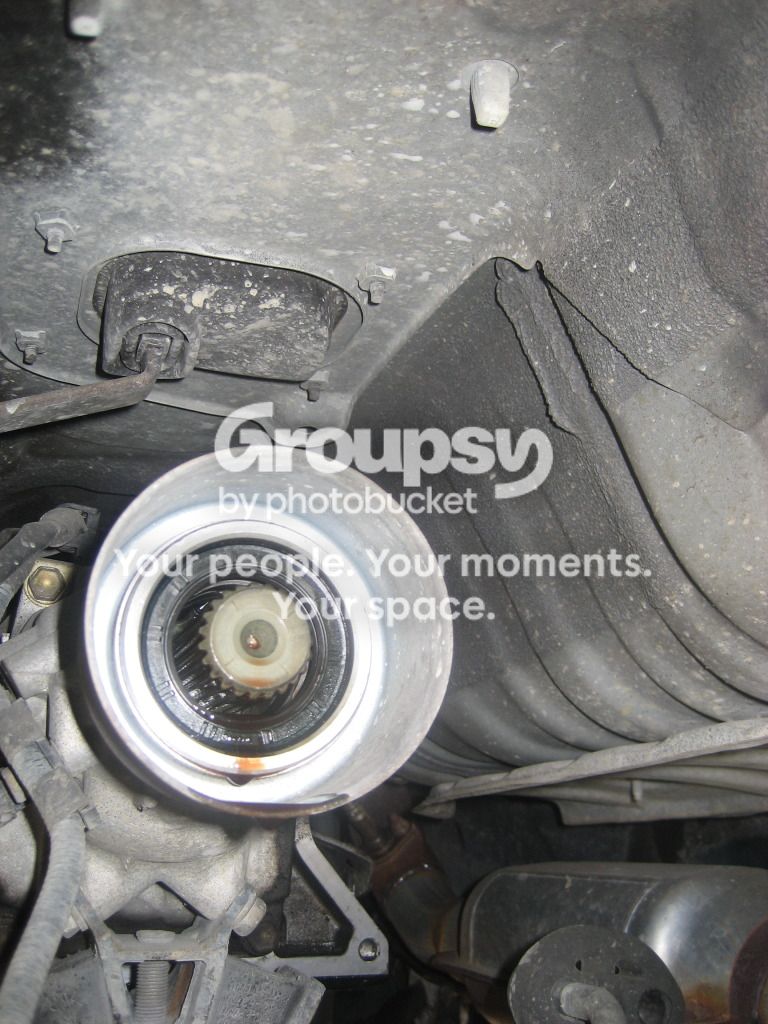
Yoke in:
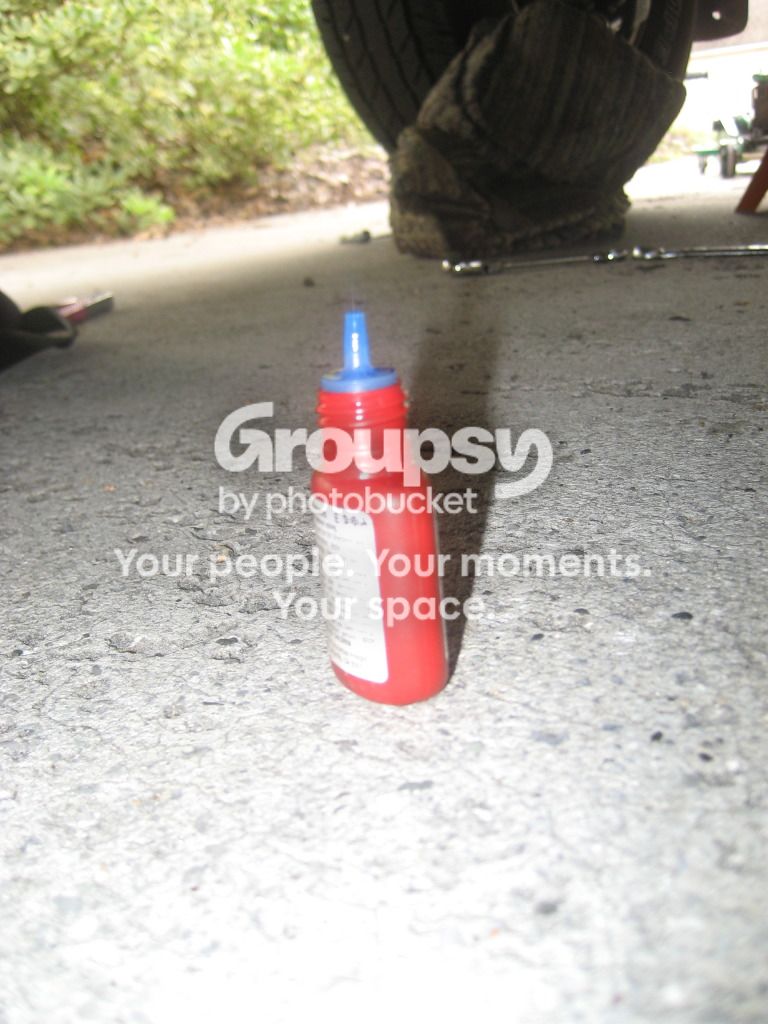
The vehicle should still be in neutral. Turn the diff to line up the holes with the rear of the shaft and insert the bolts. Don’t forget to use loc-tite! Hand tighten each of the four bolts.
Step 11: Put the car in park and e-brake on. Tighten the two visible bolts. Service manual states that the recommended torque specs are 54 ft/lbs. I did the double wrench trick and tightened as much as I could. I did not have room to use a torque wrench.
Step 12: Put the car in neutral and turn the shaft to the other two bolts. Reapply park and e-brake. Torque the remaining two bolts.
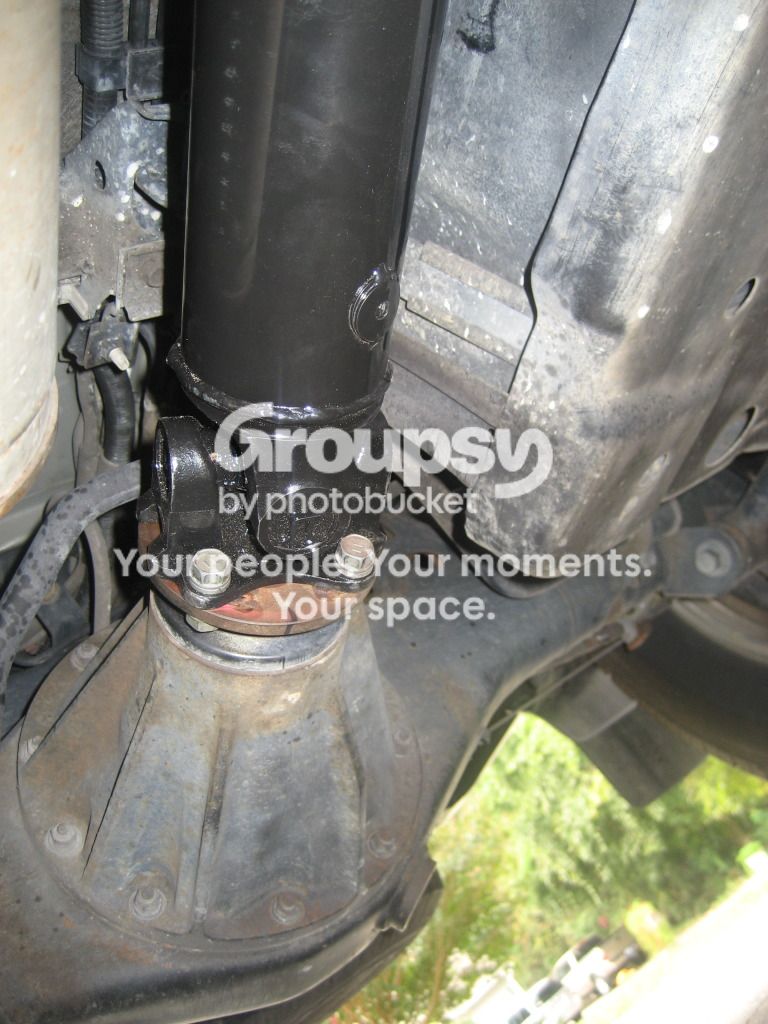
Step 13: Put the car back in neutral (you tired of this yet?) and inspect the rear joint. The joint should be flush with the rear diff on all sides. Take her for a test drive.
Fully installed:
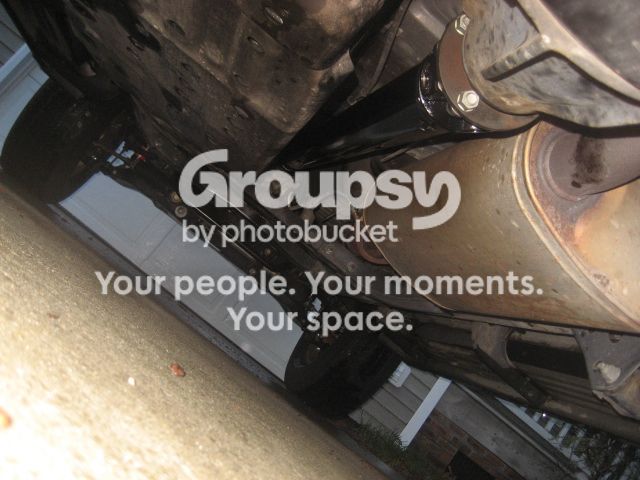
Congratulations, you now have fully replaced your drive shaft! Crack a cold one if you haven’t already.
In retrospect it may be better to take the time to torque the four bolts in a criss-cross manner. After driving the vehicle it does have slightly better response than the previous one even when it was working properly. When comparing the two shafts, the new one seemed to be a bit lighter than the old one. The old is the original, the new is a re-manufactured replacement. It is still made of steel and not aluminum I believe, but any less weight should add some efficiency. Also, a big thanks to DriveShaft Power, Inc. in Lake Worth, FL, I ordered from them on Wednesday morning and it was at my door Friday evening.
Hopefully, this guide will convince others to tackle this project themselves.
New member here. I’m a long time lurker of this and many other 4runner forums. I recently purchased a 2001 4runner 2wd, sport package with 160k on the clock. I’ve been going through the motions doing a few of the recommended updates and maintenance.
About a week ago I began having a bad vibrations in my shifter when accelerating accompanied by an overall loss of power. According to online comments, worn u-joints display these symptoms when beginning to fail. Upon inspecting mine, the rear joint was clearly busted. At one of the ends of the joint, several small metal rod bearings were making their way out of the rubber covering. Failure of the joint was imminent.
As it is never a good idea to drive a broken vehicle, I took the car to the shop. Their diagnosis though was a little different. They confirmed that my rear u joint was worn but in addition my drive shaft was bent. Since they weren’t busy that morning and I was waiting in-shop for my ride, they were able to bring me to the back and show me the problem. On the lift with the car running (and drive shaft spinning), it was clear that there was about a ¼ - ½ inch ‘wobble’ at the rear third of the shaft. This wobble was the source of the vibrations.
They quoted me the cost to repair... $850!! A little more than the $220 I had been quoted to replace the u joints. I knew the part needed to be repaired, having inspected the wobble first hand. But in the meantime, I had to get back to work. So a friend picked me up, and I told them to put it on hold and I would think it over and get back to them asap. I knew I wasn’t ready to spend that kind of money, so I hopped online and started looking for DIY guides and a replacement shaft.
I learned a few things in the process: for one, the 2wd 4runners have a different drive shaft than the 4wd versions. The 2wd version has a single-piece, straight tube design. It is a 'slip-yoke' drive shaft, meaning that the front connection slips on to the male end of the transmission, without the need for fasteners (See pic). The rear end of the shaft is then fastened by four 14mm bolts.
Luckily, there are a few good video walk-throughs for similar drive shafts. They can be found here:
Replacing a Rear Axle U Joint : Installing a Drive Shaft to the Transmission - YouTube
Driveshaft REMOVE and INSTALL how to - YouTube
Next I needed to find the part. According to the guy at the shop, the replacement drive shaft made up $750 of the total repair cost, i believe they were going straight to the Toyota dealer for it, OEM. I was able to find a replacement online for $350, with tax and shipping. With this information, I decided I would be doing the job myself!
The only thing left to do was bolt it on.
So now what you’ve all been waiting for:
You will need the following items for this job:
2 Jack stands
1 Lift
2 Tire stops (I used two pieces of wood)
2 14mm box wrenches
1 13-15mm box wrench or similar size to add leverage to your 14mm wrench (see below)
1 Rubber mallet
1 Flat-head screwdriver
Tip: It is always a good idea to fully research a project and gather any necessary materials before beginning. Always inspect the replacement part to make sure it matches your vehicles part before disassembling anything.
Step 1: Put your vehicle in park with the e-brake on. Put tire stops behind the front tires. Next, put the rear axle on jack stands. You need both wheels off the ground, so that they can spin freely when the vehicle is
in neutral.
Step 2: Loosen the two accessible bolts on the drive shaft's rear joint. You will only be able to reach two of the four. You will likely need to use a second wrench and 'hook' it on your 14mm wrench to break the bolt free. Only break them loose, do not remove them.
(Pic is on the new shaft, for illustrative purposes)
‘Hooking’ the wrenches:
Step 4: Put the car in neutral and release the e-brake. Go under the car and turn the drive shaft to expose the other two bolts.
Step 5: Put the car back in park with e-brake and break loose the two other bolts in the same fashion. Fully remove the bolts.
Step 6: Put the car back in neutral. Turn the drive shaft back to the two remaining bolts and fully loosen them, but do not remove. Take your rubber mallet and strike the joint till it breaks free from the rear differential. Be careful to fully support the shaft so that it doesn’t fall. Remove the bolts and set the rear on the ground.
Rear differential with drive shaft removed:
Step 7: With the rear of the drive shaft on the ground, slowly slide out the front yoke out. Some ATF fluid will drip out, this is normal. Inspect for discoloration.
Step 8: Inspect the old shaft and compare to the new one. It was apparent that my rear joint was shot. The way to tell is that each joint motion should move freely, or else its bad. The front end would move side to side each way with ease. The rear would not budge in one direction.
Area where rod bearings were escaping.
Step 9: Remove the guard piece for the front yoke from the old drive shaft and replace on the new. This is where the screwdriver comes in. Use it to pry the old one off. I had to hit it with the rubber mallet to start it then slowly wedge around. Took a minute. Replace on the new one by evenly beating it on with the rubber mallet.
Step 10: Reassemble. The front yoke will slide right in. Since this is a complete replacement, it doesn’t matter how the yoke goes in. Some drive shafts are ‘keyed’ and have a missing spline or ridge in the yoke which needs to be matched up. 2wd 4runners don’t have this. I’m not sure about 4wd.
Splines:
Yoke in:
The vehicle should still be in neutral. Turn the diff to line up the holes with the rear of the shaft and insert the bolts. Don’t forget to use loc-tite! Hand tighten each of the four bolts.
Step 11: Put the car in park and e-brake on. Tighten the two visible bolts. Service manual states that the recommended torque specs are 54 ft/lbs. I did the double wrench trick and tightened as much as I could. I did not have room to use a torque wrench.
Step 12: Put the car in neutral and turn the shaft to the other two bolts. Reapply park and e-brake. Torque the remaining two bolts.
Step 13: Put the car back in neutral (you tired of this yet?) and inspect the rear joint. The joint should be flush with the rear diff on all sides. Take her for a test drive.
Fully installed:
Congratulations, you now have fully replaced your drive shaft! Crack a cold one if you haven’t already.
In retrospect it may be better to take the time to torque the four bolts in a criss-cross manner. After driving the vehicle it does have slightly better response than the previous one even when it was working properly. When comparing the two shafts, the new one seemed to be a bit lighter than the old one. The old is the original, the new is a re-manufactured replacement. It is still made of steel and not aluminum I believe, but any less weight should add some efficiency. Also, a big thanks to DriveShaft Power, Inc. in Lake Worth, FL, I ordered from them on Wednesday morning and it was at my door Friday evening.
Hopefully, this guide will convince others to tackle this project themselves.
Last edited: