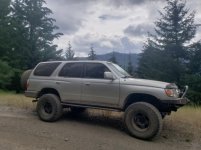
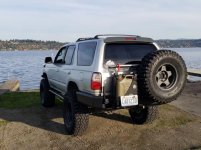
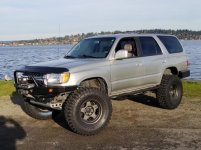
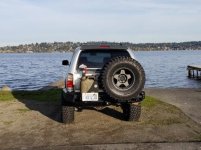
Road Bull's 2002 SR-5 timeline.

maybe you could get one of those battery powered cameras that hunters use to track game to stealthily overwatch your 5th wheel. It wouldn't have stopped them, but could lead to catching them.

Good idea, I'll have to look into that, in case they decide to come back :thumb:
 
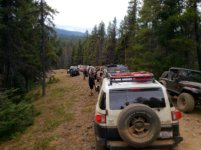
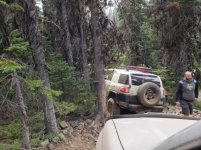
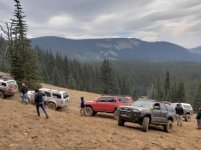
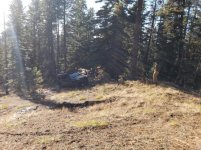
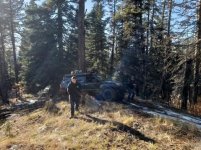
Naches camping, wheeling, with Empty Pocket Crawlers 08/24/18

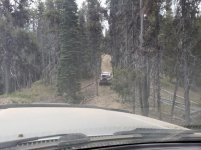
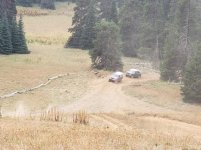
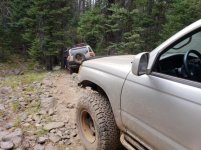
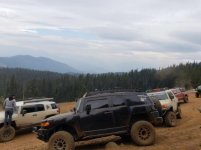
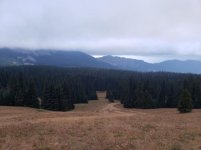
Met up with EPC for their annual get together at Naches. This was a good time and I got to meet and hang with a lot of new people. Lots of FJ's, three 3rd gens, one 4th gen, a Toyota truck, a, 3rd gen Taco, a Ford Ranger, and one Jeep.

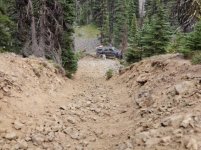
It was a lot if fun, then really challenging. This trip was a mostly dry and gentler version of the same trail when wet. Apparently, some parts are all but undoable when there is rain or snow involved.

Lots of heavily tight wooded trails with plenty of rocks, roots, drops, stumps, and logs to watch out for. There were a fair amount of steep hills that always seemed to transition into a quick right or left decision at the peak once you could see again over your hood.

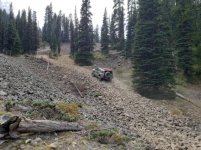
There were two very challenging hill climbs. One was not super technical or anything, but it was long, steep, sandy with plenty of momentum robbing rocks. The other was split into about two equal parts with an 80° turn halfway through. The first long climb was ALL rocks. Again, it was all or nothing for these climbs, as resetting from the bottom was necessary.

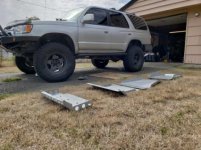
This hill killed my friend's 4th gen. He broke a front diff mount, a CV, cracked the upper and lower skid pans, and grenaded the rear diff. Before we knew how bad it was, I managed to claw my way to the top. This sense of accomplishment was short lived as we realized how screwed the situation was. We were in a remote location and the vehicle, without power steering or brakes due to compromised oil pan, had to be dragged, winched, tethered down the normally plenty difficult trail. It took them a bit over ten hours to get the rig back to camp, to complete the trip down to the trail head in the morning. They were able to get the rig down without any further damage, and without anyone getting hurt.

This was a solid crew.

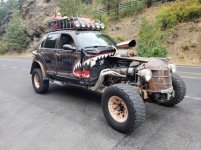
Oh! And it was supposed to be the Gambler 500 this weekend, so there were a few interesting rigs out and about.

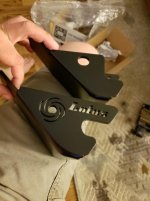
Also, I picked up a set of Lotus rear lower control arm mount skids. Whooohooo!

 

Attachments

  • IMG_20180827_004627.jpg
    IMG_20180827_004627.jpg
    49.9 KB · Views: 499
  • IMG_20180827_004607.jpg
    IMG_20180827_004607.jpg
    69.1 KB · Views: 513
  • IMG_20180827_004544.jpg
    IMG_20180827_004544.jpg
    53.3 KB · Views: 518
  • IMG_20180827_012032.jpg
    IMG_20180827_012032.jpg
    70.1 KB · Views: 401
  • IMG_20180827_004649.jpg
    IMG_20180827_004649.jpg
    58.1 KB · Views: 417
  • IMG_20180827_004617.jpg
    IMG_20180827_004617.jpg
    40.4 KB · Views: 410
  • IMG_20180827_004555.jpg
    IMG_20180827_004555.jpg
    63.3 KB · Views: 421
  • IMG_20180819_222731.jpg
    IMG_20180819_222731.jpg
    34.3 KB · Views: 421
Last edited:
Naches.

https://youtu.be/0uESwwqpkcchttps://youtu.be/an6rmHPO_ZY">https://youtu.be/an6rmHPO_ZY" type="application/x-shockwave-flash" width="425" height="350">">https://youtu.be/an6rmHPO_ZY">https://youtu.be/an6rmHPO_ZY" type="application/x-shockwave-flash" width="425" height="350">" type="application/x-shockwave-flash" width="425" height="350">">https://youtu.be/0uESwwqpkcchttps://youtu.be/an6rmHPO_ZY">https://youtu.be/an6rmHPO_ZY" type="application/x-shockwave-flash" width="425" height="350">">https://youtu.be/an6rmHPO_ZY">https://youtu.be/an6rmHPO_ZY" type="application/x-shockwave-flash" width="425" height="350">" type="application/x-shockwave-flash" width="425" height="350">" type="application/x-shockwave-flash" width="425" height="350">
 

Attachments

  • IMG_20180827_004637.jpg
    IMG_20180827_004637.jpg
    41.9 KB · Views: 408
  • IMG_20180827_015428.jpg
    IMG_20180827_015428.jpg
    66.7 KB · Views: 417
  • IMG_20180827_015847.jpg
    IMG_20180827_015847.jpg
    56.6 KB · Views: 402
  • IMG_20180827_015827.jpg
    IMG_20180827_015827.jpg
    44.2 KB · Views: 407
  • IMG_20180827_015727.jpg
    IMG_20180827_015727.jpg
    32.8 KB · Views: 422
  • IMG_20180827_015618.jpg
    IMG_20180827_015618.jpg
    26.9 KB · Views: 398
Last edited:
4.88 gears and rear ARB locker!!
Woot there it is!!

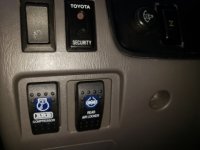
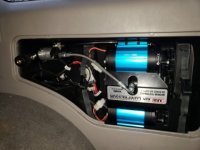
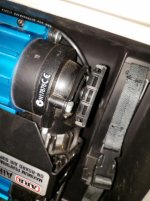
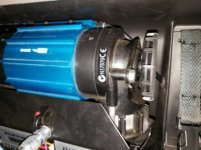
I dropped my rig off last week at Bull Built Differentials to have 4.88 gears and a rear ARB locker installed. Nils Bull, owner of Bull Built Differentials really knows his stuff. He was a tech for ARB for about six years before starting his own business. He only uses the best parts, like solid steel spacers, as well as Toyota OEM hardened steel shims. He also offers a 60K mile / 5 year warranty. ARB is local here in Washington, and ARB sends their factory trucks to Nils to have gears and lockers added.

That, and Nils is a hell of a nice guy who takes plenty of time to go over questions and concerns all while "geeking out" (his words) about all the components that go into his builds and the hands-on inspection of those items to catch any imperfections.

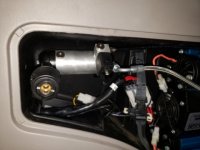
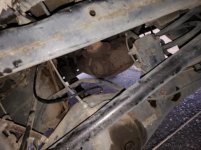
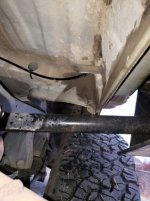
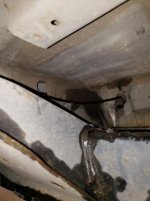
Nils was able to find a good pass-through to plumb the air line from the compressor, through the rear of the black cubby hole, ran it alongside if another grommeted pass-through opening, (looks like a drain feeder for roof), then down to the diff. I have to say that I am impressed. And I can be a picky mofo.

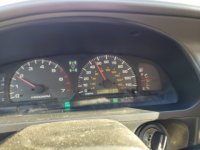
The odometer is sitting at 233054 miles. I am about 55 miles into my 500 mile easy-does-it break-in period before I can play in the dirt again.
 

Attachments

  • IMG_20180910_192049.jpg
    IMG_20180910_192049.jpg
    103.5 KB · Views: 376
  • IMG_20180910_192116.jpg
    IMG_20180910_192116.jpg
    113.8 KB · Views: 366
  • IMG_20180910_192314.jpg
    IMG_20180910_192314.jpg
    42.8 KB · Views: 369
  • IMG_20180910_192325.jpg
    IMG_20180910_192325.jpg
    28.5 KB · Views: 373
  • IMG_20180910_192347.jpg
    IMG_20180910_192347.jpg
    111.2 KB · Views: 380
  • IMG_20180910_192357.jpg
    IMG_20180910_192357.jpg
    29.6 KB · Views: 367
  • IMG_20180910_192409.jpg
    IMG_20180910_192409.jpg
    43.8 KB · Views: 372
  • IMG_20180910_192426.jpg
    IMG_20180910_192426.jpg
    32.1 KB · Views: 370
Nice! Do the 4.88's make as much of a difference as you were hoping they would?

I don't have a lot of open range highway to gauge it on, but it feels more responsive right off the line. Not like I am gunning it or doing quick starts during this break-in time, but that's just the way it feels. I might have a better estimation tomorrow when I get to drive it some more. But I can tell it is different. Maybe it's just me, but it seems like it is shifting closer to factory shift and RPM patterns. Once I get past the 500 mile break in I will be able to drive like I normally drive. I need to pay more attention and get back to you.
 
So, 16" SCS with 3.5" BS clear Tundra 13L brakes no problem without spacers?? ...planning my move to 35's and contemplating dropping back down to 16" wheels for it.
 
Well that escalated quickly. Nice! Let us know how you like the 4.88's as time goes on.

Yes it did. I had been putting off any other mods or anything exciting to be done to the 4Runnrr while I was saving up for this big upgrade.

I am really digging the 4.88 gears so far. Now I don't drive like Burt Reynolds used to in Smokey and the Bandit, (RIP), but I feel like these are a noticable upgrade for me. It feels a little more responsive coming off the line. And I am being careful to take it easy during break-in. I have been doing a lot of thinking about my next tire size. In the 16" wheel world, at least for the tires I am interested in, there are only a few options that offer any height advantage that I am weighing. If I was 100% sure that I wanted a 35" tire, I MIGHT have gone with 5.29 gears. But I would be very comfortable leaving things as is. I am about halfway through my break-in. But I feel like the engine and transmission are not having to work as hard and it seems to be shifting where it was designed to shift.


So, 16" SCS with 3.5" BS clear Tundra 13L brakes no problem without spacers?? ...planning my move to 35's and contemplating dropping back down to 16" wheels for it.

They do. I had a minor problem initially with clearance do to the fact that I had my wheels put on at Toyota. They have these very tall adhesive weights as opposed to Discount Tires much thinner adhesive weights. I did not catch this right away until my first tire rotation at discount. I heard a click click click and pulled over to find out at the tires they put on the front had weights on the wheels that contacted the caliper. They simply fix this by putting on there thinner style weights and removing the tall Toyota weights. I I'm not the only one to run the F5 in 16 in with the tundra brake upgrade, but other than that minor issue that was due to Toyota's abnormally tall adhesive weights there has not been an issue.

35s... Part of me is tempted, but it also seems like a PITA to get them to play nice with the rig. LOL. Tire manufacturers don't offer a lot of options between short 33s and short 35s. I really want to split the difference and run a 34, like a 285/75/17. It is a 34" tire with the same width as a 285/75/16. But that would mean having to run new 17" wheels... That AND, tire options in 285/75/17s are generally more expensive than 35s for 16" wheels, so there ya go... If they don't get you in the wash, they'll catch you in the rinse. The compromise would be a 295/70/17, but that's not a whole hell of a lot different than what I'm running right now. It is cheaper though then other 17" wheel options.

I remember researching very early on that 3.5" backspace wheels we're what you wanted if you wanted to clear 35s for the 3rd gen. When I was starting out this build I was trying to future-proof some of my decisions to allow for maximum possibilities down the road. The wheels were part of that decision Still.. with all the different variations that people run, it has been difficult for me to track down people that are using 3.5" BS wheels AND are running 35" tires to see how things tuck and what all needs to be done to the body to clear them.

What 35s are you interested in?
 
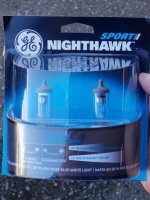
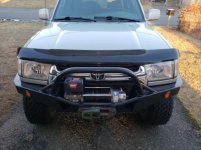
Headlight swap. Don't get too excited they're just OEM.

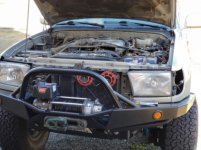
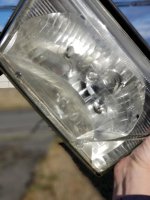
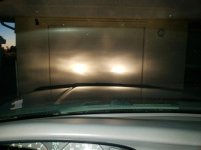
So I have been putting off swapping out some OEM headlights and housings that I had purchased almost a year ago. My front driver side headlight had been badly chipped by a rock three different times! My temp fix had been just to put clear tape over two of the pinholes that were made by these rocks. On the last Wheeling trip, I noticed the passenger side light housing seem to be asked you in a mean off axis. When I began to look at adjusting it I realized the adjuster nut seemed like it was stripped and the light was not going to go anywhere I wanted it to go. This seems like a good time the swap them out and I'm happy I did. I took this time to also throw in some GE bulbs I had laying around from a previous Amazon purchase well over a year ago. I've yet to drive around with them very much, but I did try to aim them to get at least in the ballpark of where they should be, but I need to drive around a little bit and see if I'm pissing people off and make adjustments from there. Also, those little rubber gasket seals that go on the back of the light bulb to keep moisture in dust out are much easier to put on with the entire light housing removed. I discovered this after putting in the driver side and not being able to get it on there securely. It only takes a couple minutes to take the headlight out once you have the grill off.

They have to be brighter then my compromised set up that I inherited from the PO.
 

Attachments

  • IMG_20180916_195727.jpg
    IMG_20180916_195727.jpg
    47.2 KB · Views: 628
  • IMG_20180916_195746.jpg
    IMG_20180916_195746.jpg
    54.4 KB · Views: 648
  • IMG_20180916_195717.jpg
    IMG_20180916_195717.jpg
    66.5 KB · Views: 623
  • IMG_20180916_195652.jpg
    IMG_20180916_195652.jpg
    48.8 KB · Views: 628
  • IMG_20180916_195701.jpg
    IMG_20180916_195701.jpg
    23.9 KB · Views: 610
Maintenance day.

So, I decided not to wait to put my newly repainted skids back on. I have at least about 75 more miles on the new 4.88 gears break-in. But I feel like I am driving naked without them. LOL.

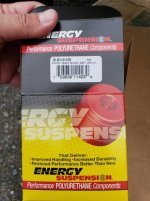
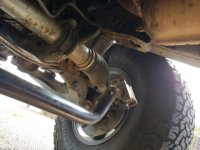
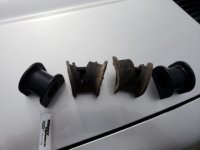
Before I put the skids back on, I threw some new Energy Suspension front sway bar bushings on. My old ones were toast.

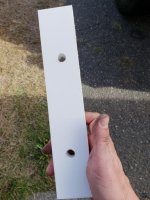
I added a piece of HDPE from TAP, that [MENTION=133775]Snowden[/MENTION] suggested in another thread. ( http://www.toyota-4runner.org/3rd-g...fter-savage-skids-combo-install-question.html ) This took the place of a handful of washers stacked at the rear mount of the TCS to give it clearance from the TC to keep it from vibrating.

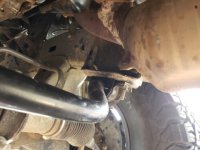
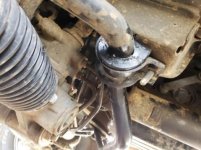
As I was tightening up the last oil pand skid bolt, the one by the LCA on the passenger side, I heard a pop, then a bit of a release. The mounting nut on the frame side stripped!! F#$@!!!! This little thing was mocking me at the end of all my hard work... SOAB....

I decided the easiest way to fix was to just buy a longer bolt and use a nut up above the stripped portion. Not happy about it, because it just complicates removing the oil pan, but, what's done is done. I will get some practice removing it in just a few miles anyway as I only have about 75 more miles left to go for my new gears break-in.

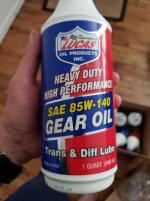
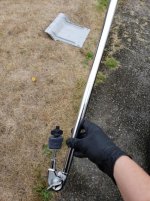
I swung by Napa and picked up some Lucas gear oil for the break-in change.
 

Attachments

  • IMG_20180919_150848.jpg
    IMG_20180919_150848.jpg
    31.7 KB · Views: 587
  • IMG_20180921_212710.jpg
    IMG_20180921_212710.jpg
    42.2 KB · Views: 594
  • IMG_20180921_215900.jpg
    IMG_20180921_215900.jpg
    41.9 KB · Views: 583
  • IMG_20180921_212717.jpg
    IMG_20180921_212717.jpg
    126.5 KB · Views: 588
  • IMG_20180921_212724.jpg
    IMG_20180921_212724.jpg
    118.1 KB · Views: 592
  • IMG_20180921_212729.jpg
    IMG_20180921_212729.jpg
    31.6 KB · Views: 552
  • IMG_20180921_212738.jpg
    IMG_20180921_212738.jpg
    84.3 KB · Views: 579
  • IMG_20180921_212758.jpg
    IMG_20180921_212758.jpg
    32.8 KB · Views: 544
As I was tightening up the last oil pand skid bolt, the one by the LCA on the passenger side, I heard a pop, then a bit of a release. The mounting nut on the frame side stripped!! F#$@!!!! This little thing was mocking me at the end of all my hard work... SOAB....

I decided the easiest way to fix was to just buy a longer bolt and use a nut up above the stripped portion. Not happy about it, because it just complicates removing the oil pan, but, what's done is done. I will get some practice removing it in just a few miles anyway as I only have about 75 more miles left to go for my new gears break-in.

Ryder I think you are describing one of the nuts that is welded to the first skid plate on the back side. I bet if you take the front skid off and take it down to a muffler shop with a new nut they can tack a new one on for you. Hey do you think you are going to lower the front of the back two skids as well...? I'm undecided about that right now myself.
 
Last edited:
Ryder I think you are describing one of the nuts that is welded to the first skid plate on the back side. I bet if you take the front skid off and take it down to a muffler shop with a new nut they can tack a new one on for you. Hey do you think you are going to lower the front of the back two skids as well...? I'm undecided about that right now myself.

I just threw another nut on top for now and it looks good. Thanks for the tip about welding a new one in place. It is pretty tight there with the LCA right there. But if I redo my LCA bushings, I will take another look.

I am just going to run the rear spacer for now and see how it goes. It gives me more clearance than my old washer stack.
 
Gear break-in achievement met!

This seemed to take a lot longer than anticipated. But... Eventually, I broke the 500 mile break-in mark. I changed around ~560 miles, as advised, just to be safe.

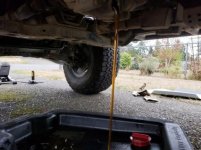
I used standard dyno Lucas 85-140 for front and rear diffs and Valvoline 75-90 for the transfer case. I had to start the day off right with a hearty breakfast burrito and bloody Mary before I set upon my task.

Like an idiot, I had taken off the skids to touch up, sand off rust, and repaint. I put them back on to have to take them right off again. I also found out that when I tried to do my front diffs, I had purchased a 3/8ths 10mm hex drive instead of the 1/2" 10mm hex drive, (the one I had the 1/2" breaker bar for. My wimpy 3/8 drive was not going to be enough. So I employed the top section of one of my cymbal stands for stand-in cheater bar. Those things were on there.

At any rate, the gears feel GREAT, and I can't wait to put the rear ARB locker to work.

What's next?

I am considering a few different things. I might try to pick up some new tires during the impending DTD eBay sale. I would like to add a snorkel at some point, not to play U-boat commander so much, but the dust here for summers us something else. And I would like to pick up a rack this year to expand my storage and weight distribution options.

I just need a pile of money.
 

Attachments

  • IMG_20181001_154816.jpg
    IMG_20181001_154816.jpg
    107.4 KB · Views: 501
  • IMG_20181001_154918.jpg
    IMG_20181001_154918.jpg
    55.1 KB · Views: 504
  • IMG_20181001_154836.jpg
    IMG_20181001_154836.jpg
    35.2 KB · Views: 496
  • IMG_20181001_154902.jpg
    IMG_20181001_154902.jpg
    69.4 KB · Views: 493
  • IMG_20181001_155232.jpg
    IMG_20181001_155232.jpg
    30.1 KB · Views: 442
Lots on the to-do list, and big things to come.

-New Cooper STT Pros 35s (5)
-ARB Safari Snorkel (for Tacoma)
-TC Spindle gussets.
-TC LCA Cam tab gussets.
-White Line LCA bushings.
-SPC Cam bolt kit.
-Tub job.
-Lower front ride height.

Out of money... LOL.
 

Attachments

  • IMG_20181030_223846.jpg
    IMG_20181030_223846.jpg
    133.3 KB · Views: 477
  • IMG_20181030_223941.jpg
    IMG_20181030_223941.jpg
    29.2 KB · Views: 399
  • IMG_20181030_223905.jpg
    IMG_20181030_223905.jpg
    29.7 KB · Views: 404
Last edited:
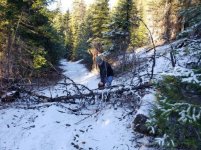
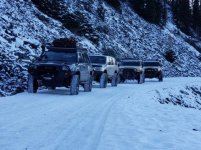
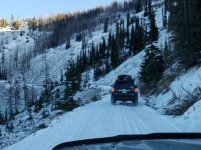
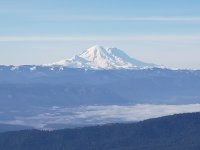
Camping trip to Liberty, WA. 11/10/18. Brrrrrrrr.

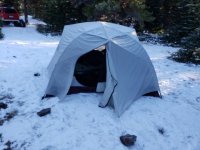
So we took a short one night or camping trip version of a day trip we did about a year ago. This time there was less snow, but staying overnight sure made you feel the low temps. Getting there we split into two groups as there was a group that was meeting later that would mainly B-Line it on the fire service road and then there was our group it was going to try to find some side trails to get to the campsite. It was fun and actually turned out to be somewhat challenging due to the fact that there is a fair amount of wet terrain and icy Terrain with some mud that was slicker than snot. Even standing up became challenging at some points on some of those hills. The locker did come in handy a couple times. I had to laugh at my sleeping situation because I was essentially sleeping in a tent that was primarily mosquito netting wearing a hat. I could have saved myself a bunch of trouble by just setting my caught up outside and putting the tarp up over it. Here are a few pics.
 

Attachments

  • IMG_20181112_165214.jpg
    IMG_20181112_165214.jpg
    46.9 KB · Views: 330
  • IMG_20181112_165330.jpg
    IMG_20181112_165330.jpg
    50 KB · Views: 344
  • IMG_20181112_165231.jpg
    IMG_20181112_165231.jpg
    52.4 KB · Views: 343
  • IMG_20181112_165340.jpg
    IMG_20181112_165340.jpg
    43.4 KB · Views: 375
  • IMG_20181112_165357.jpg
    IMG_20181112_165357.jpg
    40.2 KB · Views: 337
  • IMG_20181112_165301.jpg
    IMG_20181112_165301.jpg
    99.4 KB · Views: 408
  • IMG_20181112_165222.jpg
    IMG_20181112_165222.jpg
    134.4 KB · Views: 400
  • IMG_20181112_165203.jpg
    IMG_20181112_165203.jpg
    87.4 KB · Views: 388
A few more pics of the trip.

More stuff.
 

Attachments

  • IMG_20181112_165311.jpg
    IMG_20181112_165311.jpg
    28.3 KB · Views: 344
  • IMG_20181112_165348.jpg
    IMG_20181112_165348.jpg
    35.9 KB · Views: 350
  • IMG_20181112_165321.jpg
    IMG_20181112_165321.jpg
    42.6 KB · Views: 355
  • IMG_20181112_165428.jpg
    IMG_20181112_165428.jpg
    67.1 KB · Views: 392
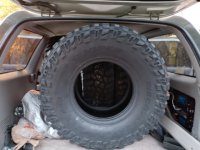
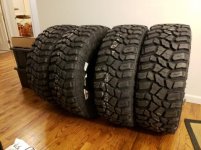
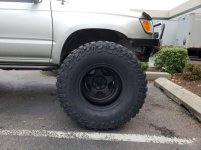
35s

A few pics of the new shoes.
 

Attachments

  • IMG_20181112_165408.jpg
    IMG_20181112_165408.jpg
    30.6 KB · Views: 335
  • IMG_20181112_165250.jpg
    IMG_20181112_165250.jpg
    31.4 KB · Views: 350
  • IMG_20181112_165239.jpg
    IMG_20181112_165239.jpg
    30 KB · Views: 349

Members online

Forum statistics

Threads
278,316
Messages
3,554,113
Members
248,016
Latest member
Advally Service

Trending content

Back
Top