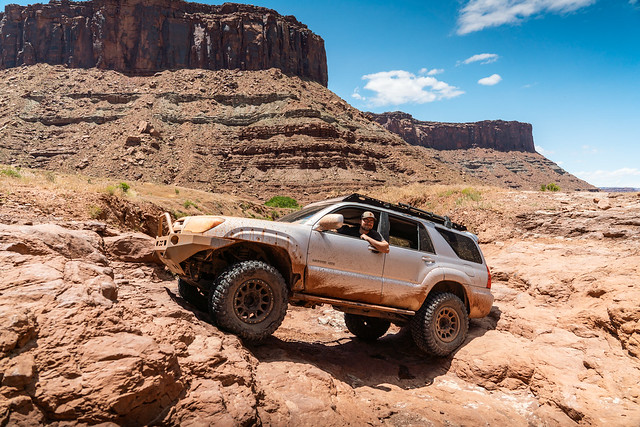
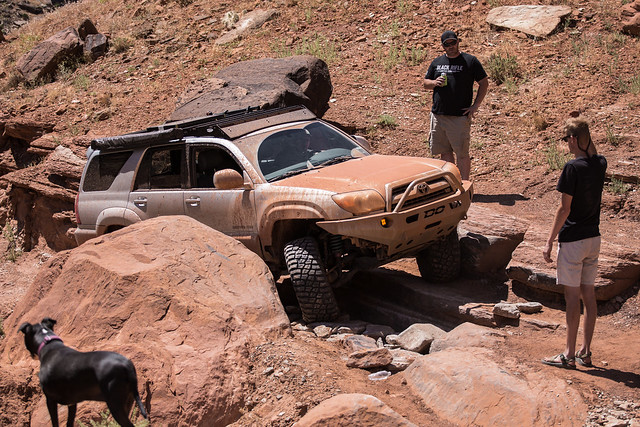
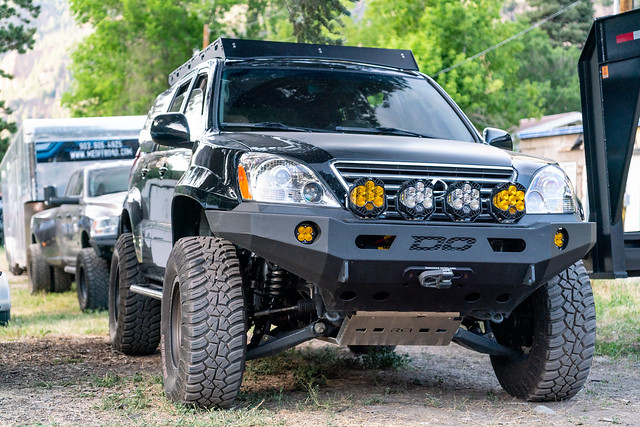
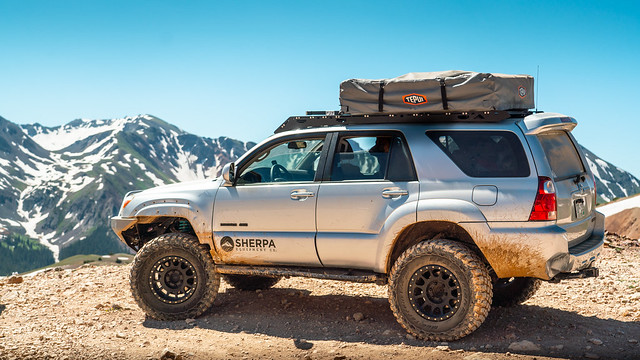
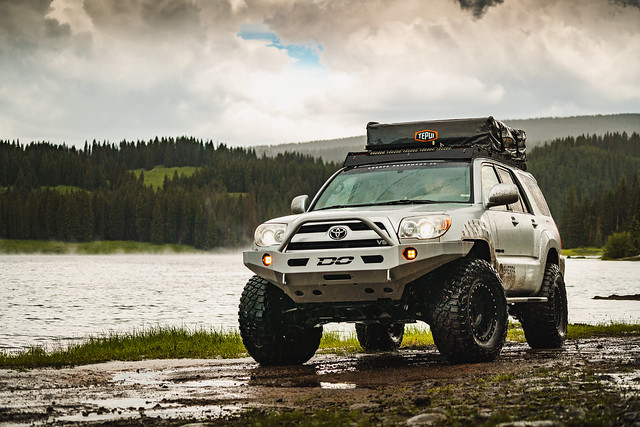
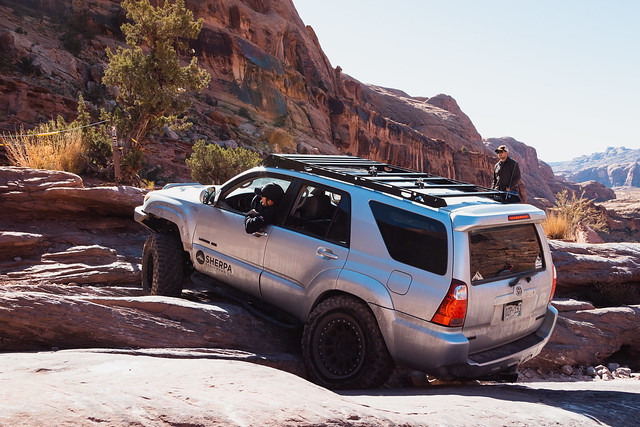
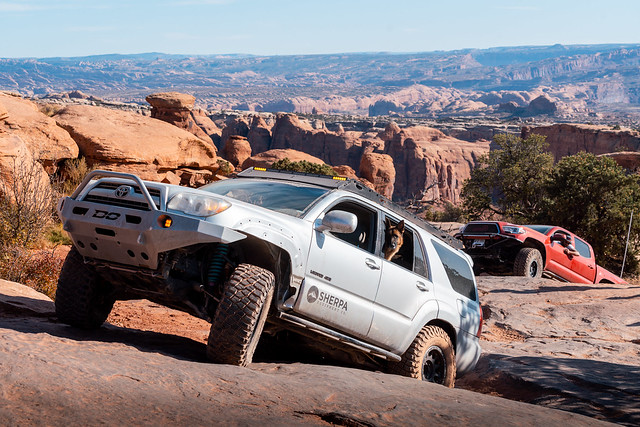
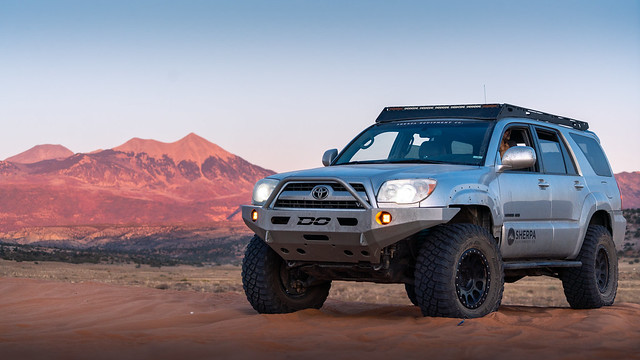
RockyRunner's 2007 Limited Build

Nice truck, nice pictures.

Be mindful of that rear axle, 35's don't play nicely with the stock gears. I've seen it more times than not on the forum when moving to 34's or 35's and taking them on hard trails, R&P grenades; my brother's and mine included. And no we don't wheel like crazy people. Nothing a solid pinion spacer won't remedy.

I'm jealous you made it through Chinaman's. When I was there I blew a CV boot and turned around. Then a jeep guy drove by asking what the issue was; 'stupid IFS problems'.

Thanks!

Yeah, I have had quite a few people warn me about how quickly the rear-diffs go in these trucks. I did a lot of asking around and reading and the results are kinda inconclusive. It seems like a lot of times it comes down to people being on the gas hard or binding the rear axle. So I have opted to just be mindful of how much power I am putting in and what the truck is doing/not doing. When it goes it goes and ill have to get in there and figure something out. I'm hoping to get some lockers for the front and rear, which would make for the perfect time to throw a solid spacer in.

Chinaman's was a blast. Would really like to go back with a smaller group next time and really get to enjoy the trail a little more. My boot has been blown since before I bought the truck. I ran one on my third gen with a torn boot for a long time before selling the truck. Since then I have just opted for the "un-adult" thing and just carried a spare incase it goes. Ive spent too much money on Toyota reboot kits.
 
New Parts: DuroBumps

After seeing how nice everyone else's truck rode with aftermarket bumps I was quite a bit jealous. Couldn't be more excited to have these guys on the truck to smooth things out a little bit. I haven't had too many issues with the Dobinsons not soaking things up, but a little peace of mind is nice.

40666786363_00615b9243_z.jpg


46717612155_87ce08ebd0_z.jpg
 
New Parts: Diode Dynamics SL1 LED Bulb Replacement

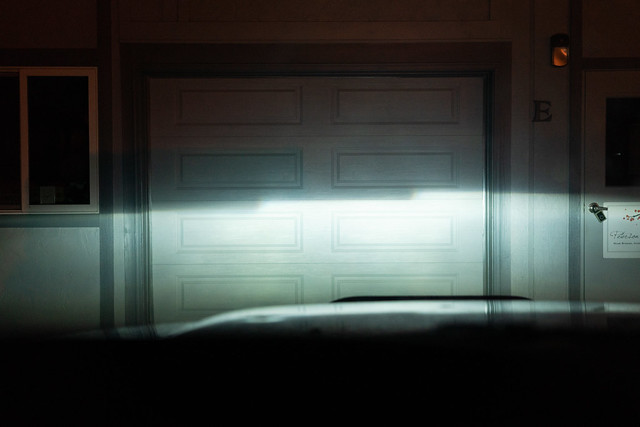
I have been looking for something to replace my stock projector bulbs since I got the truck. The 35W HID retrofit on the last truck had me feeling a little spoiled. Diode Dynamics reached out and asked if I would give them some honest feedback on the new 4th Gen bulb replacements they have been working on. Seemed easy enough to give em' a try and boy am I impressed.

47954772707_baeb652af7_z.jpg


The new LED bulbs are designed to work in both projector and reflector housings, while it seems like it might not be the best idea to run them in the later. They are plug and play so the install took a couple of minutes and I even managed to snap a couple of pictures along the way.

47954789328_5594587e6a_z.jpg


Old and new together...

47954770287_93cfe58458_z.jpg


Easy install... and BAM! The sun has exploded inside of my headlights.

47954807421_a256fffaa6_z.jpg

47954806656_a17c4e5216_z.jpg


Now for some output shots...

47954796686_9950e9fbbe_z.jpg


47954798731_fc22c68c6a_z.jpg


47954779328_fb57130928_z.jpg


Overall, I am quite impressed with the output of these bulbs in an OEM housing. I do have to say I don't think these are nearly as bright as some of the high end HID kits, but for cost and ease of install they are worth checking out.

47954802411_54af7ab9ef_z.jpg
 
Trip Report: Memorial Day Weekend

Some photos in this thread are by [MENTION=129084]Flemster[/MENTION]

Couldn't have asked for a more relaxing weekend away. [MENTION=129084]Flemster[/MENTION] and I spent some time playing in the area around Woodland Park, CO.

We spent the first day messing around near "Moab Hill" and completing my maps of the Rainbow Falls area. I have been coming here for years but I haven't logged all of the trails in Hema yet, so it's kinda been on my list to wrap up.

47953788431_9dfaa715dd_z.jpg


The trails were still a bit soft from all the rain and snow we have been getting here in Colorado but a little mud never hurt anyone.

47954826807_d2225bd661_z.jpg


47953790026_e7367aea54_z.jpg


47954828767_8b02de62af_z.jpg


I failed to capture any photos of it but we spent a little over an hour working [MENTION=129084]Flemster[/MENTION]'s truck up some of the more difficult lines on the actual Moab Hill. It may sound silly, but we have been working pretty hard at honing in our spotting and landscaping skills.

We wrapped up the day with a decent campsite away from all of the memorial day hubbub going on in the area. The sunset wasn't too shaby either...

47954821887_446793c7b2_z.jpg


47954864586_0a9a1d108f_z.jpg


47954841638_6e62fea3a8_z.jpg


47954837703_4b07cce203_z.jpg


The next day we met up with some family and old King of the Hammers buddies to run some of "The Gulches". These guys really are some of the best drivers out there and its always a blast going out with them. One of them has pretty much won every stock class event in their #4608 WJ Grand Cherokee. Now to add a little "challenge" to things they take a bone stock Grand Cherokee out on trails and show the "big boys" how it's done.

47954853651_724174947b_z.jpg


47954816897_9159020002_z.jpg


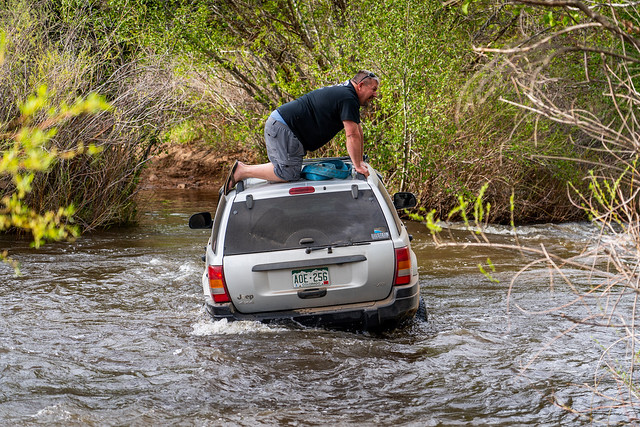
Hackett Gulch was a blast and the water crossings were pretty high due to all the snow runoff and thunderstorms. We happily let the stock Jeep take the plunges first before throwing our rigs into the mix. On one of the crossings the little jeep got stuck on a rock and needed a little hand.

47954833868_8fe4f62e2f_z.jpg


47954830398_a10bc2d9c3_z.jpg


After we knew where the rock was we all crossed and off we went. The water was working its way about half way up the driver door. Luckily the door seals held and I avoided getting any water into the intake.

That night we camped in the same spot as the day before since we got off the trail so late. The next morning we aired up and made the journey back to northern Colorado.

47953748422_5e15a8114d_z.jpg
 
Trip Report: Birthday Moab Run

Since I picked up the new truck I have been dying to get it out to Moab and run some of the harder trails. The last truck had 33's and a rear locker which worked pretty well and I still feel like I have so much to learn about this new truck out on the trail. We all pretty much decided to ditch our RTT's for the weekend and man was the wheeling fun. We were originally worried it was going to be way too hot but man was the weather perfect all weekend.

*Some pics in this thread are by [MENTION=7992]Ripcord[/MENTION]

Seven Mile Rim

The first day was focused on travel but we opted to sneak in a little run on Seven Mile Rim for a warm up. We had several relatively new people in our group and it proved to be a great starting point for teaching spotting mechanics and trust.

48123719571_d87696a7e2_z.jpg


48123719041_948dc3dfc7_z.jpg


48123815177_f9a25afbbd_z.jpg


48123722186_e27d400ecb_z.jpg


48123723721_31d992393c_z.jpg


48123721681_8168a641ea_z.jpg


Kane Creek Canyon Trail
I have been wanting to run Kane Creek for a loooong time. I always here people talking about how much fun/how hard it is. It was pretty much a requirement for this trip. We had a larger group and started that day a little too late but we believed we would be back at camp by 4:00 at the latest. T

he trail pretty much starts out with some fun little rock climbs and a few puddles to play in a little. The girlfriend quickly took over the wheel and opted to smash a puddle when I forgot to mention it was a bad idea.

48123747683_b152a0fee3_z.jpg


The next little obstacle is a simple dip and climb... what could go wrong. Well, the 4th gen is a big girl and I found the perfect place to wedge my truck in the crack and back up into the corner of my stock bumper. The little crunch was a healthy reminder that I need to get started building my high clearance rear.

48123717011_281d829276_z.jpg


Next we had to squeeze the trucks through a little tight section that tips you towards the large boulder on your passenger side. We only had one Tacoma in our group kiss their door panel on the rock as their suspension just barely unloaded. The rest of us were within a mere inch of kissing it ourselves. Luckily I set my sliders up to point straight out rather than at an angle. This gave me a lot of room to use my sliders to pivot my truck up and around the rock.

48118392268_544d56a1c2_z.jpg


48118380088_139065e7e5_z.jpg


48118346791_ac82f3b942_z.jpg


After that it was smooth sailing for a while. The creek was pretty much all dried up which we weren't expecting with how high the Colorado river has been. On the other side of the creek section, there were a couple of small little rock sections that were worth spotting as we worked our way towards Hamburger Hill. The gas tank on the V8 4runner is absolutely massive and loves to eat rocks. A strong gas tank skid will be my next purchase for the truck.

48118435572_58101a4763_z.jpg


When we arrived at hamburger hill we were past our 5:00 exit time and there was a group stuck in front of us. A couple of guys decided to take their XJ and tow rig (Dodge 2500) through the trail after their buggy blew a tranny. The XJ blew a bead and the Dodge was just about shredded to bits at this point. We gave the Jeep some air and helped spot their Dodge out of the way. All in all it cost us about another 2.5 hours. Once they were out of the way we took turns spotting our crew up the hill one at a time. After about and hour or so of spotting I got my crack at the hill and followed up behind everyone else.

The truck absolutely eats the rocks like they are nothing. I am finally learning how to apply the torque and also let ATRAC do its thing. Walked up just about the whole hill without any hiccups.

48123746893_8ed92df78e_z.jpg


48118403411_7bfee8bd03_z.jpg


48123808277_f1426956d3_z.jpg


48118498532_ae4c496f46_z.jpg


48118359283_7cc617aec6_z.jpg


48118428713_f506ec229e_z.jpg


Once we were all through Hamburger Hill we started chugging towards the exit. There were a few more small obstacles that we did our best to just power through as the sun was setting in it was around 10:00 already.

48123807072_9274611d2d_z.jpg


We made it to the exit at about 11:00 and a member of our group had a part failure that became apparent as soon as he hit the road. The cam tabs on his lower arms sheared off on the trail and he lost just about all control of his truck. We finally babied his truck back to camp at 12:00pm... it was a long day.

Top of the World

The next morning we woke up much earlier with the hope of knocking out Top of the World trail on the way back home. We tried to make the best time that we could and get some of the typical shots you get at the top. It's always a blast hitting this one on the way home.

48123743658_054d31d049_z.jpg


I always forget how bumpy this trail can get and man does it beat the crap out of you even with good suspension. We hit pavement and we boogied back home to try and make it home at a decent time. Moab is always fun, but man is it refreshing to make it back home to Colorado and all of its beautiful green.

 
Trip Report: 4th of July

For the 4th [MENTION=7992]Ripcord[/MENTION] and I opted to have an "anti" trip. When we normally go out with our group we are always trying to pack in as much action as possible. This weekend we decided to just camp and decide on things as the came.

We settled for hanging around Crested Butte and getting as far away from the other campers as possible. We got some lake time in and walked around town. Boy was it relaxing just sitting at camp and a little day drinking here and there.

48235653487_d7e55a68b3_z.jpg


48235573116_261aa149cf_z.jpg


48235571916_15d218464e_z.jpg


48235571086_493f7d1a21_z.jpg


48235569226_0167aec65c_z.jpg
 
I miss being self employed, just so I can just say where closed, see you when I get back.

Nicely built rig!
Just be easy throttle in and you should be good until you get regeared. And just check them BJ on the SPCs, my only disappointment with them.
 
I miss being self employed, just so I can just say where closed, see you when I get back.

Nicely built rig!
Just be easy throttle in and you should be good until you get regeared. And just check them BJ on the SPCs, my only disappointment with them.

It's certainly nice now, just left the day job a couple weeks ago. Most of my trips have happened between Friday-Sunday up until now.

Thanks, I may hold off on regearing for a while. The truck still has so much power and torque compared to my last one. I do wanna double lock it at some point and I may do it then. Good to know on the SPC! Do you have the newer model or the old one?
 
Think they had 3 versions already, I do believe I had the 2nd, (non greasable). Mine never had the early yrs problem.
Departed with them a few yrs ago. After 20k on them, a few ruff trails, they had so much wear/slop in the BJ, really scary, surprised they didnt break on me. This is when I still had 2.5" lift. Went to uniball, figured they wouldn't leave me stranded due to breaking.

I do miss from them, the alignment #s I had with them, with ease. Now I'm lucky to get 1.5 caster.

Just keep an eye on your modded spots, your going to hear and feel things in the future.
 
Think they had 3 versions already, I do believe I had the 2nd, (non greasable). Mine never had the early yrs problem.
Departed with them a few yrs ago. After 20k on them, a few ruff trails, they had so much wear/slop in the BJ, really scary, surprised they didnt break on me. This is when I still had 2.5" lift. Went to uniball, figured they wouldn't leave me stranded due to breaking.

I do miss from them, the alignment #s I had with them, with ease. Now I'm lucky to get 1.5 caster.

Just keep an eye on your modded spots, your going to hear and feel things in the future.

This is good to know, I'll add that to my inspection list before my trip.
 
This is good to know, I'll add that to my inspection list before my trip.


If they are worn out they’re super easy to replace, only downside is you have to get an alignment afterwards. I think they’re under $100 for the pair from various sites if I’m not mistaken, but it’s been a while since I checked.

Anyway, nice rig and I’m hoping to pick up one of your racks for the 4th gen soon!


Sent from my iPhone using Tapatalk
 
Trip Report: BroCo Annual Shenanigans

Trip Report: BroCo Annual Shenanigans

FJ Summit, Rim Rocker Trail, Moab, Grand Mesa and Marble

This years BroCo trip was pretty epic to say the least. We have been doing this now for 3 years and it just keeps getting better. We are starting to settle in as a team and we have been learning a lot about video production. The only goal for this year was to get to camp every night before the sun went down.

We made FJ Summit our gathering point for this year and Telluride/Ouray never disappoints. We had a rack install to knock out but we budgeted plenty of hangout time before the start of the "trip". It also gave us some time to run trails, meet a few of our friends and even bump into couple of our dealers.

Rack Install
48401155032_0d4d560f7d_z.jpg


First Night's Camp
48401152642_9078f2c61b_z.jpg


Alpine Loop Run
48401138727_1cb9053896_z.jpg


48401005481_82946fdae3_z.jpg


48400987116_a75c6ff107_z.jpg


48401128132_3db01d4cae_z.jpg


After a few relaxing nights in Ouray we set out on the BroCo trip. We weren't really sure what to expect from the Rim Rocker trail and how toasty it would get as we moved towards Moab. Let's just say the 180 miles that are the Rim Rocker Trail, didn't disappoint. We took our time and spent 3 days doing the trail.

48400976536_e465d28f9e_z.jpg


48401119007_c9dbe6a599_z.jpg


48400973501_90f62941a0_z.jpg


48400978676_00f8ee390a_z.jpg


48400966921_c04219fbfb_z.jpg


The trail dropped us on the outskirts of Moab. We all opted to head to a campground in town for quick showers and head back to Colorado. Moab was coming in at a little over 100 degrees that day and we couldn't get out of town soon enough. We stopped at the bottom of Top of the World and everyone did a quick run up the trail while I rearranged my entire truck...

We are working on new drawer systems and I just haven't quite figured out how I like my own truck to be setup. The drawers I have in the truck now just aren't getting the job done. The new system will help out a lot with adaptability.

48401108682_a810b9cb1a_z.jpg


The next day we made it to Grand Mesa in Colorado. At a cool 50 degrees, we rolled into town to find that there was hail covering the ground. It was the complete opposite from Moab the day before.

48400962976_d23f50313e_z.jpg


48401100002_e5d09733ec_z.jpg


48401090747_6628480203_z.jpg


After a couple days of goofing around at the lakes we decided to start working our way back home. We planned one last stop in Marble, CO to see the Crystal Mill. Really we all wanted to go there just so we could get some world famous BBQ at Slow Groovin BBQ. By far the best BBQ around. After that we spent one more night at camp outside of Leadville before the final push home.

48401089192_8435520203_z.jpg


________
Shameless plug here... If you haven't already checked out our video series, we run a small Youtube channel 'BroCo Adventure Media' that we use to document our travels. Drop us a like if you enjoy it or comment and tell us why you don't.
________

Now that I am back home I have a whole list of build updates to start working through on top of some side projects. Hope to update soon.
 
sick looking truck man. I really enjoy following along the process and it looks like you make a great product. Can't wait to give it a try.
 
Build Updates: Race Car

Woah, it's been too long since I have updated the build thread. Going to do my best to make up for lost time so hang in there with me.

So in August we made the exciting jump to start building an 04' Limited into a 4600 class car to compete at King of the Hammers. I've been dreaming about getting to be a part of KOH since 2012 and we are about to make that dream a reality, one side gig at a time. We wound up spending most of our free time making money for the race car on weekends and a bit less camping.

The race car does have it's own page if you're interested in following along with that build process or drop by our YouTube channel.

Here are some quick shots of where she started back at the end of 2019 and now. WE HAVE A LONG WAY TO GO.

48643854348_a22730cb14_z.jpg


49746586652_f0ac4ca081_z.jpg
 
Trip Report: Rock Therapy 2019

Rock Therapy always ends up being a killer time every year. It's really one of the last opportunities us Colorado boys get, to go do some real wheeling, before the season wraps up. It's always served as a great opportunity to put faces with names and put our vehicles to the test. I feel as though I have been on a mission to prove what 4th gens are capable of since I got the truck. This year's trip didn't disappoint.

48937636772_b8df7935ab_z.jpg


Moab Rim Trail

I first did this trail as a passenger on a night run with my family when I was younger, in a side by side... Since then Moab Rim has been on my list as one of the harder trails I wanted to complete in my own truck. I've always been told that Toyota's cannot make it up without a locker and full skids. But when everyone at camp mentioned they wanted to give it a shot I figure, what's the worst that could happen. I was a little too focused on driving during this so thanks to [MENTION=129084]Flemster[/MENTION] for the shots as always.
48933233063_82af4fb3e2_z.jpg


48933965362_6eb1886903_z.jpg


48933778181_0155da7b1c_z.jpg


48933780371_5d31326a9c_z.jpg


I was amazed at how well the truck walked up the obstacles. We took our time and worked through them one by one. The KM3's hooked up and ATRAC did it's thing. I've said it before, this truck just works for some reason.
As a note... I would recommend that unless you really know what you're doing, then I wouldn't run this trail without full armor. It was 100% a real challenge with a few puckering moments tucked in here and there.

49783314347_d342009d7d_z.jpg


Metal Masher Trail

A new one to add to the list. This trail made for a pretty fun day. A member of our group did suffer a blown diff after getting a little over committed to a certain line. All in all we did have to cut the trail a little short but I would recommend this to anyone. It is on the difficult side and provided a great mix of technicality and killer views.

48936900423_8f8219f4a1_z.jpg


48937441816_d3dd562f88_z.jpg


48937440621_557b660c23_z.jpg


48937627842_c0faa5700c_z.jpg


Dunes

Every year we make a point to go mess around in the dunes and do stupid things. Seems like every year someone breaks something but it's still a great time. This years carnage? One 3rd gen Tacoma front end. While everyone jumped their trucks I opted for 'posing for the gram'.

48937448916_899af7e6b5_z.jpg


48937449196_b2b9f34f52_z.jpg


48937432636_9bbb074484_z.jpg


48937634607_8524fbd562_z.jpg
 
New Parts: Sherpa PAK System

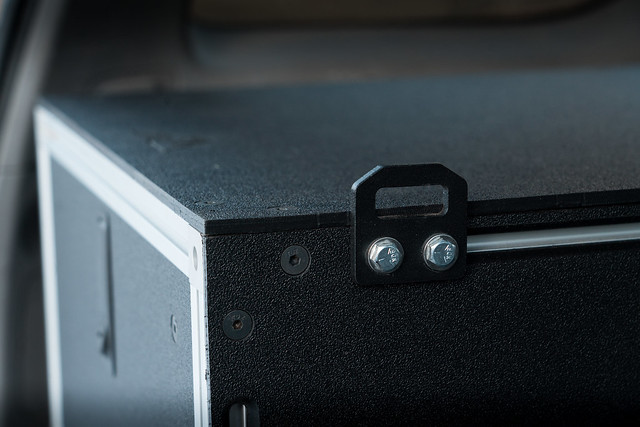
While we were at Rocky Therapy I got the chance to do some testing on our new drawer systems we had been working on for months. Lucky for me they passed with flying colors and I got to do the actual install in my truck.

One thing I have been dreaming of for the truck is to simplify the interior and try to hard mount as many things as possible. Up to this point the truck was hard to clean (due to owning a German Shepherd and trip dirt) and crap was always flying around on trails. Removing the carpet and moving to a baseplate was a no brainer for the future of this build.

49118248806_f9e407abc1_z.jpg


The baseplate also serves as the foundation for the PAK drawer system. These aren't the first aluminum frame drawer systems on the market but they solve a lot of issues that other systems have. The first being access to the extrusion rails for mounting accessories. From the beginning we pushed to make this drawer system as versatile as possible, so you can reconfigure them quickly. They are also made of from the same material as most cutting boards, so cleanup is a breeze.

I have a few more ideas for the drawers that are coming soon.

49118246091_db193ba76f_z.jpg

49118240031_7f675c5ba2_z.jpg

49117731358_d2597e98cf_z.jpg
 
Last edited:
New Mod: OEM Headlight Black Out

I have a weird obsession with not having chrome on vehicles and the last bit left is in the headlights. I have been pushing for a stock look on the front of this truck, and after a year, I am caving in.

Before getting started on pulling the headlights apart I took the time to hit them with a decent restoration kit from Meguiar's. Honestly I didn't expect it to do as well as it did. Took the nasty foggy lights and made them look like new.

49784150708_deeed354f6_z.jpg


49692629602_962365b541_z.jpg


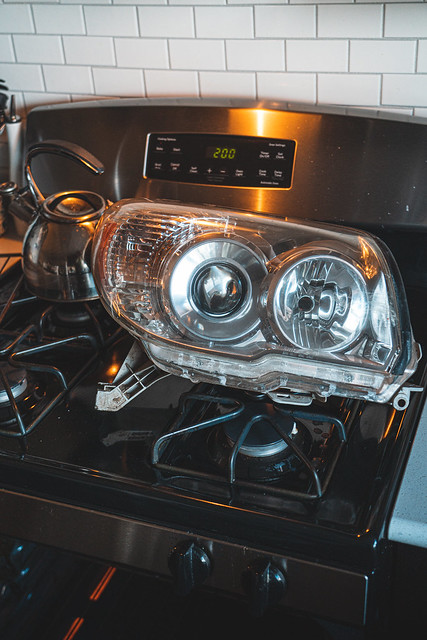
First I went around the housing and pulled all of the small screws located around the edges. Next I set the oven to 200 degrees and then baked for 7-9 minutes. The seal on the first headlight still felt a little tough at 7 minutes and 9 seemed to work better. I have found that I like setting the oven shelf at about a 1/4 of the way up.

49692628787_6390564627_z.jpg


49691786213_0c632488dc_z.jpg


As a little tip: have a pair of thick gloves on and ready to go when you pull the headlight out of the oven. I use the biggest flat head screw driver and I work my way around the edges loosening the seal as I pry them apart with my hands. Avoid getting the seal inside of the headlight lens and shrouds as much as possible. It is incredibly sticky and is difficult to remove.

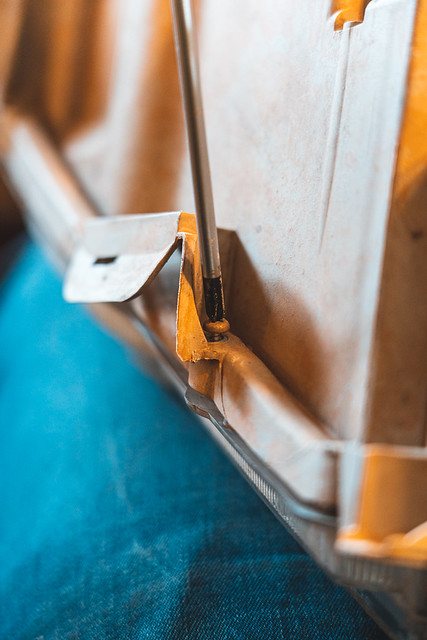
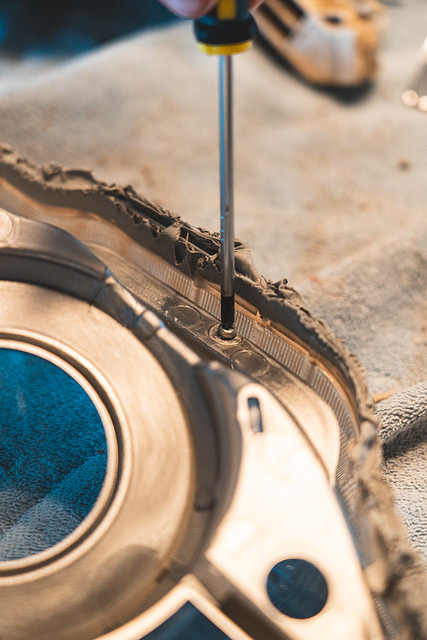
Once they are out of the oven and pried apart, there are little screws holding the chrome trim to the clear lens. In addition to the screws there are a few plastic clips holding it in. These do take a little bit of force to remove.

49691786068_f29e024455_z.jpg


49691786178_5a02095fe9_z.jpg


It was at this point I realized how broken my housings were. My headlight was hit by a piece of exploding furniture on the highway one day and broke all of the tabs on the outside of the headlight. I hadn't know that the damage actually carried over and broke the plastic inside the headlight as well. I will be replacing these soon I am sure.

49692629102_5ab0c68411_z.jpg


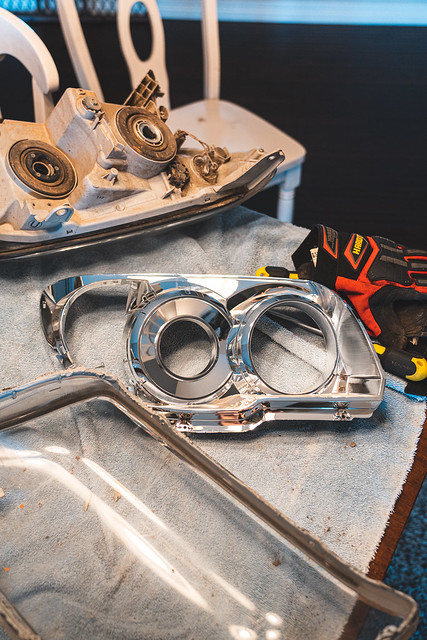
With the headlights broken down I hit the chrome pieces with some steal wool and sand paper to create a solid surface for the paint. I went with a can of black gloss Colormaxx. My last truck had matte black retrofits and I wanted something a little glossier.

49692628937_3b25a88aaa_z.jpg


49692628967_f7b608b795_z.jpg


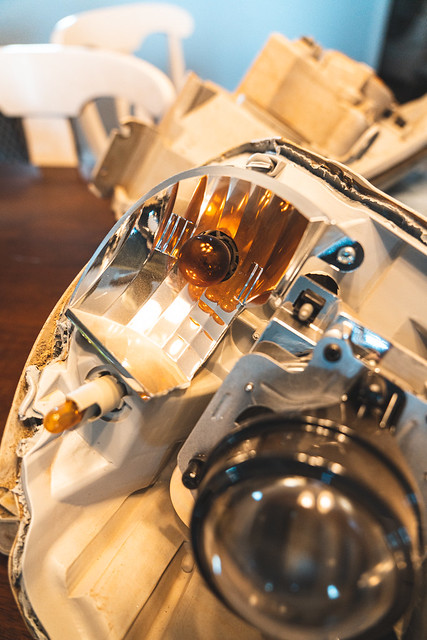
I did leave the reflectors for the high beam and blinker chrome as I need those to still function properly. I gave the paint a day to totally off gas before I reassembled them. In my last truck I missed this important step and found myself rebaking my headlights several times trying to clear out all the film on the inside of the housing.

Once they are totally dry, I repeated all of the steps above backwards and sealed them up. I had enough of the OEM seal left that I could just reheat and use that. If you dont have enough to form a proper seal, I recommend RetroRubber from The Retrofit Source.

49785087977_e51b0ea31e_z.jpg


49784763341_617990d786_z.jpg


All in all, I am pretty satisfied with how they turned out. I might make some slight changes on my next set of headlights as far as color and projectors go. But for now this absolutely gets the job done.
 

Members online

Forum statistics

Threads
278,316
Messages
3,554,111
Members
248,016
Latest member
Advally Service

Trending content

Back
Top