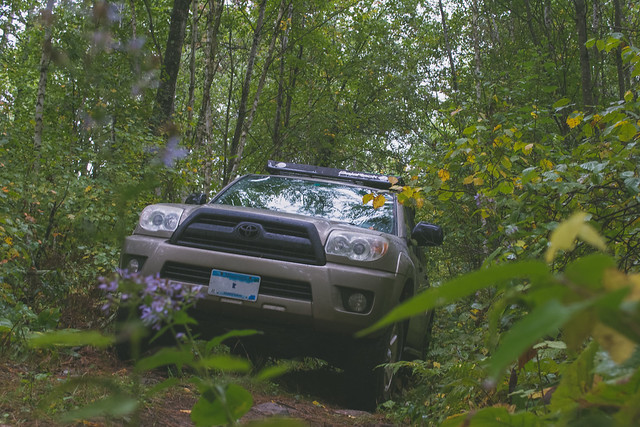
"Sammy" Build and Exploration Thread

Great looking rig. I'm considering the OME 883/895e lift as well since I don't want to replace the UCAs or stress the CV boots.

Have you had any issues getting the truck into stock alignment specs with the stock UCAs or any issues with CV wear?

Thanks

Nope none at all. Once I found a place that was competent that is. CVs were one of the reasons I swapped to the 883 from the 884's.

I was out this weekend with some much more vertically enhanced and found the setup exactly what I want for my intended use. So 2 years later still happy with my choice.

My only gripe with the OME stuff is they do not like salt at all. Rustoleum Marigold and a scotchbrite pad are in order each year.
 
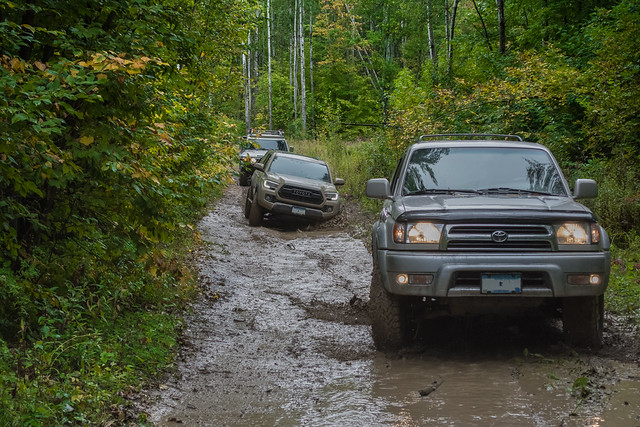
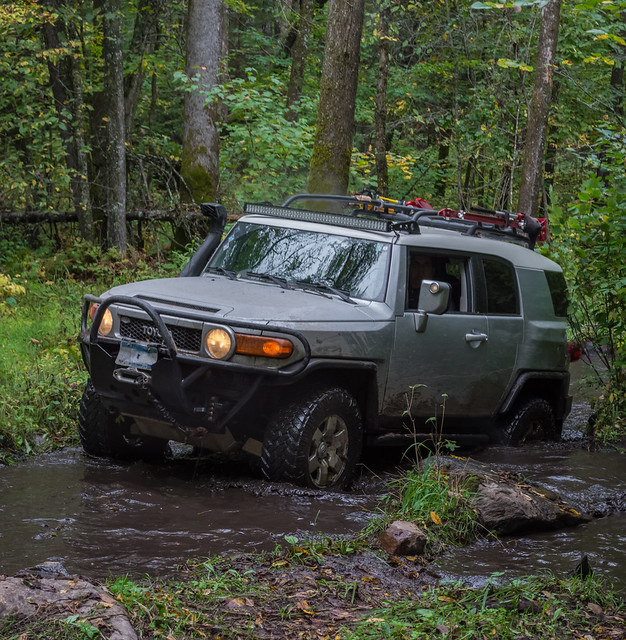
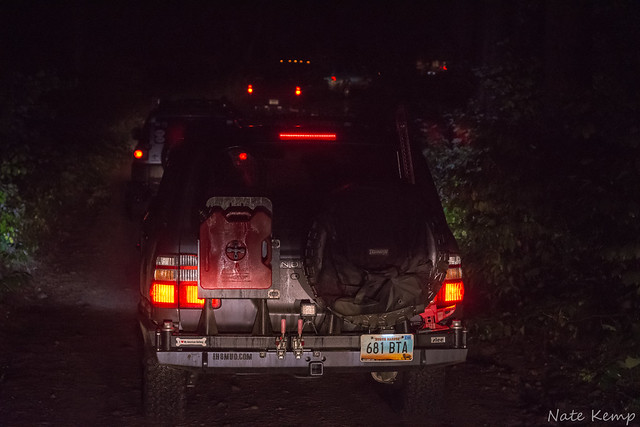
The 5th gen brake upgrade turned out great. After a week of DD use we went up north with Midwest Overland Society. It was a mucky experience. Torrential rains the day prior made for plenty of water and muddy hills to crawl up.


I got one shot of me.

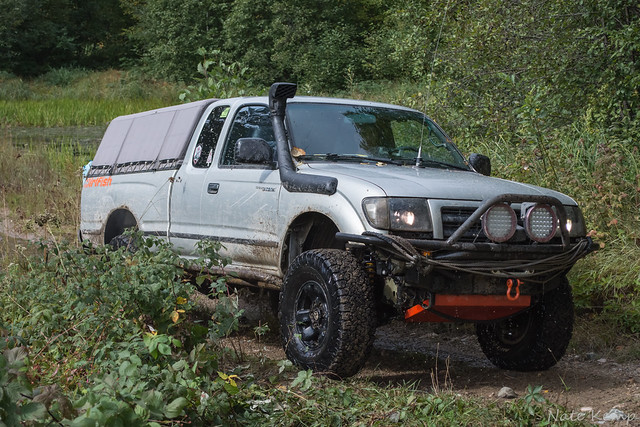
Sparing you the Jeep participants a selection of the plentiful Toyotas at this year's event.


great thread!

Just wondering how you're liking the C4 sliders and wondering if you'd be able to send me a few pics of them installed! Trying to decide between RCI and C4 and can't find much on 4th gens. Feel free to PM me if you don't want to clutter the build thread :)

Cheers from Fernie!
 
great thread!

Just wondering how you're liking the C4 sliders and wondering if you'd be able to send me a few pics of them installed! Trying to decide between RCI and C4 and can't find much on 4th gens. Feel free to PM me if you don't want to clutter the build thread :)

Cheers from Fernie!

Sure no problem. I love the [MENTION=131444]C4 Fabrication[/MENTION] sliders. Install was easy. You do have to basically install them, line up holes then pull them off to drill additional mounting points and then reinstall. Lined up real nice though. The only issue I have heard is that they don't match cross members on the V8's. I haven't done much "sliding" on them yet but I did have a good drop onto the mounting bracket under the front passenger seat. They slider bracket took the hit and no damage to the frame. So that's a win.
Highly recommend.
 
Last edited:
Sure no problem. I love the [MENTION=131444]C4 Fabrication[/MENTION] sliders. Install was easy. You do have to basically install them, line up holes then pull them off to drill additional mounting points and then reinstall. Lined up real nice though. The only issue I have heard is that they don't match cross members on the V8's. I haven't done much "sliding" on them yet but I did have a good drop onto the mounting bracket under the front passenger seat. They slider bracket took the hit and no damage to the frame. So that's a win.
Highly recommend.

Yeah, they say they don't fit the V8. If they did, they would've been bought and installed on mine by now! lol

Looks like RCI's are in my future.
 
Very cool. Some good inspiration in this thread for my build... gonna be turning my T4R into an expedition vehicle :)
 
Yeah, they say they don't fit the V8. If they did, they would've been bought and installed on mine by now! lol

Looks like RCI's are in my future.

I have RCI sliders and full skids on my 4R V8 SE...and love them. Haven't rubbed the sliders on rocks yet, but great steps for accessing rack and deploying RTT. Next year that will change as they will see a lot more trails.
 
I have RCI sliders and full skids on my 4R V8 SE...and love them. Haven't rubbed the sliders on rocks yet, but great steps for accessing rack and deploying RTT. Next year that will change as they will see a lot more trails.

I do like RCI skids. Very nice stuff.
 
Thanks for the info!

I do like RCI skids. Very nice stuff.

Thanks so much for the info. I did end up pulling the trigger on some demello sliders. I just couldn't resist their 20% off pre black friday sale and shipping from them to me was only $90. Plus they come standard with DOM and appear very stout. Although if I do have to say, maybe not as stout as the C4's would be.

Now to decide on RCI skids, or a new company in Canada called Element which makes some that look very nice.

Cheers from Fernie, BC
 
Any updates on this build?

Haha! Yes indeed [MENTION=121993]MightyP[/MENTION] . It's like we chat regularly or something. Recent changes. Finally finished my drawer build. Home brew with 2 drawers. One utility that will house recovery and tools etc. The other is a galley. Stove and canisters with a cutting board pullout. The stove is magnetically attached so it can be pulled off. The stove base is loose as well. In DD driver mode it is just another drawer. Around here winter JIC type gear.

Some crappy photos.


In other news. Upgraded the OME 895e rear springs for 895s. Same spring rate just 1/2" taller. I have never truely been happy with the stance. When loaded I would get a loaded look. Now that the drawers are full time (100lbs est.) I knew that would only get worse. Now I have some rake and like the look much better.

Did the remote breather while I was back there.

And finally snorkel install to come. Hopefully this weekend. When I work up the nerve to cut a hole in the rig.
 
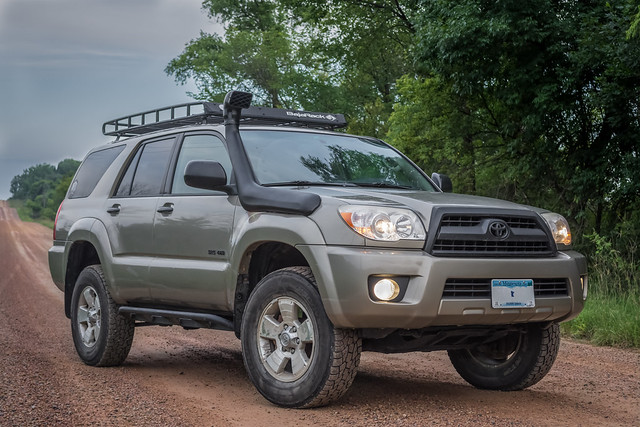
Snorkel!

So this happened today. Much more work than it should have been, even for this novice fabricator. The first to the last cut were nerve wracking. I will post up a more detailed write up soon.

 
So this happened today. Much more work than it should have been, even for this novice fabricator. The first to the last cut were nerve wracking. I will post up a more detailed write up soon.


Snorkel install looks to be the flushest that I've seen so far. Is this the generic Amazon one that goes for around $60?

Nice work!


I want to do a little tweaking of the snout angles and smoothing of the crease at the mount but overall. Very happy with the install. At about 2k RPM I can hear it rumbling by the passenger window.

Time to update the signature line!


I want to do a little tweaking of the snout angles and smoothing of the crease at the mount but overall. Very happy with the install. At about 2k RPM I can hear it rumbling by the passenger window.

Time to update the signature line!

Looks good, you going to do a detailed write up of the process?
 
Snorkel Install

Outline of my process for installing the TMS Snorkel Air Ram Intake Kit for 90-97 Toyota 80 Series Land Cruiser/Lexus Lx450 on my 2006 4Runner SR5 V6.

Tools Needed:
Flat Head Screwdriver
Phillips Screwdriver
3.5" hole saw ($25 hole saw and bit)
Drill bits - various sizes (sorry can't remember what I used)
Metal file (chainsaw file works great)
Angle grinder with cutoff wheel (or your preferred method of cutting sheet metal) ($4 for wheel)
10mm socket and open end wrench
13mm socket and open end wrench
Jack, lug nut wrench, jack stands etc. if you take the wheel off
Hand saw
Wood clamps
Heat gun (borrowed)
painters tape
Dry erase marker
Flashlight
Piece of Cardboard long enough to trace the snorkel "base"
Pop Rivet Gun ($7.95)
Stress relieving beverage or your choice (prices may vary)


Parts:
Auto/marine silicone ($5)
Spray paint ($4)


Step 1.
The backside of the snorkel is not flat and the screws are not all oriented parallel to each other, perpendicular to the body of the snorkel. The body of it is also not a perfect form fit to the 4Runner edge. What I did to try and address that was to cut a piece of cardboard to the shape of the snorkel body. I then used the supplied mounting bolts, washers and Nyloks (don't tighten them all the way on) to bolt the cardboard to the snorkel. I then wet the cardboard and weighted it to try and form it to the snorkel.
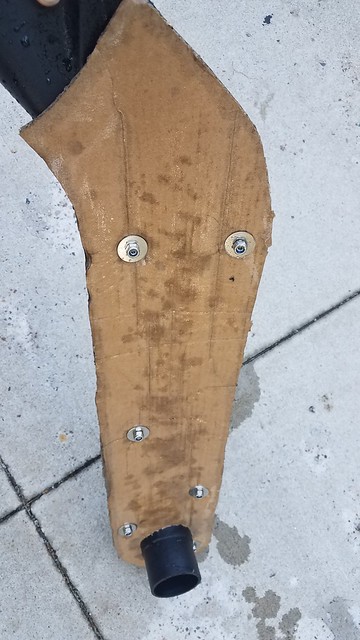


Clamped and weighted.
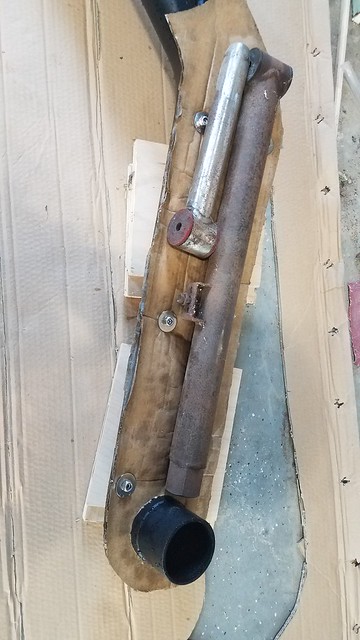


My hope was that this would give me a better orientation of the bolts holes to minimize the wallowing of the holes others have needed to accomplish to fit the bolts through the body panel.
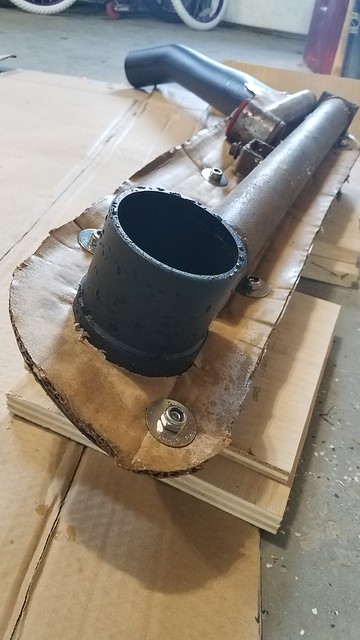


Side view to show the curvature. I let it dry for a day until the cardboard would hold its shape.

Step 2.
You will need to pull the wheel well liner to access the interior of the fender. I struggled getting this thing off so I pulled the front wheel off. There are 3 - 10mm bolts under the fog light, 3 along the end of the wheel well and then 5 on the mud flap. I was able to bend the liner back enough that I didn't need to pull the mud flap anyway.
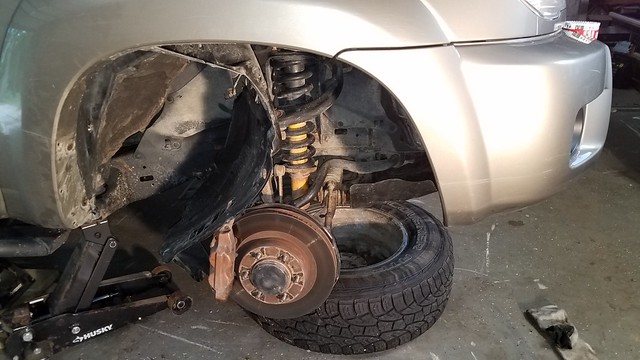


In addition there are a whole bunch of the square clips.
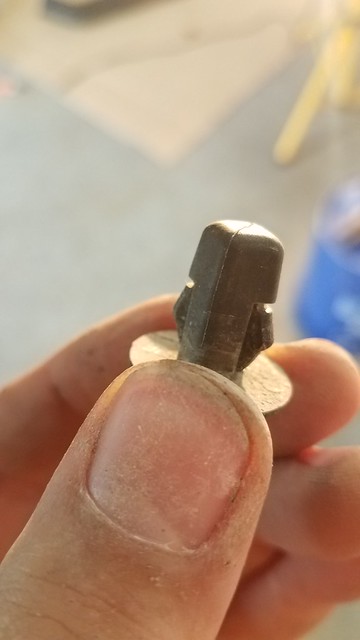


Some you can pinch from inside the engine bay.
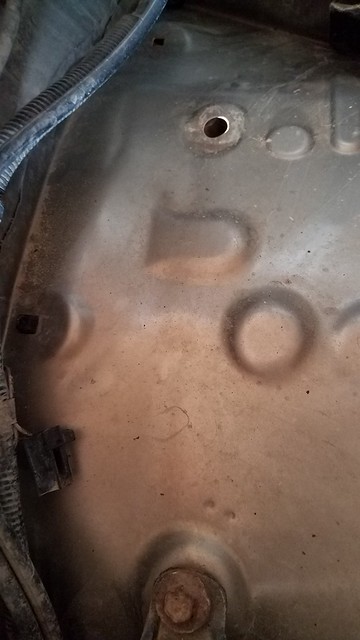


Once you see how they are released a small flat head will assist it popping the others out. there are 3 I believe that are hidden under the lip of the fender in the arch of the wheel well. PITA to get them out. I only ended up breaking 2.

Step 3.
Remove the air inlet that bolts to the wheel well. Release the hose clamp at the end of the hose to completely remove the air inlet.

Sidebar:
I the inside of air inlet I saw "pebbles." Closer inspection revealed it was dog kibble. Completely intake, clean, dog kibble. I have no idea.
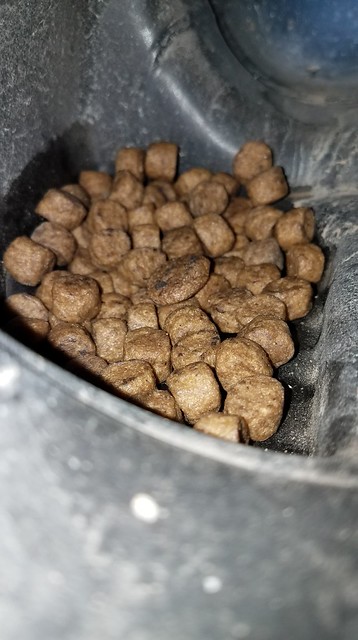

 
Step 4.
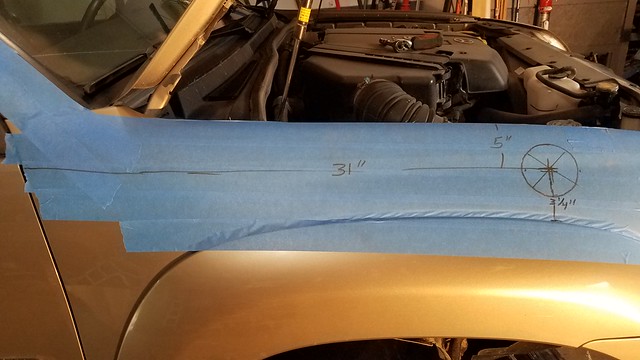
Cover the work area with painters tape. Headlight to top of the A-Pillar and hood to fender. I was repeatedly positioning measuring and moving the snorkel around trying to find the fit I liked. Scratches are likely, especially when the bolts are added to the snorkel.

Step 5.
Place verify the accuracy of your templates, cardboard and the supplied. The supplied template wasn't even close. As every review has commented, it just isn't correct. Don't use it as is.

Step 6.
Remove Explose the inside of the A-Pillar. The side curtain airbags reside in there. Pop the covers off the grab handle and use a 10mm socket to remove the bolts and handle. Using a soft pry piece, I used a bike tire lever, start by the headliner and pop off the A-pillar cover. Pull it down being careful of the airbag.

Step 7.
Using your templates and the snorkel itself position it for the best fit. Also make note of where the snorkel arm bracket will rest on the A-pillar. The rivets should not piece the inside wall of the pillar but I want to know for sure I wasn't going to set them off. Once I got a rough position I traced the location of the snorkel. I did not want to trim the fender flare and wanted to be sure the hood and door were not obstructed.

Here are rough measurements as to how mine was situated.


Step 8-20.
Position. Question yourself. Reposition. Question. Fret. Verify it is correct. Think more. Take a break. Verify.

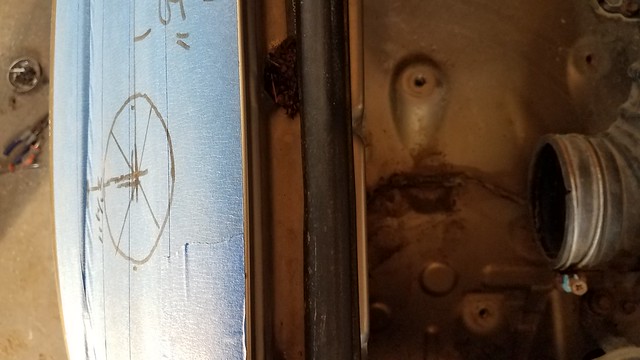
Here is how my hole and the air tubing lined up.


Step 21.
Locate the center of the large hole outline. Tap the center with a punch or nail to set a hole for the pilot bit. Note the angle that the air line will enter the body of the truck. Mine was at a downward angle. Using a 3 1/2" hole saw cut the main hole into the fender. Take it easy. You don't want the saw to jump and damage the body.

Step 22.
Realize you are now committed so the rest is easy.
 
Last edited:

Members online

Forum statistics

Threads
278,309
Messages
3,554,071
Members
248,016
Latest member
Advally Service

Trending content

Back
Top