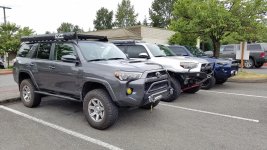
Seattle206's 2014 SR5 Thread

Loaded up the 4Runner to meet a bradduh for a few days of camping and fishing.


2mnog7l.jpg


eq15pd.jpg


34j92k1.jpg


Damn dude... Slayyyyed 'em!


Sent from my iPhone using Tapatalk
 
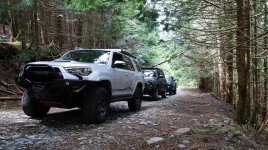
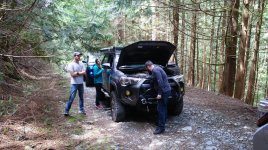
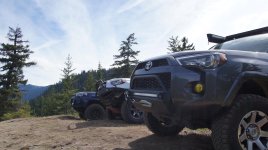
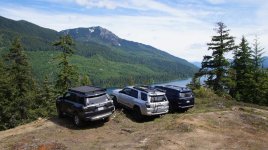
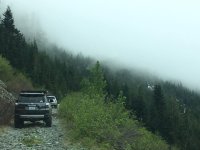
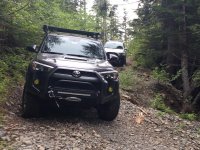
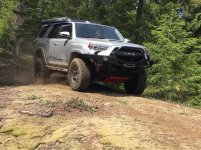
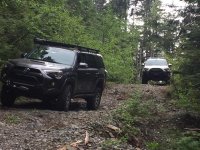
Hit up some trails yesterday with fellow 5th Gens.
 

Attachments

  • DSC08744.jpg
    DSC08744.jpg
    140.5 KB · Views: 816
  • DSC08745.jpg
    DSC08745.jpg
    139.1 KB · Views: 802
  • DSC08759.jpg
    DSC08759.jpg
    137.4 KB · Views: 809
  • DSC08756.jpg
    DSC08756.jpg
    136.7 KB · Views: 817
More...
 

Attachments

  • 18881937_124041261507497_4737216552584187835_n.jpg
    18881937_124041261507497_4737216552584187835_n.jpg
    60.1 KB · Views: 813
  • 18835642_124041268174163_8013249222790884715_n.jpg
    18835642_124041268174163_8013249222790884715_n.jpg
    127.6 KB · Views: 810
  • 18922001_124041188174171_8591745102880748201_n.jpg
    18922001_124041188174171_8591745102880748201_n.jpg
    143 KB · Views: 812
  • 18882293_124041144840842_1562592809087443537_n.jpg
    18882293_124041144840842_1562592809087443537_n.jpg
    128.8 KB · Views: 804
  • 20170603_125320.jpg
    20170603_125320.jpg
    135.1 KB · Views: 810
Adding this to my thread in case other 5th gen owners experience the same issue. Found a small leak on my passenger side innermost(toward the diff) CV boot clamp. Examined the area and saw no tears in the boot. The clamp may have finally just worked itself loose over time due to a combination of the lift and trail usage. I've had my rig lifted since 5k miles over two years ago and never experienced any issues with the boots. Now I'm at 36k and I believe a high-center situation finally pulled the boot loose. It is nothing major as it such a small seepage. The boots are packed full of grease and it would take a long while before everything leaked out. For precautionary measures I went ahead and found a cheap fix.

11mg4mp.jpg


Here is the leaky boot, innermost clamp.

2s1a9sj.jpg


Ordered these clamps from here:

CV clamp kit (6 piece) - PFran LEDs

-Made from Type 304 stainless Steel (both bolt and clamp)
-Rolled edges (will not bite into and cut OEM CV boot)
-Smooth band (will not imprint CV boot and then tear at it when tightened)
-Worm drive screw with no exposed back (protects CV boot)
-3/8' width (fits perfectly in the OEM boot band channel)
-Reuseable
-Rated to 26.5 in-lbs torque
-Sized perfectly for both large and small end of OEM inboard/outboard boots
-Made in Germany
-Large clamp (4 3/4") *edit; You will preferably want to use 4 3/8" clamps as they are a bit smaller with less band remaining after you tighten it but the 4 3-4" clamps will work too:

5574K24 1 Pack 304 Ss Smooth-band Worm-drive Hose Clamp, 3-1/2" To 4-3/8" Clamp Dia Range, 3/8" Band Width

2gul4lf.jpg


It was a PITA getting off the OEM clamp. I didn't jack the rig up or bother taking off the front skid. You will have a lot more space if you do so. I took my dremel and a cutting disc to put some cuts on the crimped area of the clamp. Then used some pliers to carefully break it off.

10ynq5g.jpg


Clean up the area and make sure you hold the boot securely into place as you tighten the new clamp. Get it on tight and snip off the excess band. Not sure if this does anything but I added a little blue loctite to the clamp screw.

1ht57d.jpg


Took it out for a run to make sure it's still tight with no seepage. I'll be sure to check on it periodically. From read from other members that they have gone 50K+ on worm claps without loosening issues.

Cheap and quick fix. The only other option would be to order a new OEM boot kit from Toyota which comes with grease packets, boots and clamps. You would need to remove the whole axle and disassemble it to get the new boots installed. Another option is to purchase a brand new CV axle and install it then reboot the old axle as a trail spare.
 
Last edited:
For those with the RCI transfer skid plate you are probably hearing some rattling/vibration coming from your Y-pipe. This is because the skid plate doesn't allow much clearance for the pipe when you bolt it up. You experience the vibration in reverse whether you're on the brake or giving it some gas. Super annoying. Passengers always ask if my transmission is having issues.

I've tried adding some worm clamps on the OEM hanger. Worked for a few days but they always work themselves loose and fly off. They come off for sure anytime you hit a trail. I also replaced the OEM rubber hanger with a Perrin poly hanger. The OEM rubber degrades over time causing it to hang lower. Supposedly, poly is more stiff and shouldn't have this issue. Within a week the pipe was contacting the skid again with the Perrin unit.

I bought (4) 1/2" SS spacers, (4) M8x1.25 bolts (I don't recall the length but a tad bit longer than what RCI supplied. This is to compensate for the additional 1/2" spacer) and (3) thick 7/16 washers. I do lose a little bit of ground clearance but at least the vibration goes away. The only other method I can think of is to re-bend the skid plate or re-route the y-pipe.

All rattle and vibration free! Don't mind that little pebble in there.

2z5t6a0.jpg
 
Spent a few hours washing, claying, polishing and waxing the beast. I only do a detail once a year to get rid of the trail pinstripes. So smooth and clean I don't want to get it all dirty again. It won't stay looking like this for too long.

Although the paint is silver it hides most of the scratches at a distance but seeing it in person is much worse. Scratches run from the headlights to the taillights.

106zdvn.jpg


2qce5ub.jpg


After polishing with Meguiar's ScratchX and a little bit of M205/M105 on the deeper scratches/scuffs.

288thtt.jpg


Some products I used, missing a couple bottles in the photo.

156v5uu.jpg
 
Completed sections 1 & 2 this weekend and man...I must say it was an awesome experience. Just hanging out with friends and exploring Washington together made this trip so worth it. We are excited to complete sections 3-6 next summer. Definitely a fun car camping or ahem...overland trip. Here are some pictures my buddies and I took.

Day 1: 7/28/2017

Buddy and I didn't get to leave Seattle until 5. The two other rigs were already en route down to Carson, WA since they took a half day at work. Knowing how shitty I-5 traffic is during Friday rush hour I was estimating it would take about 4.5 hours to get down to the Bridge of Gods. Nope, dead wrong. Crashes, road work and an oil spill decided to occur at the same time we hit the road. It took 3.5 hours from Seattle to Dupont, WA(which normally takes 40 mins when clear). We didn't get to Carson until midnight. It took 7 hours total which would have been normally 3.5 hours.

36150870452_9081c49dc7_z.jpg


36275925106_5d1032883c_z.jpg


36150868242_079ce51aae_z.jpg


Finally reached the Bridge of Gods on the OR/WA border that crosses the Columbia River. BTW, there is a $2 toll for those who are unaware. It's a pretty cool steel bridge.

36150863112_9e7770f3a6_z.jpg


36150860152_07b3d594a9_z.jpg


To Stevenson/Carson, WA to begin section 1.

36150868872_149f4d5086_z.jpg
 
Last edited:
Topped off fuel in Carson before searching for my friends who found a cool campsite on the WABDR. Drove about another 1 hour before I found their pin-drop on Gmaps.

We reached the campsite by 1 AM tired, hungry and just wanted to sleep. I unloaded the 4Runner, ditched the tent and just slept in the back. It was dark and we had no clue how the area really looked until the day break.

36150863492_ba419ac4a3_z.jpg


36150863862_ff6a38f943_z.jpg


35947742780_2de83ecbd8_z.jpg
 
Last edited:
Day 2: 7/29/17

Woke up to a spectacular sight with Mt. Hood in the background. My friends found this nifty spot that can fit all 3 vehicles plus space to set up our table and cooking station.

35947743580_5a94eea884_z.jpg


36150869482_69d271b735_z.jpg


This Fiskers axe made easy work of that log we brought. Using the logs for the evening.

35482487584_1073e71f9b_z.jpg


WADBR map which we never used. We relied on GAIA during the whole trip. The physical map is useful to have just in case.

36150870062_04fae0f16d_z.jpg


Tembo skottle grill cooking up our unhealthy breakfast.

36275925736_8ca82378f5_z.jpg


Jameson with Mt. Hood, ya know to warm up the body. We woke up at 6 AM so it was kind of chilly.

36150864172_de4626a174_z.jpg


and the skottle grill with Mt. Hood in the background.

36150861552_f597f3e353_z.jpg


Cheers!

35482804254_e43117e938_z.jpg


Adventure begins.

36032500880_41292fb3c3_z.jpg


35923684490_db79150ab0_z.jpg


36151133292_e8a4df78cb_z.jpg
 
Last edited:
Day 2: 7/29/17 Section 1

After breakfast we followed the section 1 route and visited Gifford Pinchot National Forest Ice Cave.

36150870732_ff511e9642_z.jpg


36150860392_a92408b0e6_z.jpg


Cave shots.

36150862152_784389c0b6_z.jpg


36150864572_565bafbe17_z.jpg


36150864872_9a08de8f33_z.jpg


36150865262_c48ef20c88_z.jpg


Caught this little guy outside.

35482488054_088450eda5_z.jpg
 
Last edited:
Day 2: 7/29/17 Section 1

Airing down for a more comfortable ride through section 1.

36150871692_7e0d8be49f_z.jpg


Went down to 20psi. The ARB deflator makes quick work on all 4 tires.

35482488514_126ab2af77_z.jpg


36150872002_1095ef083f_z.jpg


Taking a break from driving so somebody else can take the lead. Section 1 is all dirt and gravel roads, no 4WD necessary. Can be done in any 2wd passenger car. Dust kicks up so bad at times whoever is trailing needs to slow down for the dust to clear before proceeding

36150872832_d881b99ab2_z.jpg


36150861112_0b7433322a_z.jpg


Finished section 1 to Packwood to refill on fuel and water. Off to section 2!

36150873662_2ace4f1aed_z.jpg


En route to section 2: Packwood to Ellensburg, WA.

36150861512_cb73f0651a_z.jpg
 
Last edited:
Day 2: 7/29/17 Section 2

Burnt forest
36183862431_e6853eab14_z.jpg


Airing up/down/up/down started becoming a routine by now.

36319445655_24effe55f7_z.jpg


35923953900_339119e759_z.jpg


Rimrock lake and Mt. Rainier in the background.

35482491844_cffc8f6c13_z.jpg


36150874202_2ab90a6064_z.jpg


Off a basalt rock cliff.

36150862482_dc959f7c53_z.jpg


36208059911_081587ceb6_z.jpg


36150865902_450b0c3dc9_z.jpg
 
Last edited:
Day 2: 7/29/17 Section 2

Section 2 is so much better than section 1 in every way. More scenic, tighter and more technical trails. Not difficult at all but just more entertaining.

35947740540_dfbd370717_z.jpg


36150874552_0804d665a3_z.jpg


36318989835_1b68e442ff_z.jpg


Even the big tree can make it through the tight turns.

35482492064_1eb67f0a2c_z.jpg


36150874812_a0061f8184_z.jpg


36150861802_8ec759d115_z.jpg
 
Last edited:
Day 2: 7/29/17 Section 2

By 7 pm we decided to find a good spot to set up camp. Got to this nice clearing on Bethel Ridge to rest for the night. Time for dinner, we were hungry after hours of trail time.

36150862762_a91471814e_z.jpg


36383605036_ab728abbde_z.jpg


Marketing shot for #YETI and #Scepter MWC

35924238060_151ed4f75e_z.jpg


Kevin putting in work on the skottle sauteing some mushrooms and onions.

36184001541_716a32dc52_z.jpg


Cooking up some andouille sausage with mushrooms and onions.

36184001811_67954d2e7c_z.jpg


USDA choice Ribeyes on the charcoal grill. Sorry, but the Tembo skottle grill can't cook a steak right. We eating good tonight.

36319600465_548b2a1bd6_z.jpg


36276476046_73a05dd0c7_z.jpg


Finished off the night by killing the bottle of Jameson by the camp fire.

35483467434_29b6355013_z.jpg


36049413080_679fc38b14_z.jpg


36344755215_4a07f89825_z.jpg
 
Last edited:
Day 3: 7/30/17 Section 2

Sunday, last day of our trip and to finish off section 2. We had a great nights sleep with surprising low wind. Cooked up breakfast, cleaned up our area and off to the Ellensburg.

Morning coffee.

35638362663_ae66c24ace_z.jpg


Shoooot...we are Asian after all so we made some fried rice with the skottle grill. This thing is quite versatile.

36319669375_6c525600bc_z.jpg


Our view from camp before we say goodbye.

35510900333_2ed0e37fdc_c.jpg


Found a steep hill climb to play on. All too easy.

36150874932_b228f7d1e8_z.jpg


36151592522_b9b4409565_z.jpg


36207863051_42c4dde99a_z.jpg


36318990045_4b7706b51e_z.jpg


36276632466_ecfefd37f1_z.jpg


On to our last stretch through Umtanum Ridge to Ellensburg.


36150875562_d94384bd85_z.jpg


35482493284_33cd348294_z.jpg
 
Last edited:
Day 3: 7/30/17 Section 2 completion

36429195055_7d581e91c6_z.jpg


36150875722_9e50c9f387_z.jpg


36150866302_4c9af0c90e_z.jpg


36208052211_21b8985e57_z.jpg


35508991144_b9766a2a55_z.jpg


36208052431_8b84dffc78_z.jpg


Finally put that Rotopax to use. First time using for an "offroad" adventure and the spout decided to break. I think this thing is better suited for filling up the lawn mower.

36150865592_9d2428ccc0_z.jpg


Last air up before we hit the highway back home.

35482493594_f766748857_z.jpg


36383605456_ba53885a59_z.jpg


36383606016_0d6688b9c7_z.jpg


And 2.5 hours later we make it back home to Seattle. This time the view of Mt. Rainier is on the other side. Rig is covered with dust inside and out. Going to spend several hours cleaning and wiping everything down and storing the gear away until next time. Checked out my tires afterwards and the rocky trails really tore up my tread on the Ridge Grapplers.


36150875862_2c8ba1cc71_z.jpg
 
Last edited:
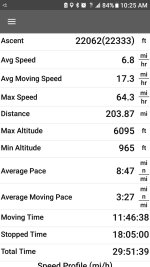
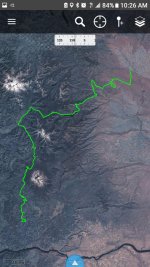
My Gaia tracks and stats for the entire trip.
 

Attachments

  • Screenshot_20170801-102556.jpg
    Screenshot_20170801-102556.jpg
    114.1 KB · Views: 921
  • Screenshot_20170801-102657.jpg
    Screenshot_20170801-102657.jpg
    143.9 KB · Views: 914
Awesome pics, looks like a great trip. I agree on the rotopax, things can be a pain in the ass and take forever to empty. They are super convenient for certain applications though, had an allpro bedrack on my Tacoma that carried them real nice. Keep the camera rolling!
 

Members online

Forum statistics

Threads
278,309
Messages
3,554,072
Members
248,016
Latest member
Advally Service

Trending content

Back
Top