Shawn719 plagiarism slow build

shawn719

New member
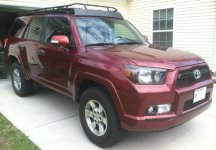
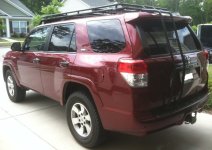
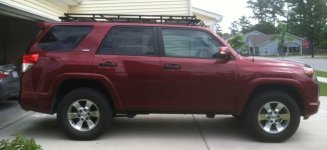
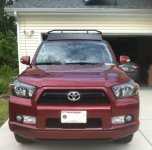
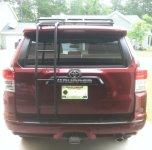
Ok, so I have been reading and plagiarising ideas from so many of you since I owned my 4th Gen.
I figure, if there is room, I will start my own thread and offer my novice experience (most often my errors, in order to keep others form doing the same).

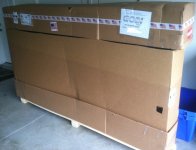
A few projects completed with many, many more pending. Currently waiting for Gobi rack to be sent out (this week :banana:) and I ordered a set of Shrockworks sliders...but, have to wait two months for production :cry2:

Working on lift.

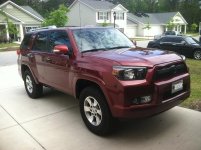
Here is where I am at today
 

Attachments

  • IMG_0610a.jpg
    IMG_0610a.jpg
    57 KB · Views: 9,702
  • IMG_0611b.jpg
    IMG_0611b.jpg
    59.3 KB · Views: 9,703
Register to hide this ad
Ok, so I have been reading and plagiarising ideas from so many of you since I owned my 4th Gen.
I figure, if there is room, I will start my own thread and offer my novice experience (most often my errors, in order to keep others form doing the same).

A few projects completed with many, many more pending. Currently waiting for Gobi rack to be sent out (this week :banana:) and I ordered a set of Shrockworks sliders...but, have to wait two months for production :cry2:

Working on lift.

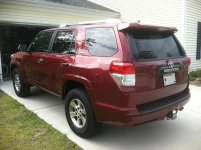
Here is where I am at today
Looking forward to your build. And thank you for your service sheepdog!

Okki
 
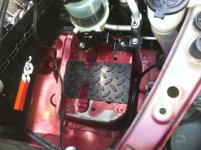
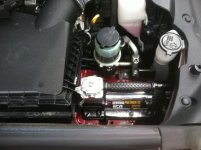
Underhood Air install

Ok, so I read "VBdiver" thread http://www.toyota-4runner.org/5th-gen-t4rs/114918-air-compressor-mounted-underhood.htmlon his install (great job), and had referenced others (such as "Harper7"http://www.toyota-4runner.org/gallery/58037-june-2010-t4rotm-harper7-5.html#post554122, "Phillyd2" http://www.toyota-4runner.org/5th-gen-t4rs/102292-them-me-mods-2.html,etc). Installs look good - thanks for taking time to post.
I love the look and function of the ARB but the price tag did not sit well (maybe one day when past my bigger $$ projects).
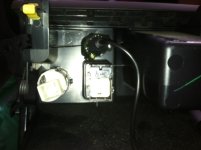
So, I went down to Harbor Freight and picked up a compressor for $50 w/air hose and attachements. Not to mention the store gave me a 2 year unlimited return policy on unit (that paperwork is secured in the glovebox).
The location was easy as I have no plans for a second battery (for now)).
Considered putting in switch but will hold out until I order "OTRs" for lighting, etc. I'll wire in when I run others. Alligator clips will work for now.
Unit came with its own base and rubber "dampers". I added a piece of rubber padding just in case (keep metal from rubbing).
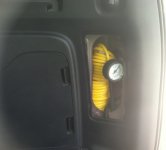
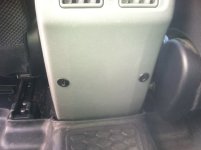
Stored rubber hose and attachements in rear panel.
Installed yesterday and tested. Works great so far. I'll see if the unit holds out.
 

Attachments

  • IMG_0605a.jpg
    IMG_0605a.jpg
    70.7 KB · Views: 9,606
  • IMG_0614.JPG
    IMG_0614.JPG
    66.6 KB · Views: 9,609
  • IMG_0616.JPG
    IMG_0616.JPG
    35.6 KB · Views: 9,561
Last edited:
USB install

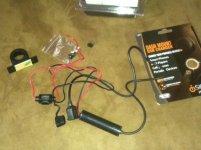
I have been searching for a little while looking at different solutions for powering the myriad of different power devices the family carries with them when we travel (cellphones, handheld gaming, ipods, etc.). I had wires running all over the place.
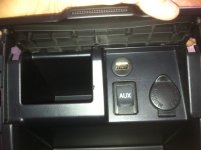
I had considered running a couple extra 12 volt outlets but decided what I really needed was more usb ports. The one and only USB is dedicated to the ipod which is velcro'd in the glove compartment. So a couple more USB's should (and did) do the trick.
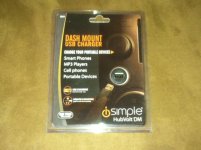
So, I went searching. There were a couple posts/sites online of folks building their own USB's (no thanks). I finally found an a company by the name of "iSimple" that makes the USB I was looking for. One that was made as a car kit.
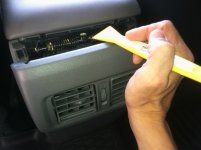
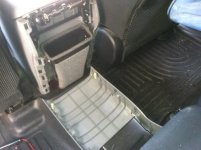
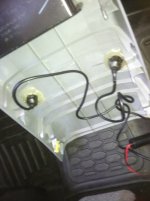
I thought of all the locations to install and settled on the on the back of the center console and the area above the "aux" plug under the stereo. The install went well. I think I will get a couple more of these and run them to the 3rd row seating area.
I posted a couple pics to show.
 

Attachments

  • photo8.JPG
    photo8.JPG
    118 KB · Views: 9,568
  • photo7.JPG
    photo7.JPG
    124.9 KB · Views: 9,584
  • photo6.JPG
    photo6.JPG
    94.2 KB · Views: 9,519
  • photo5.JPG
    photo5.JPG
    111.8 KB · Views: 9,555
  • photo4.JPG
    photo4.JPG
    93.1 KB · Views: 9,563
  • photo3.JPG
    photo3.JPG
    104.5 KB · Views: 9,508
  • photo.JPG
    photo.JPG
    85.7 KB · Views: 9,533
  • photo2.JPG
    photo2.JPG
    93.2 KB · Views: 9,511
Last edited:
Looking good! I really like the extra USB ports. What method did you us to black out the door handles? I think those may be my next project
 
Looking good! I really like the extra USB ports. What method did you us to black out the door handles? I think those may be my next project

I tried my hand at vinyl. After a few tries I got the hang of it. As others have said, PATIENCE is the key. I plan on doing a little more, just pacing myself. I want to use the 3M DINOC carbon fiber to line the center console as the gray consoel scratches so dang easy. I applied the DINOC to the light gray on the sterring wheel and it turned out real good.
Again, patience (and proper prep of surface) is really the key to successful outcome. Had I worked vinyl first, before painting front and rear chrome, I would have used.
 
Last edited:
Very nice USB ports. Antman, you had better get read to do this mod as the little ones will have a need soon lol.
 
Up front why did you not just buy a cigarette to USB adapter? I got one that has two USB ports for charging and install was as easy as well putting it in.

Build looks good so far.
 
Up front why did you not just buy a cigarette to USB adapter? I got one that has two USB ports for charging and install was as easy as well putting it in.

Build looks good so far.

I suppose I could pack a cooler with ice too but I like the idea of having a fridge. :wink2:
3 kids + wife + me x how many other devices that need to be plugged in...wires routed everywhere...no thanks. Been there done that.
I prefer the plug and go. Plus I have a 12volt open to plug in, lets say, a "cigarette to USB adapter" or some other device.
 
Interesting how we all learn and inspire each other - I was referenced above but just ordered the USB charger which I too will also install next to the AUX. Thanks for the great idea!

And yes, Shame! Shame! Antman,
 
Gobi arrived and mounted

Yes, Gobi finally arrived and I got it installed. Thanks to Okki and Reatas photos on the threads - helped visualize what needed to be done as the Gobi instructions were a bit long and confusing.
All together, once I got started, things came together nicely.
Up next will be new shocks and springs (thanks Close!).
 

Attachments

  • IMG_0746.JPG
    IMG_0746.JPG
    87.3 KB · Views: 9,220
  • IMG_0748.JPG
    IMG_0748.JPG
    100.9 KB · Views: 9,186
  • IMG_0747.JPG
    IMG_0747.JPG
    104.8 KB · Views: 9,177
  • IMG_0749.JPG
    IMG_0749.JPG
    72.8 KB · Views: 9,154
  • IMG_0752.JPG
    IMG_0752.JPG
    88.6 KB · Views: 9,105
  • IMG_0754.JPG
    IMG_0754.JPG
    80.2 KB · Views: 9,170
Looks like your parking in your garage days are basically over...I just went through this after installing my lift...:dammit:

That Gobi looks good on the Salsa Red!
 
Firestik

Ok, so travels have brought me to Kansas and will be moved into home and have homegoods delivered in about 10 days...finally.
4Runner upgrades had been on hold - cant wait to get my Bilsteins from homegoods to get lift done - thats IF the movers did not lose struts and new springs...
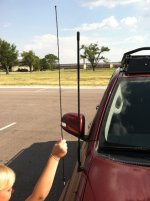
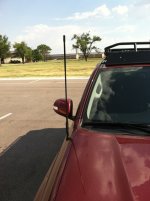
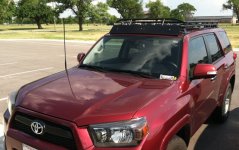
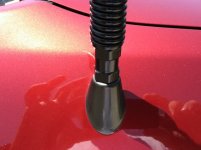
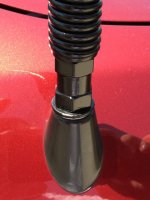
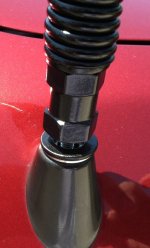
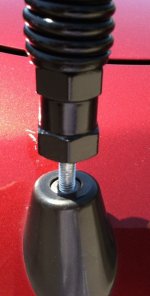
Anyhow, talking with forum member Close I got the bug for a Firestik.
I have had the stock antenna on and off. I have tried the stubby antenna, and although the stubby looks "cool" it does crap for reception. So, I figured if you cant beat 'em, join 'em.
So I contacted Nestor ("NestahEdition") from the Fj Forum. Nestor makes the mods the Firestik to fit.
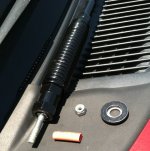
Antenna arrived, packed well and ready to go. Just a simple unscrew of oem antenna and on with the Firestik.
The Firestick came with a washer (I suspect to bridge any gaps between Firestik and 4R antenna mount? Anyhow, was not needed and I left off).
Reception quality is as good as OEM (maybe better, but, I'll have to test the two before I can say for sure) and I like the look.
So, I have a new addition to the 4R, fed the the "mod bug" and now anxiously waiting for lift parts to come in...

If interested in a Firestik you can get your own here:
"The assembled kit is about 2.5" shorter than the OEM (total length is 29.25")

The cost of the assembled antenna kit is;
$56.65 - base setup
... Modified Firestik stud mount, medium duty spring and 2 ft black antenna with red tip cover.
... In original chrome/stainless finish

Add these if you want;
$7.50 - powder coated option for the stud mount and spring
$2.00 - black tip cover

Shipping
$9.62 via USPS priority mail within CONUS

Total = $75.77 for the all black antenna kit.

PayPal to [email protected]
Please use the Personal/Gift option if you don't mind.

Also, leave your shipping address in the PayPal comment section. I can ship the kit within 3 day after the payment is received."
 

Attachments

  • IMG_1286.JPG
    IMG_1286.JPG
    112.6 KB · Views: 8,838
  • IMG_1288.JPG
    IMG_1288.JPG
    105.1 KB · Views: 8,848
  • IMG_1289.JPG
    IMG_1289.JPG
    119.9 KB · Views: 8,879
  • IMG_1324.JPG
    IMG_1324.JPG
    111.6 KB · Views: 8,813
  • IMG_1320.JPG
    IMG_1320.JPG
    100.9 KB · Views: 8,517
  • IMG_1321.JPG
    IMG_1321.JPG
    131.6 KB · Views: 8,619
  • IMG_1322.JPG
    IMG_1322.JPG
    107.7 KB · Views: 8,592
  • IMG_1323.JPG
    IMG_1323.JPG
    77 KB · Views: 8,496
Last edited:
Firestick looks nice. Actually, your entire T4R looks nice!

If you don't mind, I have som questions re your blacked out door handles and rear garnish (under the 4 Runner letters).

In an earlier post you mentioned that you used vinyl to black out the door handles. Did you remove the door handles to do this or leave them in place? Also, how is the vinyl holding up? Did you just cover the outer piece with vinyl or the inner piece as well?

Is the rear garnish also vinyl covered? Did you remove the rear garnish from the vehicle in order to black it our or did you leave it in place?

Thanks for your help and again, the vehicle looks great. Can't wait to see it with a lift.
 
Firestick looks nice. Actually, your entire T4R looks nice!

If you don't mind, I have som questions re your blacked out door handles and rear garnish (under the 4 Runner letters).

In an earlier post you mentioned that you used vinyl to black out the door handles. Did you remove the door handles to do this or leave them in place? Also, how is the vinyl holding up? Did you just cover the outer piece with vinyl or the inner piece as well?

Is the rear garnish also vinyl covered? Did you remove the rear garnish from the vehicle in order to black it our or did you leave it in place?

Thanks for your help and again, the vehicle looks great. Can't wait to see it with a lift.

Thank you.
For the handles I wrapped those in vinyl without removing. Easy, easy - just takes patience. I just viewed some 3m vinyl vids online, prepped the surface by cleaning, and then applied. Again, take your time, patience is key with the 3m dinoc.
As for the other chrome I painted with krylon...I am going to redo the front chrome with black vinyl as the paint has not held up to road travel. The back is holding out and still looks good. I had to remove rear piece to paint but if I had a do over I would have vinyl or plasticoated instead.
Soon I'll try my hand at plastipainting my rims. I'd seen a few done on other members rides and I like the look and the spray product is removal.
 
Thank you.
For the handles I wrapped those in vinyl without removing. Easy, easy - just takes patience. I just viewed some 3m vinyl vids online, prepped the surface by cleaning, and then applied. Again, take your time, patience is key with the 3m dinoc.
As for the other chrome I painted with krylon...I am going to redo the front chrome with black vinyl as the paint has not held up to road travel. The back is holding out and still looks good. I had to remove rear piece to paint but if I had a do over I would have vinyl or plasticoated instead.
Soon I'll try my hand at plastipainting my rims. I'd seen a few done on other members rides and I like the look and the spray product is removal.


Thanks, I have a friend who does auto vinyl at work. He's really skilled and I'll have him take a look at the door handles. I'm sure he can handle it. I am still afraid of taking off the rear garnish in order to black it out. I'm afraid I'll mess up taking apart the inside of the rear gate.
 
Nice build thread. The rear garnish isn't difficult to take off. It really isn't, especially with all the write up and how many folks on here that has done it.
 
Firestick looks nice. Actually, your entire T4R looks nice!

If you don't mind, I have som questions re your blacked out door handles and rear garnish (under the 4 Runner letters).

In an earlier post you mentioned that you used vinyl to black out the door handles. Did you remove the door handles to do this or leave them in place? Also, how is the vinyl holding up? Did you just cover the outer piece with vinyl or the inner piece as well?

Is the rear garnish also vinyl covered? Did you remove the rear garnish from the vehicle in order to black it our or did you leave it in place?

Thanks for your help and again, the vehicle looks great. Can't wait to see it with a lift.


What model do you have? If you have an SR5 just buy the Canadian SR5 handles that are color matched. Thats the way I went and looks WAY better then just blacking them out.

Thread Jack over....
 
What model do you have? If you have an SR5 just buy the Canadian SR5 handles that are color matched. Thats the way I went and looks WAY better then just blacking them out.

Thread Jack over....

Removing door handles scares me even more than removing the rear hatch inner lining. Sorry for the tread jack.
 

Members online

No members online now.

Forum statistics

Threads
278,315
Messages
3,554,104
Members
248,016
Latest member
Advally Service

Trending content

Back
Top