
You are using an out of date browser. It may not display this or other websites correctly.
You should upgrade or use an alternative browser.
You should upgrade or use an alternative browser.
Shawn719 plagiarism slow build
- Thread starter shawn719
- Start date


shawn719
New member
Dipped the wheels
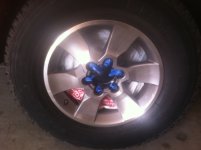
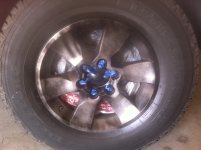
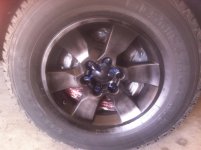
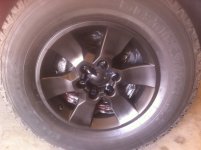
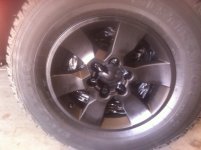
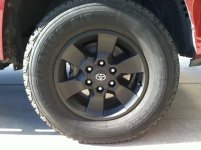
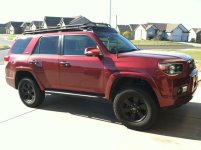
Ok, another project down. Plastidipped the wheels today. A little trial and error but they turned out pretty good.
I sprayed the rims down with diluted Simple Green, washed, wiped down with paper towels. I used DipUrCar.com's cleaning solution as a final go over before spraying. I dont know if that was necessary as I have had luck with just cleaning with Simple Green, but, cant hurt.
There are a couple flaws here and there but overall I am happy with the end result. I might try cleaning up the flaws with diluted paint thinner to smooth down area and then repainting (project for a later date/when necessary).
Here is the process from start to finish (ended up spraying five coats),
Ok, another project down. Plastidipped the wheels today. A little trial and error but they turned out pretty good.
I sprayed the rims down with diluted Simple Green, washed, wiped down with paper towels. I used DipUrCar.com's cleaning solution as a final go over before spraying. I dont know if that was necessary as I have had luck with just cleaning with Simple Green, but, cant hurt.
There are a couple flaws here and there but overall I am happy with the end result. I might try cleaning up the flaws with diluted paint thinner to smooth down area and then repainting (project for a later date/when necessary).
Here is the process from start to finish (ended up spraying five coats),
Attachments
kip dyno-mite
New member
Your setup is looking real good. What lift settings are you at with the Toytecs (3"/2")? What kind of lift did you get with the rear coils?
Thanks.
Thanks.
shawn719
New member
Thanks-Your setup is looking real good. What lift settings are you at with the Toytecs (3"/2")? What kind of lift did you get with the rear coils?
Thanks.
I got 2"+ all around. My front sits a little higher (give or take .5"). With the Bud hidden winch plate and winch I have on order, I suspect that extra 65-90lbs will help level things out. Not to mention the rear springs I picked up from "Close", so those were broke in- whereas the front coils are new- so, all considered the 4R will sit level.
I can't be more happy with the height and ride/handling.
I am using ToyTec Superflex coils in the rear.
ToyTec "Superflex" rear Coils (FJ & 03-09 4Run) - Toytec Lifts: Toyota Lift Kits: FJ Cruiser Lift Kits, Tacoma Lift Kits, Tundra Lift Kits, 4 Runner Lift Kits, Sequoia Lift Kits, Toyota Truck Lift Kits
ToyTec/Eiback coils
Toytec/Eibach front coil lift springs - Toytec Lifts: Toyota Lift Kits: FJ Cruiser Lift Kits, Tacoma Lift Kits, Tundra Lift Kits, 4 Runner Lift Kits, Sequoia Lift Kits, Toyota Truck Lift Kits
With Bilstein 5100's all around.
Bilstein Height adjustable front and matching 5100 Rear shocks - Toytec Lifts: Toyota Lift Kits: FJ Cruiser Lift Kits, Tacoma Lift Kits, Tundra Lift Kits, 4 Runner Lift Kits, Sequoia Lift Kits, Toyota Truck Lift Kits

FatTiresRollin
New member
Price?
"All total the cost of lift/level and alignment was $432.00"
I am assuming that this is your install price and does not include materials?
"All total the cost of lift/level and alignment was $432.00"
I am assuming that this is your install price and does not include materials?
shawn719
New member
"All total the cost of lift/level and alignment was $432.00"
I am assuming that this is your install price and does not include materials?
"You are correct sir"
S
shawn719
New member
Winch installed
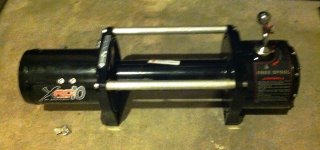
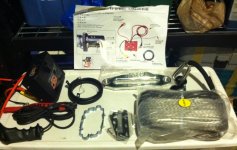
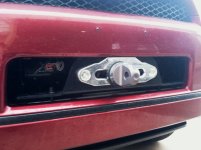
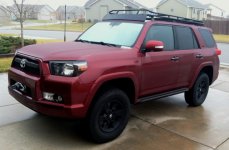
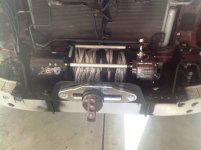
OK - so I spent time collecting bits and pieces striving towards getting winch package together. First came the winch plate from Bud and then I went back and forth on a winch. Warn is good but too pricey for my limited use. Engo was it but were on backorder until? I settled on Smitybuilt XRC10 Comp (w/ syn line). Parts sat in the garage for a while and then I got to it. Wish now I had taken more photos, but, it is what it is. All total the install took me about 5 hours (jsut taking my time, fabbing bracket for module, etc.)
For the install - things went pretty smoothly. I started by wiring winch and mounting winch to Budplate. I tested the winch to ensure it would op before getting mounted in vehicle. All checked out.
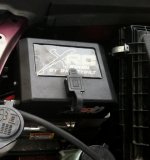
One change I made was to move control away from winch vice mounting directly. I had to purchase three 40" lengths of 4 gauge. Autozone had 40" 4 gauge battery cables with crimped rings (pefect application and fit). I replaced wire and test fitted control module above where I mounted the air compressor (in front of air filter). I fabbed a bracket to secure panel in place.
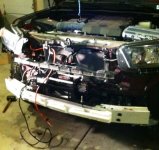
After pulling bumper cover off and all material from in front of radiator I ratched off two bumper bolts in prep for winch plate (I had to heat bolts to get them loose and off). Beofre fulling seating plate behind bumper I routed power wires to locations and secured to back of winch. Once wiring was completely routed I worked on seating plate to bumper. I was able to work budplate/winch in place (tight fit, used rubber mallet to seat plate atop bumper). Once in place I coated bumper bolts with loctite and remounted.
The budplate comes with two "U-bolts" to help further secure plate to bumper. I used them both but had to dremel them down to the proper length so that threads were just above securing nut (I added loctite to these too) and just below winch housing.
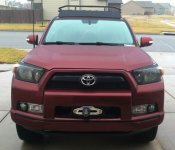
Once items were in place I powered up winch and ran test to ensure winch would op before reassembling bumper cover, etc. All worked well and the rest is history.
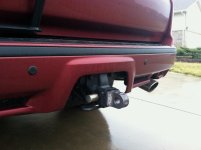
I have since added a Proline Factor 55 safety thinmble to the front and and block to receiver hitch. A couple shackles, snatch blocks, and straps are on order to complete winch.
OK - so I spent time collecting bits and pieces striving towards getting winch package together. First came the winch plate from Bud and then I went back and forth on a winch. Warn is good but too pricey for my limited use. Engo was it but were on backorder until? I settled on Smitybuilt XRC10 Comp (w/ syn line). Parts sat in the garage for a while and then I got to it. Wish now I had taken more photos, but, it is what it is. All total the install took me about 5 hours (jsut taking my time, fabbing bracket for module, etc.)
For the install - things went pretty smoothly. I started by wiring winch and mounting winch to Budplate. I tested the winch to ensure it would op before getting mounted in vehicle. All checked out.
One change I made was to move control away from winch vice mounting directly. I had to purchase three 40" lengths of 4 gauge. Autozone had 40" 4 gauge battery cables with crimped rings (pefect application and fit). I replaced wire and test fitted control module above where I mounted the air compressor (in front of air filter). I fabbed a bracket to secure panel in place.
After pulling bumper cover off and all material from in front of radiator I ratched off two bumper bolts in prep for winch plate (I had to heat bolts to get them loose and off). Beofre fulling seating plate behind bumper I routed power wires to locations and secured to back of winch. Once wiring was completely routed I worked on seating plate to bumper. I was able to work budplate/winch in place (tight fit, used rubber mallet to seat plate atop bumper). Once in place I coated bumper bolts with loctite and remounted.
The budplate comes with two "U-bolts" to help further secure plate to bumper. I used them both but had to dremel them down to the proper length so that threads were just above securing nut (I added loctite to these too) and just below winch housing.
Once items were in place I powered up winch and ran test to ensure winch would op before reassembling bumper cover, etc. All worked well and the rest is history.
I have since added a Proline Factor 55 safety thinmble to the front and and block to receiver hitch. A couple shackles, snatch blocks, and straps are on order to complete winch.
Attachments


shawn719
New member
I know I need to pull trigger on wheels - 285's. before long, before long. I want to keep my rims though-really like how they turned out.
HK- thx f feedback on winch. Seemed the part but always helps to get positive feedback from another.
Jeff- Tomorrow I am running that footlocker to the UPS store and getting thing in order for ship cost. Ill let u know.
S
HK- thx f feedback on winch. Seemed the part but always helps to get positive feedback from another.
Jeff- Tomorrow I am running that footlocker to the UPS store and getting thing in order for ship cost. Ill let u know.
S

Hellamatic
New member
Salsa Red is REALLY starting to grow on me. The truck looks sharp! I may go with the Budbuilt winch mount as well - seems like a good affordable mounting solution to tide me over until I can get my hands on a Shrockworks bumper.
shawn719
New member
Looks good, I wish I had skills and coorage to do the same winch installation : )
Honestly, I was the same way but I took the plunge and started studying great posts/ideas by members such as Antman, Okki, Mikey, Jang, Philly, Ride, and many more.
I know my limitations, hence reason for outsourcing of lift install. But, for the other items it is a no brainier and relatively easy to do. Just have to give it a try and takeyour time.
I really owe all the upgrade ideas to those veterans of mods, listed above, for the motivation.
S

scanny
Senior Member
Honestly, I was the same way but I took the plunge and started studying great posts/ideas by members such as Antman, Okki, Mikey, Jang, Philly, Ride, and many more.
I know my limitations, hence reason for outsourcing of lift install. But, for the other items it is a no brainier and relatively easy to do. Just have to give it a try and takeyour time.
I really owe all the upgrade ideas to those veterans of mods, listed above, for the motivation.
S
I think I'll start modding one day, all of write-ups here are very inspiring. Winch, sliders, permanent CB radio is on my list for sure : ) Just need to wait until it gets warmer outside.
shawn719
New member
Defiant and winch plate "mod"
Ok, so I waited patiently for my Defiant bar to sell - brand new $200.00! Never sold...Well, I was forced to do it and I did.
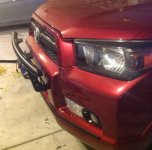
I "modded" the Defiant light bar to fit with my Budbuilt winch plate. The process took much longer than I thought it would, but, everything turned out right after hours in the garage and two trips to the hardware store.
The Defiant bar comes with two heavy duty brackets that bolt on to preexisting bumper bolts. The brackets are a little overkill (IMHO) but better to have more than less - I commend Defiant for putting in the extra effort - worth the money.
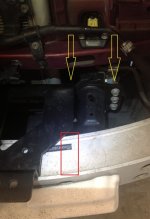
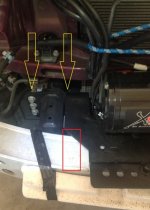
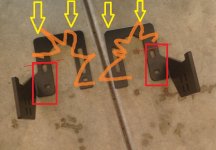
Anyhow, once I removed bumper cover I worked a way to get brackets to work. The winch plate covers half of where the Defiant bracket would have to sit. So, I had two options - cut winch plate or bracket. Bracket - easy choice.
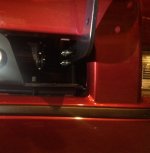
I cut brackets as seen in picture.
I measured distance from where bracket would have been positioned in origninal mounting spot and I marked the area for new brackets to match. I did not want to make the mistake of mounting only to have replaced bumper to find light bar not aligning properly.
Once the area was marked and measured (more than a couple times) I test fit brackets to bar and positioned assembled bar on bumper - fitting, measuring (a couple more times), until I was satisified all would match and bolt properly.
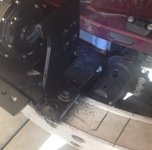
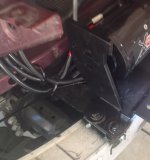
I drilled mouting holes for modded brackets into the aluminum bumper. The brackets aligned so that they mounted to bumper with back half of bracket sitting on winch plate (I had to shim up the from of modded bracket a little bit for level).
The only issue I ran into with was where the brackets back mount hole was located (in bumper) came out right over one of the bumper mounting bolts. All I did was to test fit 3/8 bolts sizes until I found best fit (2"). The bolt is just long enough for nut and washer, but, just short of making contact with bumper bolt.
With the brackets bolted down (w/ help from Mr Loctite) I gave them a liberal coat of Plastidip. Why? I dont know, just because I had some and figured it couldnt hurt.
Once satisifed everything was where it needed to be and well coated, I coated again (just because) and then I reattached bumper cover.
I added light bar to brackets and bolted them down. The hardest part was bolting left side of bar - Bracket in close proximity to winch so, patience and perservance was the name of the day - I did get all four bolts in and tightened down. The right side (pictured) was much easier.
After all eight bolts were tight I tugged and pulled on Defiant light bar - solid, no movement. Very impressed - no regrets on the purchase.
Just a few more things to do -
1. I still have to winch in rope under weight before first use (I figure someone will point out the "rat nest" on drum).
2. I have a syn roper roller fairlead coming in the mail to replace Hawse.
3. PIAA 520's coming in the mail. Install and run wire as needed
4. Get switches on order for lights and winch.
Thats it...well, in regards to light bar and winch...:drummer:
Ok, so I waited patiently for my Defiant bar to sell - brand new $200.00! Never sold...Well, I was forced to do it and I did.
I "modded" the Defiant light bar to fit with my Budbuilt winch plate. The process took much longer than I thought it would, but, everything turned out right after hours in the garage and two trips to the hardware store.
The Defiant bar comes with two heavy duty brackets that bolt on to preexisting bumper bolts. The brackets are a little overkill (IMHO) but better to have more than less - I commend Defiant for putting in the extra effort - worth the money.
Anyhow, once I removed bumper cover I worked a way to get brackets to work. The winch plate covers half of where the Defiant bracket would have to sit. So, I had two options - cut winch plate or bracket. Bracket - easy choice.
I cut brackets as seen in picture.
I measured distance from where bracket would have been positioned in origninal mounting spot and I marked the area for new brackets to match. I did not want to make the mistake of mounting only to have replaced bumper to find light bar not aligning properly.
Once the area was marked and measured (more than a couple times) I test fit brackets to bar and positioned assembled bar on bumper - fitting, measuring (a couple more times), until I was satisified all would match and bolt properly.
I drilled mouting holes for modded brackets into the aluminum bumper. The brackets aligned so that they mounted to bumper with back half of bracket sitting on winch plate (I had to shim up the from of modded bracket a little bit for level).
The only issue I ran into with was where the brackets back mount hole was located (in bumper) came out right over one of the bumper mounting bolts. All I did was to test fit 3/8 bolts sizes until I found best fit (2"). The bolt is just long enough for nut and washer, but, just short of making contact with bumper bolt.
With the brackets bolted down (w/ help from Mr Loctite) I gave them a liberal coat of Plastidip. Why? I dont know, just because I had some and figured it couldnt hurt.
Once satisifed everything was where it needed to be and well coated, I coated again (just because) and then I reattached bumper cover.
I added light bar to brackets and bolted them down. The hardest part was bolting left side of bar - Bracket in close proximity to winch so, patience and perservance was the name of the day - I did get all four bolts in and tightened down. The right side (pictured) was much easier.
After all eight bolts were tight I tugged and pulled on Defiant light bar - solid, no movement. Very impressed - no regrets on the purchase.
Just a few more things to do -
1. I still have to winch in rope under weight before first use (I figure someone will point out the "rat nest" on drum).
2. I have a syn roper roller fairlead coming in the mail to replace Hawse.
3. PIAA 520's coming in the mail. Install and run wire as needed
4. Get switches on order for lights and winch.
Thats it...well, in regards to light bar and winch...:drummer:
Attachments

shawn719
New member
so, is that the budbuilt "hidden winch mount" ($375) or just one of his "winch plates" ($60)? the pictures on bud's webpage of the hidden winch mount are so piss poor its hard to see what you're getting for the money.
Yes, it's the "hidden" version. The mount is top notch and fits perfectly in the spot intended. I couldn't be more pleased.
S
azn-sensation
New member
Ok, so I waited patiently for my Defiant bar to sell - brand new $200.00! Never sold...Well, I was forced to do it and I did.
I "modded" the Defiant light bar to fit with my Budbuilt winch plate. The process took much longer than I thought it would, but, everything turned out right after hours in the garage and two trips to the hardware store.
The Defiant bar comes with two heavy duty brackets that bolt on to preexisting bumper bolts. The brackets are a little overkill (IMHO) but better to have more than less - I commend Defiant for putting in the extra effort - worth the money.
Anyhow, once I removed bumper cover I worked a way to get brackets to work. The winch plate covers half of where the Defiant bracket would have to sit. So, I had two options - cut winch plate or bracket. Bracket - easy choice.
I cut brackets as seen in picture.
I measured distance from where bracket would have been positioned in origninal mounting spot and I marked the area for new brackets to match. I did not want to make the mistake of mounting only to have replaced bumper to find light bar not aligning properly.
Once the area was marked and measured (more than a couple times) I test fit brackets to bar and positioned assembled bar on bumper - fitting, measuring (a couple more times), until I was satisified all would match and bolt properly.
I drilled mouting holes for modded brackets into the aluminum bumper. The brackets aligned so that they mounted to bumper with back half of bracket sitting on winch plate (I had to shim up the from of modded bracket a little bit for level).
The only issue I ran into with was where the brackets back mount hole was located (in bumper) came out right over one of the bumper mounting bolts. All I did was to test fit 3/8 bolts sizes until I found best fit (2"). The bolt is just long enough for nut and washer, but, just short of making contact with bumper bolt.
With the brackets bolted down (w/ help from Mr Loctite) I gave them a liberal coat of Plastidip. Why? I dont know, just because I had some and figured it couldnt hurt.
Once satisifed everything was where it needed to be and well coated, I coated again (just because) and then I reattached bumper cover.
I added light bar to brackets and bolted them down. The hardest part was bolting left side of bar - Bracket in close proximity to winch so, patience and perservance was the name of the day - I did get all four bolts in and tightened down. The right side (pictured) was much easier.
After all eight bolts were tight I tugged and pulled on Defiant light bar - solid, no movement. Very impressed - no regrets on the purchase.
Just a few more things to do -
1. I still have to winch in rope under weight before first use (I figure someone will point out the "rat nest" on drum).
2. I have a syn roper roller fairlead coming in the mail to replace Hawse.
3. PIAA 520's coming in the mail. Install and run wire as needed
4. Get switches on order for lights and winch.
Thats it...well, in regards to light bar and winch...:drummer:
Wow thanks for sharing! I started with a defiant light bar, however wanted a BB hidden winch. But after seeing this we can have both. Just to clarify, the orange part highlighted is the material you cut off correct? And the cut line is indicated by the red line?
Thanks in advance!
shawn719
New member
Wow thanks for sharing! I started with a defiant light bar, however wanted a BB hidden winch. But after seeing this we can have both. Just to clarify, the orange part highlighted is the material you cut off correct? And the cut line is indicated by the red line?
Thanks in advance!
Yes, the straight red line is approx where I cut bracket (w/ Dremel).
There may be another way to configure bracket to fit and save more of the mounting surface; however, this is what I came up with and it worked out.
The Defiant light bar is a sturdy piece of gear and the brackets are heavy duty. As I posted, after I had everything put back together I tried my best to get bar to move or flex and it held steady - all I could get was movement out of the 4R. For me - the light bar is just for that - lights. So, I have no other need as I wont be pushing or pulling with bar.
The only other option I had considered was notching out a section of the budplate to slip Defiant bracket in behind where bumper bolts are. The bracket would then sit flush against where the Bud plate attachess to bumper mount (almost as designed). Of course, a shim would have to go in on the other side to even up bracket and longer screws (5 per side) would be needed to tie all of it (bud plate, Defiant bracket, and bumper mount) back together. A lot of work as compared to my finished project, but, its an option.
S
shawn719
New member
Antmna Hella rewire, PIAA's, and roller fairlead
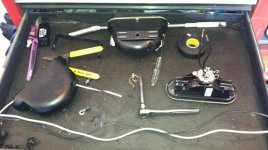
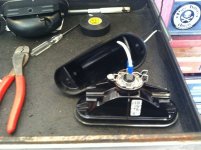
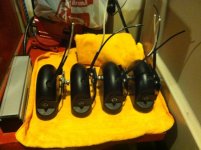
I spent "the day" rewiring 4 Hella lamps for the Gobi. The Hellas are off Antman's ride - thanks for the pay-it-forward! They will be like a set of donor eyes for the 4R. :wacko:
The wiring went quick and I mounted Gobi bases to brackets. Now, I only need my Gobi replacement rack to arrive (3 months and counting) to get these mounted and wired.
I guess in the meanwhile I going going to pick up weatherseal two-pin connectors in prep for wire harness.
I have also been searching for a wire harness to run up to the Gobi lights. I have found a 4-wire, 12 gauge, run for about $60.00. Just need to see if that will hold the amperage (I think it would - but,will have to make sure before speaning money). :flame:
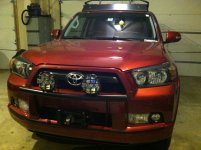
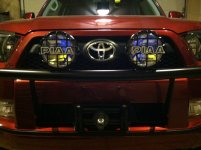
I also added PIAA 520's to my Defiant short bar. I picked them up off Ebay for $70.00. Just needed some TLC and six coats of Plastidip (I love that stuff). I also swapped out my aluminum Hawse fairlead for a syntheitc rope roller fairlead. I think it looks better and will help to clear bottom of Defiant bar if I ever need to pull off center.
I have to get an order out for switches this week. :eyebrows:
I spent "the day" rewiring 4 Hella lamps for the Gobi. The Hellas are off Antman's ride - thanks for the pay-it-forward! They will be like a set of donor eyes for the 4R. :wacko:
The wiring went quick and I mounted Gobi bases to brackets. Now, I only need my Gobi replacement rack to arrive (3 months and counting) to get these mounted and wired.
I guess in the meanwhile I going going to pick up weatherseal two-pin connectors in prep for wire harness.
I have also been searching for a wire harness to run up to the Gobi lights. I have found a 4-wire, 12 gauge, run for about $60.00. Just need to see if that will hold the amperage (I think it would - but,will have to make sure before speaning money). :flame:
I also added PIAA 520's to my Defiant short bar. I picked them up off Ebay for $70.00. Just needed some TLC and six coats of Plastidip (I love that stuff). I also swapped out my aluminum Hawse fairlead for a syntheitc rope roller fairlead. I think it looks better and will help to clear bottom of Defiant bar if I ever need to pull off center.
I have to get an order out for switches this week. :eyebrows:
Attachments
Similar threads


- Replies
- 0
- Views
- 2K


