Sherpa Equipment Company - 5th Gen

No worries, you guys are still top of my list. How are most mounting their giant 3-4 man RTT? adding crossbars like your recent build, directly to your crossbars, etc?

That is the most common method yes. Makes it painless for removal and installation without having to mess with the rack much.
 
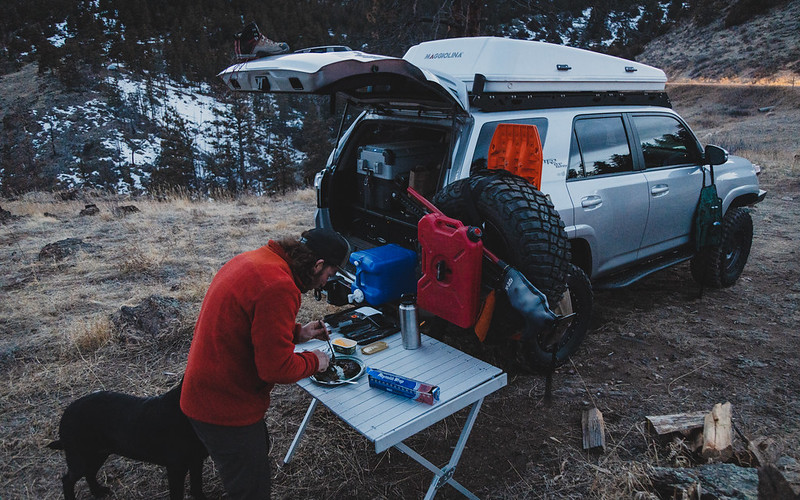
I wanted to share a recent install on a local 5th gen. @aimlessadventure_ on Instagram.

We installed a powder-coated Crestone rack with black crossbars as well as made some custom brackets for his Autohome hardshell tent. This tent was not like most hard shells and had a flush-mounted track system. It also had a very noticeable amount of fiberglass flex when bouncing around, so we whipped up some custom brackets for it. These brackets raised the tent about an 1" off the rack and also allowed it to mount to 4 crossbars as opposed to 2. Overall we are really happy with the finished install and glad we could use some ingenuity so we didn't leave Joe hanging due to his more unique style of tent. We also managed to keep everything sleek and tight to avoid any unsightly gaps between the rack and the tent that are common on a lot of the other tent brackets on the market.

His truck is just badass so enjoy these photos of it.

49615333268_9d7d51a51d_b.jpg


49616106332_ffca58ff02_b.jpg


49616106112_4cea8a8781_b.jpg


49615850476_143fb9d534_b.jpg


49615850251_81d289a0da_b.jpg
 
Any pics of the solution or how you guys got it to mount so tight? does it rub the side rails? and will it work for other size hard-shells?
 
Any pics of the solution or how you guys got it to mount so tight? does it rub the side rails? and will it work for other size hard-shells?

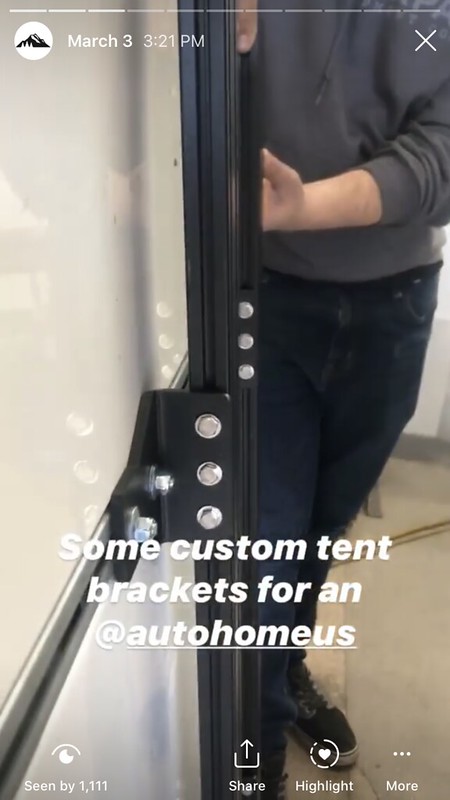
Heres the best photo I have of them, we were in a hurry to get the install finished so we did not take any photos of them prior to installing. This is just a screengrab from our Instagram story.

It does not rub the side rails.

49639854392_44135486c3_c.jpg


They are basically a fancy L bracket that lifts the tent off the crossbars and allow the tent to mount to 4 bars instead of 2 being we are using 8 mounts.

We also bumped into Joe while out and about this weekend and he reported that everything is working awesome!
49637287283_9b17823ddc_c.jpg
 
Excellent design on the mounts. I tried to fab a similar thing when I mounted my Prinsu, but ended up with rubber washers to seal. The silicon blobs people do are insane and show they don’t understand how the roof rack seals.

You guys clearly understand. Wish I knew about this rack last October.


Sent from my iPhone using Tapatalk
 
Excellent design on the mounts. I tried to fab a similar thing when I mounted my Prinsu, but ended up with rubber washers to seal. The silicon blobs people do are insane and show they don’t understand how the roof rack seals.

You guys clearly understand. Wish I knew about this rack last October.


Sent from my iPhone using Tapatalk


Thank you for the kind words! We worked for a long time to design these because we hate silicone with a passion!
 
Installed your Crestone rack on my 2019 last Saturday, placing the front mounts over the rubber channel guards. I had a hard time adjusting the front mounts to stretch them out and get them all tight - there's a little flex at the front end. I'm thinking part of the solution is to cut the rubber channel guards and put the front mounts directly on the body. Second observation is that the rubber guards lift rather easily off the roof - I fear that they will fly off or flap around at highway speed now that the factory rack mounts aren't holding them in place.

So a few questions:
- Any tips for getting things tight at the front?
- Should I use two-sided tape to hold the front mount down on the body?
- Should I use two-sided tape to secure the rubber channel guards in place? 30 pound tape is rather permanent, and Toyota may have left those rubber strips loose for a reason.
 
Installed your Crestone rack on my 2019 last Saturday, placing the front mounts over the rubber channel guards. I had a hard time adjusting the front mounts to stretch them out and get them all tight - there's a little flex at the front end. I'm thinking part of the solution is to cut the rubber channel guards and put the front mounts directly on the body. Second observation is that the rubber guards lift rather easily off the roof - I fear that they will fly off or flap around at highway speed now that the factory rack mounts aren't holding them in place.

So a few questions:
- Any tips for getting things tight at the front?
- Should I use two-sided tape to hold the front mount down on the body?
- Should I use two-sided tape to secure the rubber channel guards in place? 30 pound tape is rather permanent, and Toyota may have left those rubber strips loose for a reason.

When we tighten the front mounts during installs, we usually use either two people, or use a rag or towel to lift the front of the rack from the front corner. It also helps to loosen the rear mounts so that once you tighten them back down with the front feet set it sucks them down a little more. You can stuff a folded up towel or microfiber under the rack to lift it up. Then while its held uptight the front foot while lightly pushing the lower section into the rubber trim. This method works great for us. You could also place it on the roof where you want it and mark the bolt head locations with a pencil and set the feet up off of the truck and simply bolt the front crossbar in with them at the right tension. That is what a few customers have told us they have done. The feet do not have to be crazy tight, but when set up properly it will take quite a lot of force to get the front of the rack to budge.

I would avoid any kind of double-sided tape. The rubber channel guards should not move. We have never had an issue with those.
 
Follow-up: Got it all tightened up this afternoon with a little help from my wife. Loosened the front brackets, which I kept on top of the rubber channel guards.. Loosened the center mounts so the rack would flex upwards. Pulled each side upwards at the front until we could get a finger underneath it, then marked the front bracket. Same on the other side, then removed the front bracket and tightened each side at the marks. Reinstalled the front, lifting the sides as required. Tightened the center mounts, which put pressure on the front and got it very tight. I now see why the front mounts are two piece construction - it lets it get tighter, with full contact against the sloping forward section of the roof.

Worked far better with a partner rather than solo in the driveway racing against a setting sun.

Very happy overall.

 
Follow-up: Got it all tightened up this afternoon with a little help from my wife. Loosened the front brackets, which I kept on top of the rubber channel guards.. Loosened the center mounts so the rack would flex upwards. Pulled each side upwards at the front until we could get a finger underneath it, then marked the front bracket. Same on the other side, then removed the front bracket and tightened each side at the marks. Reinstalled the front, lifting the sides as required. Tightened the center mounts, which put pressure on the front and got it very tight. I now see why the front mounts are two piece construction - it lets it get tighter, with full contact against the sloping forward section of the roof.

Worked far better with a partner rather than solo in the driveway racing against a setting sun.

Very happy overall.

Glad to hear you got everything tight! They are definitely not the easiest to set up but once they are, you should never have to touch them again.
 
49777716267_fe5d65c618_z.jpg


With cabin fever affecting everyone at the moment, what better time to pick up a roof rack or drawer system to kick off a summer of adventures. We are running a 12% off stimulus sale on all of our products. The savings are auto-applied at checkout. If you know us, you know we do not run sales often, so don't miss out on this opportunity to save some valuable cash!

This being said, we are still on a statewide stay at home order here in Colorado, meaning that your lead times do not start until April 27th, and this does have the possibility to be extended.

Feel free to reply, call or email us with any questions.
 

Members online

Forum statistics

Threads
278,316
Messages
3,554,124
Members
248,016
Latest member
Advally Service

Trending content

Back
Top